Page updated: 21 July 2026
Recommended Lightroom Export Settings for Beginners
Simple, Reliable Export Settings for Everyday Use
If you’re new to Lightroom, the Export window can feel overwhelming. There are many options, and many users don’t know which ones matter. This guide gives you a simple, reliable set of export settings for everyday use — email, web, social media and prints — without any advanced complexity.
Related Lightroom Export Tutorials
Lightroom Export Presets Hub – your central hub for all export tutorials.
Lightroom Export Options Explained – a complete reference guide to every Export option.
ON THIS PAGE
Export vs Save As
Lightroom never edits your original RAW file. All your Develop adjustments stay inside Lightroom as edit instructions. When you export, Lightroom creates a brand‑new file in the format you choose; JPEG, WEBP or TIFF, based on those settings, while keeping the RAW as your working file. For beginners, this is similar to using Save As… in other applications, which creates a new copy without overwriting the original.
The Export Button
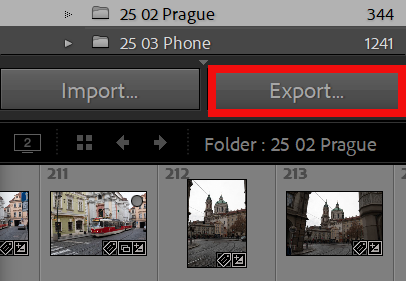
The Export button is in the bottom left area of Lightroom and is visible in Grid View, Loupe View and other Library view. It is not visible in the Develop module.
Press G for Grid View, select one or more photos, then click Export. Or press Ctrl+Shift+E (Windows) or Cmd+Shift+E (Mac) to open the Export dialog.
Recommended Beginner Export Settings
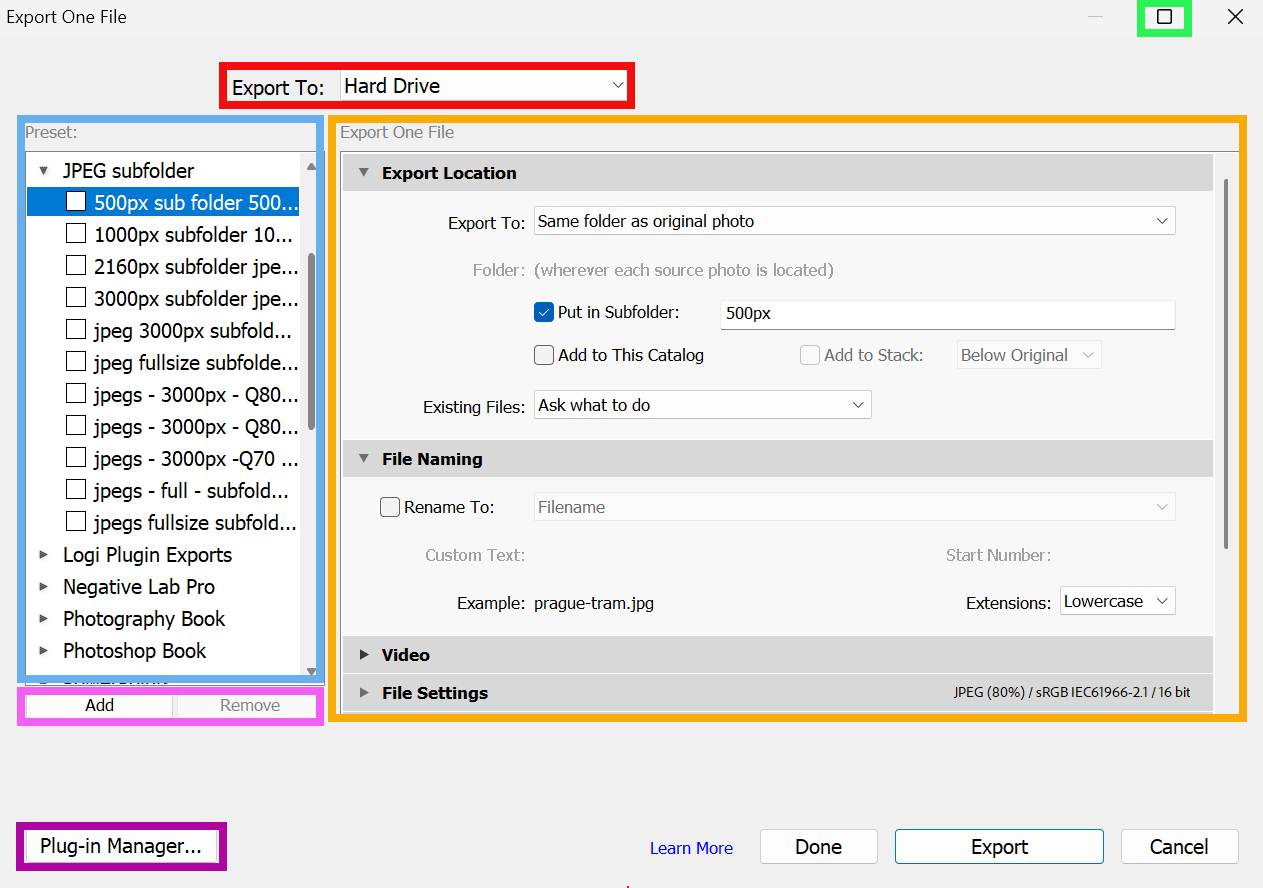
File Settings
- Format: JPEG
- Quality: 80%
- Colour Space: sRGB
Image Sizing
- Resize to Fit: Long Edge
- 2048px – general use (email, web, social media)
- 1080px – Instagram posts
- 3000px – small prints
- Full size – maximum quality
Resolution
- 300 ppi (set once and leave)
Output Sharpening
- Screen / Standard – for web and social media
- Print / Standard – for prints
Metadata
- Include: Copyright only
- Remove: Location info (privacy)
Watermarking (optional)
- Use a simple, small watermark if needed
When to Use These Settings
These beginner settings work well for:
- Emailing photos
- WhatsApp and messaging apps
- Facebook and Instagram
- Websites and blogs
- Prints
For more specific workflows (Instagram Stories, printing large photos, archiving, thumbnails), see the Lightroom Export Presets Hub.
Summary
Lightroom’s Export window contains many options, but beginners only need a small number of them. These recommended settings give you clean, reliable results for everyday use — email, web, social media and small prints — without any advanced complexity. Use JPEG, Quality 80, sRGB, resize by Long Edge, sharpen for Screen or Print, and include only basic copyright metadata. These defaults work consistently across all common platforms and ensure your exported photos look correct everywhere.
For more Lightroom export tutorials, visit the Lightroom Export Presets Hub.
