Page updated: 14 June 2026
Assisted Culling Photos in Lightroom
A clear, step-by-step guide to using AI Assisted Culling of your photos in Lightroom Classic
Lightroom’s Assisted Culling helps you move through large shoots quickly by suggesting the strongest frames from each burst or sequence. Instead of checking every single image at 100%, you review Lightroom’s shortlists, confirm the keepers, and move on. This guide walks you through how Assisted Culling works, when to trust it, and when to override it, so you stay in control while still saving serious time.
ON THIS PAGE
What Is Assisted Culling in Lightroom?
Assisted Culling uses Lightroom’s analysis of faces, sharpness, and similarity to group related images and highlight likely keepers. You still make the final decision, but Lightroom does the first pass for you, selecting the best candidates from each group. It’s ideal for events, portraits, and weddings where you have many near-duplicates and only need the strongest moments.
Assisted Culling vs Manual Culling
Both approaches can work well, but they suit different situations and personalities. Use the table below to see which fits your workflow, and when it makes sense to combine them.
| Aspect | Assisted Culling | Manual Culling |
|---|---|---|
| Speed on large shoots | Fast on big shoots with many similar frames. | Slower, especially with many near-duplicates. |
| Who makes the first pass | Lightroom suggests likely keepers; you confirm or override. | You review every frame yourself from the start. |
| Control and nuance | High, but biased toward technically strong, obvious choices. | Maximum control over subtle expressions and micro‑moments. |
| Best for | Weddings, events, portraits, sports, and burst sequences. | Smaller shoots, personal work, or highly curated projects. |
| Learning curve | Low: review groups, accept/reject suggestions, move on. | Moderate: you need a consistent rating/flagging system. |
| Risk of missing a subtle favorite | Possible if you rely only on suggestions and skip the rest. | Lower, because you see every frame yourself. |
| Best hybrid approach | Let Assisted Culling do the first pass, then manually refine your favorites in key moments. | |
When to Trust Assisted Culling (and When Not To)
Assisted Culling is at its best when you have clear “wins” in each sequence: sharp eyes, clean expressions, and obvious hero frames. If a moment really matters - vows, first kiss, key portraits - treat Lightroom’s suggestions as a starting point, then inspect the surrounding frames manually. That way you keep the speed boost without sacrificing the subtle, human choices that make your work yours.
What This Tutorial Covers (and What It Doesn't’t)
This tutorial focuses specifically on Assisted Culling — Lightroom’s AI‑supported way of helping you review and select your best images during import. It explains how the feature works, how to review Lightroom’s suggestions, and when to trust or override them. It does not cover the full import workflow, such as file handling, destination folders, renaming, metadata presets, or backup options. If you’re new to importing photos, or want a complete walkthrough of every panel and setting, see my full guide on Importing Photos into Lightroom.
1. Open the Import dialog
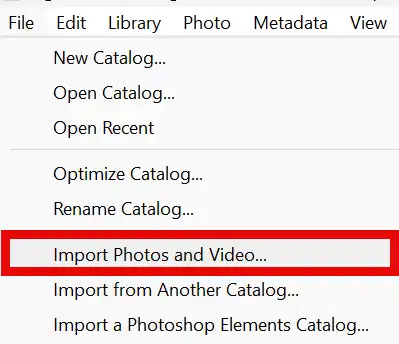
In Lightroom Classic, go to File > Import Photos and Video…. This opens the Import dialog, where you choose the source of your images and decide how Lightroom should handle them.
The Import dialog is the standard way to bring new photos into Lightroom, and it gives you full control over how your files are copied, organized, and added to your catalog.
2. Choose your photo source
On the left side of the Import dialog, select the location where your photos currently are. This might be a memory card, an external drive, or a folder on your computer. Lightroom will display thumbnails of the images so you can choose which ones to import.
Once you’be selected the source, Lightroom will show you how many new photos it has found and give you options for copying, moving, or adding them to your catalog. We’ll walk through those choices in the next steps.
3. Choose How Lightroom Handles Files
Assisted Culling appears inside the Import window, so Lightroom still asks how you want it to handle your files before the culling step begins. You’ll see the four familiar options at the top of the Import panel:
- Copy as DNG – copy and convert to DNG.
- Copy – copy files to a new location, keep original format.
- Move – move files to a new location, remove from source.
- Add – leave files where they are, just add them to the catalog.
This tutorial doesn't’t cover the full import workflow, file handling choices, or best‑practice recommendations. If you’re new to importing photos or want a complete walkthrough of every panel and setting, see my full guide on Importing Photos into Lightroom.
4. Before Assisted Culling

This screenshot shows all images selected, before turning on Assisted Culling.
5. Subject Focus 40


With the Subject Focus slider adjusted to 40, all images are selected.
6. Subject Focus 50
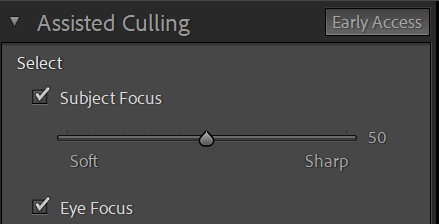

When the Subject Focus slider is adjusted to 50, one image is rejected. The image is not perfectly sharp, but sharp enough for most purposes.
7. Subject Focus 60


When the Subject Focus slider is adjusted to 60, two images are rejected.
8. Subject Focus 80
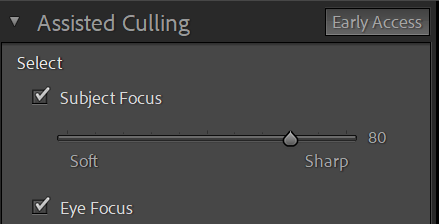

When the Subject Focus slider is adjusted to 80, five images are rejected.
You would need to inspect your images for sharpness.
9. Imported Photos
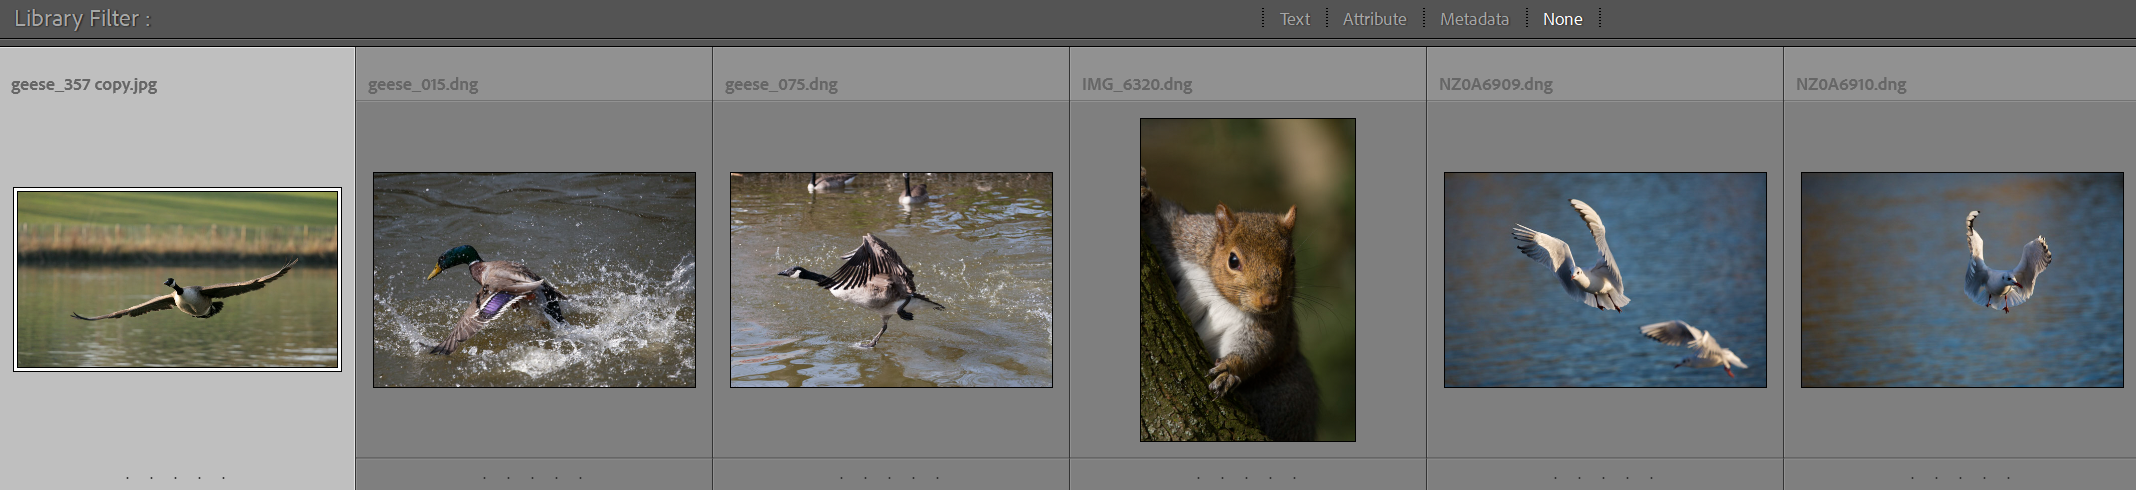
I settled on a setting of 40, which resulted in one image being rejected. These are the imported photos.
10. Setting the Destination (Brief Overview)
Before Assisted Culling appears, Lightroom asks where you want the imported photos to live. In the Destination panel on the right, choose the main folder you want to use, then pick how Lightroom should organist the files:
- By Date – Lightroom creates subfolders based on shooting dates.
- By Original Folders – keeps the structure from the card or source drive.
- Into One Folder – everything goes into a single folder you choose.
This tutorial doesn't’t cover folder organization in detail. If you want a full explanation of date‑based folders, single‑folder workflows, and best‑practice recommendations, see my complete guide on Importing Photos into Lightroom.
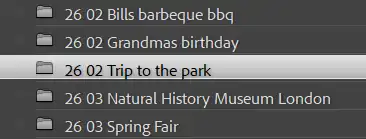
11. Go to Folder
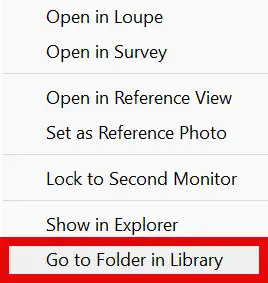
To view the actual folder you have just imported your photos into, right-click on any of the photos and select Go to Folder in Library.
Summary of Assisted Culling
Assisted Culling helps you move through large sets of photos quickly by analyzing similar images and highlighting the strongest candidates from each group. Lightroom looks at faces, sharpness, expressions, and duplicates, then presents a shortlist for you to confirm or override. You stay fully in control of the final selections, but Lightroom removes the need to check every single frame. It’s especially useful for weddings, portraits, events, and any shoot with bursts or near‑duplicates. Once you’be reviewed Lightroom’s suggestions, the chosen images are imported normally and ready for editing.
Related tutorials:
Full regular workflow (without assisted culling)..
Alternative workflow that is quick and simple, (it also doesn't include assisted culling).
