Page updated: 14 June 2026
Photoshop Contact Sheet to Create a Montage
Using Contact Sheet in Photoshop
Contact Sheet is an excellent method to create a montage / collage in Photoshop, with multiple images automatically aligned and evenly spaced.
This page covers how to create a montage using Contact Sheet, but once you have created it, have a look at 40 Easy to Create Montage Variations using Layer Styles
Contact Sheet without captions
Contact Sheet with captions (filenames)
Contact sheets used to be printed by laying strips of negatives directly onto the print paper, to provide a quick reference of all the shots on the film and to choose the best shots for printing or publication. It can still be used for the same purposes today, but it's also a great method of creating a montage.
ON THIS PAGE
Part 1: Create a Photo Montage / Collage with Contact Sheet
In this tutorial you will learn how to;
- Create a montage of 9 images
- Add a Color Fill Adjustment Layer and select a color directly from one of the images
- Adjust the outer spacing to match the horizontal and vertical spacing specified between the images
- Add a Stroke using Layer Styles to all layers simultaneously, with a Layer Group
Before using Contact Sheet to create the montage, the images were all cropped to a square shape in Photoshop, using the Crop tool. See the Crop tool and Create Crop Preset tutorial to see how to use crop presets to quickly crop many images to the same size.
Alternatively you can create a montage with rectangular images, but I recommend you crop them all to the same size before beginning.
It's also possible to use different size images, or crop rectangular images to square, within the Contact Sheet, using layer masks, but that is not covered in this tutorial. It will be covered in another tutorial.
The techniques in this tutorial will enable you to create montages of any number of images.
Contact Sheet is a great method for creating a photo collage
1. Select from Menu
From the menu select:
File > Automate > Contact Sheet II.

Select Contact Sheet from the menu
2. Browse for Images
You can either select a folder, which will include all the images within that folder, or select files. Select Files or Folder, then click on Browse and navigate to your images. If your images are in different folders, you can click on Browse multiple times and select files from different folders.
To select multiple files within a folder, click on the first one, then Ctrl+click on additional images. Or tick check boxes next to each image, depending on options on your device.

Browse to select images
3. Select Options
There are several options here that you should pay attention to, as highlighted.
Selected images (red): Click on Browse to add images, or click on Remove to remove images from the list.
Document (orange): Choose the units (pixels, cm, or inches). Then select the width and height and resolution. Resolution is important if printing and the industry standard is 300 pixels per inch. For more information on resolution, see Image Size.
Flatten All Layers (green): UNTICK this box to enable layers. If the box is ticked, all images will be added to one layer and you will not be able to move, crop or reposition them.
Thumbnails (pink): Select the number of rows and columns and whether the sequence should run across and then down, or down and then across.
Spacing (blue): Select the spacing between images.
Use Filename for Caption: Choose whether or not to have the filename showing under each image as a caption.
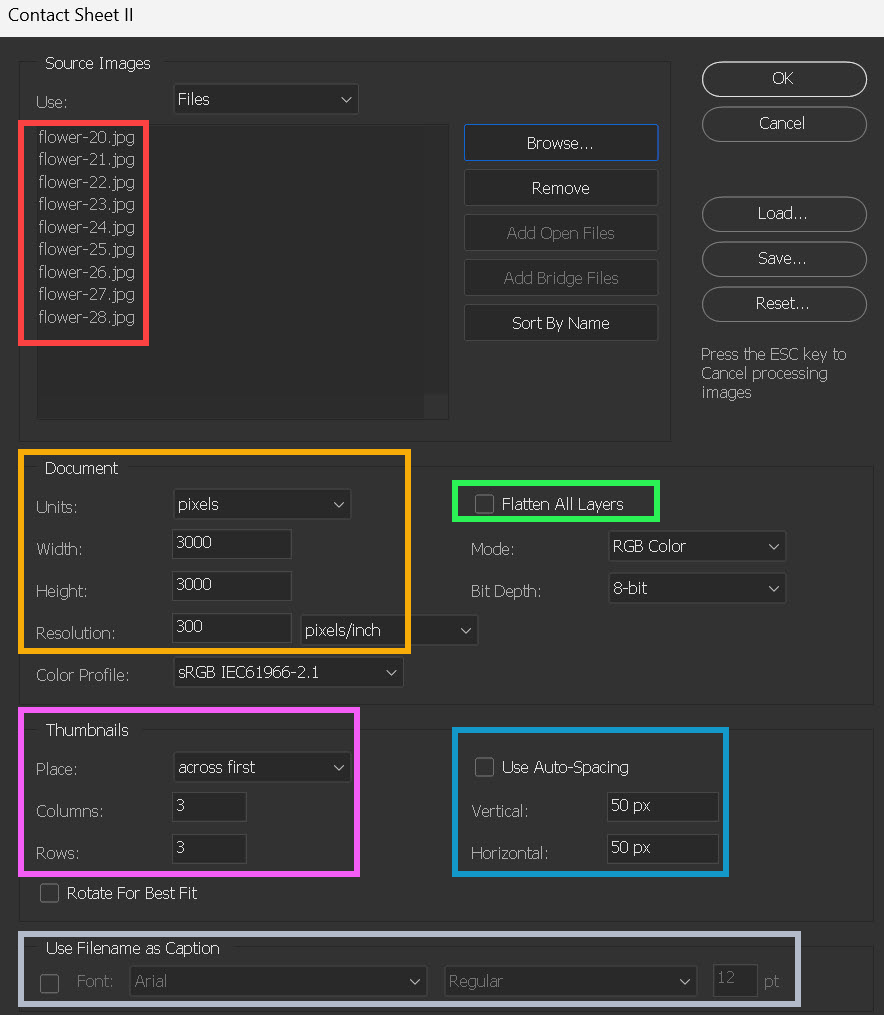
There are several options to select to create a Contact Sheet
4. Without Captions
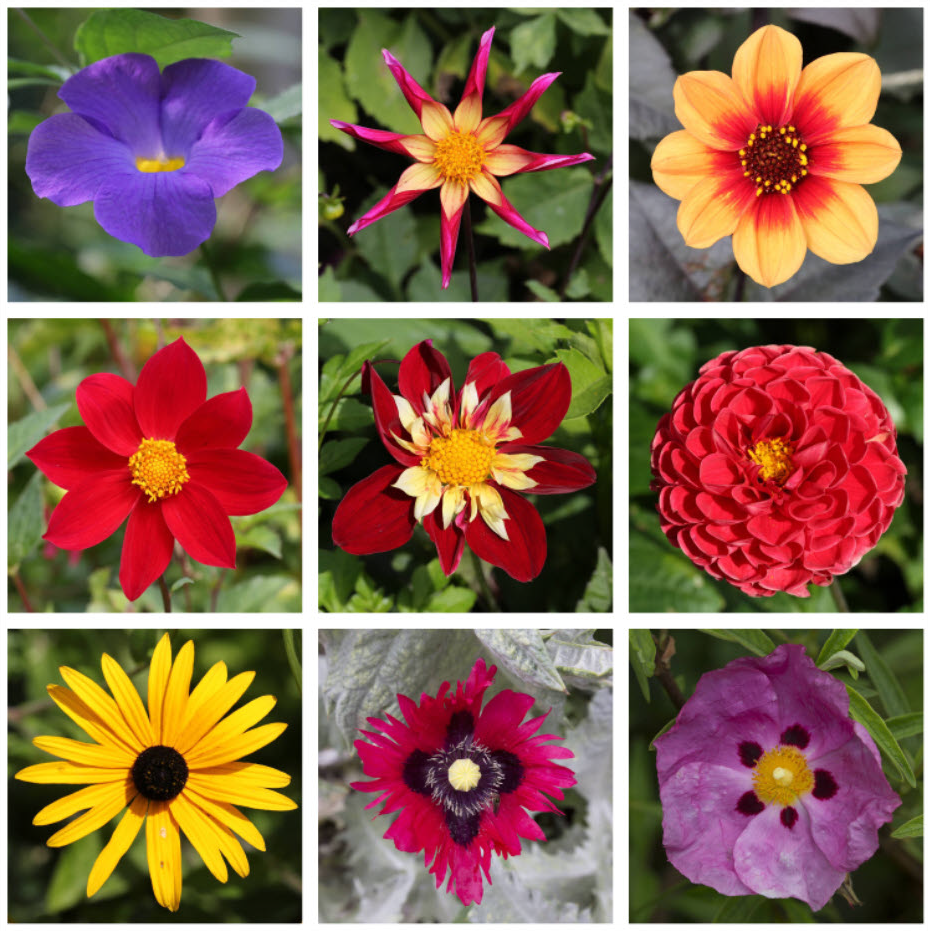
The images were all cropped square before using Contact Sheet. I used the settings shown in step 3: 3000x3000px, 3 rows x 3 columns, horizontal and vertical spacing 50px.
The rest of this tutorial will be based on this option, without captions.
Square images without captions
5. With Captions
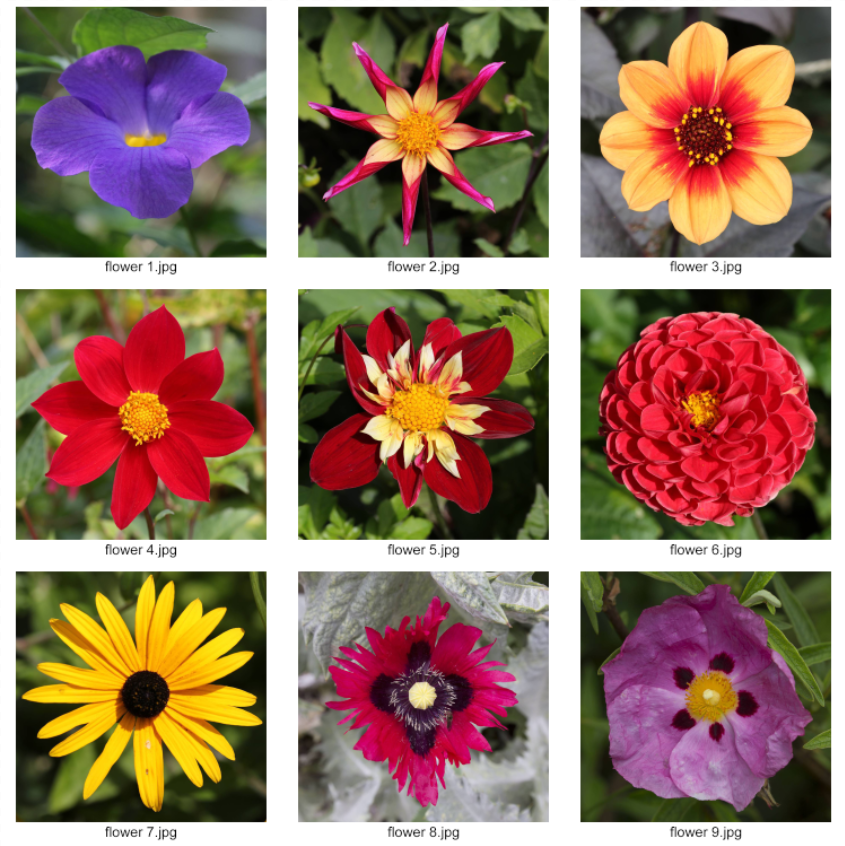
The images were all cropped square before using Contact Sheet. Settings were identical to step 4, except that Use Filename for Caption was selected.
The rest of this tutorial will be based on the previous option, without captions.
Square images with captions
6. Add a Solid Color Adjustment Layer
By default the background (bottom layer) is white. You can change the color of the background layer, but a Solid Color Adjustment Layer makes changing color easier and when adding Canvas Size, (as we'll do in a later step), the color is automatically added to the extra canvas size.
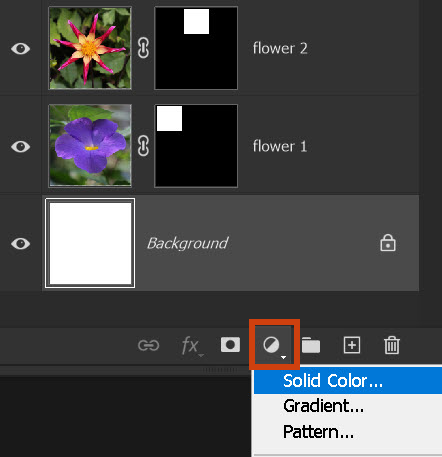
To add a Solid Color Adjustment Layer, click the Adjustment Layer button at the bottom of the Layers panel and select Solid Color.
A new layer is always added immediately above the currently selected layer. The Background layer is selected, so the new layer will be added above that.
After the Solid Color Adjustment Layer is added, you can delete the Background Layer.
To edit a Solid Color Adjustment Layer, double-click on the layer thumbnail (the colored area). This will open the Color Picker for you to select a new color.
Select a Solid Color Adjustment Layer
7. The Color Picker
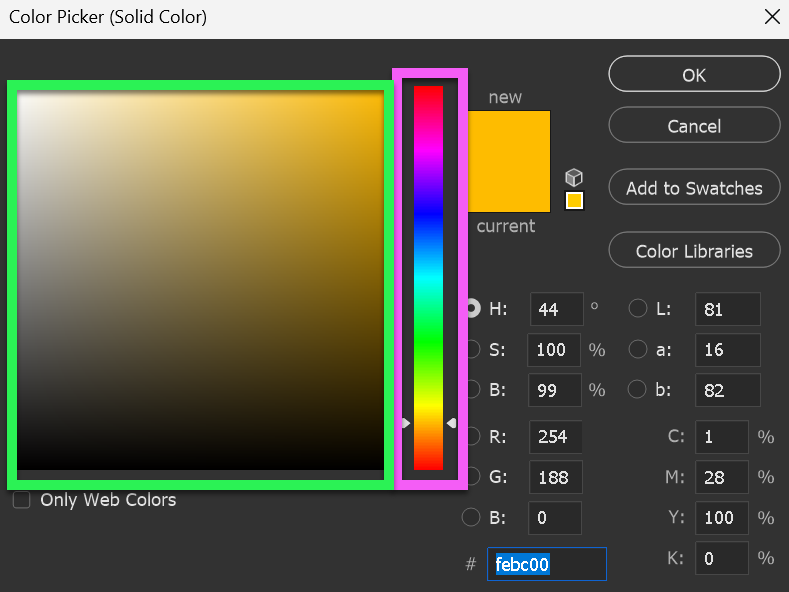
The Color Picker panel opens. You can either select a color from within the Color Picker panel, or from any part of an open image. For more information, see Color Picker.
To select a color from the Color Picker, click on a color (pink highlight), then on a tone (green highlight).
To select a color directly from within any of the images, see the next step.
The Color Picker panel
8. Select Color from Image
Move the cursor outside the Color Picker panel and over the area of the image that you want to sample the color from. The cursor will change, as highlighted in the green box.
You can click multiple times to try different colors. When you are happy with a color, click OK in the Color Picker.

Cursor shape when sampling from image
9. Uneven Outside Borders
This is the result of changing the background color, sampling directly from within the image, as shown in the previous step.
When you add horizontal and vertical spacing in step 3, 50% of the spacing is applied to each side of the the image, resulting in full spacing between images. 50% of that spacing is applied to the outer images, so the space around the edges is half of the spacing between the images.
In my opinion, the space around the edges being half of the spacing between images, doesn't look right, so we will increase this space by adding canvas size in the next step.
Background color sampled from the image. Outer spacing is half of the space between images
10. Increase Canvas Size
From the menu: Image > Canvas Size.
Ensure the Relative box it ticked. When this is selected, the additional width and height that you specify will be added to the existing canvas. When Relative is not selected, the resulting canvas size will be the total of the width and height you specified. For more details see Canvas Size.
In this case, because 50px was the horizontal and vertical spacing (step 3), I have specified 50px, as half will be added to each size, resulting in the sides being a total of 50px, to equal the spacing between the images.

Relative selected ensures the width and height are added to Canvas Size
Part 2: Add Stroke and other Layer Styles
We will add a Stroke around each image. In Photoshop a Stroke is a border, or line around an image or selected area. You can add a Stroke from the Edit menu, (Edit > Stroke), but this is added destructively. In this tutorial we will add a Stroke using Layer Styles, which is added non-destructively, so you can edit the stroke (provided you save the document as a .psd file.
For more information, see Destructive vs Non-Destructive Editing and Image Formats.
You could add a stroke to each layer individually, but this is repetitive and if you wanted to change it later, it would be more work. In this tutorial we will create a Layer Group and then add a Stroke, using Layer Styles, to the whole group at the same time. This also makes it easier to edit in the future.
A Red Stroke has been added to each image
12. fx button not available
To select all the image layers, firstly, click on the topmost layer, then press and hold the Shift key and click on the bottom most layer. Alternatively Click on the first layer, the hold the Ctrl key and click on each layer.
The screenshot shows that all the image layers are selected, but the fx button at the bottom of the Layers panel is is greyed-out (unavailable).
Instead we will create a Layer Group, that will allow us to add a Stroke Layer Style to all layers simultaneously.

fx button is not available when several layers are selected
13. Highlight All Layers and create New Group
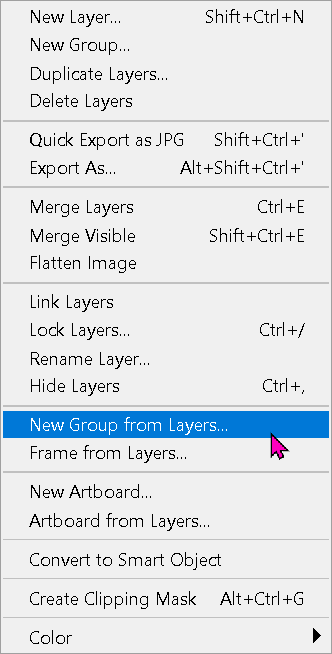
All layers should still be selected. If not, please refer to the previous step.
Right-click and from the menu, select New Group from Layers (not New Group).
Create New Group from selected layers
14. Name the Group
Type a name for the Group. To rename the Group later, double-click the name, as you would when renaming a layer.
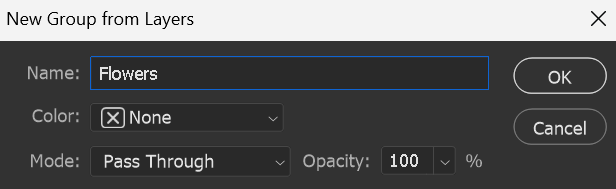
You can name the Group
15. Layers Panel with Group
Your Layers panel should look like this. To expand the Layer Group, click on the arrow, highlighted in red. All the layers will be visible below (shown in the next step).
If you didn't name the Group in the previous step, you can double click the Group name and type a new name.
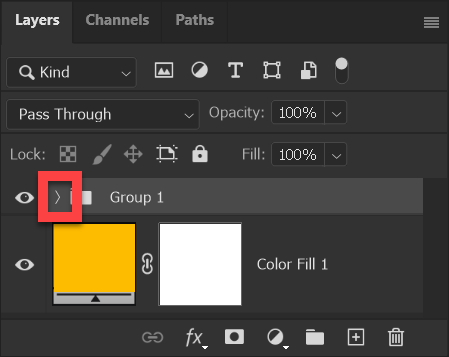
Show or hide all layers in a Group
16. Show or Hide Layers in a Group
You can show or hide the layers by clicking on arrow, highlighted in red. This screenshot shows all layers visible.
Select the group, as shown here. Now the fx button is available. Click on it and select Stroke (see next step).

fx button is now available for the Group
17. Select Stroke from the fx button
Your Layers panel should look like this.

Select Stroke from the fx button
18. Layer Styles Panel (Layer fx)
If you followed the previous step and clicked on the fx button at the bottom of the Layers panel and selected Stroke, it will already be selected (green highlight).
Adjust the thickness of the stroke with the Size slider (orange highlight).
Position (blue highlight). You can choose from Inside, Outside, or Centre. Inside will put the stroke inside the image, giving square corners. Outside will put the stroke outside your image and will give rounded corners. Centre puts half the stroke inside and half outside the image, so the corners are also rounded, but less so than outside.
Fill Type (pink highlight). Color, Pattern or Gradient. Select Color, then click in the colored area to open the Color Picker. Select a color within Color Picker, or move the cursor over an area of the image to sample a color directly from the image (shown in the next step).

The Layer Styles panel, with Stroke selected
19. Select a Color from the image
You can move the cursor outside of the Color Picker panel, to select a color directly from the image.
You can select multiple times until you're happy with the color. Then click OK to close the Color Picker panel and click OK to close the Layer Styles panel.

Click in the image to sample a color
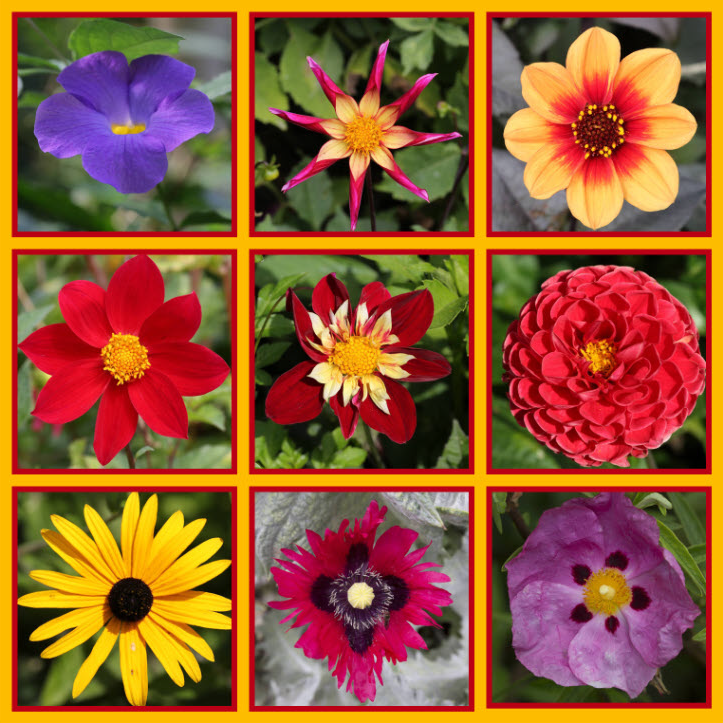
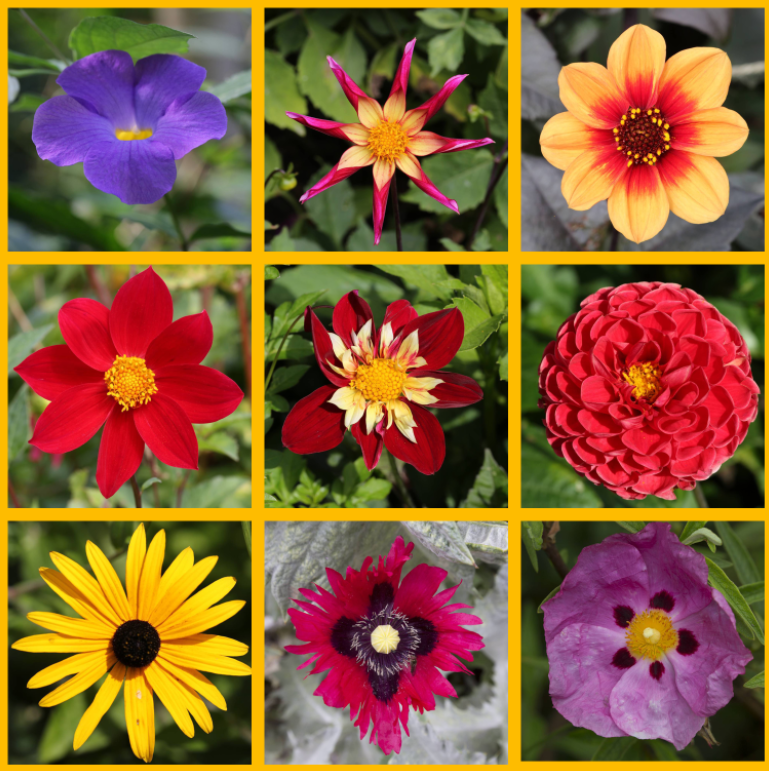
20. The Finished Montage
The montage is now complete, with a colored background and stroke.

The finished montage
When you have created a montage, it's easy to apply a variety of Layer Styles and then change them for different looks. Here is a page showing 40 different montage effect 40 Easy to Create Montage Variations using Layer Styles
Happy editing!
