Page updated: 14 June 2026
The Photoshop Histogram
An essential tool for Photoshop & photography
The Histogram is an important tool, not just in image editing, but also in digital photography.
The histogram can look a little intimidating to begin with, but understanding the Histogram will pay dividends with achieving good exposure and accurate editing. A histogram is basically a simple column chart. Column charts are used frequently in business and on TV programmes to present data in an easy to understand form.
The Histogram is a visual representation of the amount of pixels in each tone from black to white, in an image. In a jpeg image there are 256 tones from pure black to pure white. The Histogram represents this in a column graph. All the columns are squashed together in a small space, so it seems like a single entity, but it is really a chart with 256 columns.
Related subjects;
Adjustment Layers
Layers Basics
Layer Masks
ON THIS PAGE
The Histogram is a Column Chart
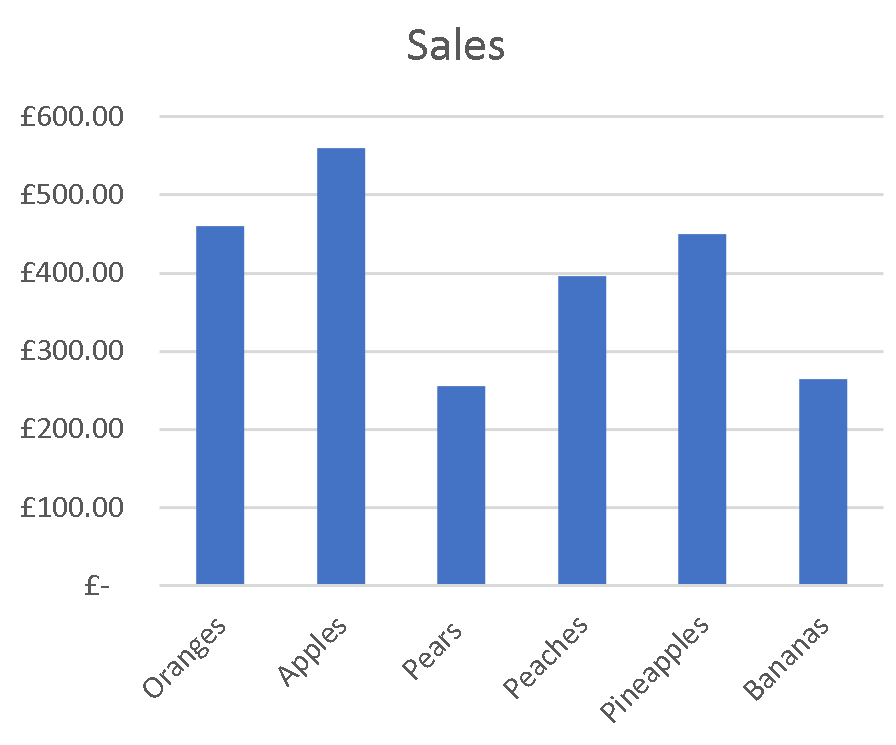
Here is a very simple Histogram. This column chart clearly shows apples are the biggest sellers and pears and bananas are the lowest sellers. The histogram is basically just a column chart, showing how much of each tone from black to white, is present in an image.
Reading The Histogram
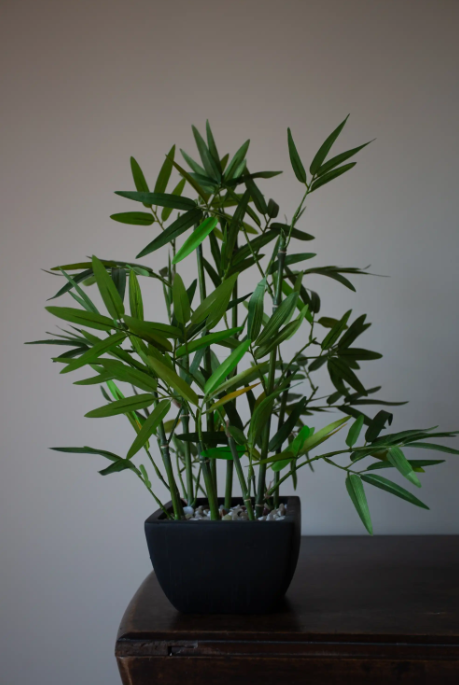
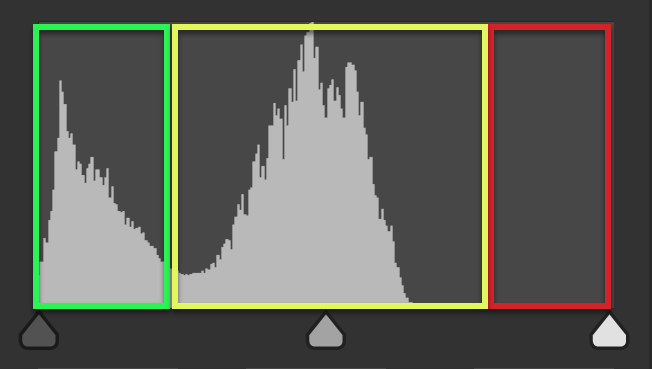
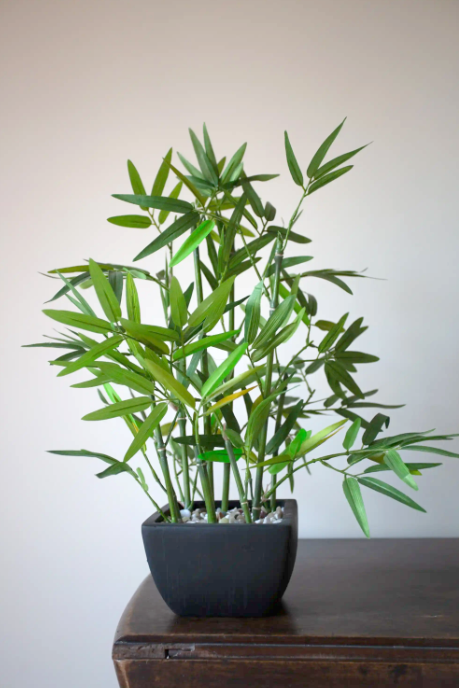
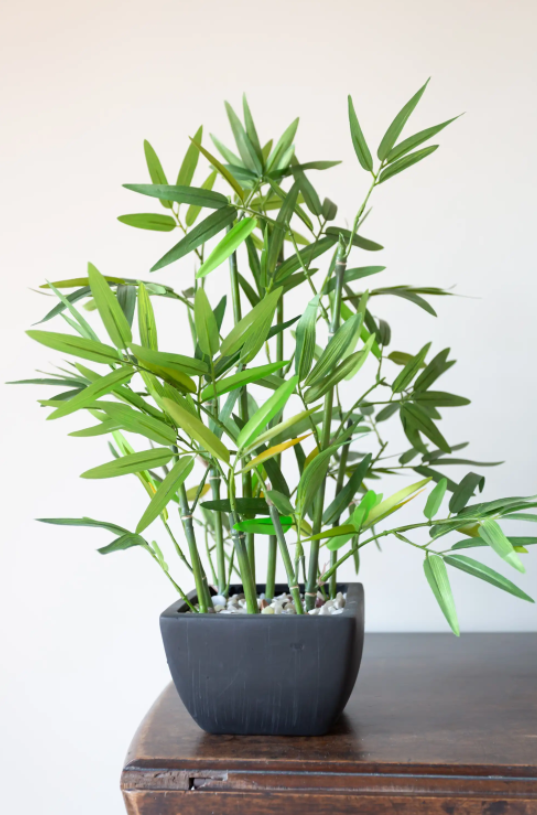
The area at the left (green highlight) is a representation of the amount of shadows, the dark pixels. In this Histogram there are shadows, in the plant pot and the table.
The area at the right (red highlight) is a representation of the amount of highlights, the bright pixels. In this Histogram, there are no highlights. The wall is a midtone, not close to white.
The area in the middle (yellow highlight) is a representation of the amount of midtones. In this Histogram, there are a lot of midtones.
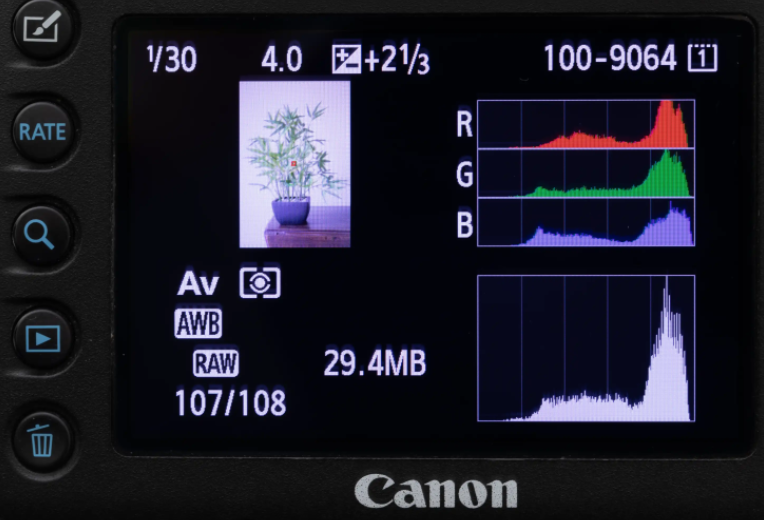
The Histogram is Available on most Cameras
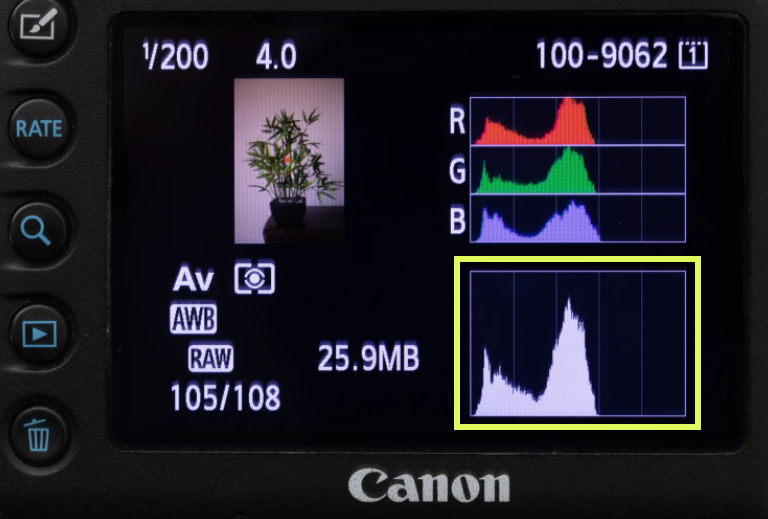
Most cameras will display the Histogram (yellow highlight). Some cameras will have an option to view either the brightness Histogram and/or the individual Histograms for each of the 3 color channels (as shown here).
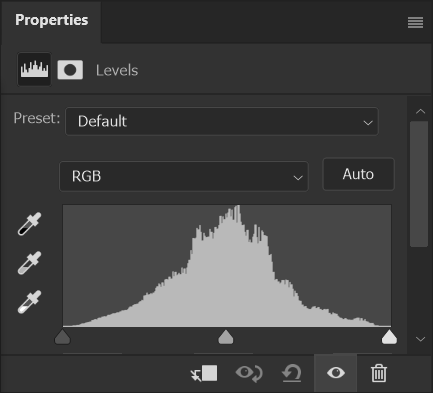
The gap on the right side of the Histogram (yellow highlight), shows there are no white or light bright pixels in the image, as you can see in the actual image.
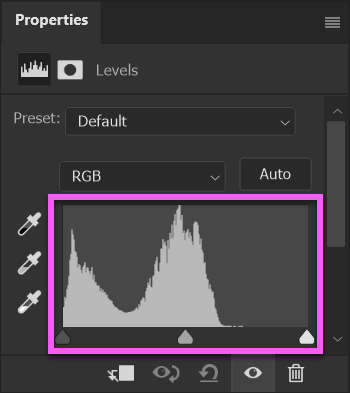
The Histogram shown in the Photoshop Properties panel (pink highlight), shows the same information.
Adjusting Levels, using the Histogram
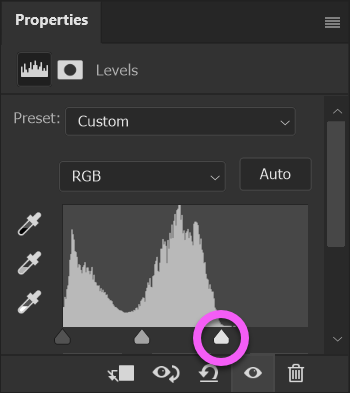
Using a Levels Adjustment Layer in Photoshop, I can move the White Point slider to the left, until it is level with the first part of the Histogram. The makes those pixels white. If there were any pixels to the right of where I've moved the White Point slider to, they would also be white.
The image now looks correct. That is the color of the wall.
Adjusting Camera Exposure using the Histogram
On the camera, I have increased exposure, to move the Histogram to the right. I want the highlights to be as close as possible to the right side, without touching. If the Histogram was touching the right side, the pixels at the right edge would be pure white, with no detail.
This is an example of the photography term "expose to the right".
Because I have moved the whole Histogram to the right, by increasing camera exposure, the Histogram now does not reach the left side.
Every Histogram is Unique to the Image
There is no such thing as an ideal Histogram. Each will be different and will depend on the content of the image. The following examples show how different image content produces a different Histogram.
Mostly Midtones
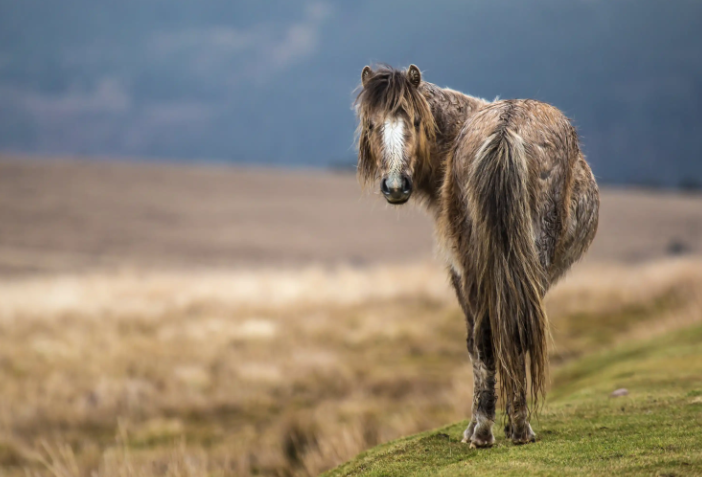
Some beginners think that a histogram should look like this. But there is no such thing as an ideal histogram. Each histogram will depend on image content. Most of the image is comprised of midtones, with small areas that are black and white.
The landscape is virtually all midtones. The pony is mostly midtones, but also with a white highlight on his head and a few dark shadows on his body and legs.
Snow - Mostly Highlights
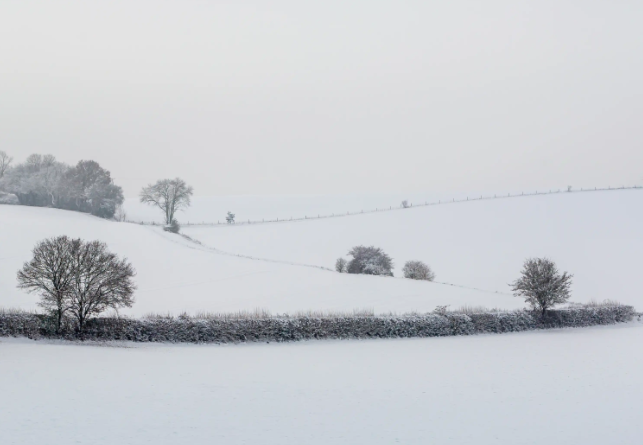
A snowy scene, correctly exposed, will contain more highlights than shadows.
The histogram shows there are no pure white pixels, as there is a gap at the right.
There are very few black or dark pixels, as shown by the left side of the histogram.
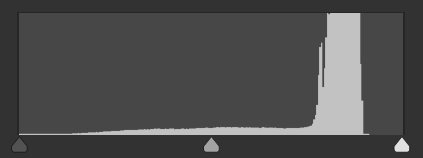
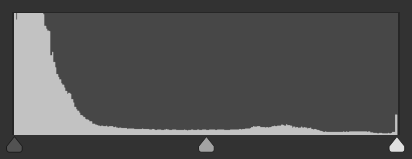
Night 1 - Mostly Shadows
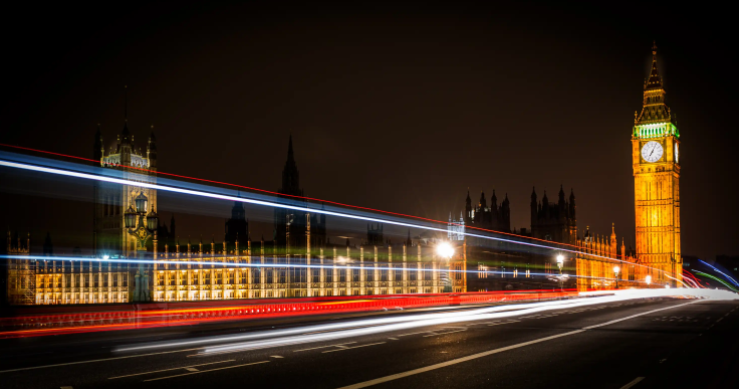
A night scene, correctly exposed, will contain more shadows than highlights.
The histogram shows that there are many pure black pixels, containing no detail. In some images, this should be avoided, depending on the shadow areas and whether you wish the detail to be visible.
The right side of the histogram shows that there are also some highlights that are pure white, with no visible detail. That would be the very bright white stream across the bottom of the image, from cars headlights during this long exposure image.
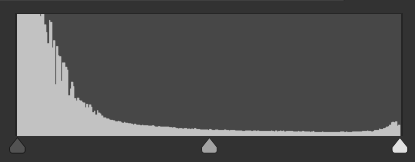
Night 2 - Mostly Shadows
Another image that is mostly dark, but with some midtones and a few very bright highlights
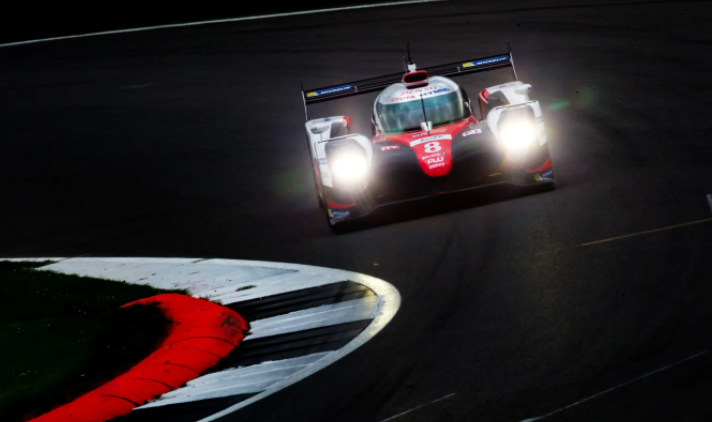
Horse Racing - Midtones
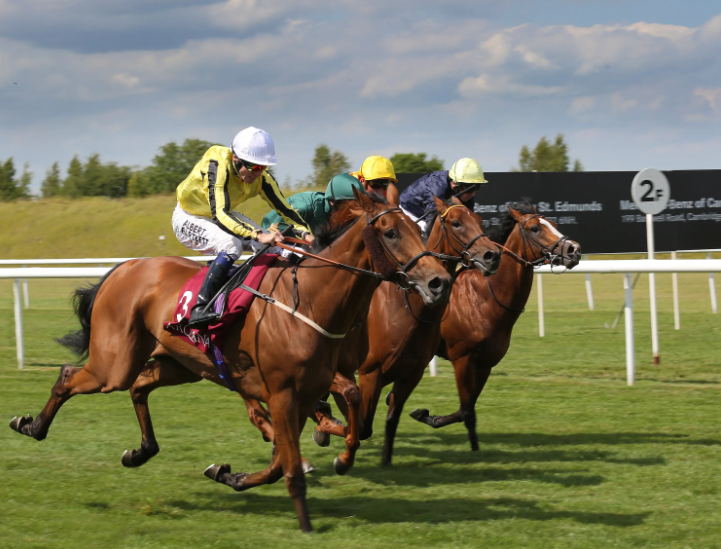
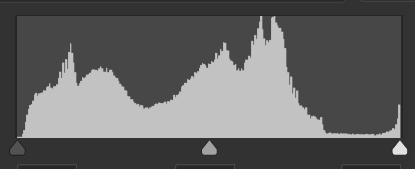
Another image that is mostly dark, but with some midtones and a few very bright highlights
Golf - Midtones

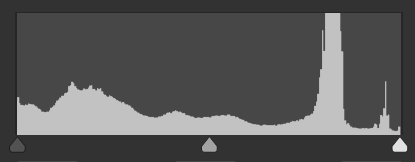
A fairly flat looking histogram. There are some shadows, lots of midtones and some highlights. These areas can be clearly seen in the image. The white background of the BMW signage would account for most of the spike we see in the histogram. There are also dark trees in the background that would account for much of the darker pixels and there are also a lot of midtones in the grass and the lighter trees and faces.
Summary of The Histogram
The Histogram are a very important and essential tool in image editing, particularly to a good quality. They allow you to edit non-destructively and are permanently editable.
