Page updated: 14 June 2026
Color Range
Photoshop's hidden Selection Tool
Color Range is an almost hidden selection tool. It is available via the Select menu, unlike several selection tools that live on the Toolbar.
But don't let that fool you. It's a very good method of making a selection when there is a distinctive difference in color between your object and the rest of the image.
It does take a little getting used to, as it works differently to other selection tools. It requires a little practice, but it is worth getting to know, as in some images, as I demonstrate below, it can achieve a better selection than other excellent selection tools, including;
Object Selection Tool
Quick Selection Tool
Magic Wand
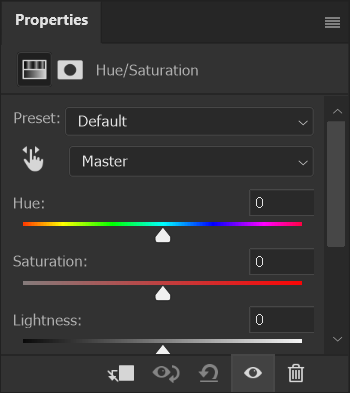
How to Use Color Range Default Colors
You can either select from a few colors, or you can sample your own colors. Below, I will look at both, beginning with sampling Reds.
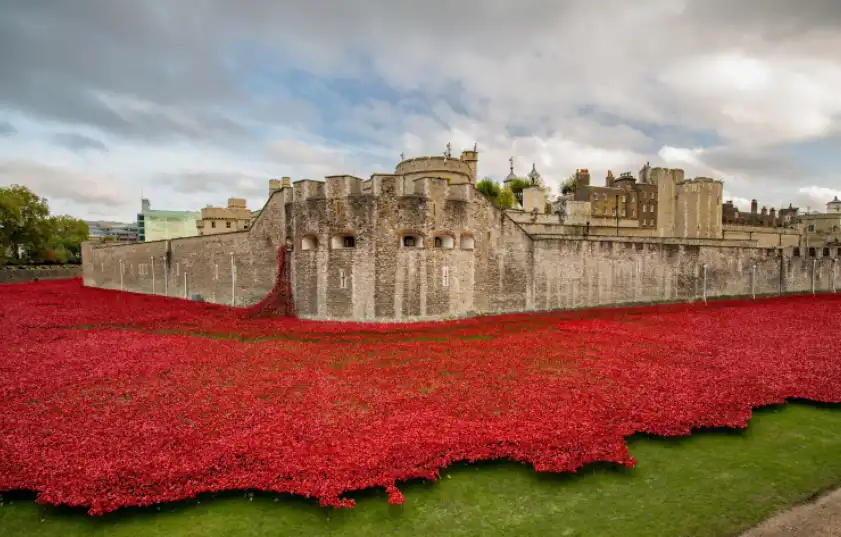
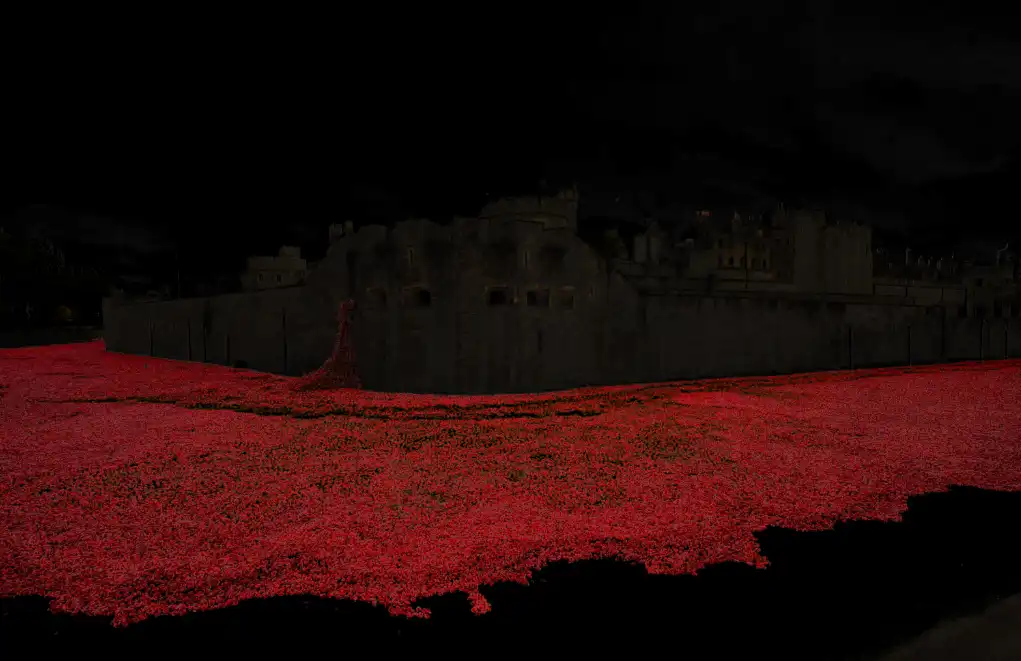
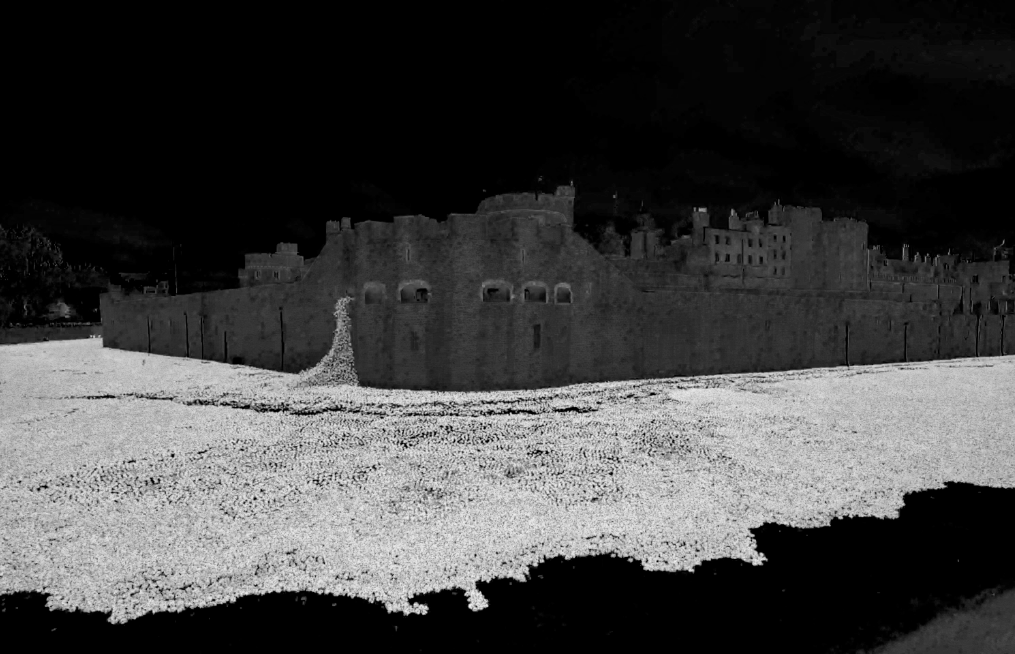
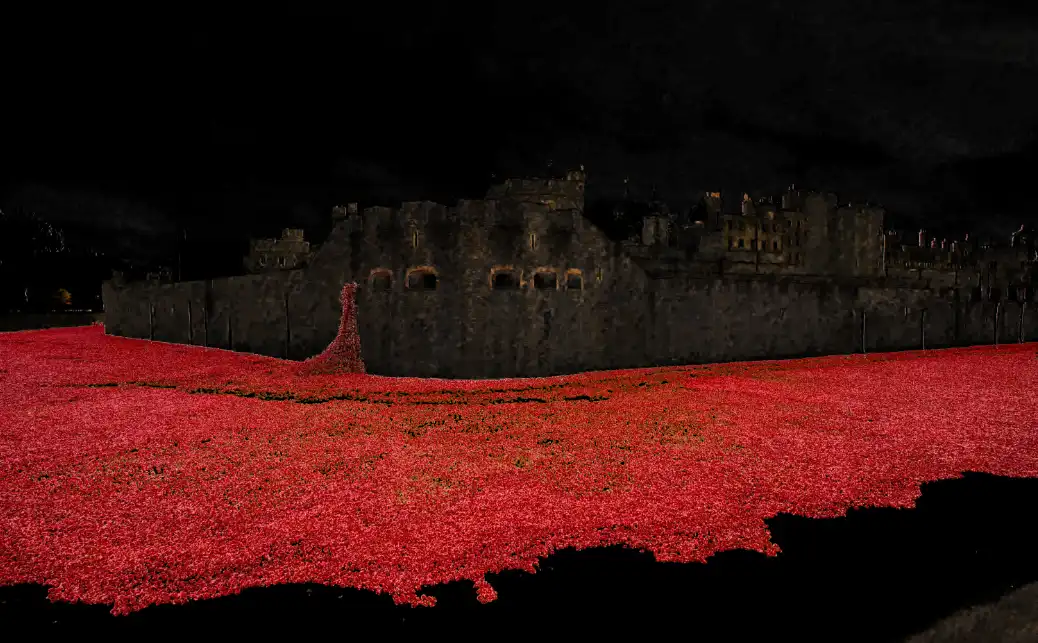
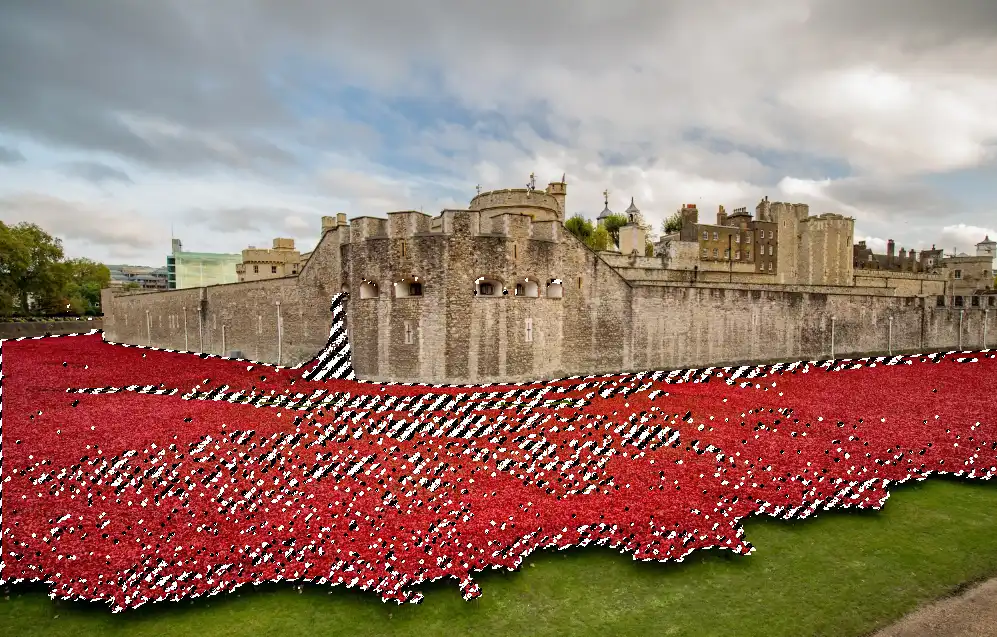
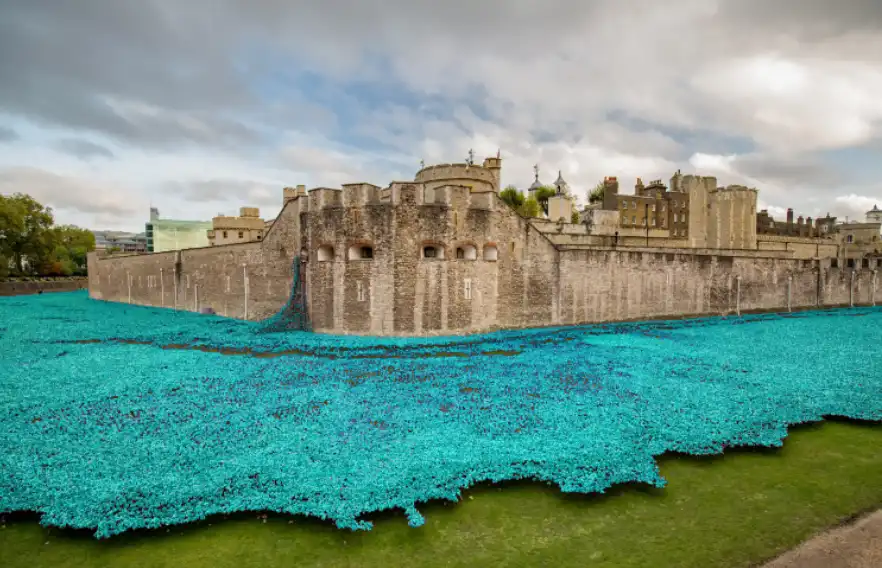
In 2014 the Tower of London marked the centenary of the outbreak of The First World War with a commemorative art installation of over 888,000 ceramic poppies, with each poppy representing a British military fatality during the war.
The Object Selection Tool and the Quick Selection Tool both make selections that include tiny areas of green, among the poppies. In this image, Color Range does a better job.
ON THIS PAGE
1. Select Color Range
Select Color-Range from the Select menu.
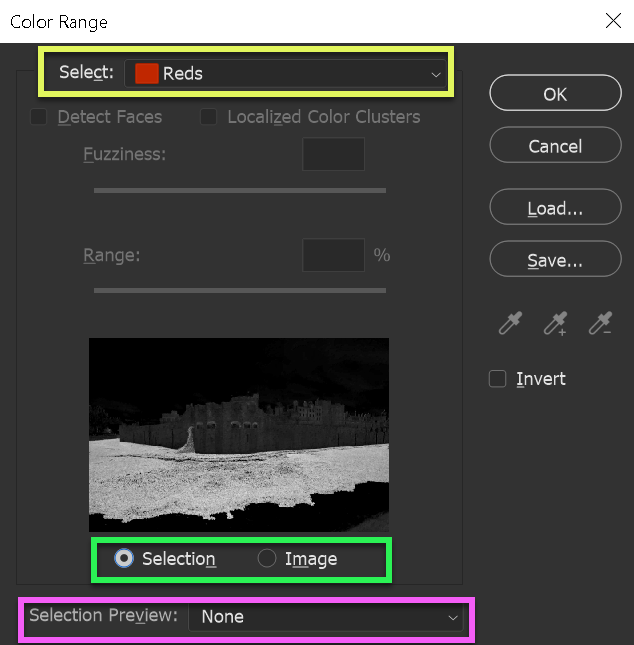
2. Select Reds
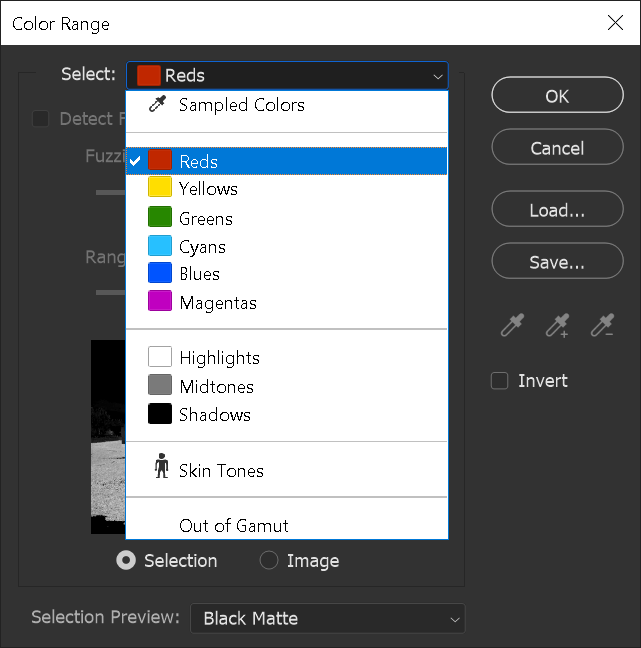
In the Select drop-down menu, select Reds.
There are only a limited number of colors that you can choose, or you can choose from highlights, midtones or shadows, or skin tones.
3. Reds are selected
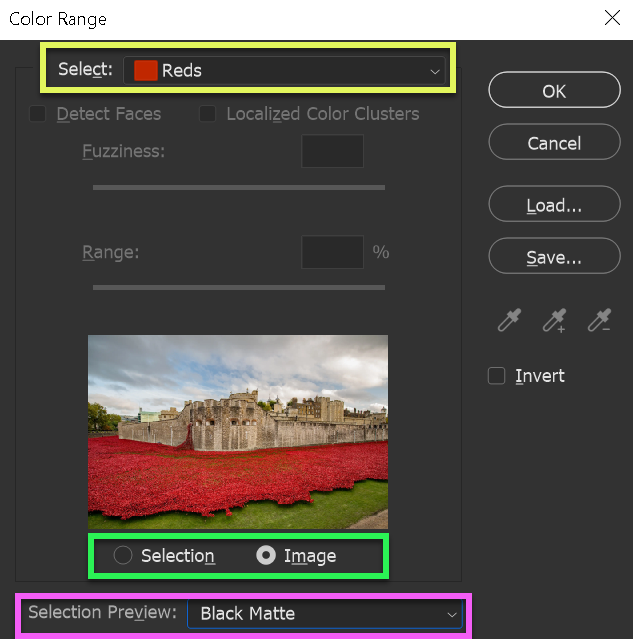
I have selected Reds (yellow highlight).
You have choices for how your image looks and how the preview looks, within the Color Range panel.
In this example, both the image (pink highlight) and preview within the Color Range panel (green highlight), show the image.
4. Previews of selection
In this example, both the image and preview, within the Color Range panel, are showing previews of the resulting Color Range selection.
5. Select Color
If you select one of the colors, as I've selected the Reds here, the color is automatically selected within your image. There aren't any additional options you can apply or change, so the choices of what to view in the image and in the in-panel preview, are not important, unlike when we select custom colors.
Click OK to apply your selection.
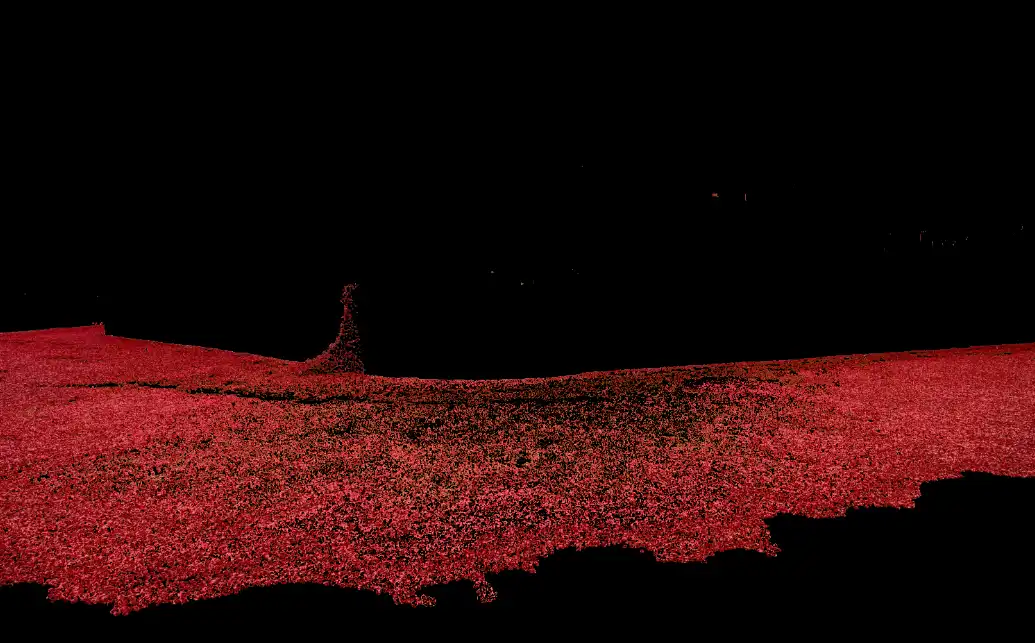
6. Resulting selection
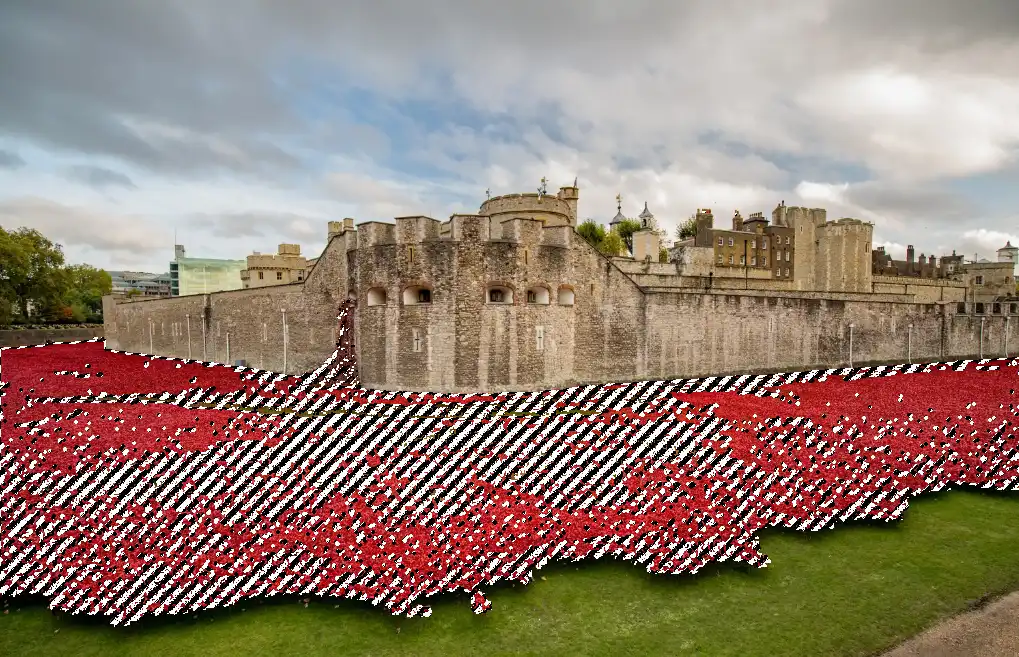
Here is the resulting selection from selecting Reds.
It's not easy to see the quality of the selection, as it looks like this, so in the next steps I will add a Hue/Saturation Adjustment Layer and change the color of the poppies.
7. Add Hue/Saturation Layer
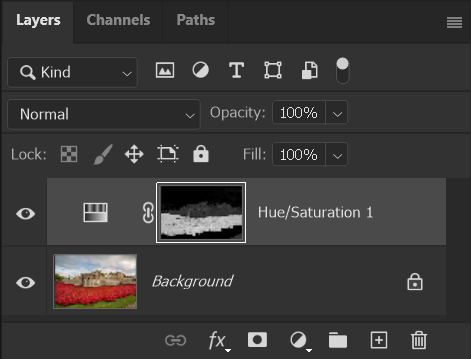
I have added a Hue/Saturation Adjustment Layer.
Click on the Adjustment Layer button at the bottom of the Layers panel and select Hue/Saturation.
For more information, see Adjustment Layers.
The active selection has automatically been applied to the layer mask.
8. Hue/Saturation before & after
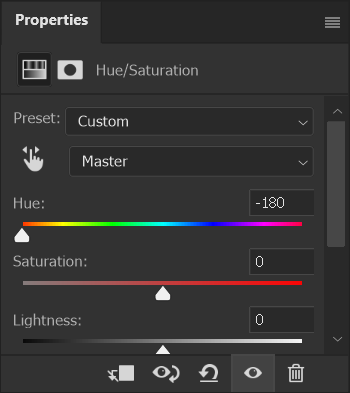
Here is the Hue/Saturation Adjustment Layer before and after my adjustment. I have dragged the Hue slider all the way to the left.
The result can be seen in the next step.
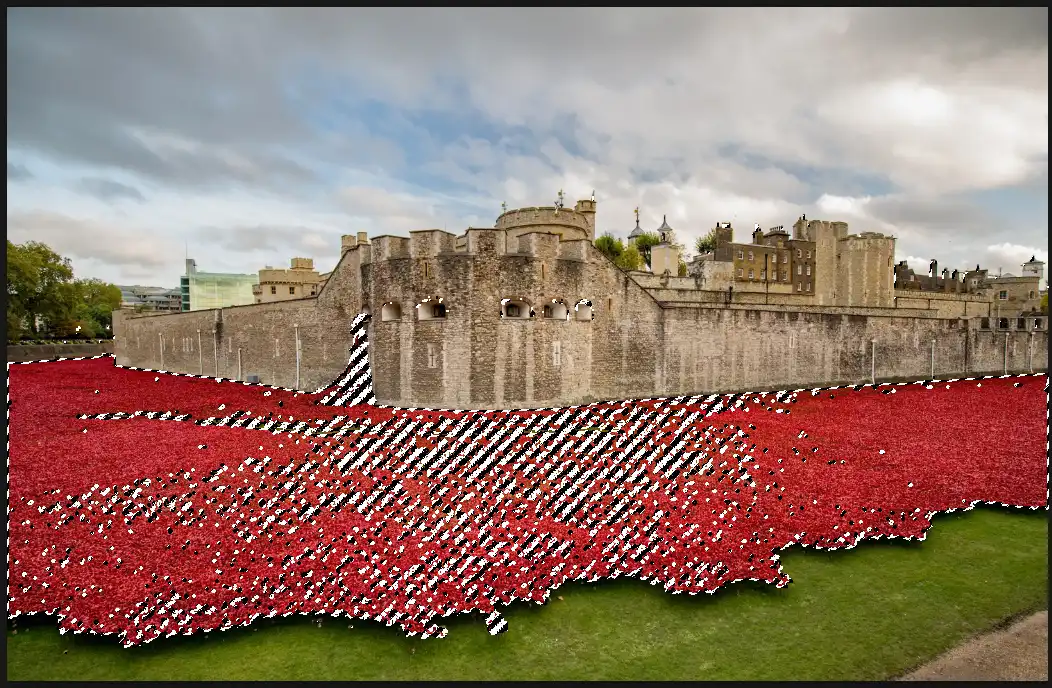
9. Hue adjustment result
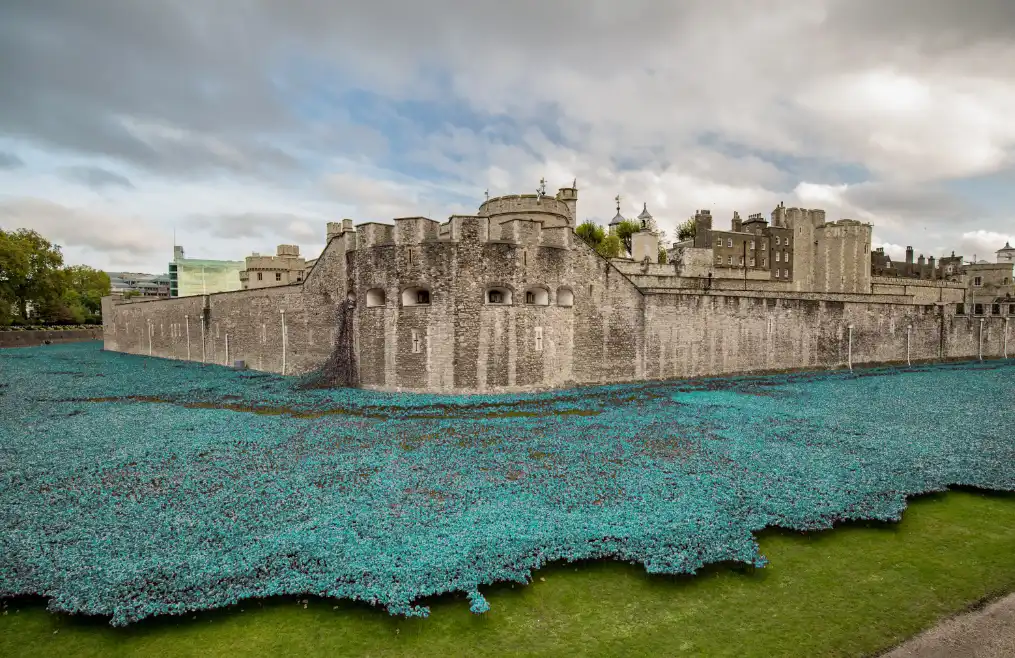
Here is the result of the Hue adjustment.
At first glance it looks very good. While this may be good enough, it isn't perfect, as I will demonstrate in the next few steps.
10. Close-up of adjustment
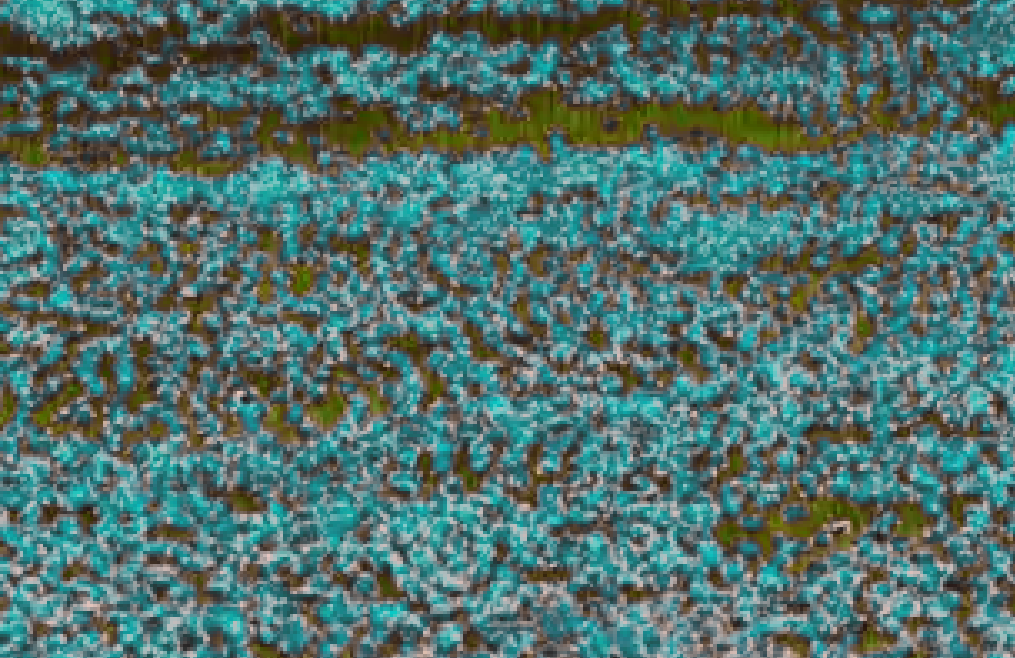
The close-up also looks good. As I said, this may be good enough. It's certainly passable.
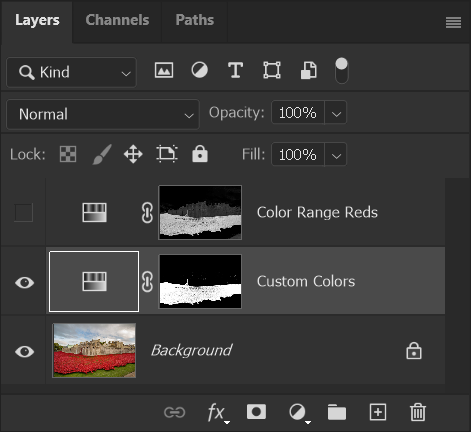
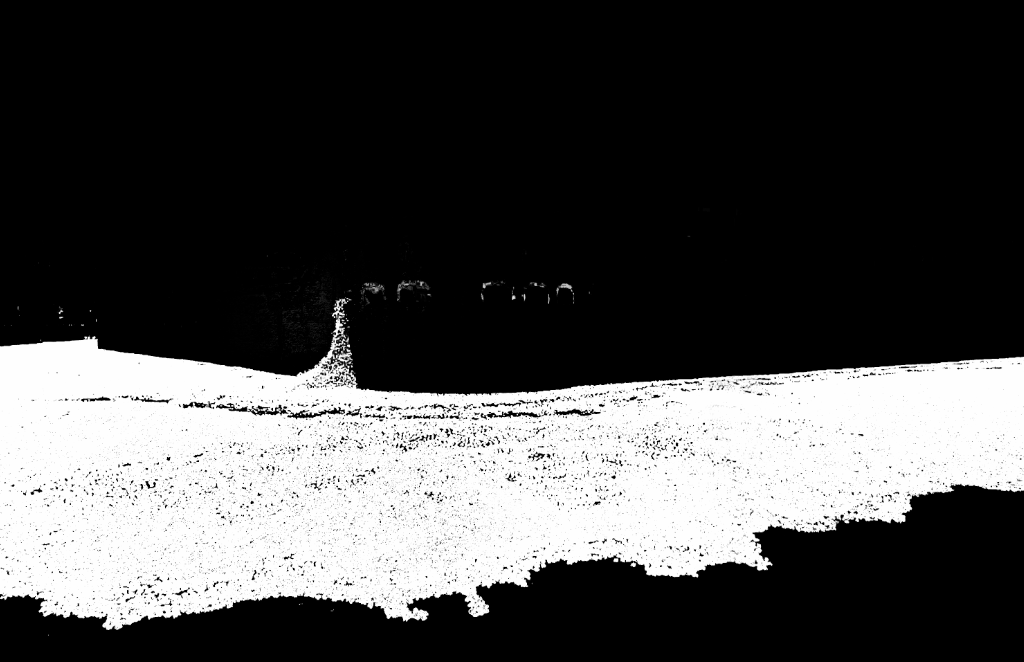
11. Inspect Layer Mask
Inspect a Layer Mask by pressing the Alt key and clicking directly on the Layer Mask. You will see the Layer Mask in black and white (and shades of gray). Black indicates an area is completely hidden. White indicates an area is completely visible. Gray indicates an area that is partially visible/hidden.
The building is dark gray, which indicates that it has been partially selected. In this image, it may not be an issue, but in some images, it will be.
After I have demonstrated how to select the reds by sampling custom colors, you will see that you can achieve a higher quality selection, where the building is not selected at all and the poppies are even better selected that here.
12. How to Use Color Range with Sampled Colors
In the above steps, selecting Reds and letting Color Range automatically select all red areas in the image, worked pretty well. However, there will be images where this is not going to work as well. Also, there are only 6 colors to choose from. We will now look at manually sampling colors and if done so carefully, you can achieve a higher quality result, even in this image. We'll use the same image, for easy comparison.
13. Sampled Colors
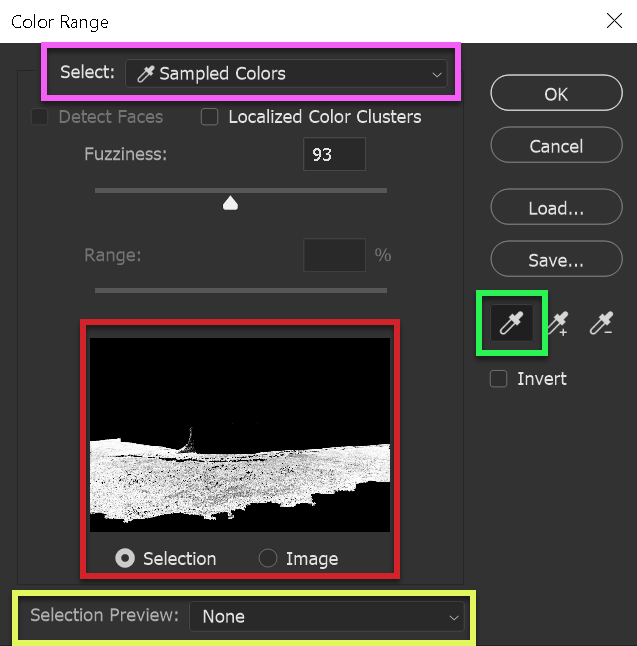
This time I have selected Sampled Colors (pink highlight).
Before starting to sample colors, I strongly recommend selecting the first button (green highlight) and clicking once in your chosen color. This creates a new sample that replaces any existing sampled colors.
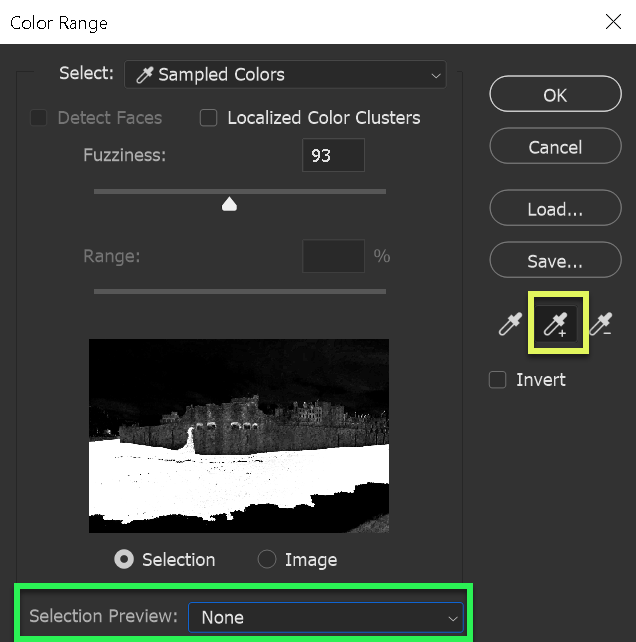
I have selected None as the Selection Preview on the image (yellow highlight). It is important when sampling colors that you click accurately on the colors you want to sample. If you accidentally click on colors you don't want, you will lower the quality of the resulting selection. I have select None so that I can clearly see the image detail
14. Create New Sample
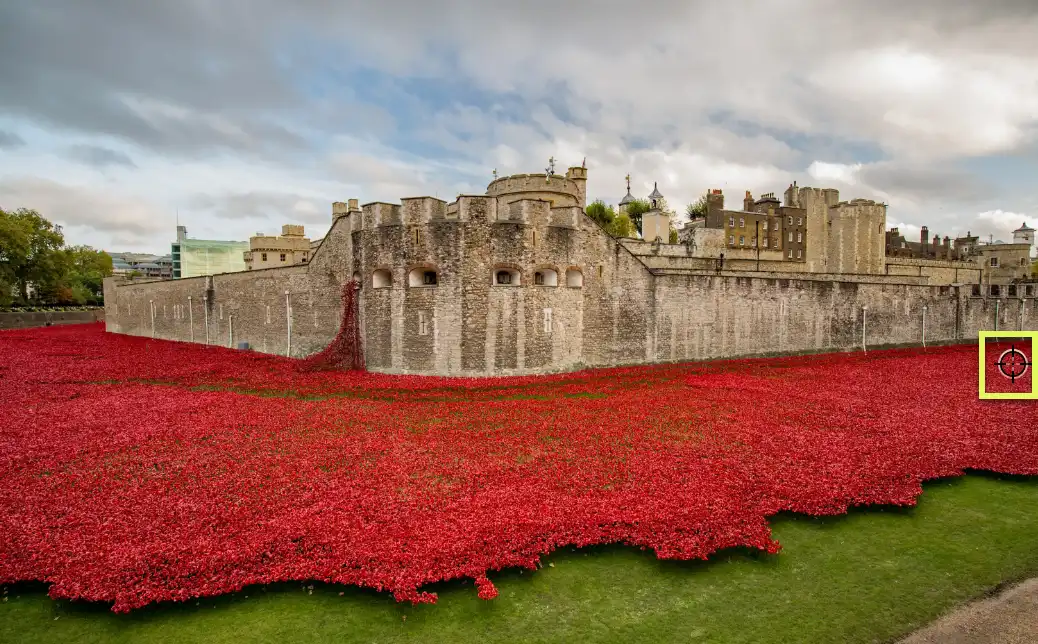
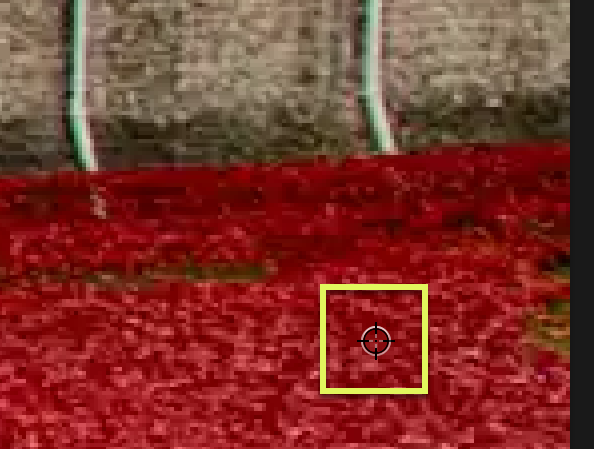
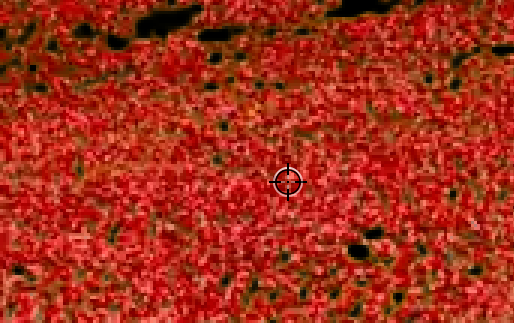
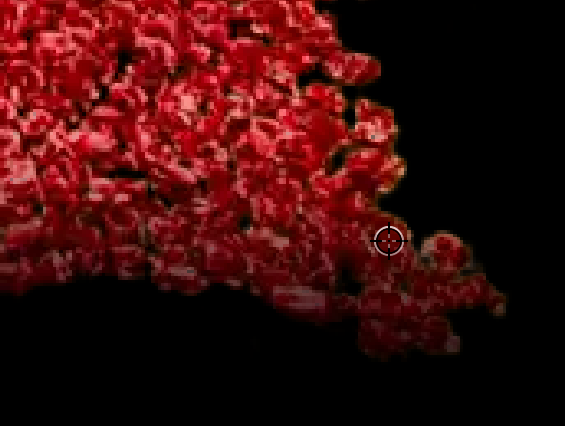
I have selected this area to click on to create a new sample, because it is entirely covered in red. In other areas, there are small areas of green grass visible. If you selected an area that included any green, it would reduce the effectiveness of sampling only the reds of the poppies.
The close-up shows that I can safely click to sample this area, as it is solid reds - lots of different shades of red.
15. Add to Sample
After clicking once with the New Sample button selected, (to clear any existing sampling), then select the second button, Add to Sample. Again, this is similar to the Add to Selection button on the Options bar of the selection tools.
I still have the Selection Preview set to None, so I can clearly see the areas in the image, to make sure that I only sample the colors I want.
When sampling, you can click and drag over and area that contains only the colors you want. Clicking and dragging will sample many more shades of a color, than just clicking. Again, be careful that you don't click and drag over any areas containing colors you don't want, i.e. the grass in this image, in between the poppies.
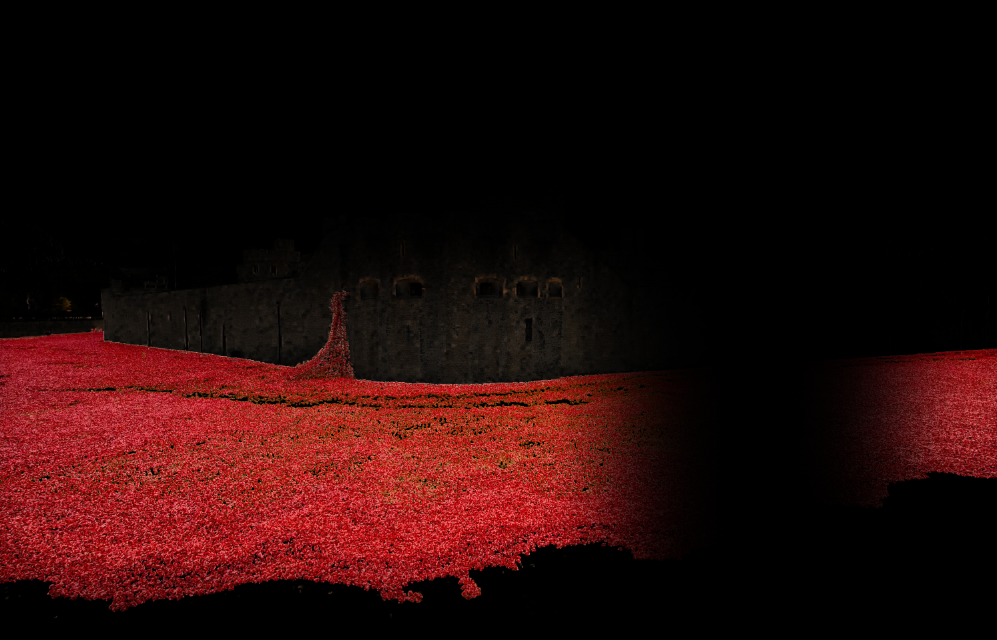
16. Change Preview Options
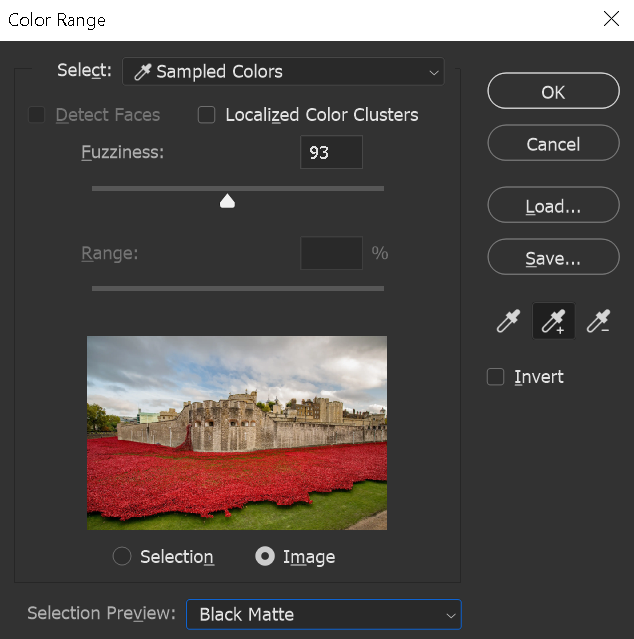
After sampling various areas (carefully), it is now important to get an idea of the quality of the sampling.
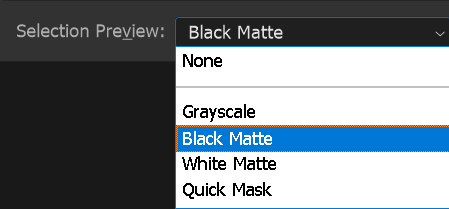
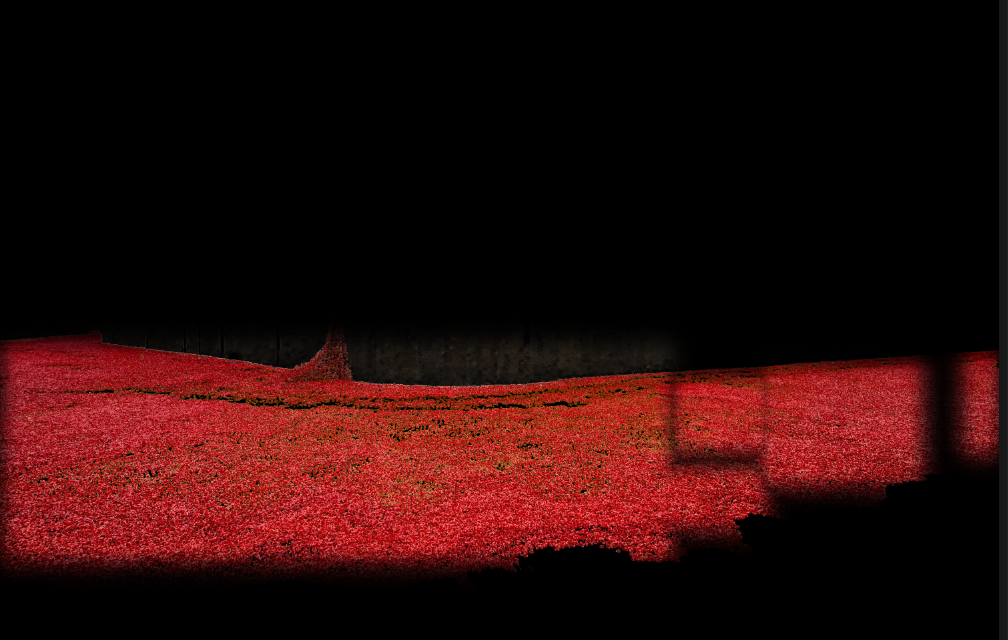
I have switched the in-panel preview to Image (instead of Selection) and I have changed the Selection Preview of the image to Black Matte. You might have your own preference from the drop-down list, but my preference is Black Matte. The black allows me to clearly see what is and is not sampled.
17. Fuziness Slider


Note the Fuzziness slider. It controls how much tolerance there is for colors and tonal ranges around the selected color, i.e. how many similar colors will also be sampled.
Compare this to the next step, where the Fuzziness slider has been moved to a much lower figure.
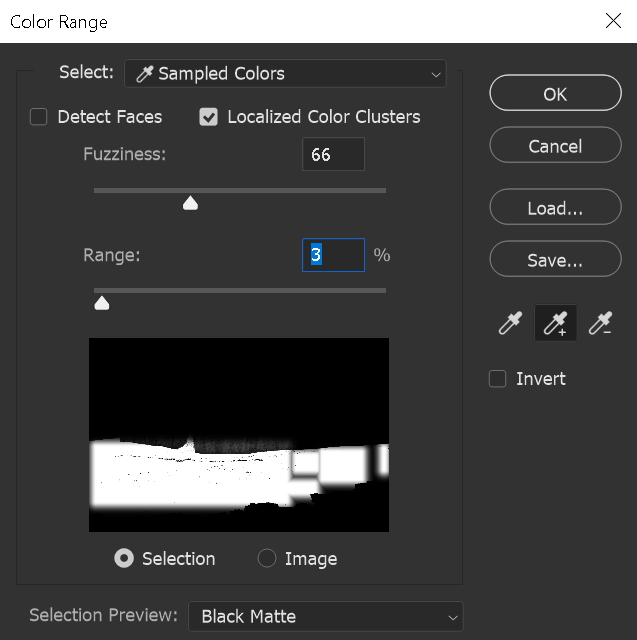
18. Change Fuziness

The Fuzziness slider has been move to the left to a lower figure of 9, just to demonstrate what a lower Fuzziness setting would do. This is compared to the previous step where the Fuzziness slider was 52.
It clearly shows that less of the poppies have been sampled.
Move the Fuzziness slider back and forth to see the effect in your sampling, but make sure you can clearly see the effects, by choosing an option in the Selection Preview (Black Matte is shown here).
19. Adjustment Layers
I have created Adjustment Layers for each, for a comparison. See the next step.
20. Sample Custom Colors
This selection, as a result of sampling Custom Colors, (second screenshot), is better than the sampling of Reds, (first screenshot).
21. Localized Color Clusters
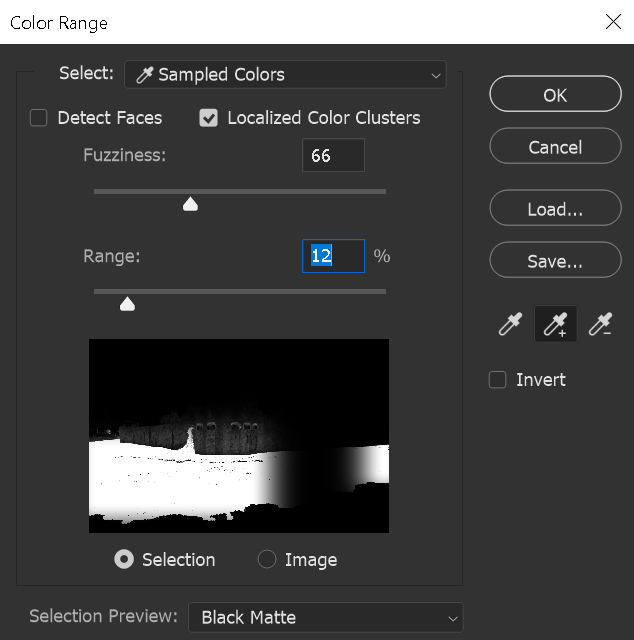
I have turned on Localized Color Clusters. This limits selected pixels to areas close to areas that you have sampled. At 100% the whole area would be sampled. At a lower Range, it limits the selection to closer to areas where you have clicked, or clicked and dragged, to sample.
This can be helpful to limit sampled areas, but you will need to sample more areas. The black band through the poppies shows that I have not yet sampled in that area.
22. Sample new areas
You will need to sample from those areas that are not currently selected.
Zoom in, so you can be sure that you only sample the colors you want and not any colors that you don't want.
23. More sampling
After more sampling, the unsampled areas are being reduced.
24. Zoom in for accuracy
Note how much I have zoomed in, to work accurately.
The first screenshot shows red areas that are dark, indicating I have not yet sampled them.
The second screenshot shows the reds looking much brighter after I have sampled them, indicating that it will produce a better quality selection.
25. Progress screenshots
The first screenshot is the selection made my sampling Reds.
The second screenshot is the improved selection we saw in a previous step, as a result of sampling Custom Colors.
The third screenshot is the result of the last few steps, were I have also used Localized Color Clusters and sampled additional areas.
26. Inspect Layer Mask
I have inspected the Layer Mask, by pressing the Alt key and clicking on the Layer Mask.
The Layer Mask still shows a few areas in the Tower of London that are not perfect. In many images this wouldn't be important, but I'll show you how you can further improve the mask by a little editing with the Brush tool.
Select the Brush tool and select a hard brush, or just adjust Hardness to 0%. Having a hard edge makes it easy to brush accurately.
27. Finished image

Select black as the Foreground Color and brush on the Layer Mask to remove unwanted areas.
28. Comparison sampling Reds & Custom Colors
The first screenshot is the Layer Mask of sampling the Reds. The second screenshot is the Layer Mask of sampling Custom Colors.
Sampling Custom Colors has produced a better quality selection and Layer Mask. The poppies are more fully selected, as shown by the whiter color on the mask. The Tower of London is not selected, as shown by black.
See the next step for the results of these Layer Masks on the Hue/Saturation Adjustment Layers.
29. Comparison screenshots
The second screenshot is the result of Sampled Colors. The better quality selection and Layer Mask shows a better saturation of the change of color. The Tower of London has not been affected by the change of Hue, compared to the first screenshot, where the color has subtlety changed.
Summary of Color Range
Color Range is an almost hidden selection tool. It can work well in the right scenario, but often you will be better with one of the main selection tools. When it is beneficial to use Color Range, it can achieve a selection that the other selection tools can't match.
When using Color Range, you can sometimes simply just select one of the default 6 colors, which is very quick and easy. So if you are looking to change the color of an object, this may be a good method to try first.
As we've seen, you can achieve a better quality result if you are prepared to spend longer on sampling colors and adjusting the Fuzziness and Localized Color Cluster settings. It takes longer, but you can end up with a better result.
