Page updated: 14 June 2026
The History Panel - Introduction
The History Panel is a very useful Photoshop tool. It shows a record of all the steps (recorded as "states"), that are taken while editing. Anything you do will be logged in the History panel and you can go back to any History "State". Note that History is lost on closing Photoshop.
- Undo any steps you wish
- The name of the History State helps
- Experiment as you can freely undo
- You can just keep part of a History State

ON THIS PAGE
The History Panel: What it Does
In common with all software programs that allow you to create, Photoshop allows you to undo the last thing you did. And the thing before that. And the thing before that...etc.
Undo
In common with other software programs you can Undo by using the menu, Edit > Undo (and the last action is named).
Or you can use the keyboard shortcut to undo, Ctrl+Z. This shortcut is universal, it works in all programs, on Windows and Apple computers.
When you want to quickly just undo the last thing you did the keyboard shortcut, Ctrl+Z, can be ideal. But if you want to go back several steps, or compare how the image looks at different steps, a better method is to use the History panel and the History States in that panel.
History
If the History panel is not open, you can open it from the menu; Window > History.
In an earlier chapter on The Workspace, I recommend you set up your workspace to have open 4 main panels; Toolbar, Navigator, Layers and History. These are panels you will use frequently.
The History panel is more useful than simply using Undo. It keeps a list of every step you take, called “History States”. Every action, whether it’s adding a Layer Mask, adjusting Levels, adding a new layer.... each step you do is recorded as a “State” in the History panel.You can step backwards through them, just like using Undo, and you can step forwards through them, like using Redo. Or you can jump to any State, then jump to another State. This is made easy because each of the History States is named with the tool you used, or a description of what you did.
History Snapshots
You can create “Snapshots” whilst working, that save a particular History State. This can be useful if you want to try a number of different options. Click on the camera icon at the bottom of the History panel. But note, when you save and close a file, these will not be saved. Next time you open the file, History will be empty.
Points to Note
- History is lost when you close an image. Snapshots are also lost.
- When you close an image, you will lose the History States in the History panel.
- This applies even if you save in the .PSD Photoshop format. When you reopen the document the History panel will be empty.
- You can save the History Log, but this will ONLY document the steps in text format, that you’ve performed but will NOT maintain the data in the History panel.
- From the menu; Edit > Preferences > History & Content Credentials (or similar name). Tick the box for History Log. You can choose to save the log either in a separate file, or within meta data of the file.
See below for examples of History States.
ON THIS PAGE
The History Panel
1. History States
The screenshot shows the History States recorded for each action in the editing process of the image below. The guitar has been selected, then a layer mask added. A new layer has been added and filled with blue This layer is then moved below the guitar layer, as a background. The description of each tool, or action, in each History “State”, makes it easy to quickly jump to the chosen state. Click on any of the States in the History panel to jump to exactly how things were at that time. Below, the screenshots show the image and the layers panel for each step, along with a description of what happened in that editing step.
2. Open History State
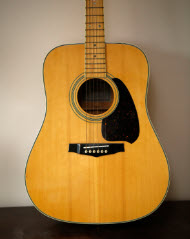
OPEN - The image has been opened, but nothing has been done yet.
3. Object Selection State

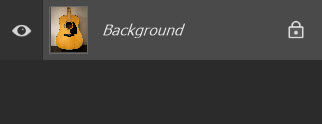
OBJECT SELECTION - The Object Selection tool had been used to make a selection of the guitar.
4. Add Layer Mask

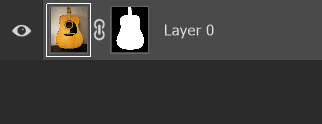
ADD LAYER MASK - A layer mask has been added, which masks the background. The checkerboard pattern represents transparency.
5. New Layer
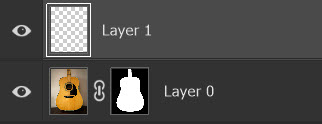
NEW LAYER - A new empty layer has been added (there is no visible difference in the image, as the new layer is transparent). New layers are always added above the currently selected layer.
6. Fill Layer

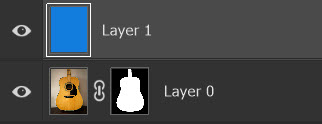
FILL LAYER - The new layer has been filled with blue. Because this layer is above the guitar, it’s all we see.
7. Layer Order

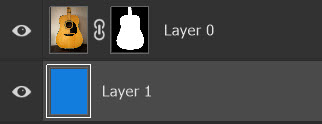
LAYER ORDER - The blue layer has been moved below the guitar layer, so is now visible as a background behind the guitar.
8. History Panel States
The History Panel shows all the previous actions as "States". To return to a previous State, simply click on that State. If you proceed to carry out other actions, you will be building new History States from that point forwards.
