Page updated: 18 July 2026
Interactive Photoshop Toolbar PDF (2026)
Preview and download available on the Tools page.
Slice Tool
Slice up an image into multiple parts
The Slice tool allows you to cut up an image into several parts, typically for use on websites, so that each part of an image can include a link to a different page. It's not useful in image editing.
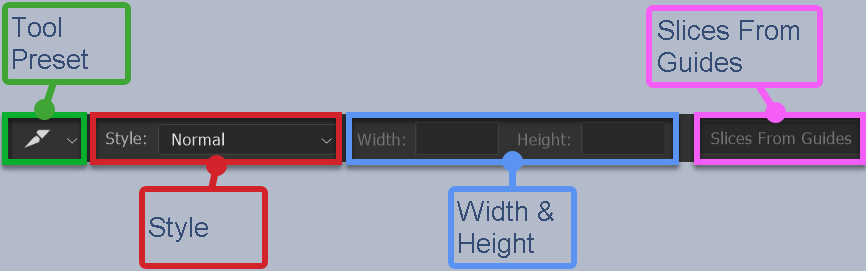
Slice Tool Options
Tap to view full size
Rotate your phone for easier reading
ON THIS PAGE
Tool Presets

You can create and save a Tool Preset for any tool, which will remember settings that you choose for that tool, so you can quickly and easily select different presets and settings for a particular tool. The degree of usefulness of presets varies, depending on the tool.
You can reset any tool back to its default settings by right clicking on the Tool Presets button and select Reset Tool. Take care not to Reset All Tools, unless that is intended.
Style
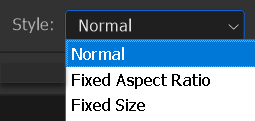
Select one of the options;
- Normal - unconstrained, i.e. freestyle, with no specific aspect ratio or size
- Fixed Aspect Ratio - Choose an aspect ratio to Slice, i.e. 1:1 for square
- Fixed Size - Enter specific dimensions for height and width
Width & Height

Normal
Width & Height are unavailable if Normal is selected from Style

Fixed Aspect Ratio
Enter figures to set the Aspect Ratio. For a square, enter 1 and 1.
If you want slices to be twice as wide as they are high, enter 2 for width and 1 for height.
If you want slices to be twice as high as they are wide, enter 2 for height and 1 for width.

Fixed Size
Enter specific dimensions for width and height.
Enter the width and height for the cropped image. Note that this is usually in conjunction with specifying the resolution (see Resolution, below).
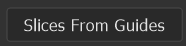
Slices From Guides
If you have any Guides in your image, you can automatically create slices from those Guides.
To add a Guide, from the menu; View > Guides > New Guide... Then select Vertical or Horizontal and enter the measurement in inches (in) or centimeters (cm), depending on the units set in Preferences (Edit > Preferences > Units & Rulers...).
If you have Guides in your image, they may not be visible, if you have previously hidden them. However they will still create the slices, if not visible.
To view Guides, from the menu; View > Show > Guides.
How to use the Slice Tool

As mentioned above, the Slice tool is not really used at all in image editing, unless creating images for use on webpages.
To create an easy to understand example, I will Slice this image of an egg. This is not intended for website use, just to illustrate how an image is sliced.
1. Select Slice Tool

Select the Slice tool from the toolbar.
Like most tools, it shares a button with other tools and the most likely tool to be showing is the Crop tool.
Note however, that the tool showing will be the last one used.
2. Guides
If you have Guides in your image, the Slices From Guides button will be available.
If so, just click it.
If there are no Guides in your image, please skip this step.
3. Add a Guide
If there are no Guides in your image, you have the option to add them.
To add a Guide, from the menu: View > Guides New Guide. Or with the Rulers visible, click on the Ruler and drag into the image to create and position a Guide.
Select Vertical or Horizontal and enter the measurement in inches (in) or centimeters (cm), depending on the units set in Preferences (Edit > Preferences > Units & Rulers...).
To add more Guides, repeat this process.
Once Guides are added, you can show or hide them, by going to the menu; View > Show > Guides and toggle on or off as required. Even if not visible, Slices will be created from Guides.
4. Slices from Guides
Other than creating Slices from Guides, you have 3 options, as per the Style options, (outlined above).
- Normal - unconstrained, i.e. freestyle, with no specific aspect ratio or size
- Fixed Aspect Ratio - Choose an aspect ratio to create Slices, i.e. 1:1 for square
- Fixed Size - Enter specific dimensions for height and width
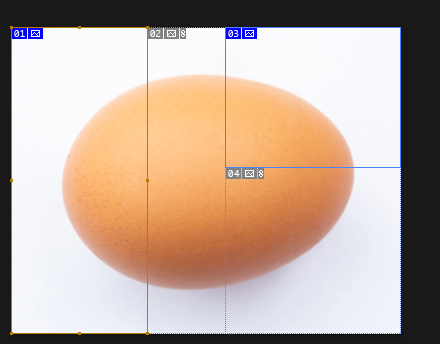
5. Create a Slice
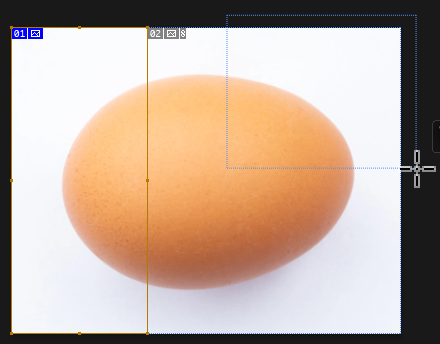
I have clicked and dragged, creating a marquee, from the top left of the image, to where the cursor is shown. This creates an orange box with handles and indicates the first slice. Automatically the second slice is created from the remainder of the image.
Each slice is numbered and this number is shown in the top left corner of each slice.
Summary of the Slice Tool
The Slice tool is used in web design. It is not used in image editing.
Happy editing!
