Page updated: 18 July 2026
Interactive Photoshop Toolbar PDF (2026)
Preview and download available on the Tools page.
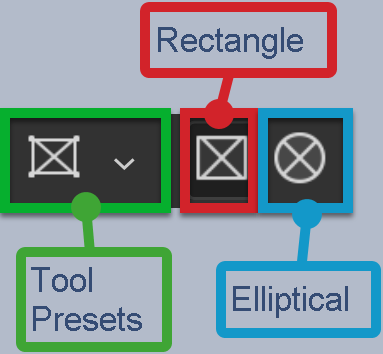
Frame Tool
A Quick Way to Mask a Layer with a Shape
The Frame tool allows you to easily mask an image or layer, to only show a rectangle, elliptical or custom shape portion of the image. It also allows you to create placeholder masks that you can drop images into. Although you can also achieve this with a regular layer and layer mask, the Frame tool makes it quicker, easier, and allows you to edit the shape in a way that you can't with the other options.

Frame Tool Options
Tap to view full size
Rotate your phone for easier reading
ON THIS PAGE
Tool Presets

You can create and save a Tool Preset for any tool, which will remember settings that you choose for that tool, so you can quickly and easily select different presets and settings for a particular tool. The degree of usefulness of presets varies, depending on the tool.
You can reset any tool back to its default settings by right clicking on the Tool Presets button and select Reset Tool. Take care not to Reset All Tools, unless that is intended.
Rectangle

Create a rectangular or square Frame.
To create a square Frame, press and hold the Alt key while you drag.
Elliptical

Create an elliptical or circular Frame.
To create a circular Frame, press and hold the Alt key while you drag.
How to use the Frame Tool

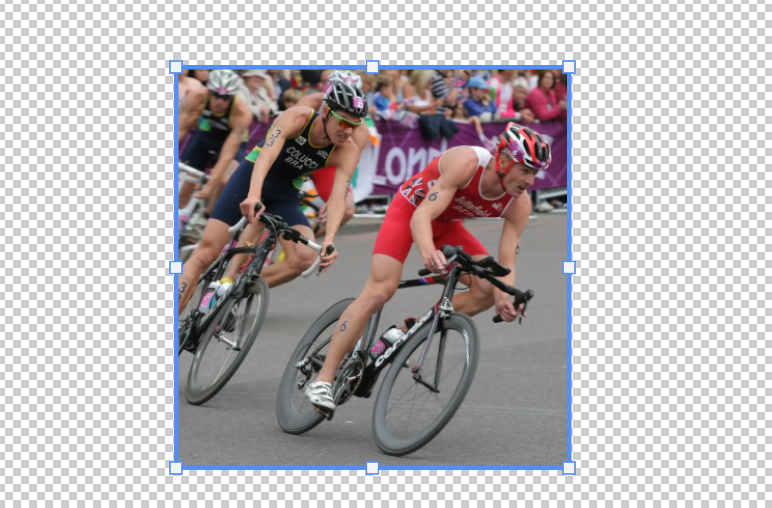
We will add a Frame to this image, from the mens triathlon at the 2012 Olympic Games in London.
1. Select Frame Tool
Select the Frame tool front the Toolbar. It's one of the few tools that doesn't share the button with other tools.
2. Select Layer
Before applying the Frame tool, select your layer. If the layer is locked, click the lock icon to unlock it.
If you apply the Frame tool to a locked layer, a new Frame layer will be applied with the shape you created, but it won't be applied to your layer. If that is the case, just drag your layer into the Frame layer and it will be applied, as in stp 4.
Sometimes, even though you unlock the layer first, it may still be applied to a separate layer. Again, drag your layer into the Frame layer.
3. Blue Box with Handles
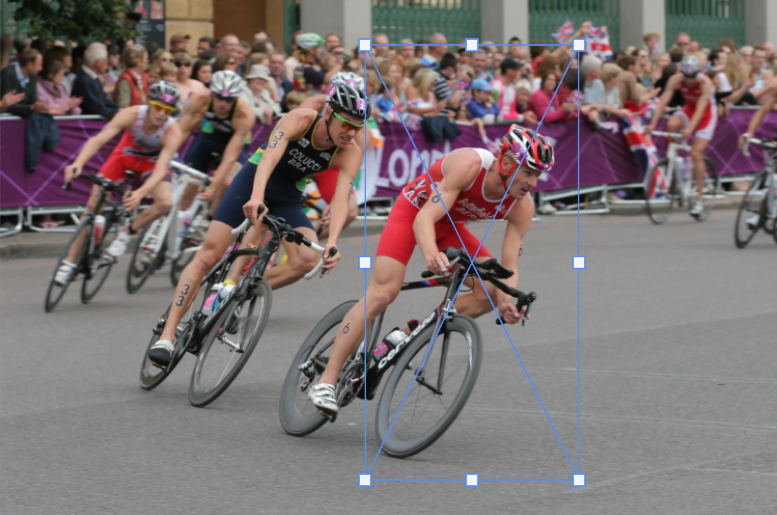
The Frame is shown with a blue box with handles.
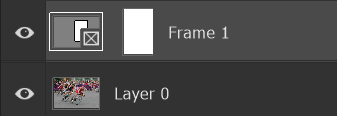
4. Apply Frame
This is the result of the Frame being applied to the image.
As mentioned in step 2, if the layer was locked, the Frame layer will be added above the selected layer, but it won't be applied to the layer. Unlocking the layer first should avoid this, but if not, just drag your layer into the Frame layer.
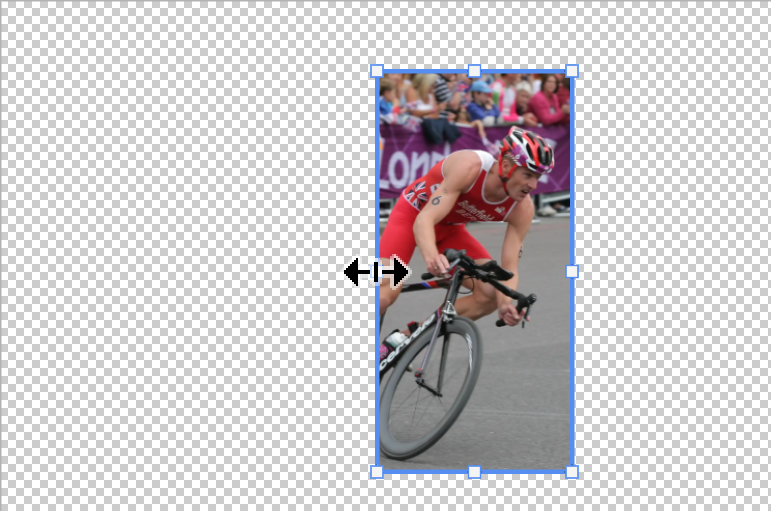
5. Select Frame and Image

To make changes either to the image or the Frame, or both, you must select them on the layer. Pay attention to which is selected, as indicated by a thin white border.
Both Frame and image are selected

Only the image is selected

Only the Frame is selected
6. Reveal Image

To increase, or change the amount of the image that is revealed, click on the Frame element on the layer in the Layers panel. When selected it will have a thin white border, (as shown in the previous step), then click and drag the handles in the image.
7. Result of previous step
This is the result of the the previous step.
8. Enlarge Image
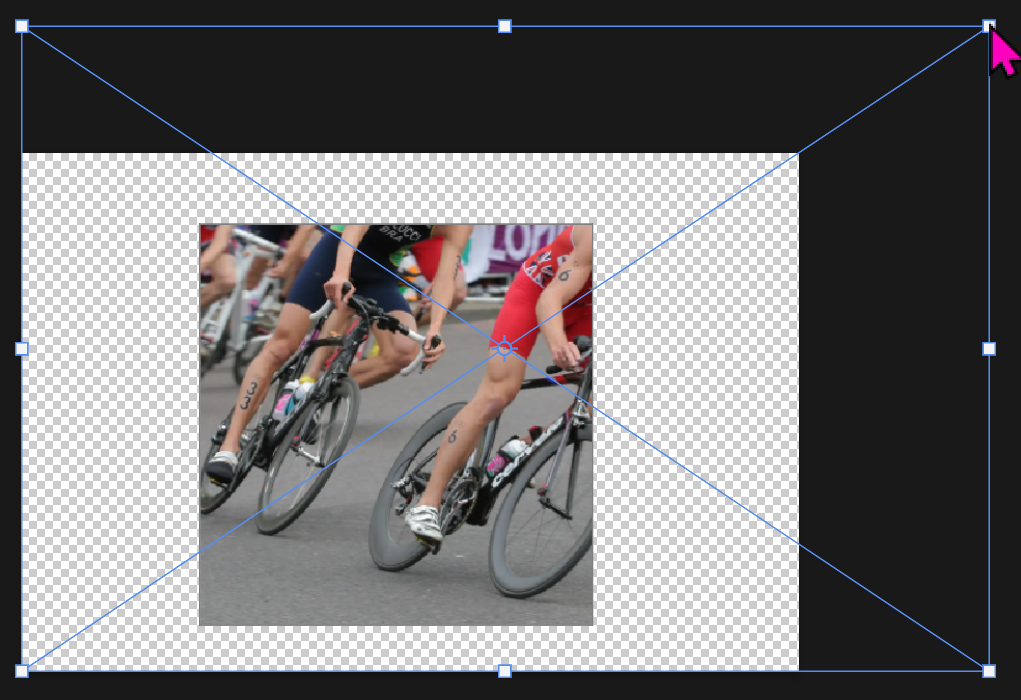
This time the image is selected and the handles are dragged to make the image larger, thus magnifying the section visible through the Frame.
9. Add Stroke
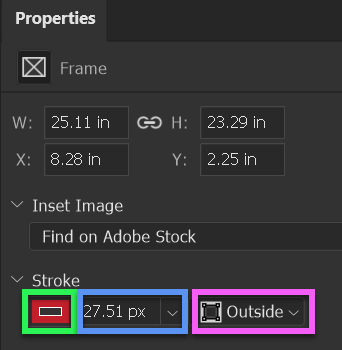
You can add a Stroke to the frame. Select the Frame thumbnail on the layer, then in the Properties panel, enter options for the Stroke. Open the Properties panel from the Window menu; Window > Properties.
Click in the box highlighted in green, to select a colour.
Click in the box highlighted in blue, to adjust the width of the Stroke.
Click in the box highlighted in pink, to select whether the Stroke goes Inside, or Outside the image, or is Centred, so half the width is inside and half the width outside the image.
9. Pick Color from Image

I have added a red stroke, selecting the colour from the lead riders outfit and added a white background.
Summary
The Frame tool is an excellent tool that makes it quick and easy to mask and clip an image, or images to a rectangle, ellipse, or custom shape.
