Page updated: 11 April 2026
Adjustment Brush
The Adjustment Brush was new to Photoshop in 2024. It is one of the few tools that does not share a button on the toolbar with other tools.
The Adjustment Brush aims to make it easy and intuitive to make adjustments to part of your image, (which we've been able to do for many years). It aims to simplify the usual workflow by combining the techniques of making a selection and then applying these to a an Adjustment Layer (which automatically included a Layer Mask, to which your selection was applied). Adjustment Layers and Layer Masks are both essential Photoshop skills and are subjects I introduce quite early on, in a classroom based Photoshop course. For beginners who don't yet understand Layer Masks, this will be a slightly steeper learning curve, but well worth the effort.
The Adjustment Brush is ideal for making adjustments to part of an image, such as lightening a face. All adjustments are non-destructive, which is the ideal way to edit. They create an Adjustment Layer and Layer mask, which are excellent ways to non-destructively edit an image. Knowledge of how these work are important Photoshop skills.
When you apply an Adjustment, note that initially the adjustments are applied with "default values" (according to Adobe). You will probably want to adjust these values, but doing so is easy.
Instead of selecting options from the Options Bar, you can also select them from the Contextual Taskbar. See below for more details.
For a complete list and description of all Selection Tools, see Selection Tools Summary.

Adjustment Brush Options
ON THIS PAGE
Tool Presets

You can create and save a Tool Preset for any tool. This will remember settings that you choose. Presets for brushes are much more useful than for some tools. If you wish to use presets, you have the option of either creating a tool preset or a brush preset. Right click on the Tool Presets button to reset the tool to default settings.
Adjustment
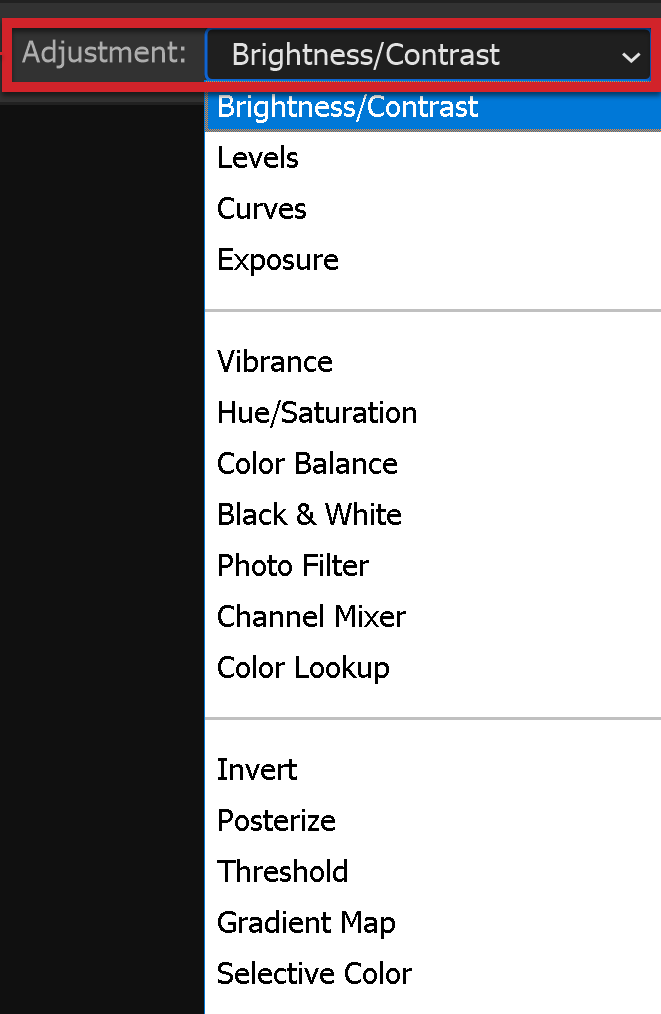
From the dropdown list, select which type of Adjustment to make.
Add or Subtract to Layer Mask

Paint on a Layer with the + to add to the adjustment, or with a - to subtract from the adjustment.
For a detailed guide on how to use this tool, see the How to Use section below.
Brush Presets
You can change size and hardness and select from a range of brush presets. There are many brushes available and you can also create your own.
Pressure Sensitive Size
If you have a pressure sensitive pen and tablet, you can turn on this option, so brush size is controlled by the pen pressure. If this is off, size will be controlled by brush settings.
For non pressure sensitive users, the best way to change brush size is with the square brackets keys [ ].
Apply Adjustment to Object

Click on an object, to automatically apply that Adjustment to the object. This is more conveniently used with the Contextual Taskbar, which is explained in more detail in the How To Use section below.
Overlay

Turn on or off the Overlay that shows the selected area that your adjustment is being applied to.
Opacity

Control the strength of the adjustment by changing Opacity. 50% Opacity will result in 50% of the Adjustment.
Pressure Sensitive Opacity

If you use a pressure sensitive graphics tablet and pen, you can control the brush opacity with the pressure of the pen.
Flow
Flow allows you to build up the ink applied in the same stroke, by going over and over an area.
This similar, but different to Opacity. In one brush stroke, no matter how many times you go over the same area, the ink applied will be limited by the Opacity. If you end the brush stroke and begin a new stroke, it will apply more ink.
Airbrush Effect
Build up paint in the same way as a real world airbrush.
How to use the Adjustment Brush
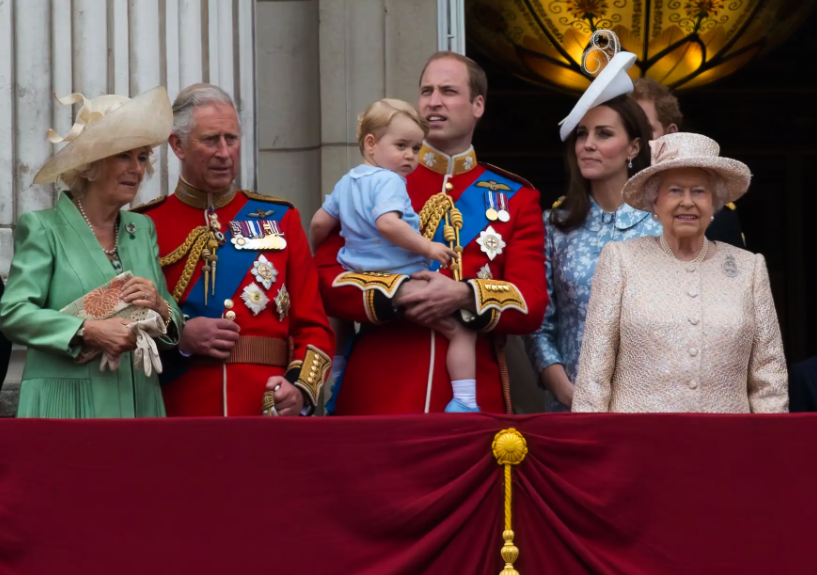
In this shot of the UK Royal Family on the balcony of Buckingham Palace, Prince Charles (as he was then, he's now King Charles) face is a bit too dark, as is Camilla (now Queen Camilla). The Queen's face is not as dark, but could benefit by slightly lightening.
These are tasks that are suited to the Adjustment Brush. If you need to lighten or darken a larger area, you would often be better making a selection.
1. Adjustment Brush

Select the Adjustment Brush from the toolbar. Unlike nearly all the other tools, it does not share the button with other tools.
2. Show or hide Overlay

Choose whether or not to show the Overlay while you paint with the Adjustment Brush. When turned on you will see a pink overlay, as shown in the next step.
3. Pink Overlay
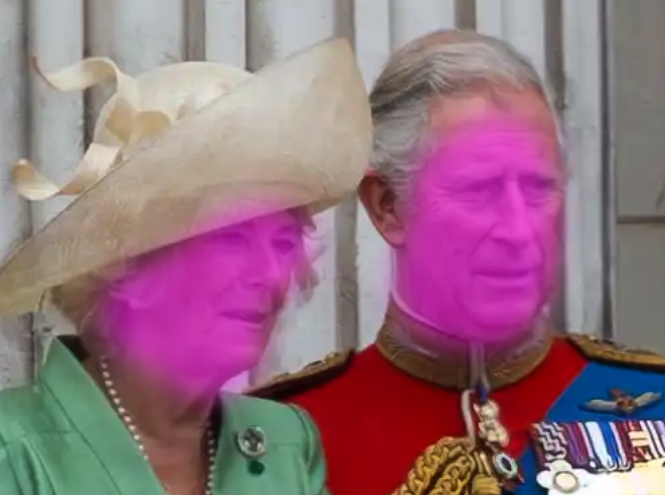
The pink overlay shows very clearly where you have painted, but it makes it harder to see the result of the adjustment.
You can toggle this on and off, even later when you want to see where you've brushed, or edit the adjustment.
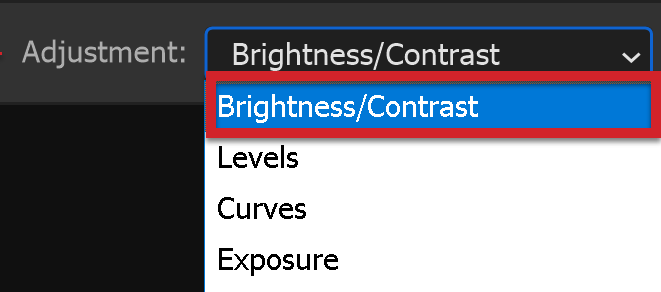
4. Type of Adjustment

Select which type of adjustment you want to make. By default, it always starts with Brightness & Contrast. Even if all you want to do is adjust brightness and contrast, this is not a good tool to use.
I recommend Levels or Curves. For beginners, Levels are easier and still very good.
In the next step I'll use Brightness and Contrast at the default values, to illustrate why you shouldn't do that.
5. Brightness & Contrast
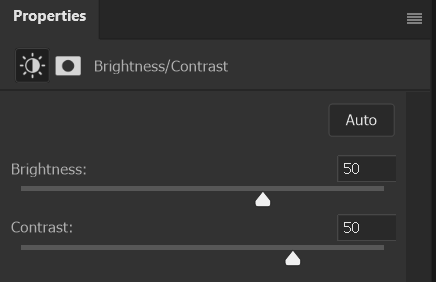
When you select the Adjustment Brush and make an adjustment, the Brightness & Contrast adjustment is automatically selected and at their default starting values of 50.
We want to lighten their faces, not increase contrast. Increasing contrast will darken the shadows.
You can adjust the settings, if you wish to use Brightness & Contrast. In this case, I would set the contrast back to zero and then adjust brightness accordingly.
6. Original image
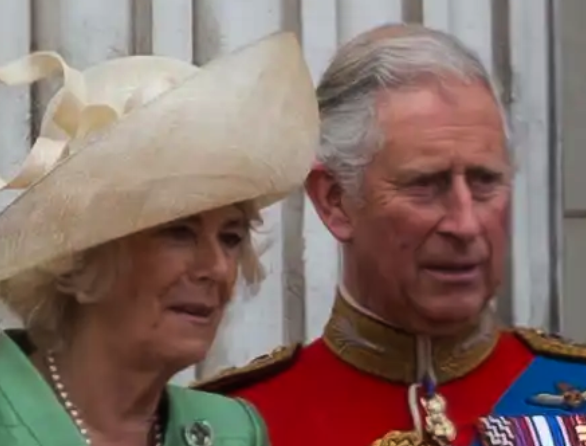
Here is the original.
7. Brightness & Contrast Default
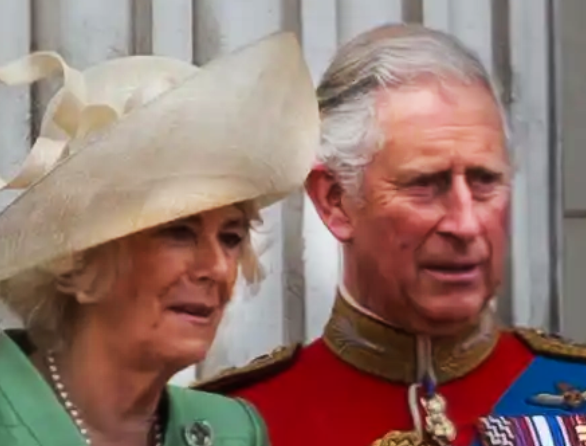
This is the result of using the Brightness & Contrast adjustment at its default settings of 50.
Highlight detail on Charles face is being lost.
8. Levels
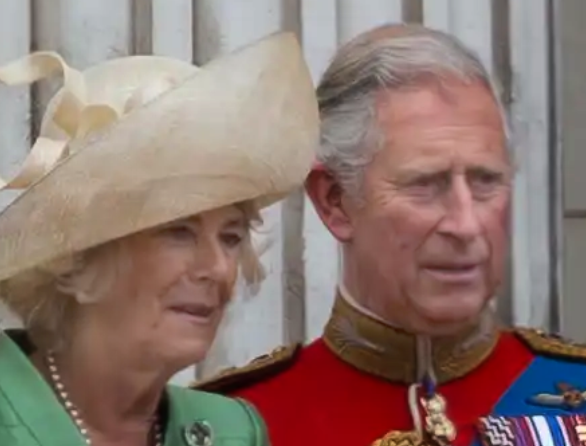
This is the result of using Levels to brighten the faces, without increasing the contrast.
Yes, they could probably benefit by a slight increase in contrast though not as much as the previous step.
Any increase in contrast should be made to the whole image, not just a few selected faces, which will then look different to the others in a noticeable way.
9. Levels Adjustment Layer
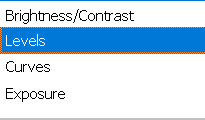
Select Levels from the adjustment dropdown menu.
10. Levels Adjustment Layer
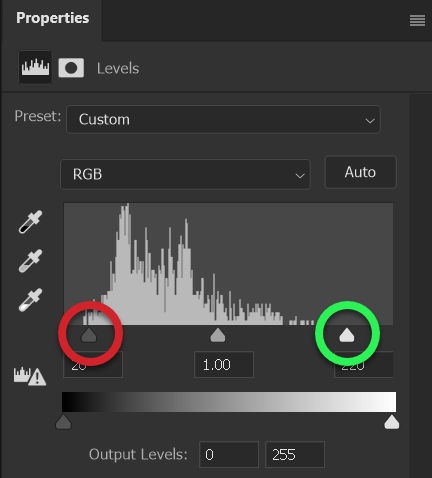
Select Levels from the adjustment dropdown menu.
It will be applied with default settings, as all these adjustments are.
The Black slider (highlighted in red) has been moved to the right, making the dark areas darker.
The White slider (highlighted in green) has been moved to the left, making the light areas lighter.
These default settings increase the contrast, much like Brightness and Contrast settings.
That's not what we want, so we'll reset them in the next step.
11. Reset button

Click on the reset button, highlighted in red. This is at the bottom of the Properties panel, which will show the Histogram while you edit Levels. If the Properties panel is not visible, you can open it from the Window menu: Window > Properties.
Settings are set back to zero. No change, until you make a change.
12. Reset Levels
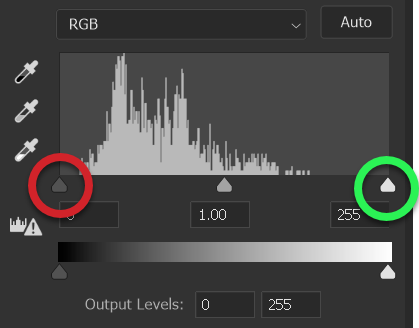
Levels are reset to zero, with no adjustment being made.
13. Increase Contrast
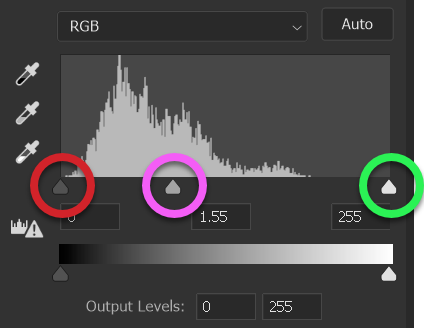
When you move the black and white sliders towards each other you are increasing contrast. That's not really what we want here, especially just on selected faces. We just want to lighten the faces slightly.
I have dragged the middle slider to the left to lighten. The black and white sliders have not moved.
14. Non-destructive
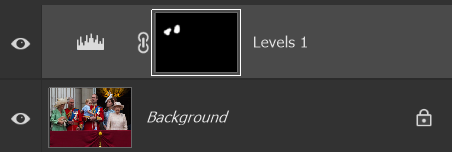
As soon as you make your first brush stroke, an Adjustment Layer is added to the Layers panel, complete with a Layer Mask, showing where you've brushed.
The great thing about this is that Adjustment Layers are non-destructive and permanently editable, with no loss of quality. To preserve the Adjustment Layer (and any other multiple layers) you will need to save the image either in the .psd or .tif formats. These formats support layers, whereas a jpeg does not.
If you opened a raw file, you will also need to save in the .psd or .tif formats, as the raw file can't be edited. For more information see mage Formats.
When a Layer Mask is added to a layer, or an Adjustment Layer is added from the button at the bottom of the Layers panel, it is white. On Layer Masks, white reveals, showing the contents of the layer it is on. When you use the Adjustment Brush and an Adjustment Layer is added, the Layer Mask is black, which hides, with the areas you brushed shown in.
15. Different adjustments
If you continue brushing in different places in your image, they will all be applied to the same Layer Mask and receive the same adjustment.
If you want to apply a different adjustment, you need to select the layer it applies to, then create a new adjustment.
But note that even after selecting a different Adjustment, such as Levels, the next adjustment you make will automatically revert back to the default Brightness and Contrast Adjustment.
So each time, you need to remember to select the adjustment that you want and then also reset the settings back to zero before making adjustments.
16. Edit Adjustment
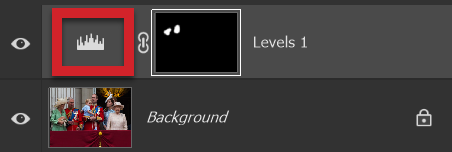
You can edit an existing adjustment by double clicking the layer thumbnail (highlighted in red).
As the screenshot shows, the original has not been changed (the layer is still locked).
When you double click the thumbnail of an adjustment layer you will open up the settings, just as you left them, however long ago that was, provided you saved the image in the .psd or .tif formats, which support layers.
17. How to use the Adjustment Brush on an Object
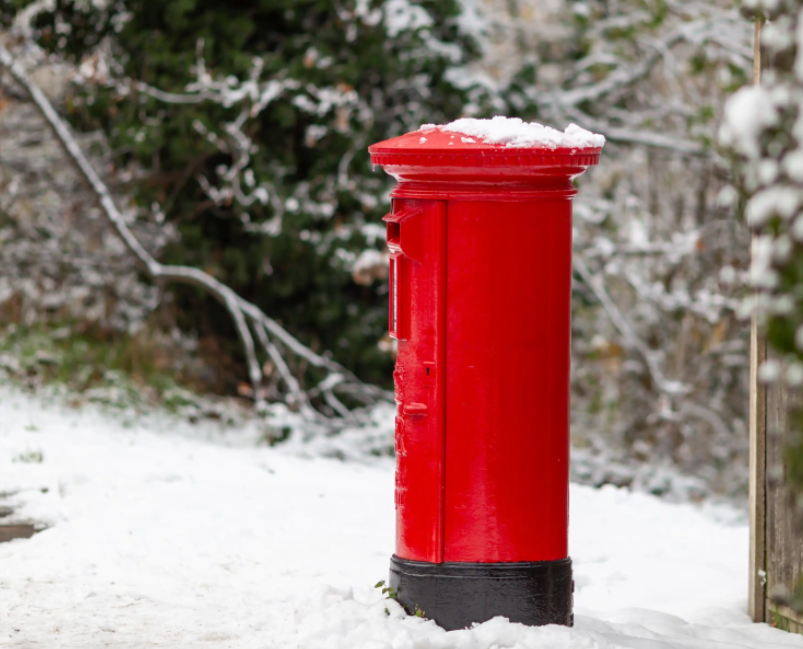
The above example looked at manually painting your adjustment with the Adjustment Brush. That is perfect when you need to adjust, generally, a small area. If you want to apply an adjustment to an object, you will probably need to be more accurate than painting with the brush.
One option you have when using the brush is to select the Select Object option. You can either do this from the Options Bar, or from the Contextual Taskbar.
We'll do that here to change the colour of the postbox. In the UK postboxes are always red, (except some are painted gold, in their home town, to commemorate Great Britain gold medeal winners at the 2012 Olympic Games, hosted in London).
18. Hue/Saturation

Select Hue/Saturation from the Adjustment dropdown list, either in the Options Bar in in the Contextual Taskbar, (highlighted in red). If the Contextual Taskbar is not visible, you can open it from the Window menu, (very close to the bottom of the menu).
Select Apply to object, (highlighted in green)
19. Select an object
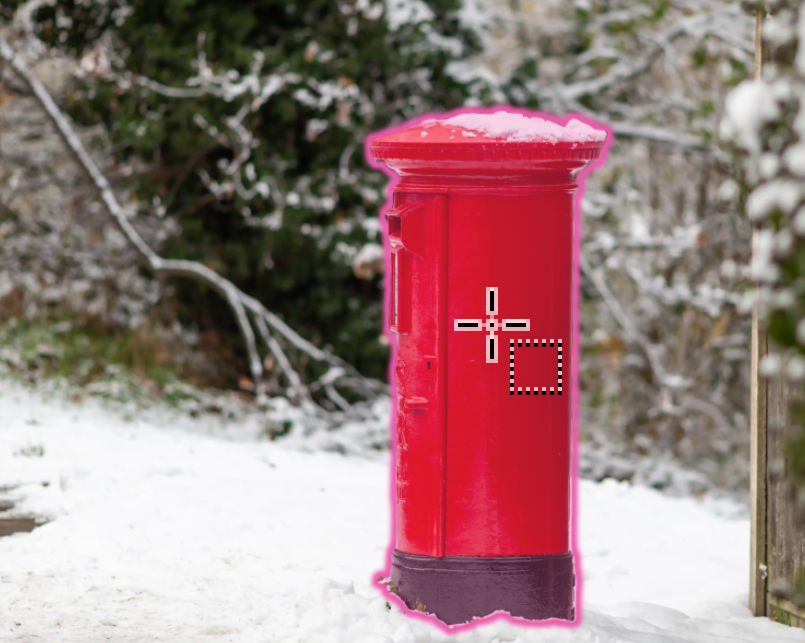
Move the cursor over the object and watch for it to be selected, as indicated by a pink outline. If this is successfully selecting your object, just click once.
20. Selection added to Layer Mask
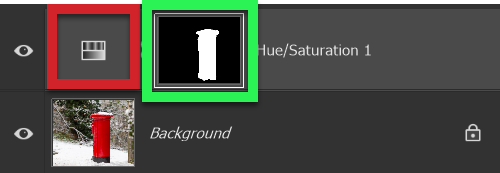
The selection is automatically applied to a Layer Mask on your Adjustment Brush layer.
The Layer Maskk is highlighted in green.
The Layer thumbnail is highlighted in red. Later, if you want to edit this adjustment, double click the layer thumbnail. You will then see the settings exactly as you left them (provided you save in a format that supports layers, like .psd or .tif.
21. Adjustment Layer
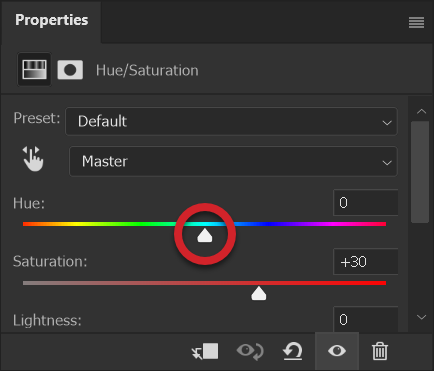
When you use the Adjustment Brush, it adds an Adjustment Layer. Whenever you use an Adjustment Layer, the details can be seen in the Properties panel, as shown.
If the Properties panel is not visible, you can open it from the Window menu: Window > Properties.
The Properties panel shows the results of the tool you are using, but this includes all tools, depending on which you are using at the time.
The screenshot shows the Hue/Saturation before changes are made. The Hue slider is set at 0.
22. Hue slider adjustment
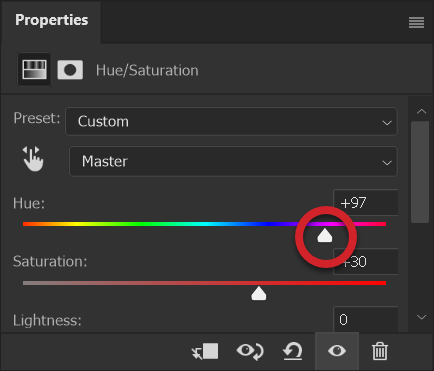
The Hue slider has been moved to the right, as shown.
The result is shown in the next step.
23. Result of Hue adjustment
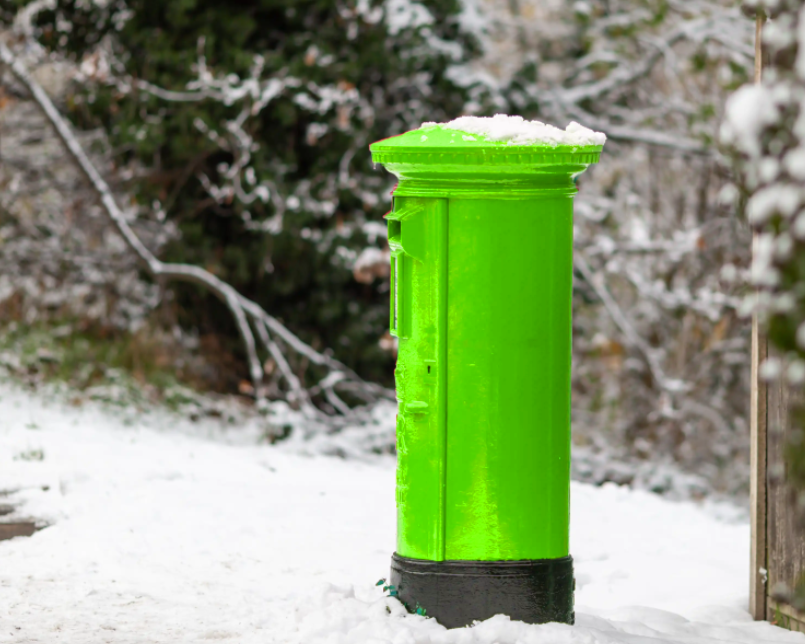
This is the result of the previous adjustment, described above.
24. Edit Adjustment Layer

If you save this in a format that supports layers, such as .psd or .tif, you can always edit this adjustment and in this case, change colors, just by moving the slider.
As mentioned above, you need to double-click the Adjustment Layer thumbnail.
Summary of the Adjustment Brush
The Adjustment Brush aims to simplify things that we've been able to do for years...to make adjustments to part of an image. For anyone who understands Adjustment Layers and Layer Masks, this isn't a revolutionary new tool...just a way to achieve something that you could already do.
However, if this makes things a little easier for beginners, I'm all in favour.
The big thing at the moment is AI assisted editing, with various tools and Generative content, but for real control in all circumstances, there is still a place for some manual control and understanding of some of Photoshop's key skills.
It does still require some knowledge of Adjustment Layers and Layer Masks, which are Photoshop skills that have been with us for years and will continue to be, as far as I can tell.

