Page updated: 14 June 2026
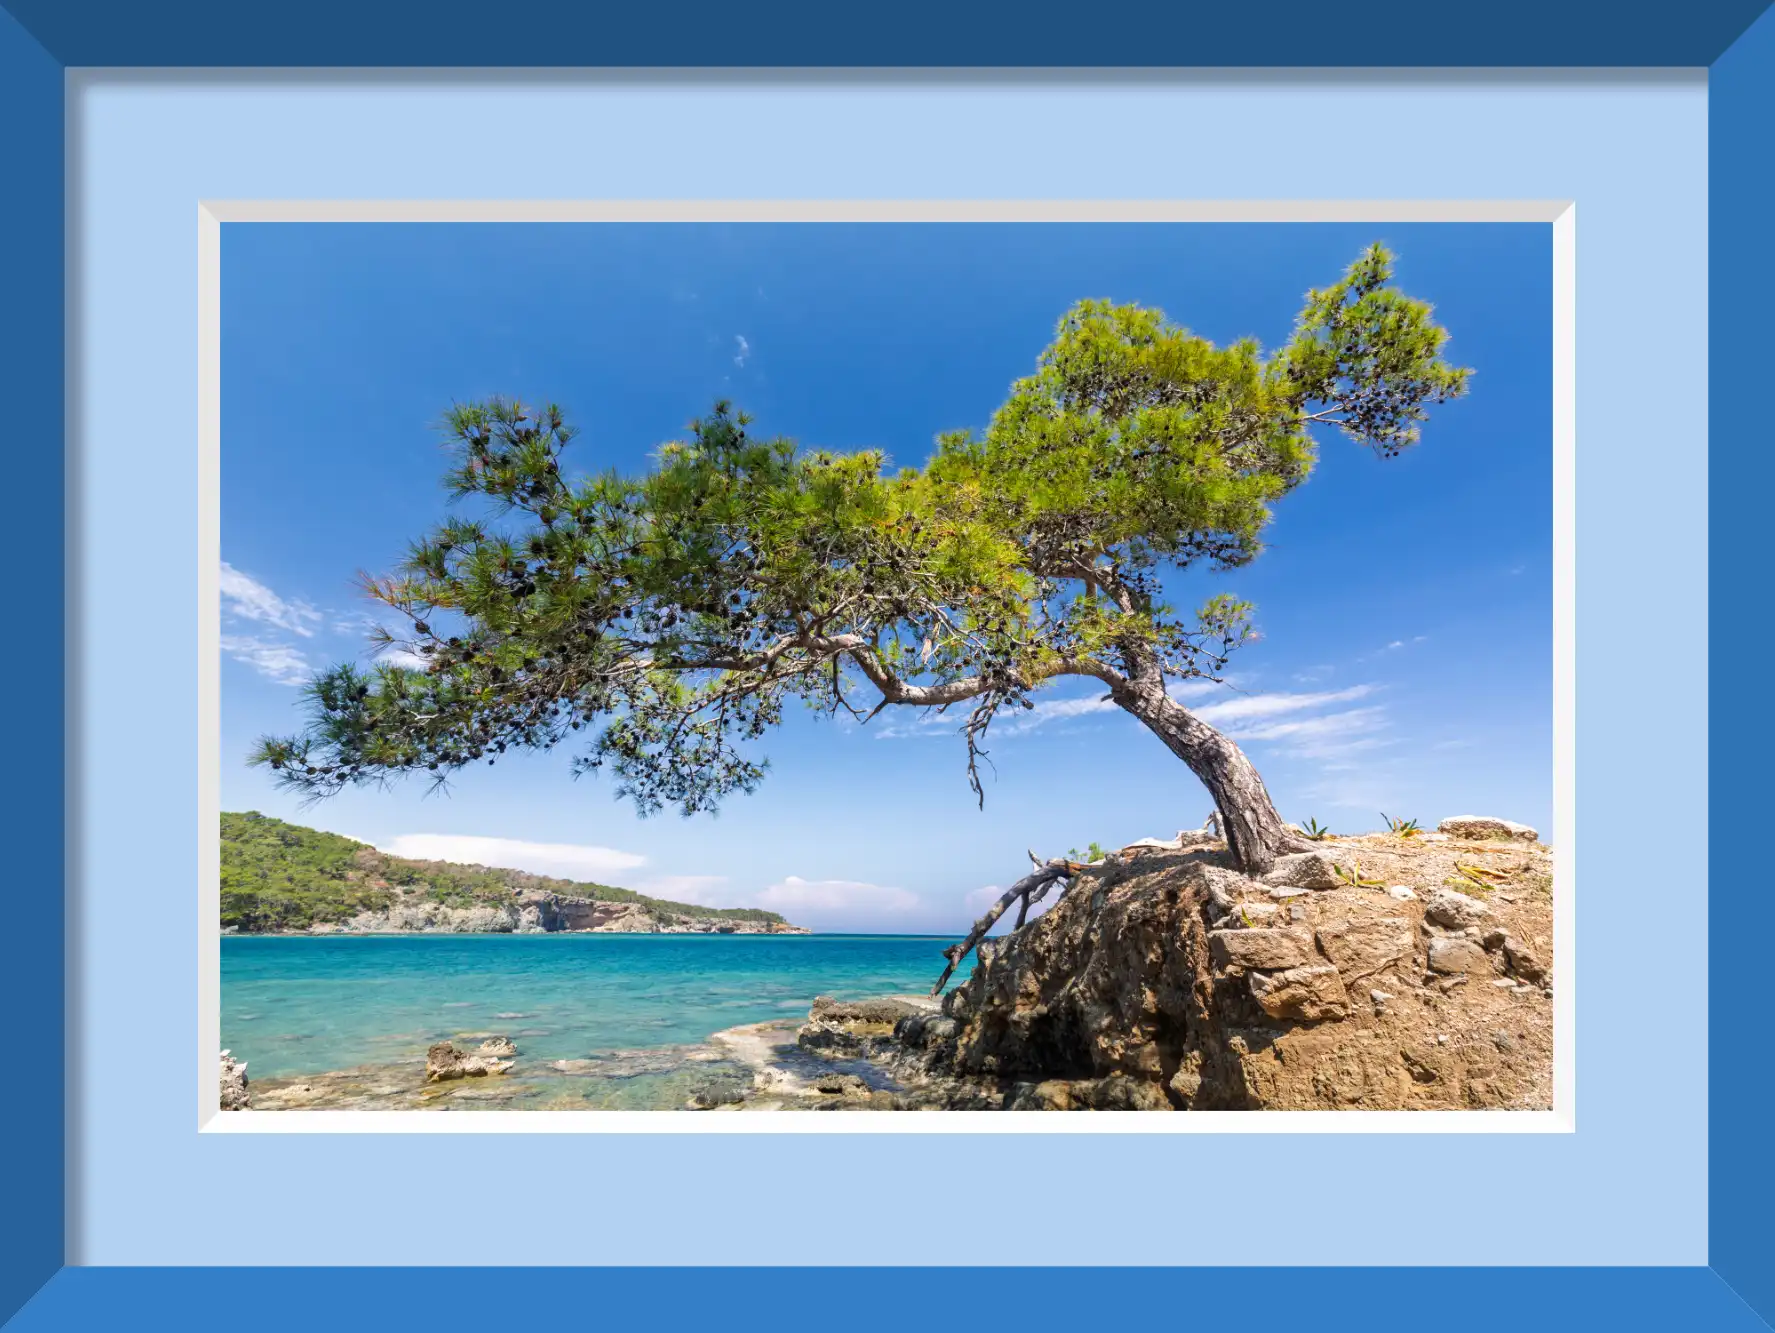
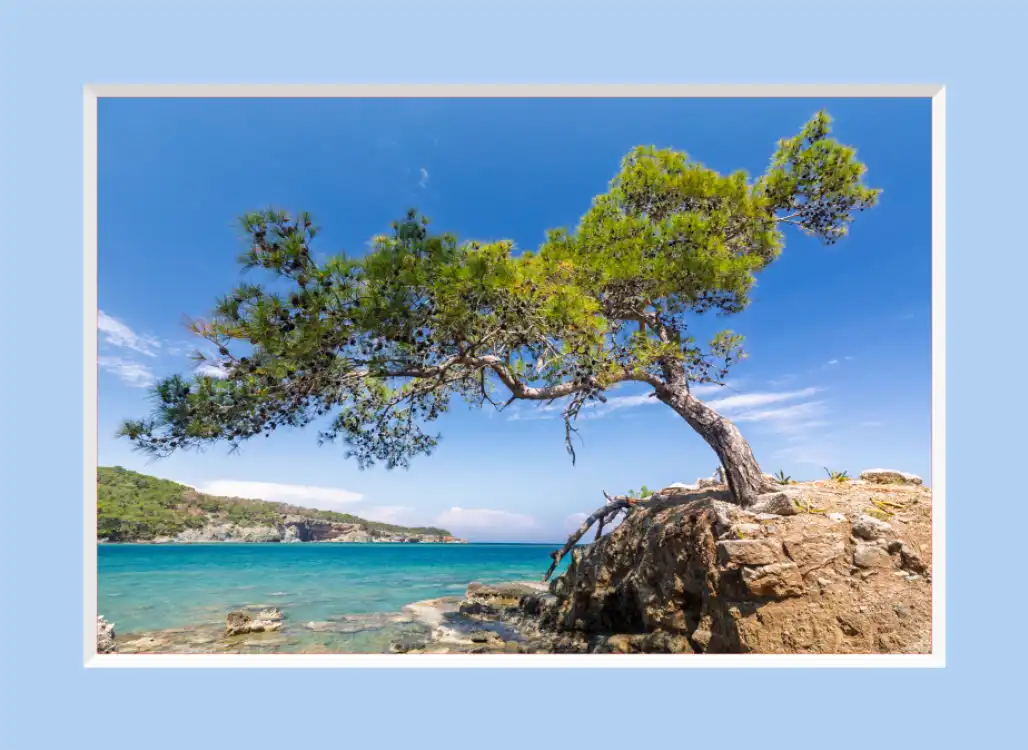
Add a Frame and Bevel Window Mount to a photo in Photoshop
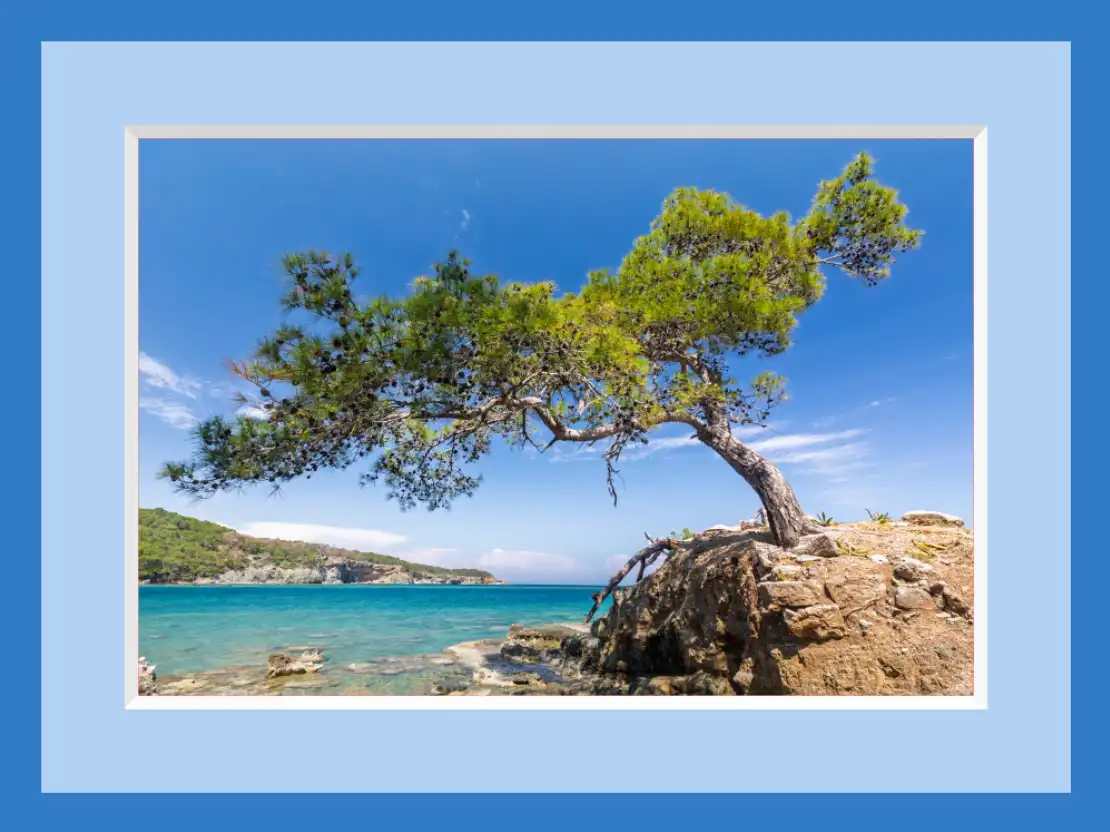
Learn how to create a realistic photo frame and bevel-cut mount in Photoshop with this easy-to-follow tutorial
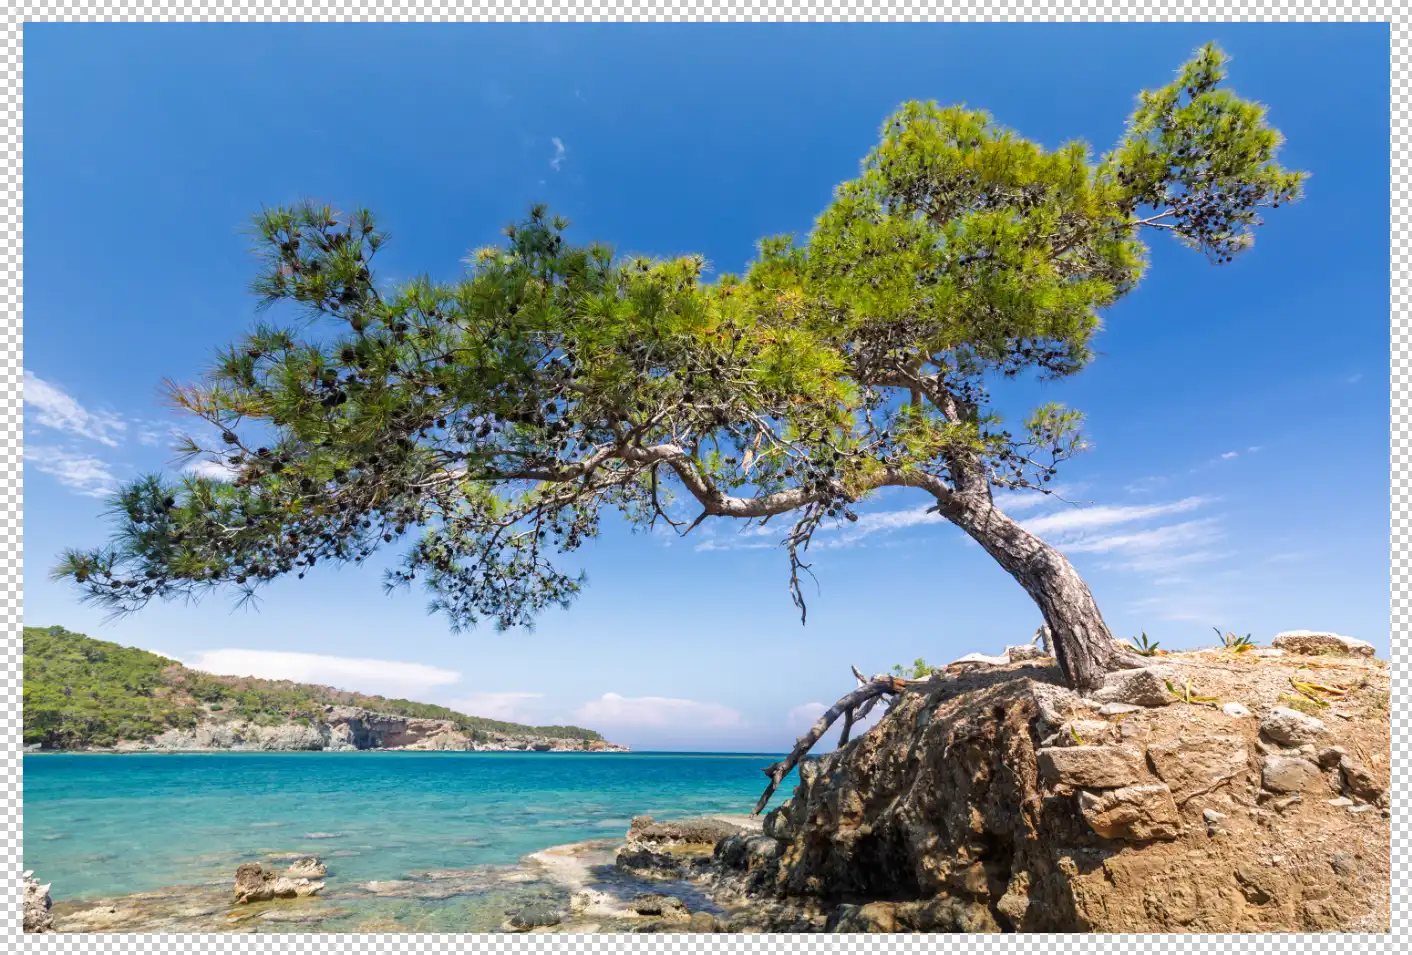
Whether you're designing a digital gallery, showcasing artwork, or creating professional mockups, this guide walks you through each step to replicate the look of a real-world framed print. Using basic tools, layer styles, and textures, you’ll learn how to add depth, shadows, and detail for a professional, gallery-ready result.
This tutorial will show you how to add a realistic looking frame and bevel-cut window mount to an image in Photoshop. The frame and bevel have been given a 3-D look by using Layer Styles Stroke and Bevel & Emboss.
The bevel is a little larger than a real world bevel, but this has been done to make it easier to see clearly on all devices. You can tailor this in your own images.
View the different stages
ON THIS PAGE
1. Unlock Background Layer
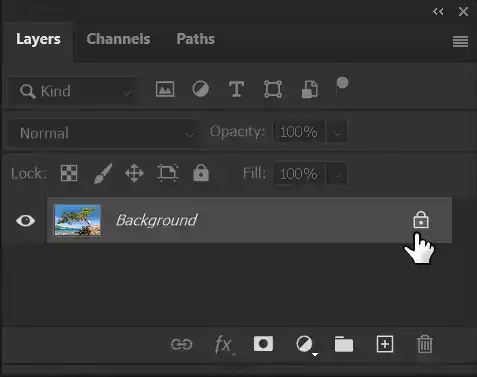
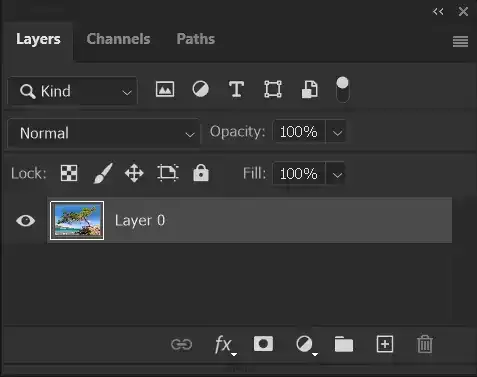
Click on the lock icon on the Background Layer. The layer name will change to Layer 0. We'll rename it later. It isn't essential to unlock the Background layer first, but it makes life a little easier later. By unlocking the Background layer now, when you add Canvas Size, the extra size will be added as transparency. If you don't unlock the Background layer and then add Canvas Size, it will be added as a solid color (the default is white). You would then need to select this and delete or mask it. By unlocking the Background layer at the start, you are saving yourself these extra steps (and possible selection issues if the image contains white around its edges).
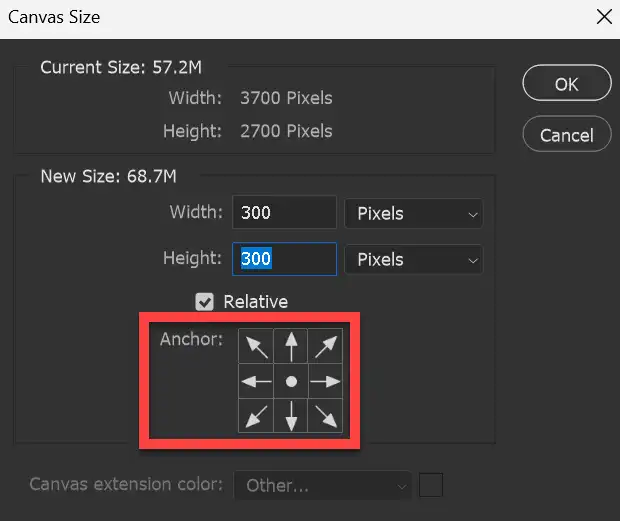
2. Add Canvas Size
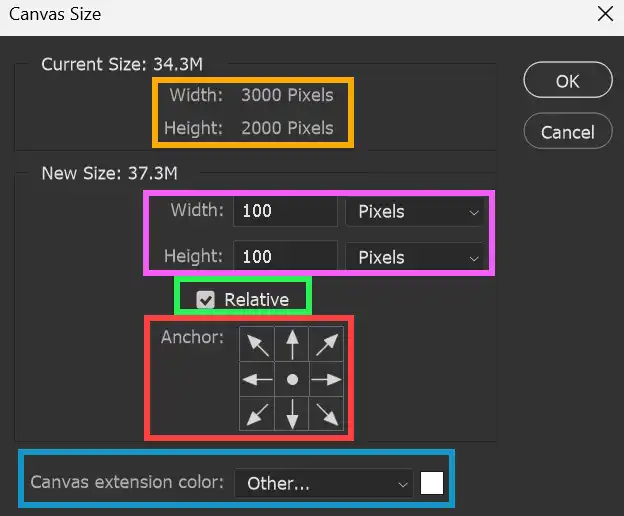
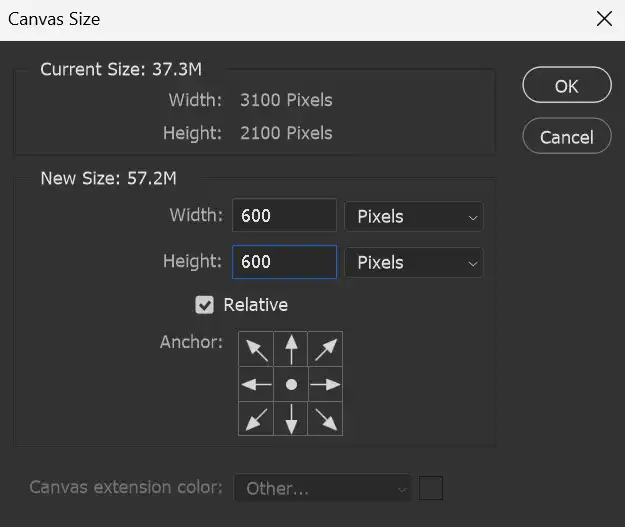
When adding Canvas Size, be aware of the current image size, which is shown in the panel. In this case the image is 3000 x 2000 px (orange highlight).
This will be the bevel of the mount, which needs to be quite thin to look realistic. I want the bevel to be 50px wide, so I'm adding 100px (top+bottom, left+right), pink highlight.
Ensure the Relative box is ticked (green highlight), so that the new dimensions will be added to the existing dimensions. If the Relative box is not ticked, the dimensions will be the total dimensions of the image.
The Anchor, (red highlight) shows where the new Canvas Size will be added. With the dot in the center (the default position), the extra space will be added evenly all around.
If you didn't unlock the background layer, as in step 1, the added area will be the Canvas Extension Color, white by default (blue highlight).
For more information see Canvas Size.
3. Canvas Size Added
The screenshot shows the canvas size added.
4. Add New Empty Layer for Mount Bevel
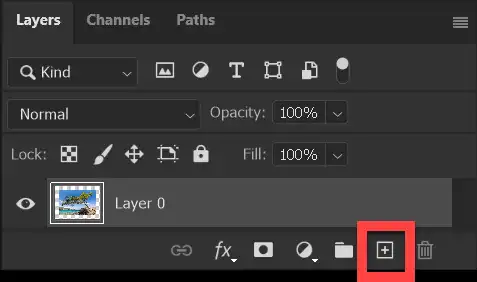

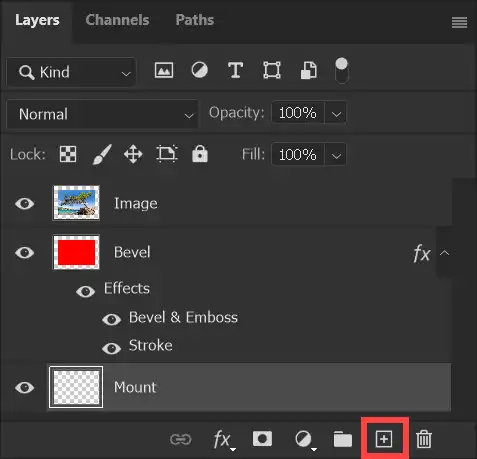
Add a new empty layer by clicking the Create a New Layer button at the bottom of the Layers panel. This will be to create the bevel of the mount.
5. Fill the Layer with Color
The bevel will be created with Layer Styles, but you can't add Layer Styles to an empty layer. So you must fill this layer with color.
It doesn't matter what color, as you will apply a Stroke in Layer Styles and this will override the layer color. To demonstrate this, I will fill the layer with red, as shown in the next step.
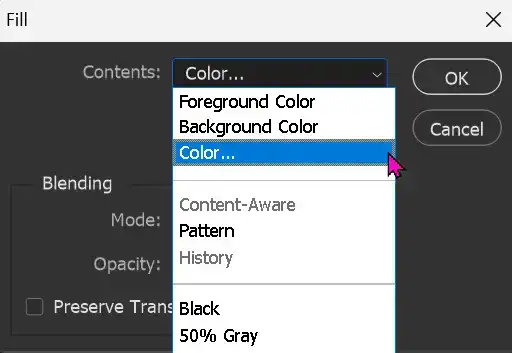
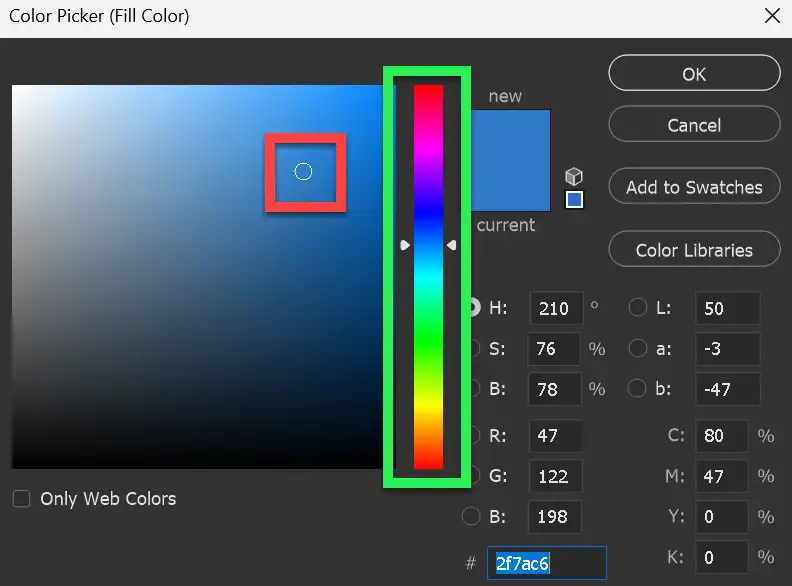
6. The Color Picker
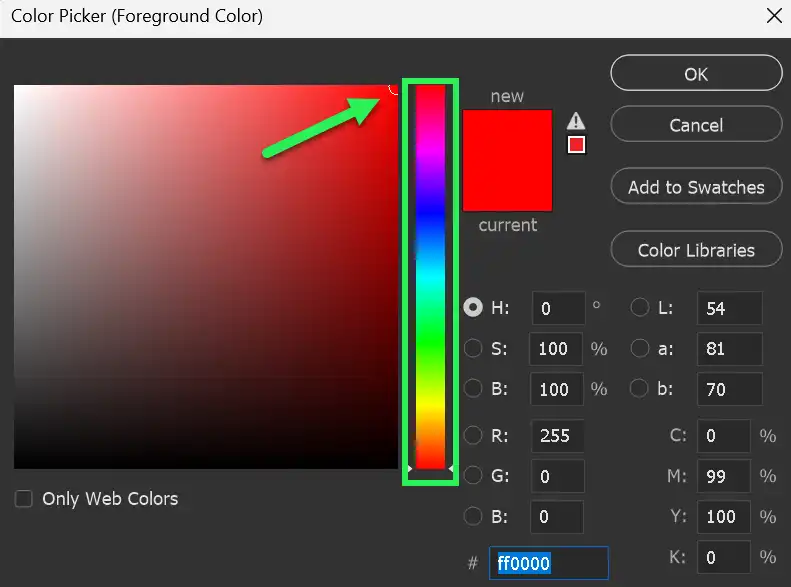
The fill color doesn't matter, as we will override this when applying a Stroke via Layer Styles.
You can select any color by clicking in the area highlighted in the green box. Then select the tone by clicking in the large area on the left. The green arrow shows I have selected red.
7. Image so far

The image looks like this.
The red stroke is only to illustrate that it doesn't matter what color it is. What matters is that there is content, to which you can then apply a Layer Style stroke, which will override the red color.
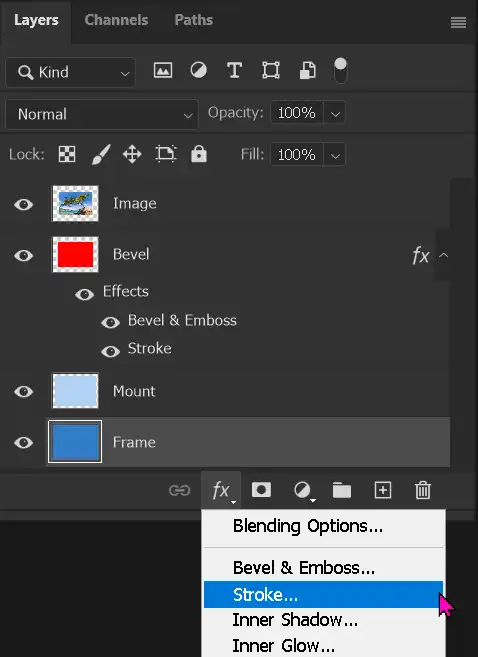
8. Add the Stroke with Layer Styles
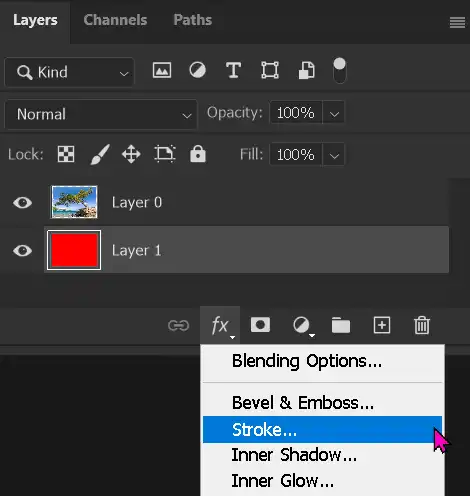
Click on the fx button at the bottom of the Layers panel and select Stroke.
You can also select from the menu: Layer > Layer Style > Stroke.
Double clicking an empty part of the layer (not the image thumbnail or the layer name) will also open Layer Styles. You will then need to select Stroke to access the options, (not just tick the box).
9. Stroke Settings
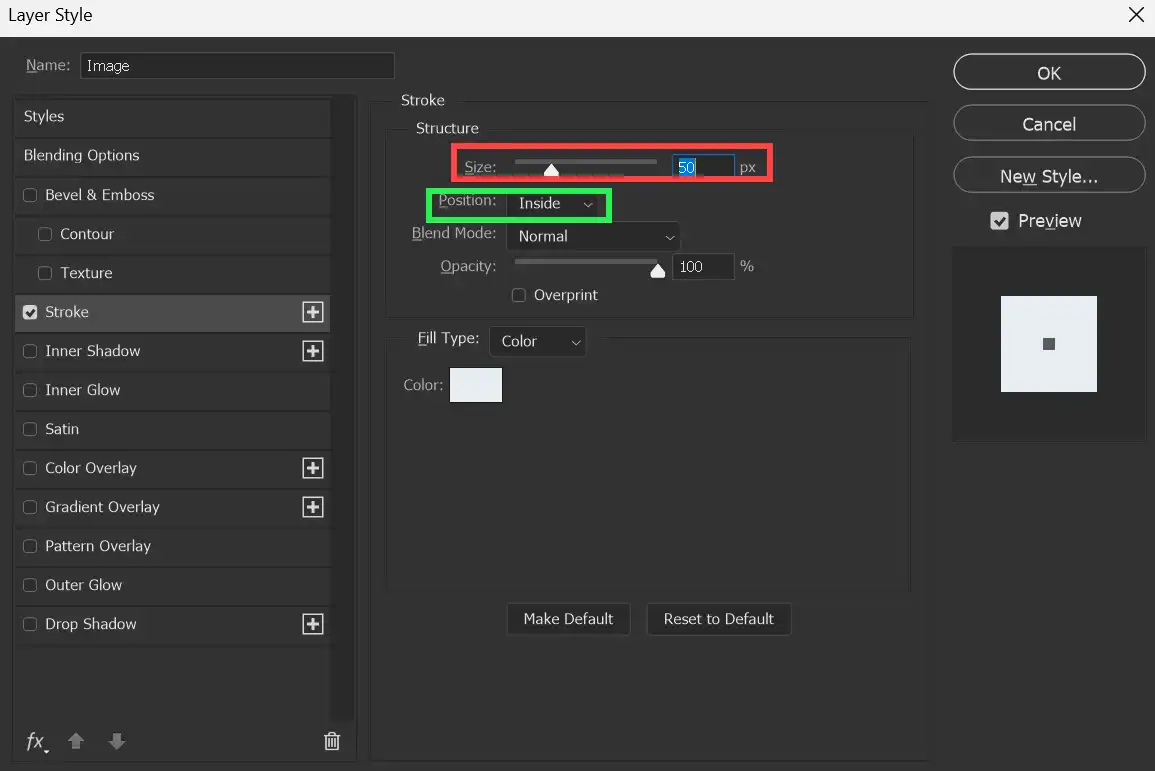
The Size (red highlight) must be exactly half the extra canvas size you added in step 2. In this image I added 100px canvas side to width and height, which is 50px per side.
Add 50px.
Position must be Inside (green highlight).
Color can be left white, or select your choice of color. I suggest a light color, as this is usual with a bevel cut mount. Pure white may not show the diagonal lines in the corners and therefore not appear 3D. Some real life mountboard has a black core, so realistically this could be black. But watch out that it shows the diagonal lines and slight shading, to make it appear real.
Don't close Layer Styles yet.
10. Bevel & Emboss to create the Mount Bevel
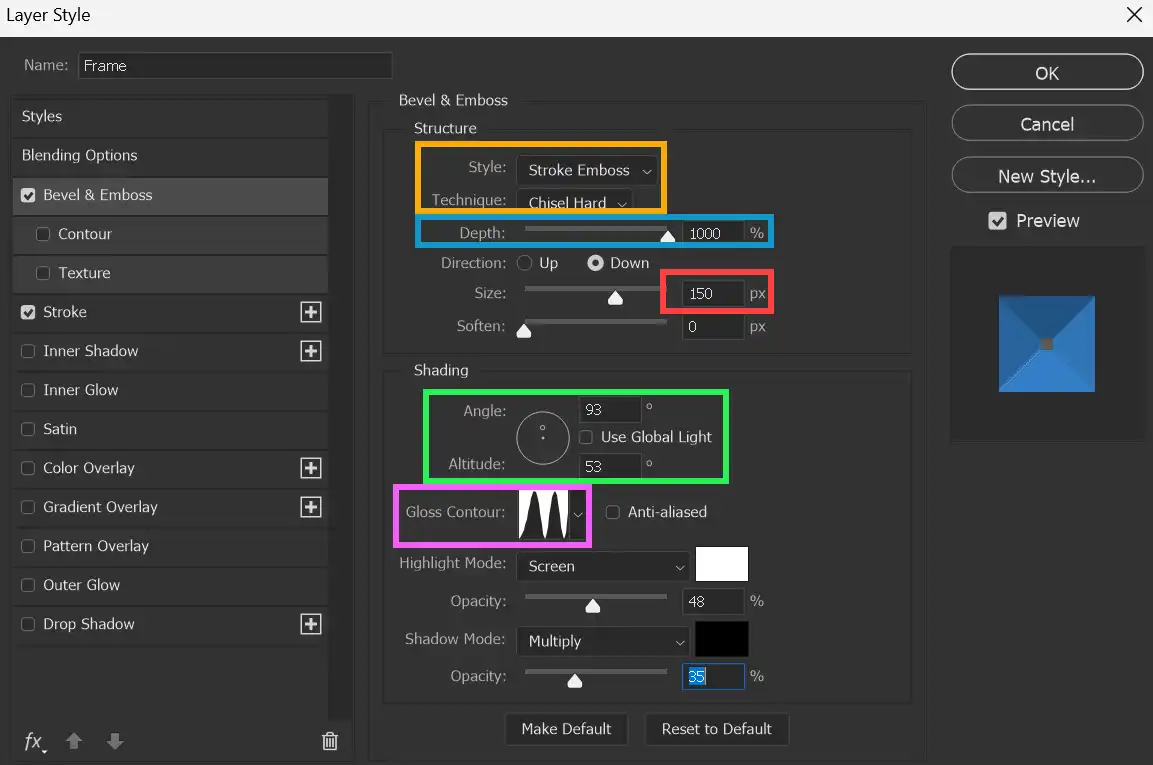
Select Bevel & Emboss in Layer Styles. Don't just tick the box, but click on the words Bevel & Emboss to see the settings. The Layer Styles panel should still be open, but if you closed it, click the fx button again at the bottom of the Layers panel and select Bevel & Emboss.
Change the following settings as shown.
- Style: Stroke Emboss (orange highlight)
- Technique: Chisel Hard (orange highlight)
- Depth: Maximum, 1000%. This highlights the corner diagonals to make the bevel look real (blue highlight)
- Size: This must be identical to Stroke 50px (red highlight)
- Angle: 93 degrees (green highlight)
- Altitude: 53 degrees (green highlight)
- Use Global Light: Turned OFF (green highlight)
- Gloss Contour: Click on the drop-down arrow and select the same as shown (pink highlight)
- Shadow Mode Opacity: Around 18-20, or adjust to taste. If you have the bevel too light, you may not see the diagonal lines in each corner and shading, which makes the bevel look 3D.
Leave the other settings as default.
11. Add Canvas Size for Mount Layer
From the menu: Image > Canvas Size.
This will create extra space for the mount layer. I have selected 600px, but you choose as you wish.
12. Add New Empty Layer
Click on the Create New Layer button at the bottom of the Layers panel.
Click on the layer and drag to the bottom of the layer stack. If you forget to do this now, when you fill the layer with color, it will hide all layers beneath it. You can then drag it to the bottom of the layer stack.
Name the layers. To rename a layer, double click the layer name to highlight it, then type a new name. Naming layers doesn't take long and can be a big timesaver, helping to avoid working on the wrong layer. Layer names should be descrlptive, so if you open the file in the future, you will have an idea of what each layer does.
13. Select Fill Color from Image
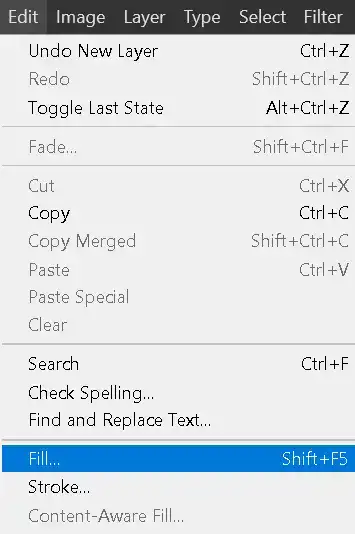
Fill the layer with your chosen color for the mount. From the menu: Edit > Fill > Color.
This opens the Color Picker.
14. The Color Picker
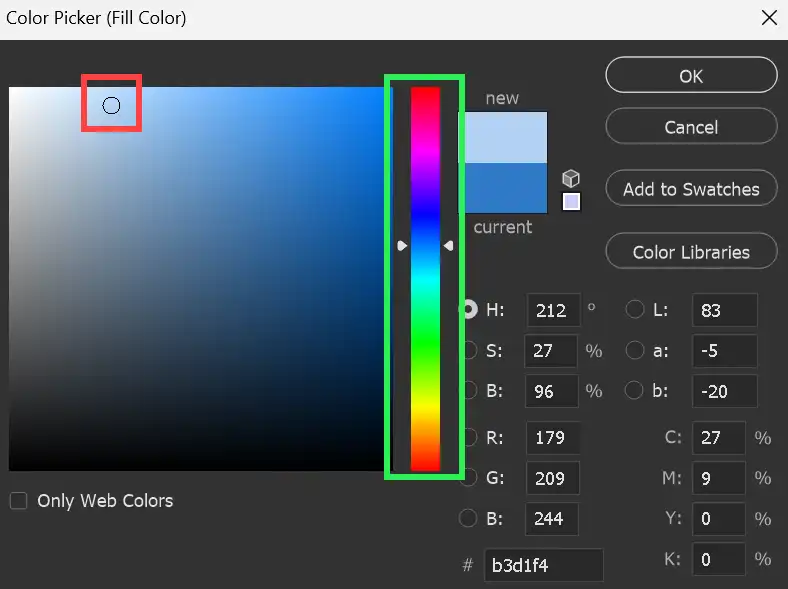
You can select any color by clicking in the Color Slider (green highlight). Then select the tone by clicking in the Picked Color (large area on the left).
Or, you can select a color directly from the image, simply by clicking in the part of the image you wish to select. You can keep clicking until you are satisfied. The red highlight shows the color I have selected. The next step shows where in the image I clicked.
15. Select Fill Color from Image
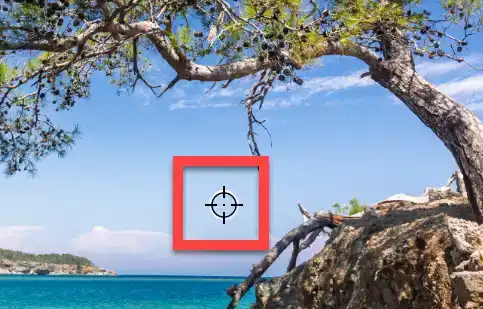

The red highlight shows where in the image I selected the color. If you didn't already move the layer to the bottom of the layer stack, all you will see is the new layer filled with your chosen color. Whenever you add a new layer, it is always added above the selected layer. If that's the case, drag the layer to the bottom of the layer stack.
16. Image and layers should look like this

Your image and layers should look like this.
17. Add Canvas Size for Frame
We now need to add Canvas Size for the frame. As in an earlier step, from the menu select: Image > Canvas Size.
I want a frame 150px wide, so I'm adding 300px
The Anchor, (red highlight) shows where the new Canvas Size will be added. With the dot selected in the center, the extra space will be added evenly all around.
18. Canvas Size Increased

This is how the image looks after adding Canvas Size.
19. Add New Layer for Frame
Add a new empty, by clicking on the Create New Layer button in the Layers panel. Then drag the layer to the bottom of the layer stack.
I have named the layers, which is recommended. Double click on a Layer name to highlight it, then type a new name.
Your layers should look like this. Note that the Frame layer is selected, ready for the next step.
20. Add New Layer for Frame

Select the Frame layer and from the menu (as in step 5): Edit > Fill... > Contents > Color.
Select a color. The screenshot shows I have selected a color from within the image.
21. The Color Picker
You can select any color by clicking in the area highlighted in green. Then select the tone by clicking in the large area on the left.
Or, you can select a color directly from the image, simply by clicking in the part of the image you wish to select. You can keep clicking until you are satisfied. The red highlight shows the color I have selected. The next step shows where in the image I clicked.
22. Image and Layers so far
Your layers and image should look like this.
23. Add Stroke to Frame Layer
Click on the fx button at the bottom of the Layers panel and select Stroke.
24. Frame Stroke Settings

Change the following settings as shown.
- Size: This must be the same as half the extra Canvas Size you added. I added a total of 300px for top and bottom and left and right side, so half is 150px.
- Position: Inside
- Color: Click in the Color box to open the Color Picker and select your color.
Leave the other settings as default.
Keep the Layer Styles panel open.
25. Create Frame Bevel & Emboss Settings
Select Bevel & Emboss in Layer Styles. Don't just tick the box, but click on the words Bevel & Emboss to see the settings. The Layer Styles panel should still be open, but if you closed it, click the fx button again at the bottom of the Layers panel and select Bevel & Emboss.
Change the following settings as shown.
- Style: Stroke Emboss (orange highlight)
- Technique: Chisel Hard (orange highlight)
- Depth: Maximum, 1000%. This highlights the corner diagonals to make the bevel look real (blue highlight)
- Size: This must be identical to Stroke 150px (red highlight)
- Angle: 93 degrees (green highlight)
- Altitude: 53 degrees (green highlight)
- Use Global Light: Turned OFF (green highlight)
- Gloss Contour: Click on the drop-down arrow and select the same as shown (pink highlight)
- Shadow Mode Opacity: Around 35, or adjust to taste. This darkens part of the frame to make it appear 3D.
Leave the other settings as default.
26. Add Frame Shadow
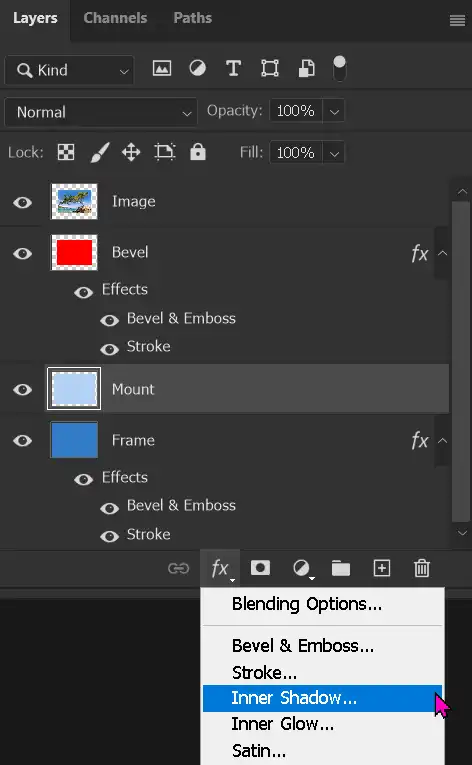
When a photo is in a real life frame, there is a slight shadow under the top edge, because light usually comes from above.
To add the frame shadow, we must select the Mount layer.
Then click on the fx button at the bottom of the Layers panel and select Inner Shadow.
27. Frame Shadow Settings
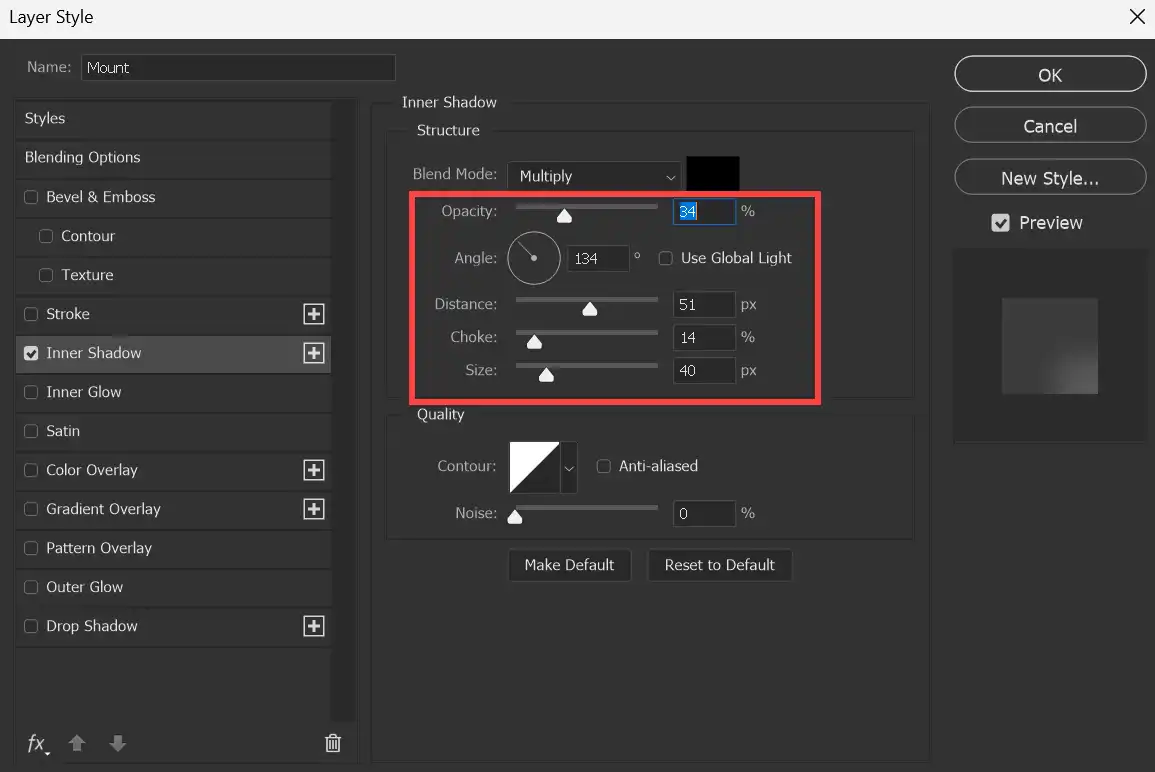
Change the options within the red box as below. Leave the other settings unchanged.
- Opacity: Change the darkness of the shadow. It might be easier to adjust this after the other settings.
- Angle: I've set the angle at 134 degrees, so light is coming from above and left. This is consistent with the light on the Frame and Bevel.
- Use Global Light:Turn OFF.
- Distance: This is the thickness of the shadow. Adjust to suit.
- Choke: Adjust in conjunction with Distance and Size. Experiment to get a feel for what these settings do.
- Size: This blurs the shadow. Adjust to suit.
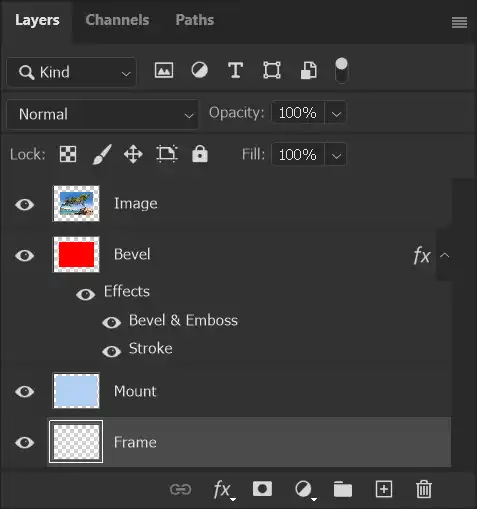
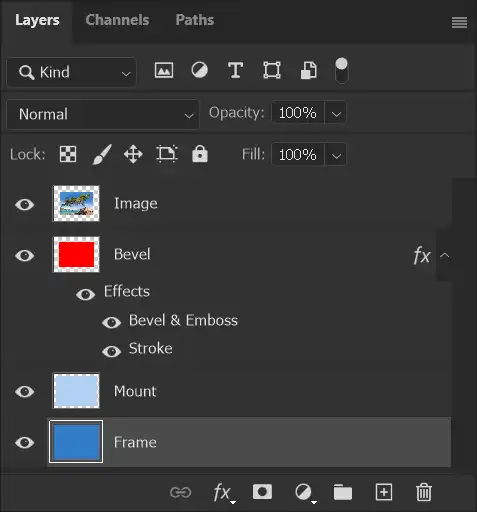
28. Finished Image - Layers Panel
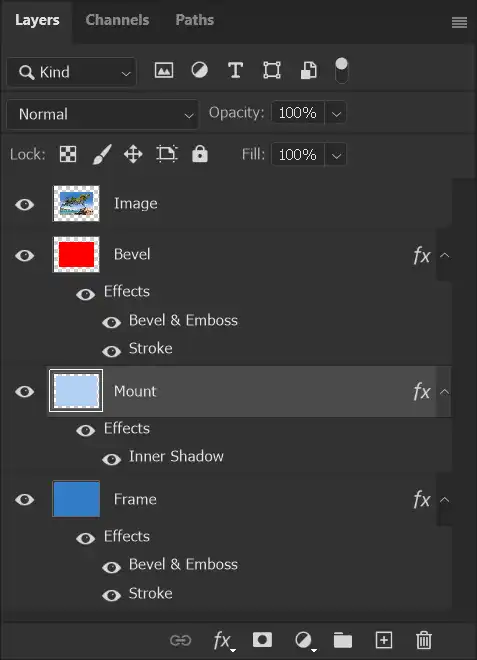
Here is the Layers panel showing all the layers and Layer Styles.
Each layer that has a Layer Style, shows an fx icon at the right of the layer.
If you have many layers and wish to hide Layer Styles for any layer, click on the chevron next to the fx on the right of each layer.
Any Layer Style can be turned on and off by clicking the visibility (eye) icon.
Layer Styles can be copied and pasted between layers and between images. Right click on the layer or Layer Style and select Copy Layer Style. Select the chosen layer in the same, or different image and right click and select Paste Layer Style. You can then edit this if required.
The finished image and earlier stages
How to Edit any Layer Style
All of the Layer Styles have been applied non-destructively and can be changed at any time, provided the image is saved in the .PSD, or .TIF formats. I prefer .PSD as it creates smaller file sizes.
To edit a layer style, double-click on the Layer Style name and this will open the Layer Styles panel. Simply make your changes and click OK to close the Layer Styles panel.
