Page updated: 14 June 2026
Select and Mask
Refine all selections including hair and fur
Select and Mask is a mini program within Photoshop and has its own toolbar. There are many tools in Photoshop to make selections and Select and Mask is a workspace that will help you make or improve these selections. In Select and Mask you can make a selection from scratch, refine a selection, or improve a layer mask.
Select and Mask has many features and controls for refining a selection, or a Layer Mask. There are also some familiar selection tools included in the workspace, such as the Quick Selection Tool, Object Selection Tool and the Lasso Tool. There are also the Brush Tool, Hand Tool and Zoom Tool. These are the same tools that are found on the Toolbar.
For a full summary of selection tools and other tools used in creating selections, see Selection Tools Summary.
You can access Select and Mask from the Select menu, or from any selection tool, by clicking the Select and Mask button on the Options bar.
You can also use an older version of Select and Mask (prior to 2015), although the latest version is probably better. The older version was called Refine Edge or Refine Mask, depending on whether you were refining a selection or refining a Layer Mask. To access the older version, hold down the Shift key, while clicking on Select and Mask in the Select menu.
ON THIS PAGE
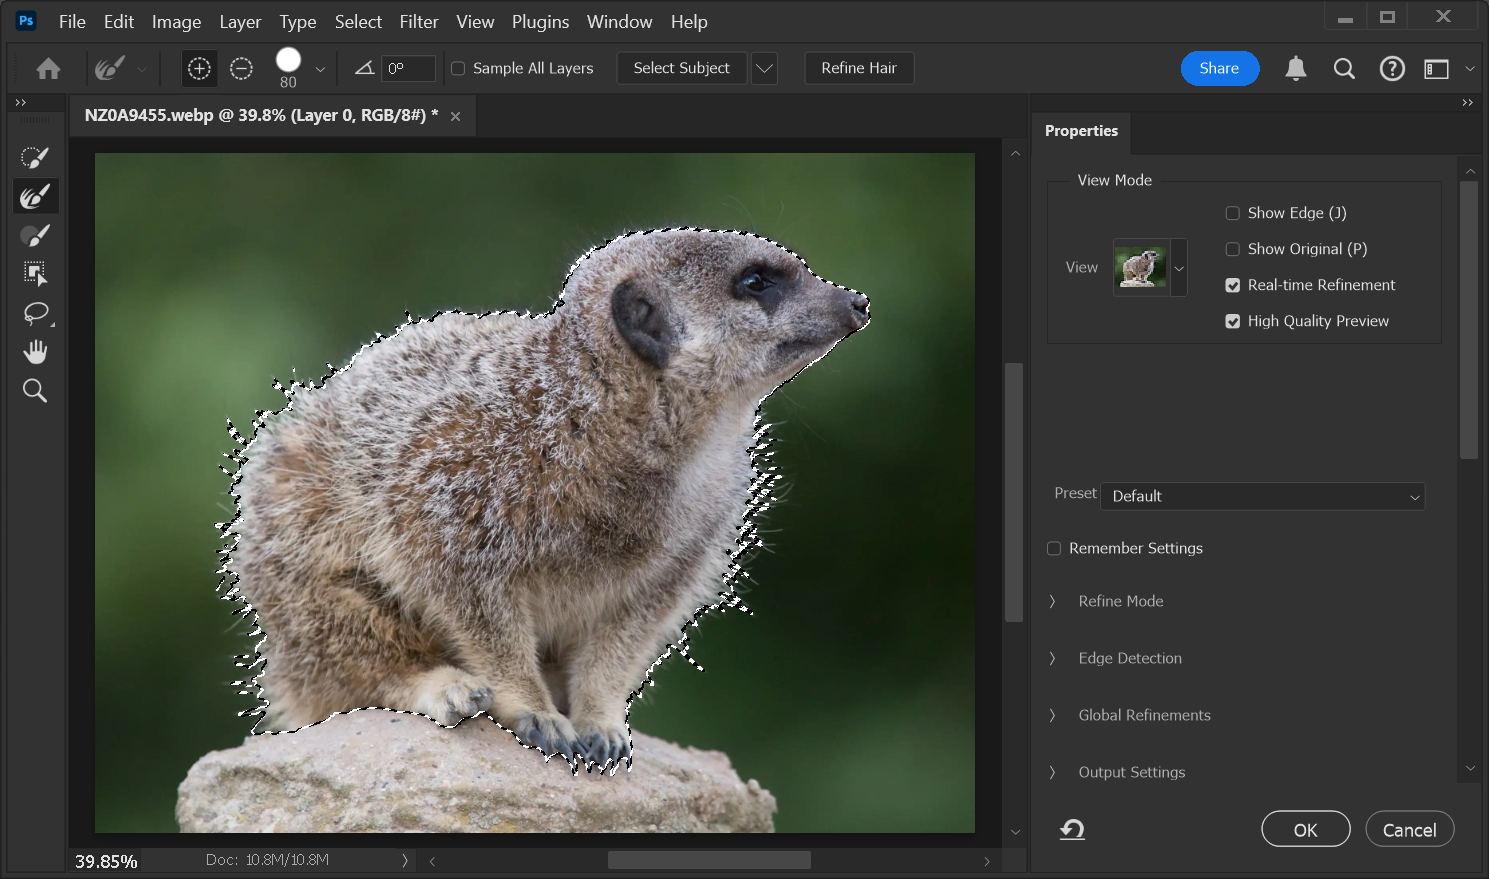
The Select and Mask Workspace
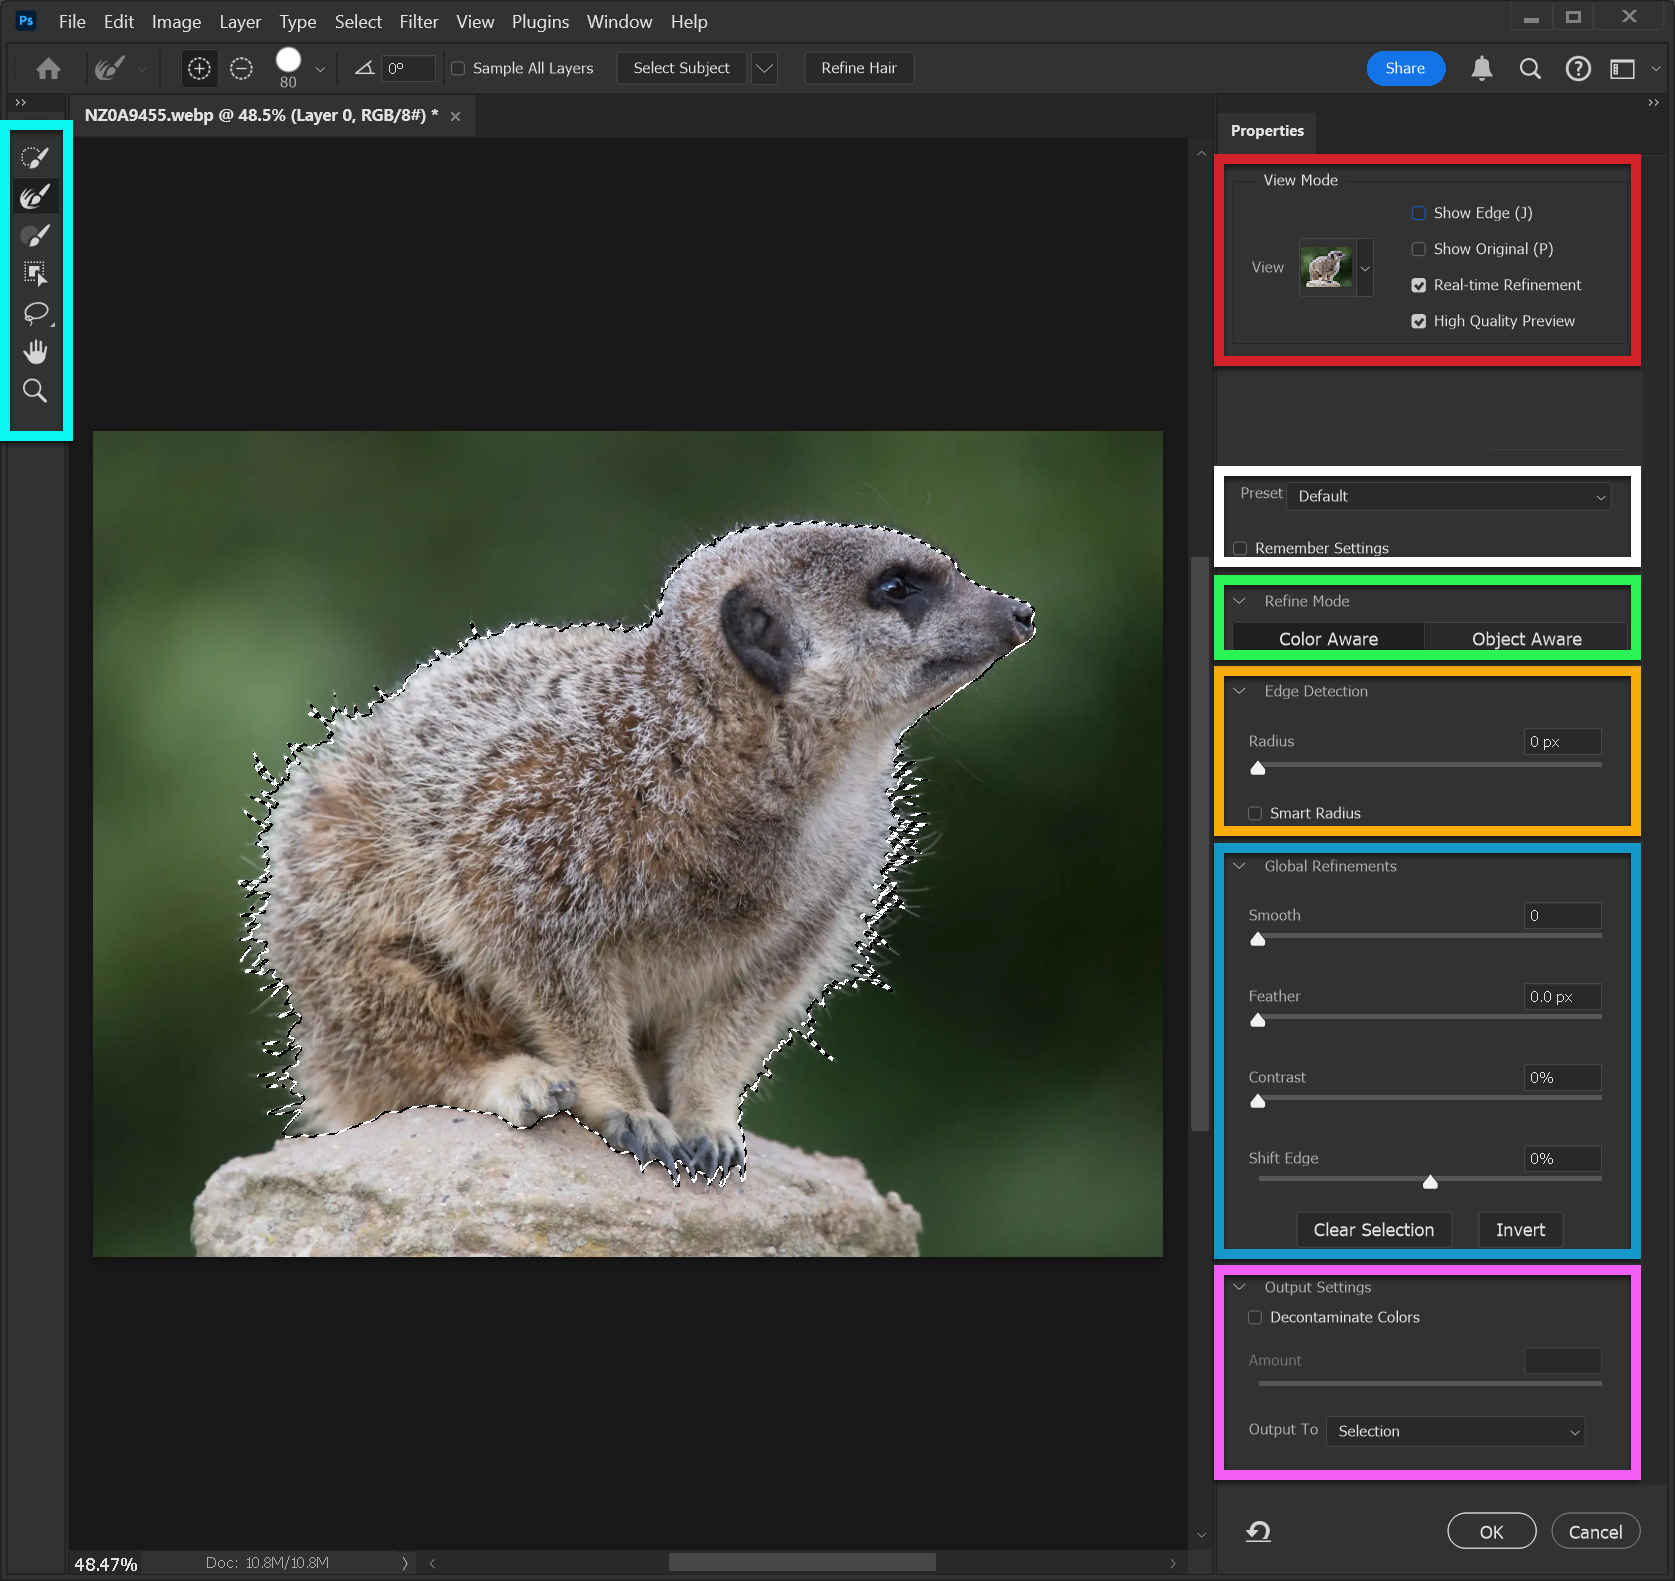
Select and Mask is such a big subject, that before we look at how to use it, let's look at the workspace and its many different features and options. Below is the complete Select and Mask workspace on a large screen. Below I will look at each area indicated, in detail.
Choose Select and Mask from the Select menu, or click on the "Select and Mask" button, which you will see on the Options bar of every selection tool.
This opens a new workspace window, with a toolbar on the left and a panel with options, on the right.
Compact Workspace
If you have a smaller screen, you can save space by closing each of the individual sections in the right panel: Refine Mode, Edge Detection, Global Refinements, Output Settings.
Toolbar

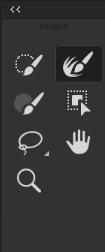
The Toolbar on the left contains a few tools that you may find useful. They include tools that are already on the main Toolbar; Quick Selection Tool, Brush Tool, Object Selection Tool, Lasso Tool, Polygonal Lasso Tool, Hand Tool, Zoom Tool.
As with the main Toolbar, you can choose either a one column Toolbar or a two column Toolbar.
To switch between a one or two column toolbar, click on the double chevron at the top of the toolbar.
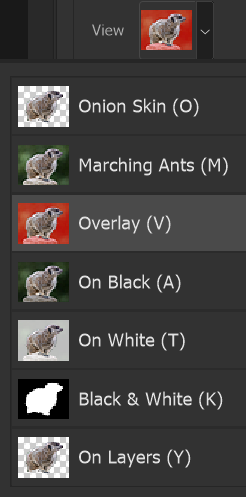
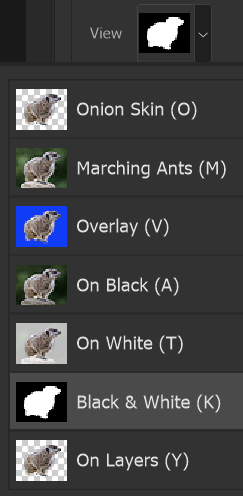
View Mode

At the top of the panel on the right, you have several options.
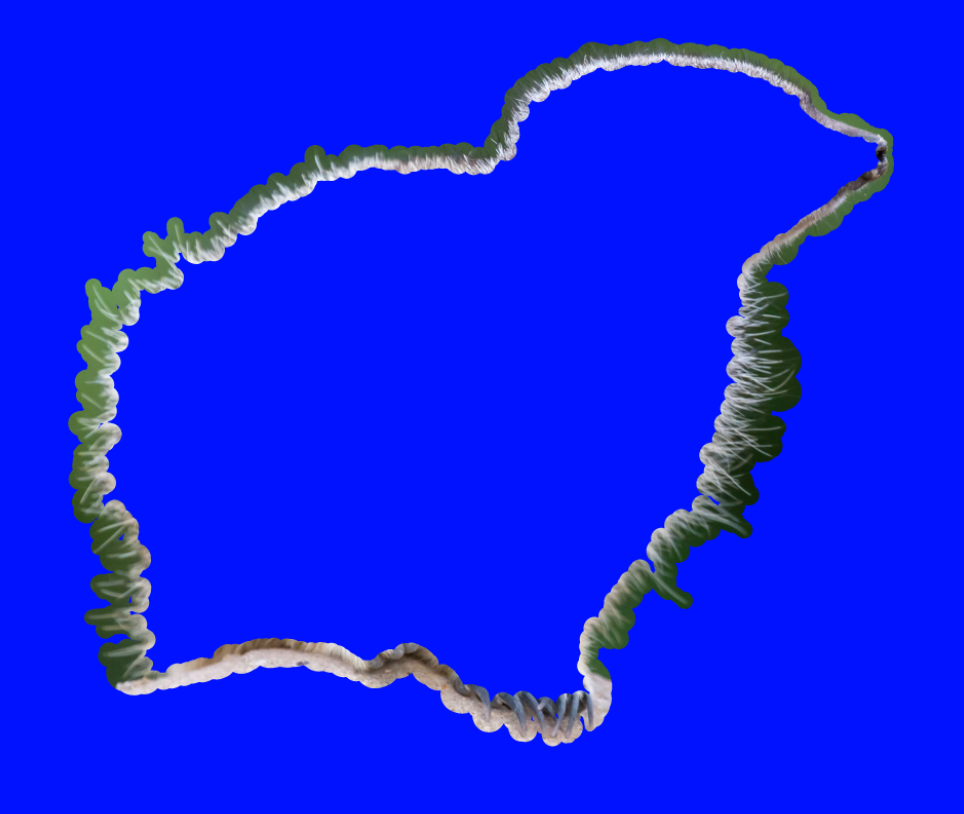
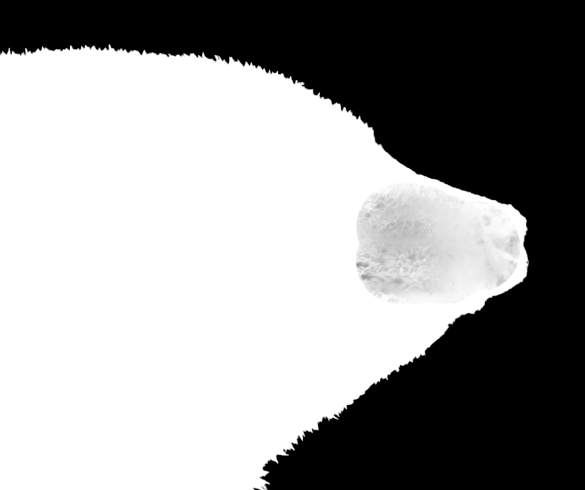
Show Edge This will show you the width of the Edge, if you drag the Radius Slider (under Edge Detection). This is shown above (blue background), with Smart Radius turned on, so the width of the Edge varies according to the content.
Show Original This will show you the original image, without any effect from the Select and Mask options.
Real Time Refinement This will take some processing power, so if your device experiences a delay, or lag, then consider turning this off. If there isn't a delay, turn it on and leave it on.
High Quality Preview As with the previous option, this will take some processing power, so if your device experiences a delay, or lag, then consider turning this off. If it doesn't then turn it on and leave it on.
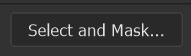
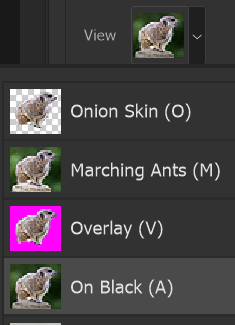
View This contains various options for how you view your image during the Select and Mask process. There is a lot to consider, so we will look at this in more detail, below.
View Options
You have several options for viewing your image while you work in Select and Mask.
Onion Skin: The Transparency slider allows you to view the selection from 0-100%, against any layers in your image.
Marching Ants: View your selection as Marching Ants.
Overlay: View your selection against a colored overlay. Like the Onion Skin, you can vary the opacity to view the selection from 0-100%. By using a color that is not in your image, you can see flaws in the selection, clearly.
On Black: View your selection against black.
On White: View your selection against white.
Black & White: View your selection as black and white, like a layer mask.
On Layers: View your selection against any layers in your image.
These are all useful. The one I use the most is Overlay, with different colors, which shows clearly small flaws. Black and white is also good at showing small flaws.
Press F to cycle through the views and press X to turn views off and on.
Presets
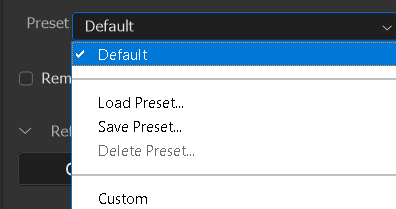
You can save various settings in Select and Mask, that you have created, to a preset. Then when you load the preset, all of those settings will be loaded.
Remember Settings
If you tick the box to Remember Settings, next time you use Select and Mask, it will start with the same settings.
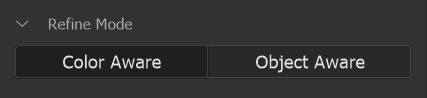
Refine Mode
If you tick the box to Remember Settings, next time you use Select and Mask, it will start with the same settings.
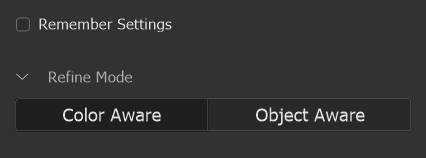
Choosing which Refine Mode to use can make a difference to the selection.
Color Aware: This mode is for simple backgrounds, e.g. a single color, or where there is a good contrast between subject and background.
Object Aware: This mode will probably be more effective on hair or fur on more complex backgrounds.
In the example, below, of the meerkat, it makes a difference, using either mode. Try both and see which is better.
Edge Detection
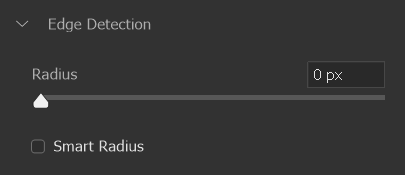
The Radius adjusts the thickness of the area around the selection where the tool will look to refine the edge. Use a small radius for sharp edges, but use a larger radius for soft edges, hair or fur.
Smart Radius attempts to detect where to adjust the radius, depending on the subject. So it should apply a small radius to sharp edges and larger radius for soft edges, hair or fur, within the same selection.
I have found that sometimes Smart Radius improves the selection, but at other times, it makes it worse. Experiment, by turning it on and off to see which is better.
You can also see the actual radius by ticking the box to Show Edge . This setting is at the top of the panel on the right and is covered above in View Mode.
Global Refinements
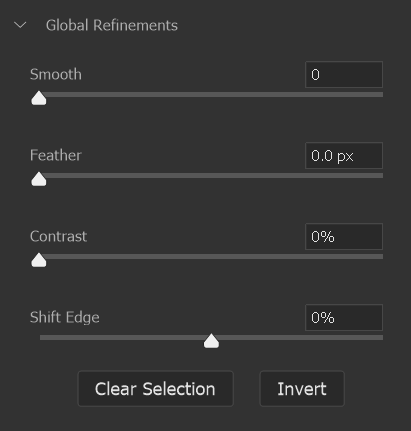
Smooth: This creates a smoother outline, by reducing irregular areas.
Feather: This blurs, or softens, the selection.
Contrast: Increasing contrast will make soft-edge selections more abrupt.
Shift Edge: This moves the selection outline inwards (negative value) or outwards (positive value). Shifting inwards can help remove unwanted backgrounds.
Clear Selection: This will clear the existing selection. You can then start again by clicking Select Subject.
Invert: This inverts the selection or layer mask.
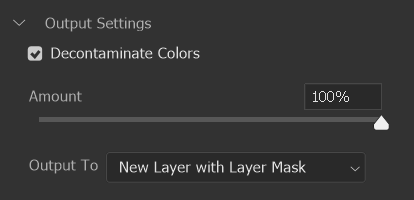
Output Settings
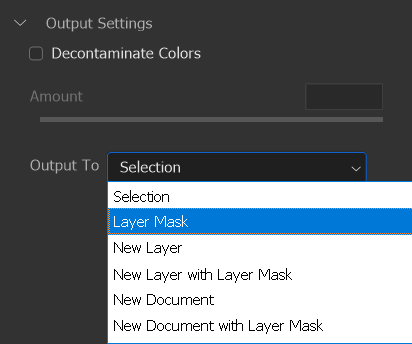
Decontaminate Colors: This replaces color fringes around the edges, with the color of fully selected pixels nearby. I've found this to improve the overall look, most of the time, but not always. If selected, it will require outputting to a new layer or document.
When you complete refining your selection or mask, you can choose what to Output To. They are all self-explanatory.
Selection:
Layer Mask:
New Layer:
New Layer with Layer Mask:
New Document:
New Document with Layer Mask:
If you Decontaminate, you will need to output to a new layer or document. I mostly output to a new layer with layer mask.
Select and Mask - First Steps
Different images require different approaches. The most common use of Select and Mask is to improve selections (or layer masks), of hair, fur and soft edges. There isn't a recipe that will apply to all images, but below is a guide for dealing with many images.
Experience of working on different types of images will improve your skills. It will also improve your skills to try different approaches on the same image. This is an excellent method of accelerating your learning. Have one or a few images that you always test out different approaches on. You will get very familiar with these images and will learn what is possible and what isn't. They can be your benchmark to test a new Photoshop feature on. You can then see whether a new feature really does do something better.
You can use Select and Mask in different ways;
- Create and refine a selection, all within Select and Mask
- Create a selection and then refine within Select and Mask
- Create a selection and add a layer mask, then refine the layer mask within Select and Mask
Within Select and Mask you have a few selection tools, but the two key tools are; Quick Selection Tool and the Object Selection Tool. You don't have the Magic Wand, Color Range, or Pen Tools (not actual selection tools, but can be useful for creating selections).
You also have options for the method you use to refine your selection or mask;
- Click the Refine Hair button and let Select and Mask do things automatically
- Adjust the Radius slider, with or without Smart Radius selected.
- Paint manually with the Refine Edge Brush
- A combination of the above
- Decontaminate, or not
Example 1: Hair and Fur - Simple Image
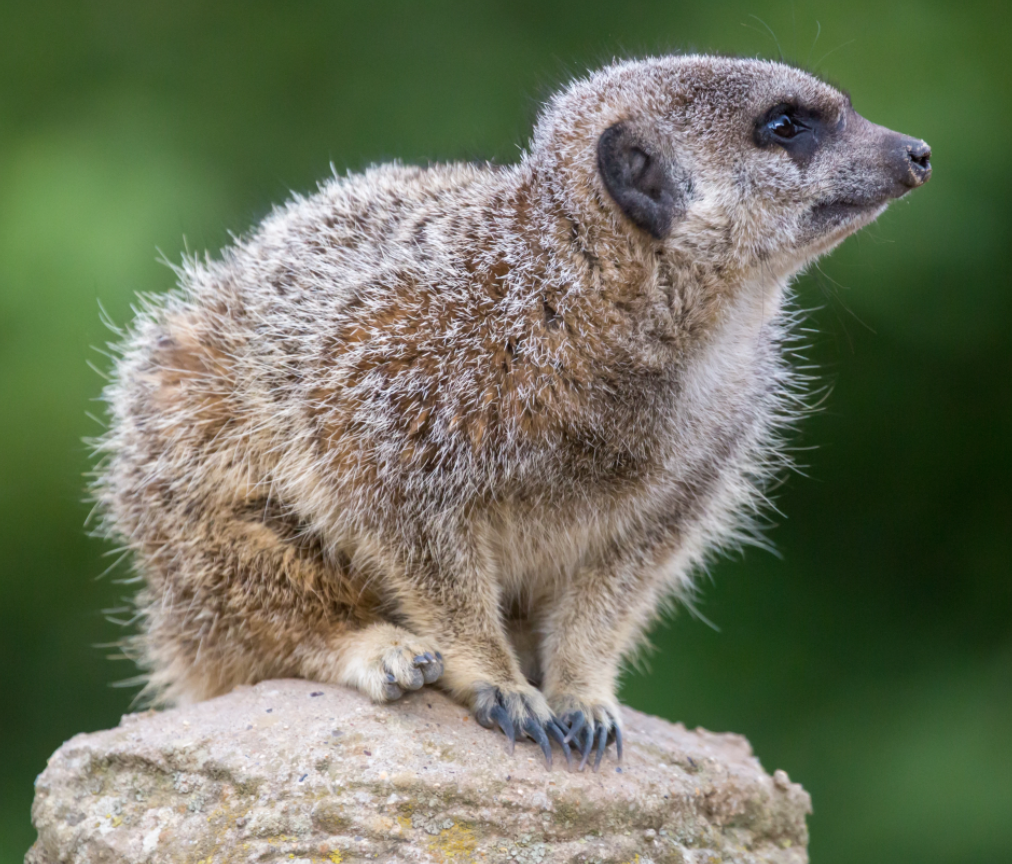
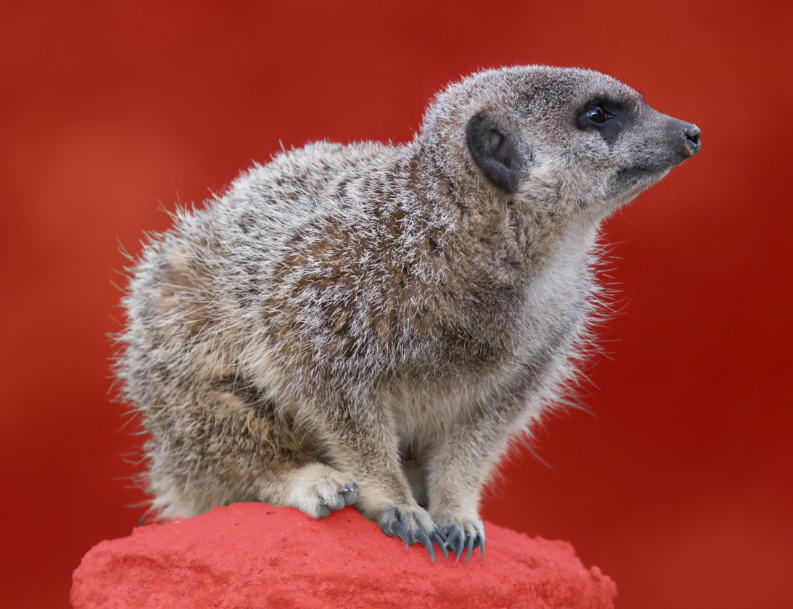
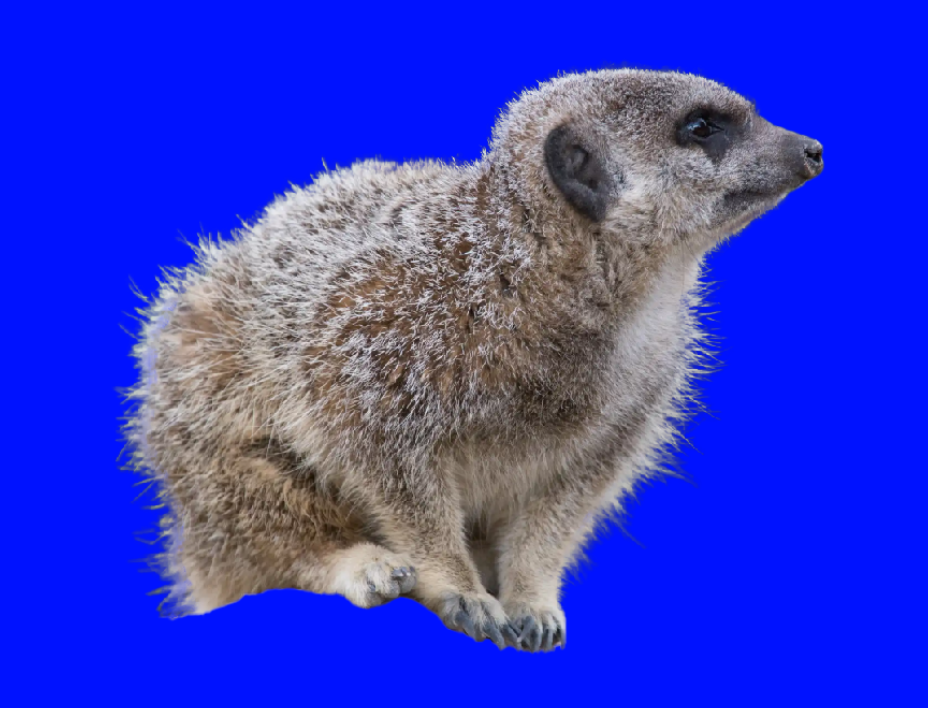
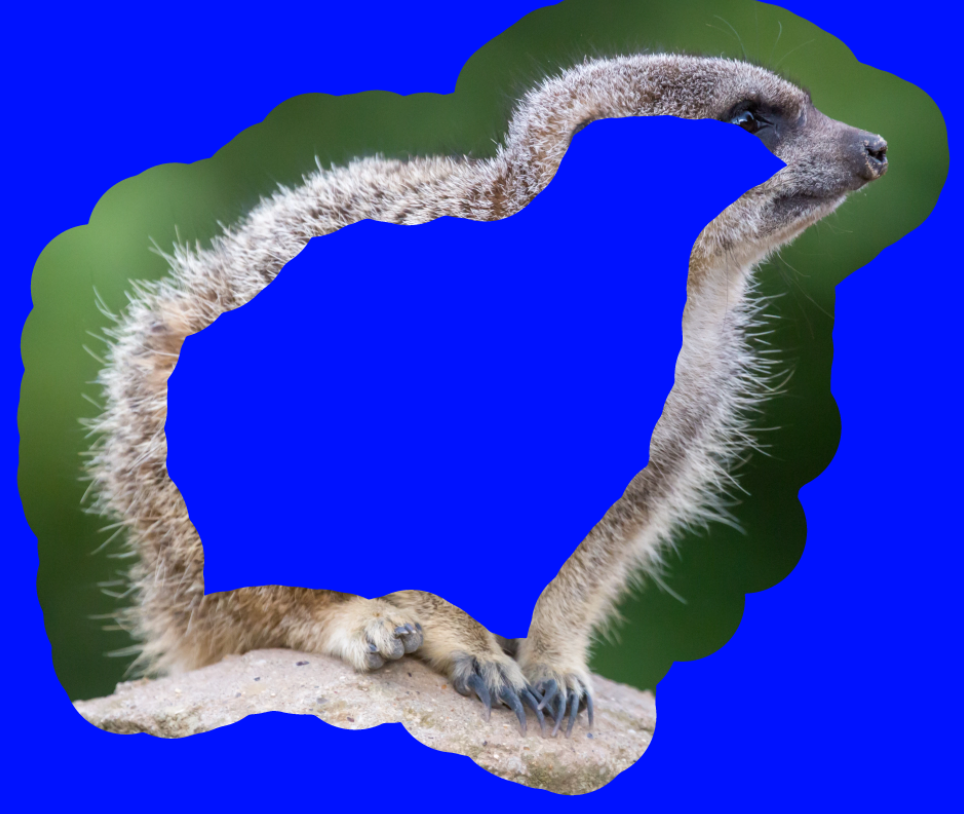
This is an easy image to achieve a good selection. The meerkat is in focus and the background is out of focus. There is also good contrast between the meerkat and the background. Images like this make the best candidates for good selections.
1. Object Select Tool
Select the Object Select Tool from the Toolbar.
When you move the cursor over an object, it will highlight in pink. If the Object Selection tool does not find your object, or select it accurately, click and drag to draw a rectangle around your object. Or use another selection tool, such as the Quick Selection tool.
In this image, it's an easy selection.
2. Object Selected
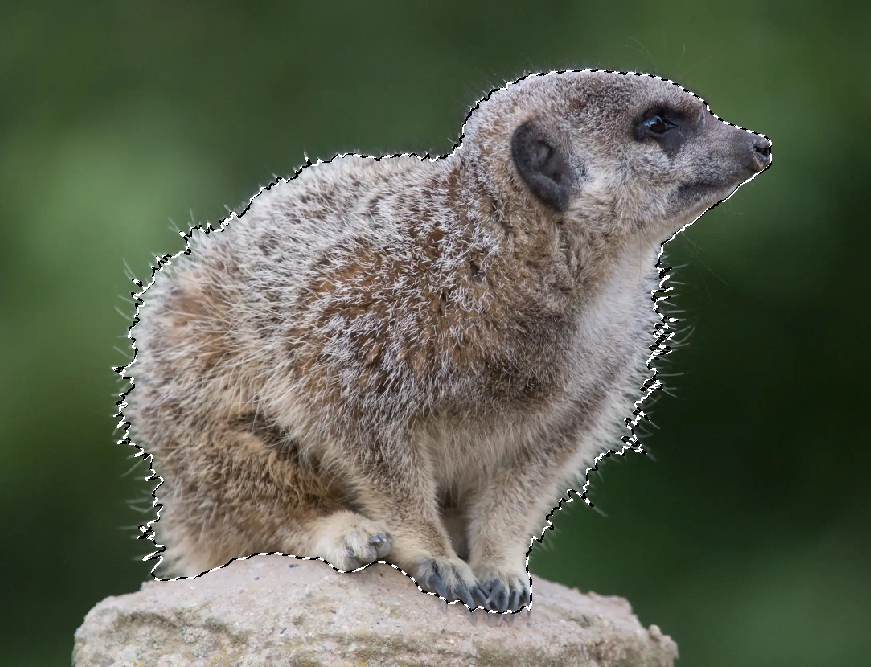
Your object will then be selected, as indicated by the "marching ants".
3. Add Layer Mask
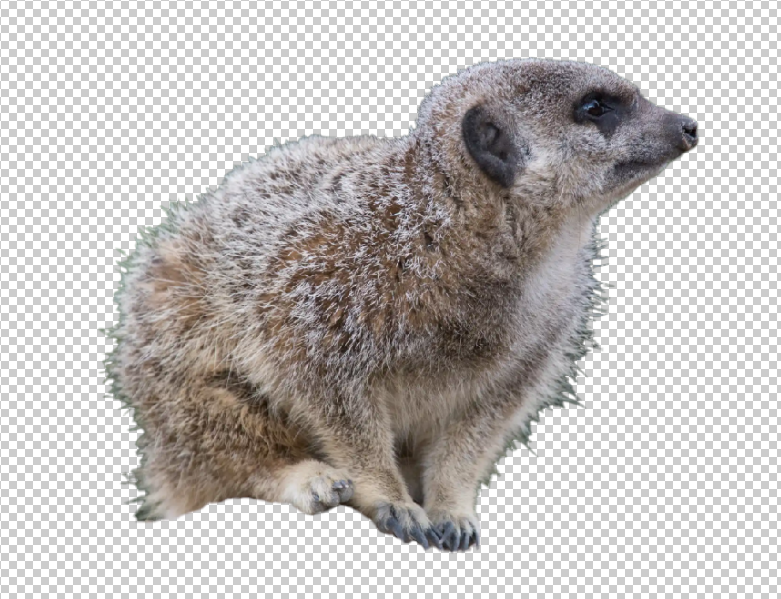
This is how the image looks when a layer mask is added to the original image layer, (with no layers visible below the image layer).
4. Select and Mask
Click on the Select and Mask button on the Options bar. All selection tools have this button.
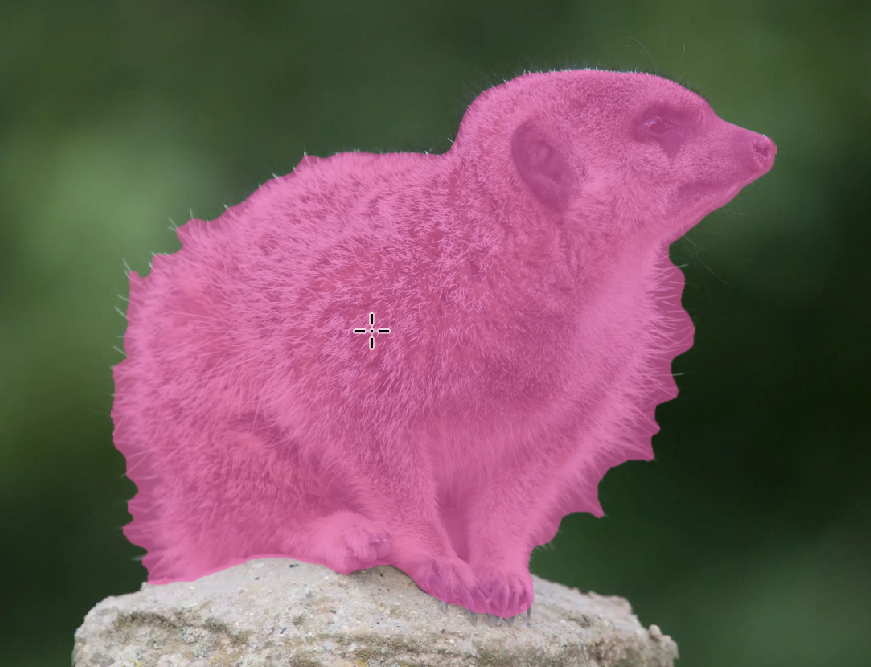
5. Select View Option
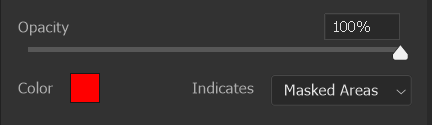
Select a view option. I have selected Overlay.
The default overlay is a 50% opaque red.
The important thing with any option you choose, is that you can see very clearly what is being included and excluded as you adjust the settings, so you can adjust them to achieve the best result.
In this image, red is a good color because there is no red in the image. However, in the next few steps I will increase the opacity of the Overlay color and also change the color. Different colors can sometimes allow you to see things more clearly. But don't choose a color that is in the image, as it could hide issues.
6. Overlay 50% Opaque
The image now has the 50% opaque, default Overlay.
I prefer to have the Overlay 100% opaque, so I see the outline more clearly. I will change this in the next step.
7. Overlay 100% Opaque
Drag the Overlay Opacity slider to 100%.
8. Choose Overlay Color
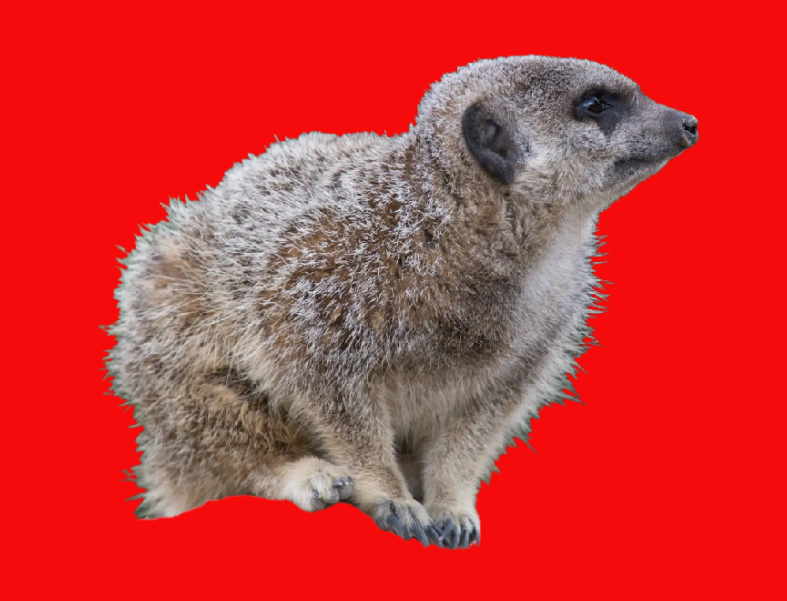
Now the Overlay is 100% opaque it shows that the selection around the edges is not as good as it looked in the last step.
When you use Overlay view, it's important that the Overlay color is not a color that's in the image. If it is, and a part of the subject was selected where it shouldn't be, it could be difficult to spot and it might be missed. Of course, you can double check this, by switching to a different View, such as Black and White, as I've done below.
It's not necessary in this image to change Overlay color, but to illustrate how easy it is to change, just click in the color overlay box to open the Color Picker.
9. Select Overlay Color
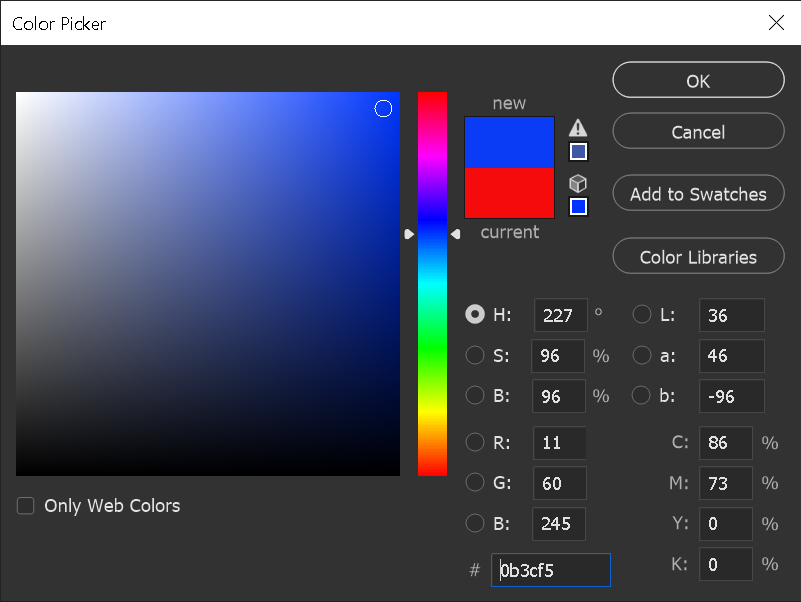
Select a new color and click OK.
In this image, it isn't necessary to change the overlay color, but sometimes it is. So I'm including this step here, so you know how to change the overlay color, when it's beneficial (if that's the option you choose to view).
For more details see Color Picker.
10. Black View
The meerkat has black in his face and nose, so I would not normally use the On Black View option, as you can easily miss important detail.
I'm using On Black here, to illustrate the issue.
11. Black View
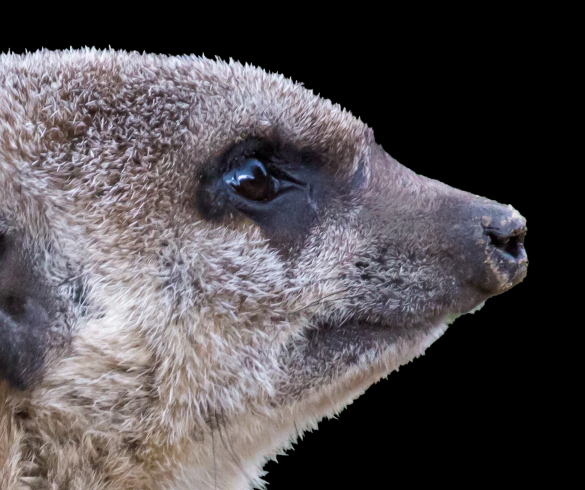
The selection around his head looks perfect against the black. However, see the next step, which shows exactly the same selection against a bright pink overlay.
12. Pink Overlay
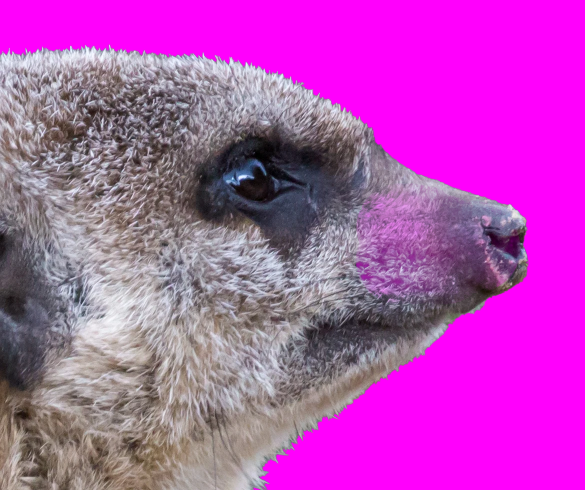
The pink overlay clearly shows that there is some transparency in his nose, which wasn't visible against the black.
13. Black & White View
I've now switched to the Black and White View option, which replicates a layer mask. This also clearly shows the transparency in his nose.
I have deliberately created this transparency to illustrate the issue. So choose your View option with care and avoid it having a color that is present in the image. For this reason, I tend to use these colors, such as bright pink, bright blue and bright green (but only when they are not present in the image).
Comparison of Steps 11-13
Click on each step to clearly view the differences.

Click or tap the numbers above the image to easily compare the steps. Read the caption under each step for more details.
Step 11: Selection looks but, but it's not. The Black view options is hiding issues.
Step 12: A pink overlay clearly shows some transparency in the meerkat's nose.
Step 13: The Black and White view option, which replicates viewing a layer mask, also shows the issue.
Note that I deliberately created the partial transparency in the meerkat's nose, but this replicates what you would find in some images and it highlight's a potential issue when choosing View Options in Select and Mask.
14. Restore Original Edge
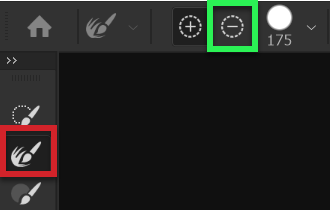
To remove an area, select the Restores Original Edge button, indicated by the - (minus) sign.
Or use the keyboard shortcut - press and hold the Alt key and paint with the Refine Edge Brush. Note the - (minus) sign in the brush, indicating Restores Original Edge.
15. Restore Edge
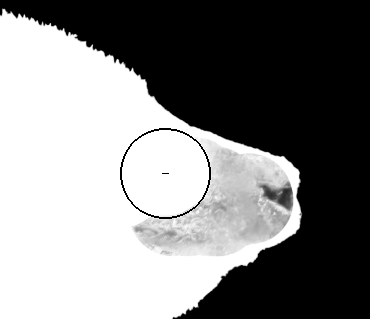
Brush over the whole area to restore, including the edge. You don't need to be careful around the edge.
16. Overlay Color

Sometimes when the Overlay is a different color, it shows the selection up in a clearer way.
Try different colors and shades of colors, to see how a selection shows up against it.
17. Refine Hair Button
If you have hair or fur in the image it's worth trying the Refine Hair button. If it doesn't do a good job, you can undo and try another tool. In this case, it's done a good job.
Where you have good contrast between the subject and background and also a difference in focus, the images should yield good results and often quite easily.
Images with backgrounds in focus and a more complex content, especially if colors and tones are similar (and touching) to the subject, will be more difficult.
18. Refine Hair
When you apply Refine Hair, or other adjustments, your results may be affected by which Refine Mode you choose; Color Aware, or Object Aware. I suggest trying both. In this image, there is a slight difference between them, with Object Aware providing the better result. See below for examples.
19. Refine Mode Notice
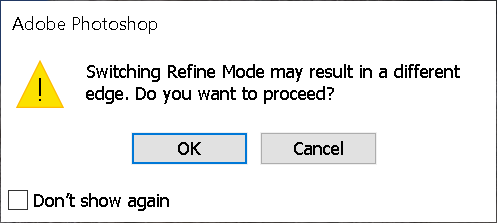
When you switch between Color Aware or Object Aware you will see this notice.
Click OK. If you don't want to see this notice again, tick the box to Don't Show Again, before clicking OK.
20. Color or Object Aware
Select Color Aware or Object Aware before applying Refine Hair. See the previous step.
Then click on Refine Hair.
21. Color Aware Selected
I have applied Refine Hair with Color Aware selected.
There is a faint area a the left edge of the meerkat, that is not perfect. See the close-ups in the next two steps, to see this more clearly.
22. Close-up of step 20
Here is a close-up, showing the faint area of blue, showing through the left edge of the meerkat. You should choose a View Option to show areas like this, that are not perfect. Also, see the next step to view in black and white.
23. Black & White View
The black and white view option is the same as you would see in a layer mask and this can often show details more clearly. White areas are visible, while black areas are masked, or hidden. Any gray areas are partially visible/hidden.
At the left edge of the meerkat there is a strip of light gray, where it should be mostly white.
24. Object Aware Selected

I have undone the previous step and this time I have selected Object Aware, then re-applied Refine Hair.
This time is has made a better selection, especially at the left edge of the meerkat, that was a problem in the previous steps.
25. View Options
Again, to double check this, change the View Option to black and white.
26. Black & White
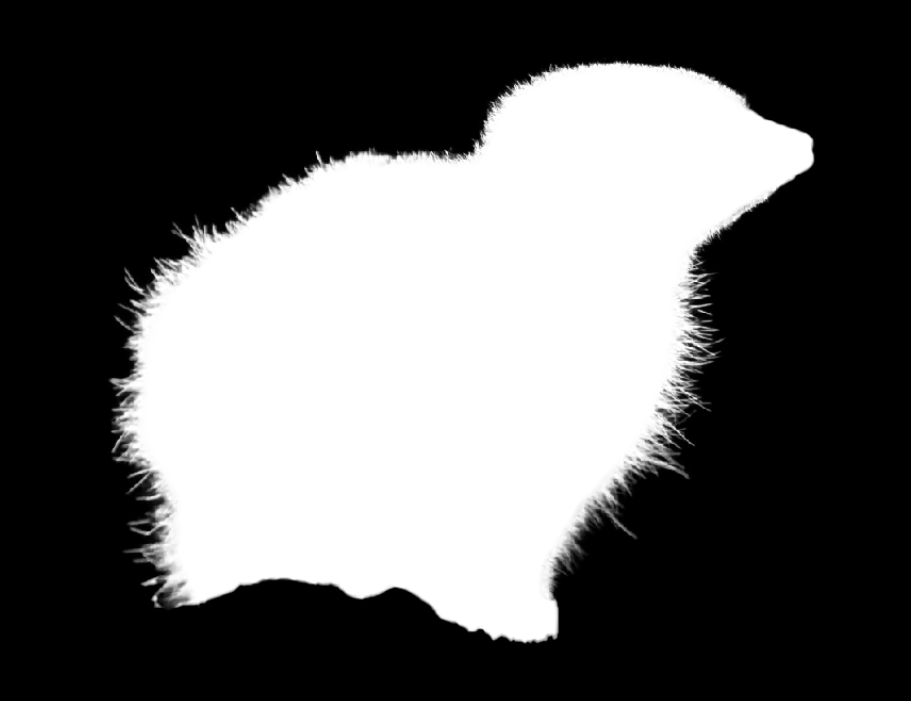
I have switched the view to Black and White, which is the same as a layer mask. White reveals, black hide. This very clearly shows that there is no area within the meerkat that has been selected. There is
27. Decontaminate Colors
Decontaminate Colors can have a very positive impact on a selection or mask and many times it will improve it. Sometimes however, it doesn't, or even makes it worse.
If you are adjusting an object, without changing the background, or replace the background with something that is similar in color and tone to the original, you probably won't need to do this. But if you are
Radius Slider Show Edge
This is an easy image to achieve a good selection. The meerkat is in focus and the background is out of focus. There is also good contrast between the meerkat and the background. Images like this make the best candidates for good selections.
28. Select Show Edge
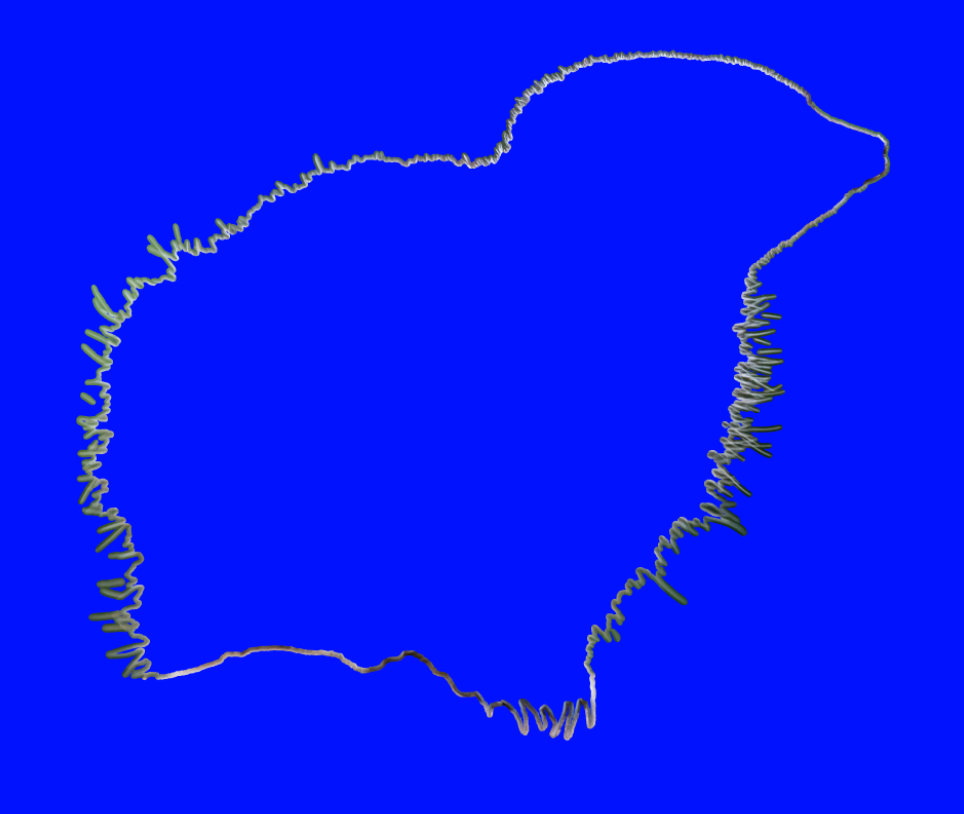
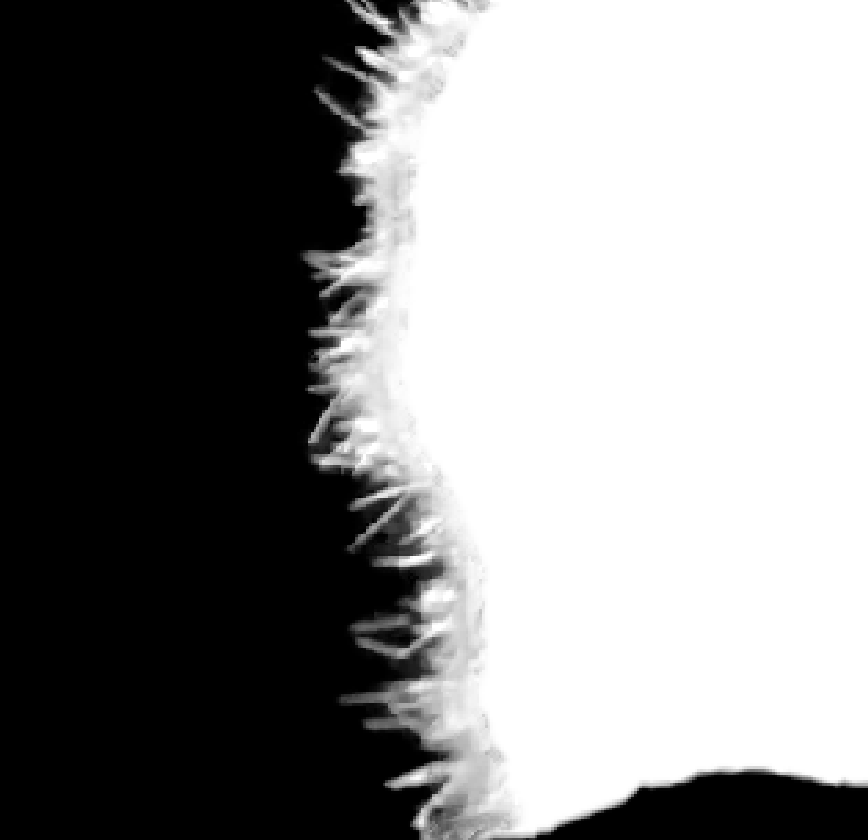
If you click on Show Edge (top of the panel), you will see a preview of the edge, while you adjust the Radius slider. This shows a very thin edge, at 9px.
In this image it's not enough. It's not enough for the longest fur.
29. Edge Thickness
This shows the thickest edge, with the Radius slider all the way to the right, at 250px.
In this image, it's too much. It's more than the longest fur.
30. Edge Detection Radius
I have adjusted the Radius slider to 76px.
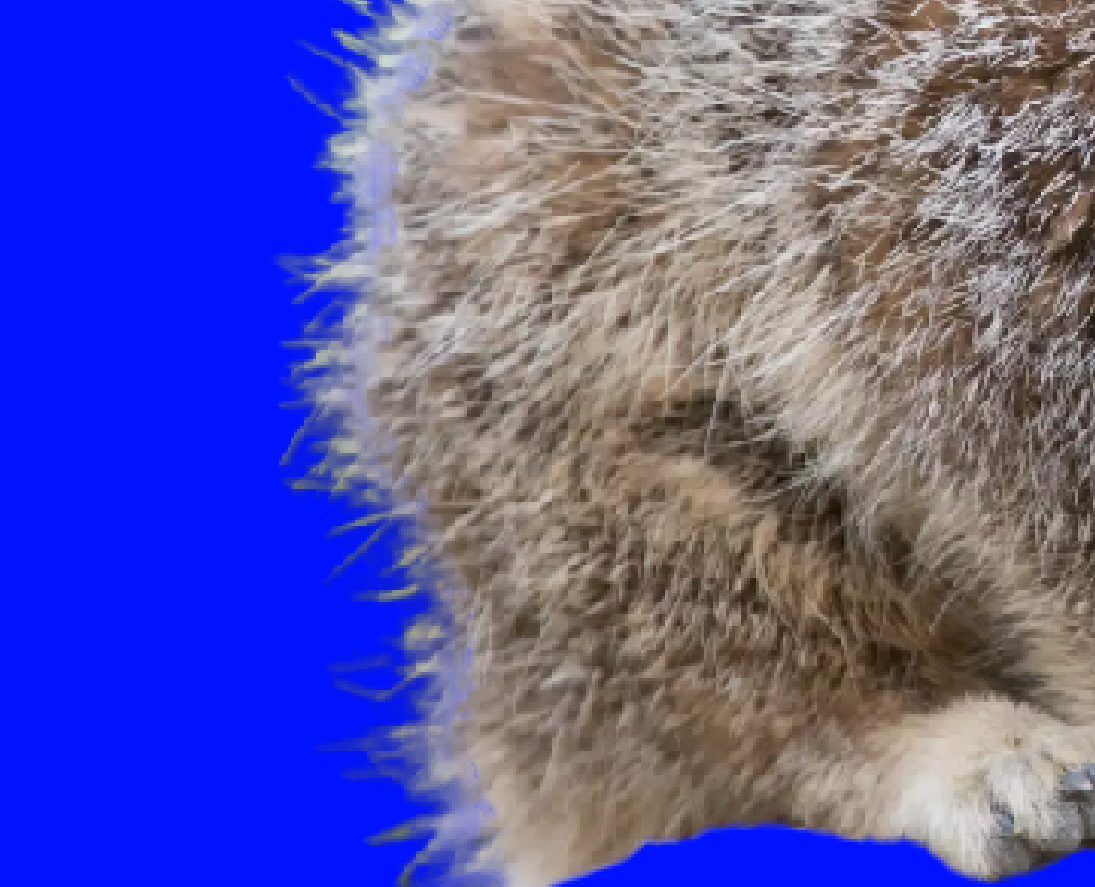
31. Edge Detection 76px
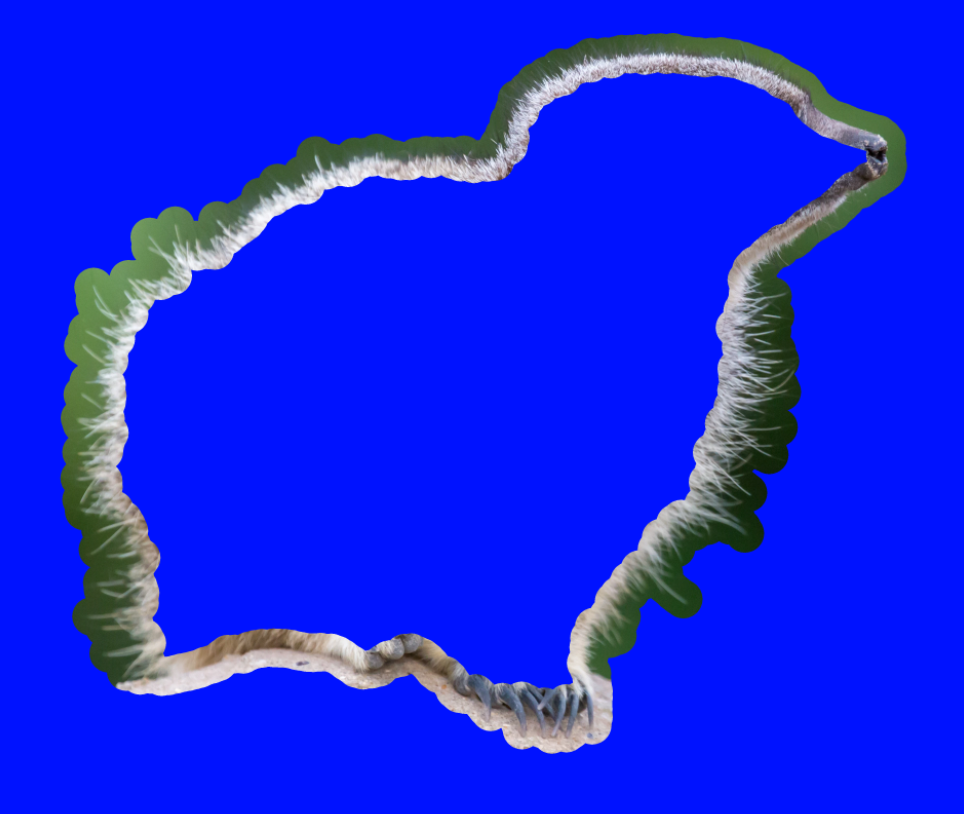
This is the setting from the previous step, 76px. I've chosen this setting, while viewing Show Edge, as shown here, to clearly see the effect my adjustments are having. The Radius is large enough to include the longest fur, on the meerkat's front and back.
32. Smart Radius OFF
This is the same setting as the previous step, 76px, but I have turned on the Smart Radius.
The Radius then adapts. Where the fur is shortest, the radius is smaller and where the fur is longest, the radius is larger.
I have experienced times when turning on Smart Radius actually degrades the quality of the selection, so try it, but keep an eye on your image. Compare it with and without the Smart Radius.
33. Result of step 31

In this image, Smart Radius has done a good job.
34. Decontaminate Colors
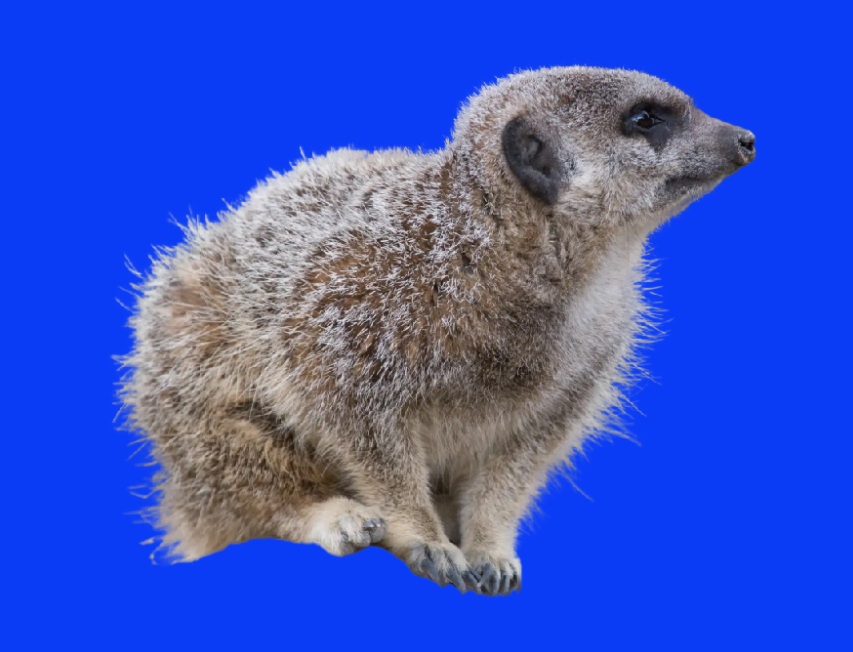
I have turned on Decontaminate Colors and that has improved the fur.
Comparison of Steps 26-34
Click or tap the numbers above the image to easily compare the steps. Read the caption under each step for more details.
Step 27: Radius slider 9px. A thin edge doesn't show enough fur.
Step 28: Radius slider 250px. Maximum edge is larger than the longest fur.
Step 30: Radius slider 76px. Enough for the longest fur.
Step 31: Radius slider 76px. Smart Radius ON. Radius is small where fur is short, Radius is larger where fur is longer.
Step 32: Result of Radius slider 76px, Smart Radius ON.
Step 33: Decontaminate also turned ON.
