Page updated: 18 July 2026
Interactive Photoshop Toolbar PDF (2026)
Preview and download available on the Tools page.
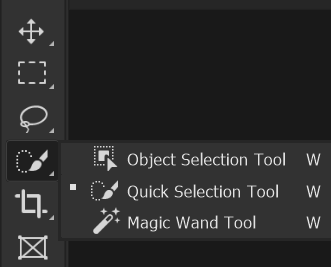
Quick Selection Tool
One of Photoshop's best Selection Tools
The Quick Selection tool has for years, been my selection tool of choice. This changed after the introduction of the Object Select tool, which is great when it works, but sometimes it doesn't work to the standard I require.
The Quick Selection tool with a good technique, is a great selection tool. However it's underrated by some people because they don't use it with a good technique. This tutorial will show you how to use it accurately and reliably, as I've done for many years.
Before using the Quick Selection tool, it's worth trying the Object Selection tool, simply because it's much faster. But when it doesn't quite make the quality selection I want, it's most often that I'll use the Quick Selection tool instead, or in addition to. It really is a great tool, when used well.
For a complete list and description of all Selection Tools, see Selection Tools Summary.
Quick Selection Tool - Options Bar

Tap to view full size
Rotate your phone for easier reading
ON THIS PAGE
Selection Buttons

Unlike most of the selection tools, the Quick Selection tool just has three buttons (most have four). Left to right, they are;
New Selection - Click to cancel existing selection and create a new selection
Add to Selection - Add to any existing selection. This is the button you will use the most. See below for my recommended correct method to use this tool.
Subtract from Selection - Remove from existing selections
The one that's missing is Intersect with Selection - which is the one least used with the other tools.
Brush Size and Hardness
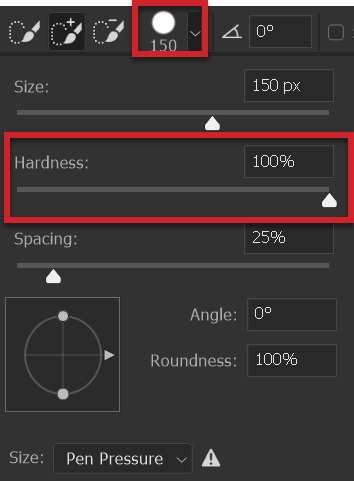
Set Brush Hardness to 100%. This setting is important in using the tool accurately.
It's unusual to set a brush-based tool hardness at 100%. However, this isn't a brush, it's a selection tool. You will need to click accurately up to, but not over, an edge, to add to, or subtract from the selection.
When the hardness is 100% you can confidently click right up to the edge of an object. If hardness was less than 100% and you click up to an edge, you may also be selecting areas you don't want.
Brush Angle
This changes the brush angle. I've never found this useful, so you can ignore this.
Sample All Layers
Choose whether you make a selection based on the content of all visible layers, or just the selected layer.
Enhance Edge

This will improve the smoothness and quality of the edges in your selection. I suggest you leave this turned on.
Select Subject
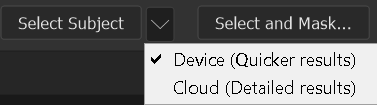
Choose whether you want the processing to take place on your device, which Adobe says is quicker, or in the Cloud, which Adobe says provides more detail.
Select and Mask
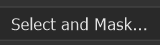
Select and Mask is available on the Options Bar of most of the selection tools. It is also available from the menu: Select > Select and Mask...
Select and Mask is a very powerful tool that allows you to improve selections or layer masks. It comprises of several tools itself. It's such a a large and important subject that it has it's own dedicated tutorial.
This is such a large subject and essential skill for anyone using selections and layer masks in Photoshop.
Read the Select and Mask tutorial here [insert link].
How to Use the Quick Selection Tool On Simple Subjects
Introduction
This is a simple tool to use and if used precisely, it is very accurate and allows you to create quality selections. However it's easy to use this tool less accurately and then be disappointed with it, as I've seen many times with students in the classroom.
For very simple subjects you may just need to Object Select tool. If that doesn't give a perfect selection then using this tool, either to edit the selection, or begin from scratch, will often provide a good selection.
This tool is slower to work with than the Object Select tool, but it can provide a better quality selection.
1. Select Add to Selection
Select the Add to Selection button. This is the middle button.
2. Adjust Brush Size

Adjust the brush size with the square bracket keys [ ]. Click within the object you wish to select. You can also click and drag. Make absolutely sure that you do not accidentally click outside the object. The tool learns what you want and what you don't want to select. If you click outside the object, you will be training the tool with the wrong information and won't achieve a perfect selection.
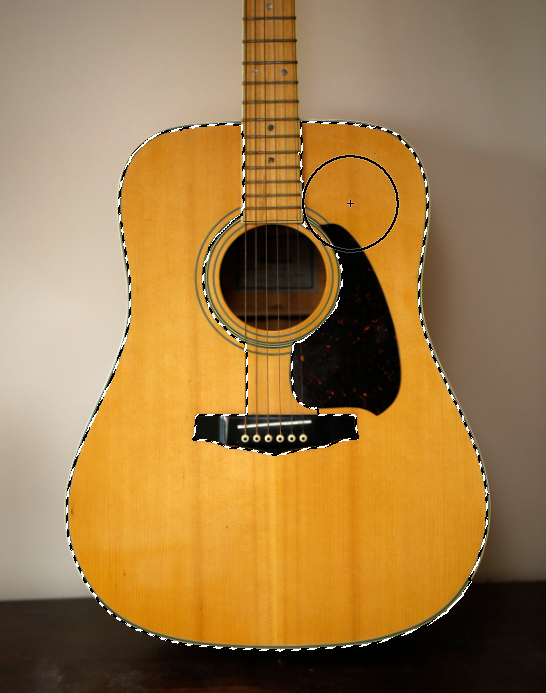
In this image you can see where I've clicked and the area that is automatically selected. You can click and drag, but to make things clear in this tutorial, I'm just making single clicks.
3. Don't Click Outsid Object
The image shows where I made my next click and the area it selected. Again, make absolutely sure that you do not accidentally click outside the object.
4. Next Click
The image shows where I made my next click and the area it selected. Again, make absolutely sure that you do not accidentally click outside the object.
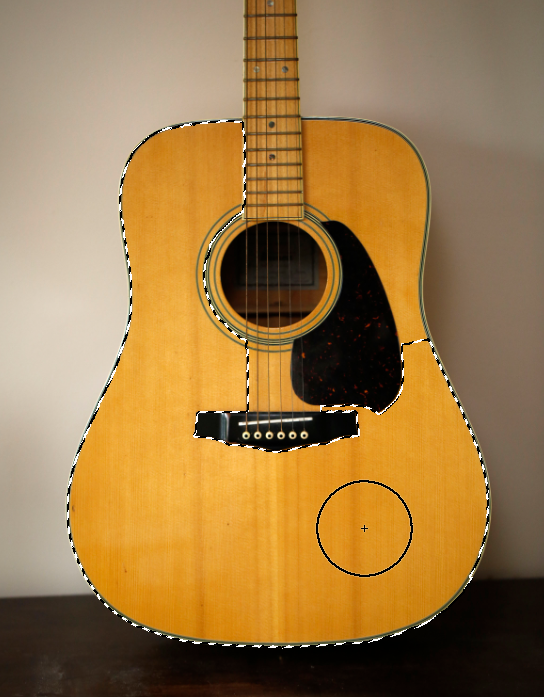
5. Another Click

I've made the brush smaller with the left square bracket key [ and carefully clicked on the neck of the guitar, making sure that I don't click outside the object.
6. Selection Complete

A final click on the neck of the guitar completes the selection.
How to Use the Quick Selection Tool On Complex Subjects
Introduction
The example above, on a simple object, was straightforward, provided you don't accidentally select outside the object. Many objects are not that simple and require Adding to the selection and also Subtracting from the selection.
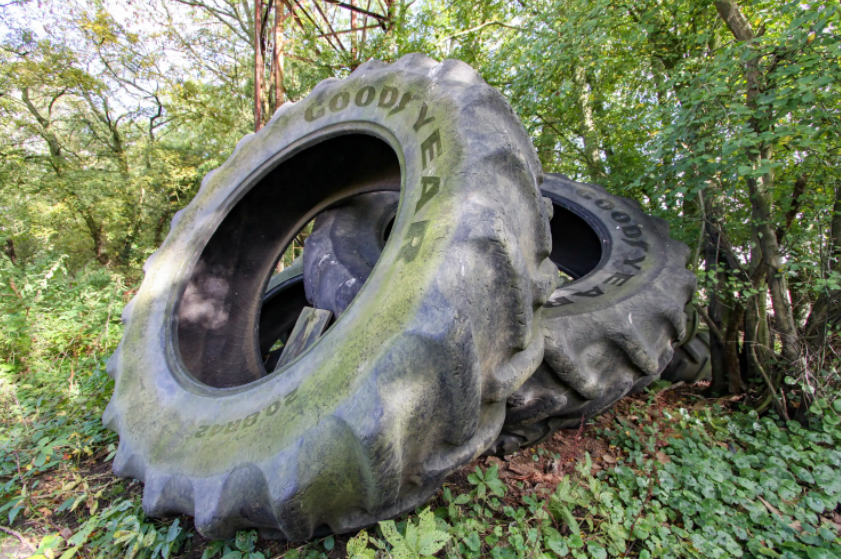
This example starts with the Object Select tool, because it's a lot quicker than the Quick Selection tool and it does a good job of selecting the large tyre. But the selection then needs refining with the Quick Select tool.
When selecting parts of an object you want, you will often also select parts that you don't want. The intuitive thing is then to undo. Don't Undo. What you need to do instead is select the Subtract button and click, or click and drag carefully, over the areas that you don't want. In this way you are training the tool. If you simply undo, the next selection will include the same unwanted areas.
7. Object Select
By moving the cursor over the tyres, the Object Select tool selects all the tyres. But we want to just select the large tyre.
8. Draw Selection
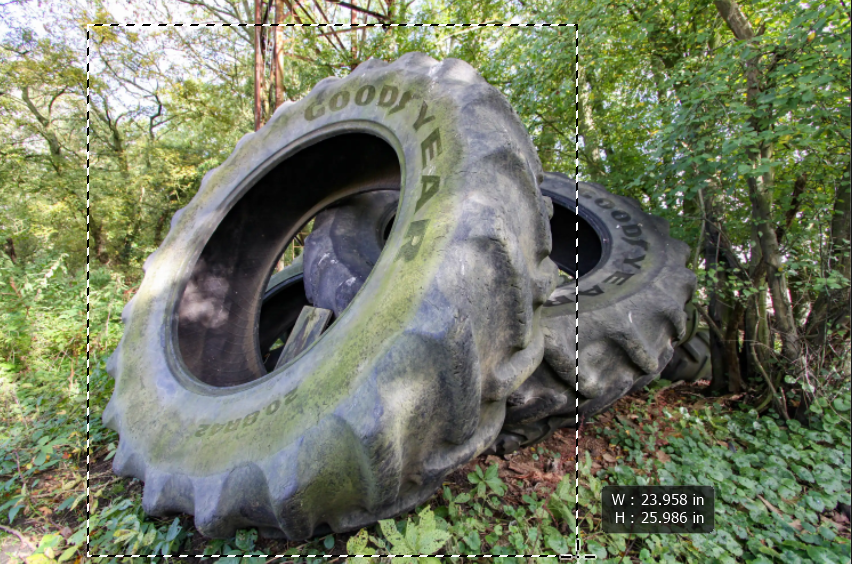
So instead of clicking on the large tyre, I've drawn a selection around it, with the Object Select tool.
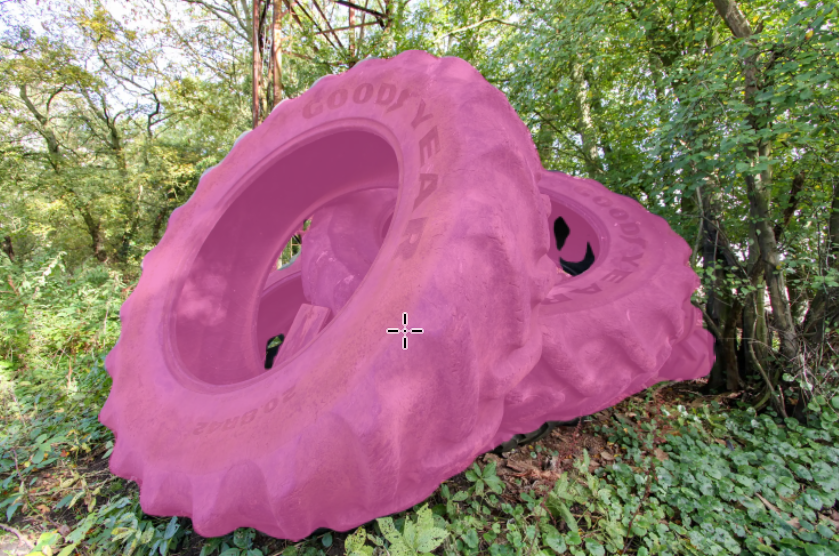
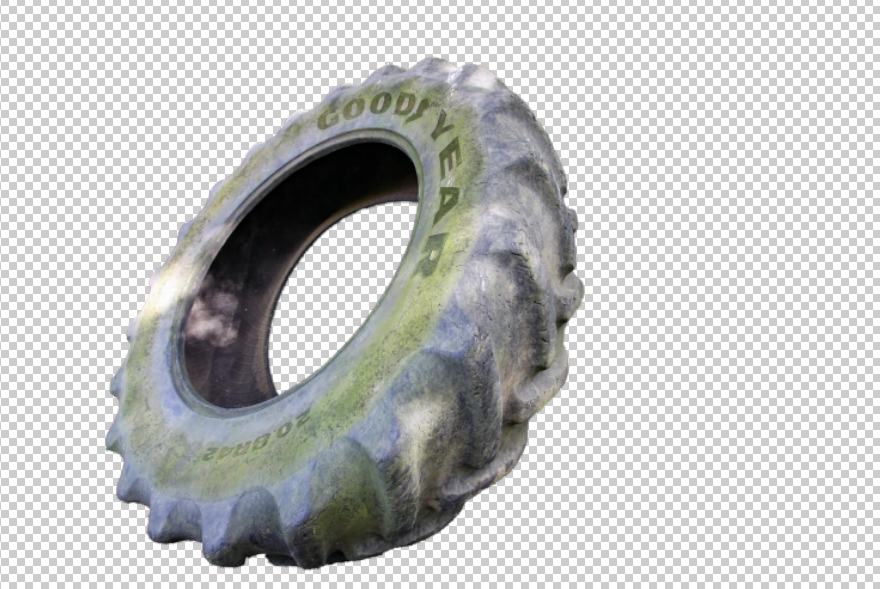
9. Large Tyre Selected
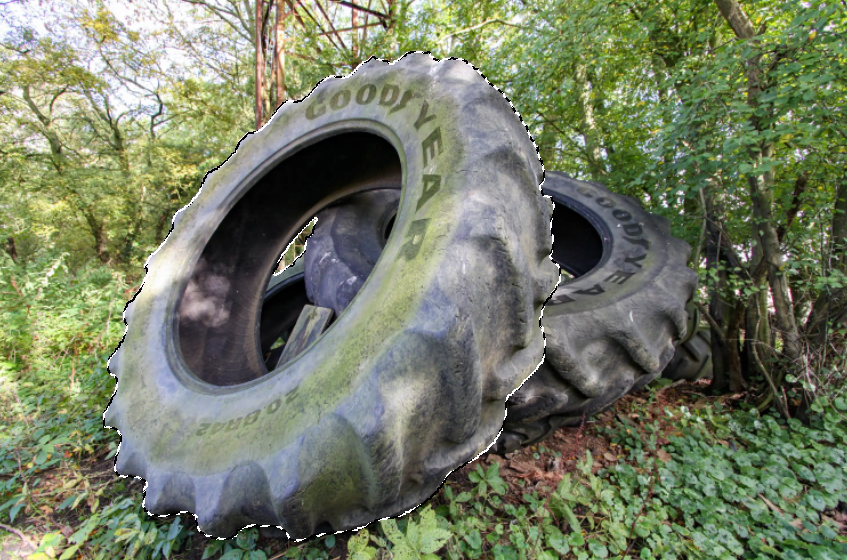
The large tyre is now selected. We will have to remove the area in the center of the tyre and there are also a few small areas that need removing.
10. Subtract from Selection
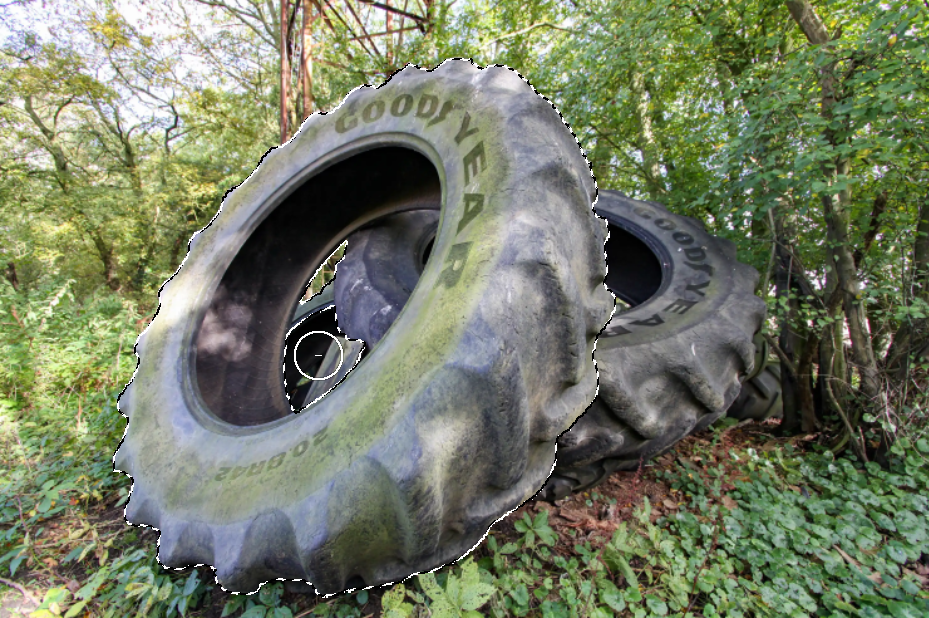
With the Quick Selection tool sized appropriately, I've selected the Subtract from Selection button.
Tip Instead of selecting the different buttons, when Add to Selection is selected, press and hold the Alt key on the keyboard to switch the tool to Subtract from Selection. When Adding, you will see a small + (plus) in the brush. When holding the Alt key and subtracting, you will see a small - (minus) in brush.
Then I clicked in the center area, being careful not to let the brush touch the tyre.
11. Remove Unwanted Areas

With the Subtract from Selection selected, I continued to carefully click in the center of the tyre to remove that from the selection.
12. Zoom In & Inspect
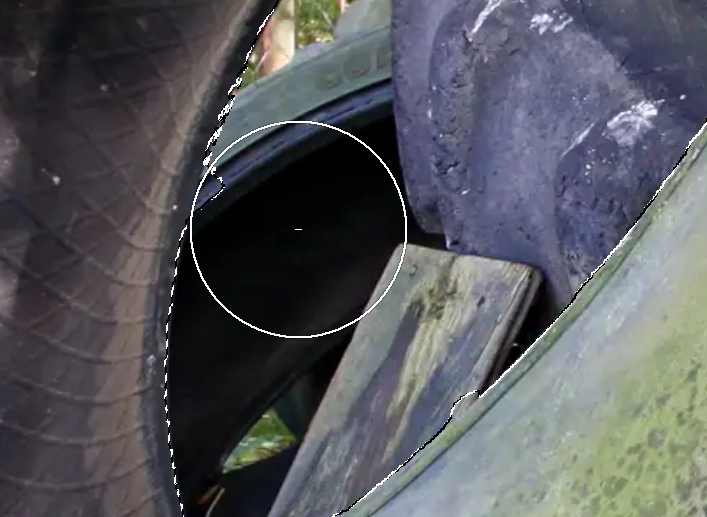
Zoom in and inspect the selection. Here, there is a small area that needs tidying up. If you miss the small things like this, it can completely spoil the end result.
Note the - (minus) in the center of the brush, to subtract.
13. Add and Subtract

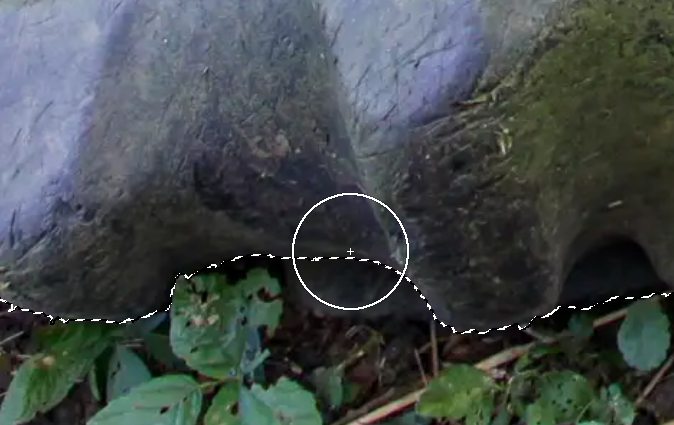
While clicking to remove, in the previous step, because the there are very similar tones next to this area, a little too much has been subtracted. Switch back to Add to selection (note the + (plus) in the center of the brush.
This is typical when working on similar tone areas. Don't undo, but subtract what you don't want and add what you do want. The tool learns.
14. Click Correctly

If you are careful to only click on the correct areas, what you do and don't want, with the add and subtract options, you will end up with a good quality selection.
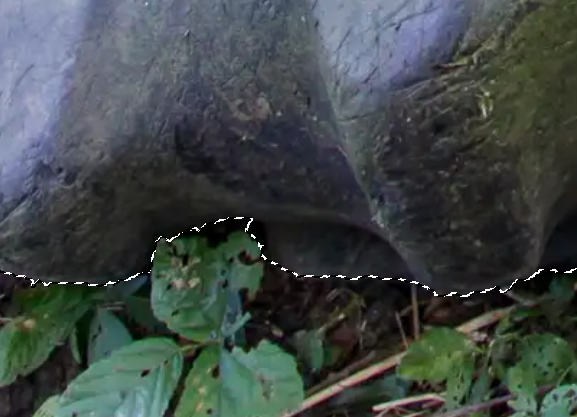
15. Add Area at Bottom
There is also an area at the bottom of the tyre that needs to be added.
16. Add and Subtract

But when adding, an area that you don't want is also selected. That's OK. Just be patient and again switch to subtract (press and hold the Alt key).
17. Finished Selection
Now our selection is done.
18. Add Layer Mask
To clearly show the selection, I've added a layer mask.
Summary of Quick Selection tool
This task was trickier than the simple task, above. You need a little patience, and you must Add (+ plus), and Subtract (- minus). Undoing won't help, you will keep getting similar unwanted areas.
While working with the Quick Selection tool it is important to pay attention to where you are clicking or dragging.
Tips
- If you click and drag, drag away from an edge. If you drag towards, or close by an edge, it's easy to slip over the edge. This will lessen the accuracy of the tool.
- Use the tool at 100% hardness.
- Select the Add to Selection button and use the Alt key to temporarily switch to the Subtract option. Release the Alt key to return to the Add option.
- Zoom in to work accurately.
- Click very close to an edge. Only drag away from the edge.
- If you accidentally click in the wrong area, i.e. you add where you meant to subtract and vice versa, undo immediately, or this will ruin the accuracy.
This is an excellent selection tool and I've used it for many years. But it's only good when used as I've described. The Object Select tool is excellent, but you will often need to tidy up selections. The Quick Selection tool is perfect for that.
