Page updated: 14 June 2026
How to Transform a Selection
Transform Selection is a menu option, when you have an active selection: Select > Transform Selection. It is not a tool on the toolbar.
When making a selection of an object, such as a wheel, using the Elliptical Marquee tool, it’s often not easy to create an accurate selection straight off. The good news is that there is no need to. An approximate selection will do just fine. You can then fine tune it accurately, using Transform Selection (and other Transform tools).
Related tutorial: See the Add Motion with Motion Blur and Radial Blur Tutorial which uses this technique to make stationary car wheels spin realistically.
ON THIS PAGE
Step Viewer of Wheel Selection
Click on each step 1-11 to view the steps that are described in detail in the tutorial.
Summary of Steps
See the caption under the image for details about each step.
1. Lighten the wheel, to see detail clearly.
2. Object Selection tool selects whole car.
3. Drag Object Selection only around wheel.
4. Shows result of 3. Still imperfect, but may be good enough on some subjects.
5. Shows result of Step 3 with layer mask added.
6. Create selection with Elliptical Marquee.
7. Shows wheel is perfectly round.
8. Transform selection.
9. Edit > Warp to manipulate selection.
10. Finished selection.
Other Transform Tools
The following tools can also be very useful when transforming a selection.
- Select > Transform Selection
- Edit > Transform > Scale
- Edit > Transform > Rotate
- Edit > Transform > Skew
- Edit > Transform > Distort
- Edit > Transform > Perspective
- Edit > Transform > Warp
Additionally you can refine selections with other tools as well, including the powerful Select and Mask.
Transform an Elliptical Selection of a Wheel
1. Object Selection Tool
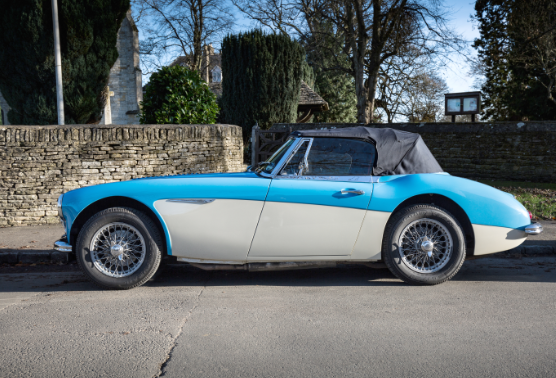
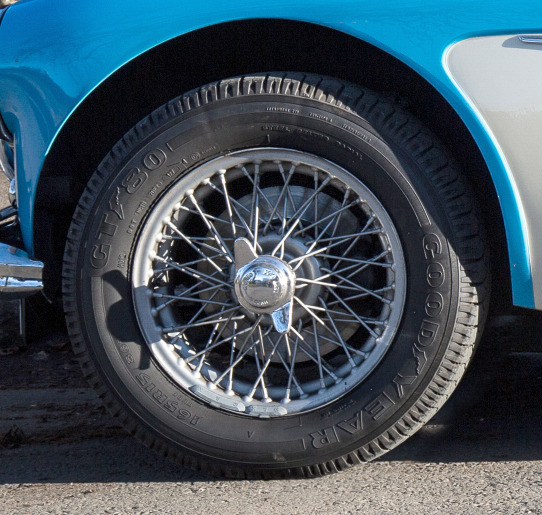
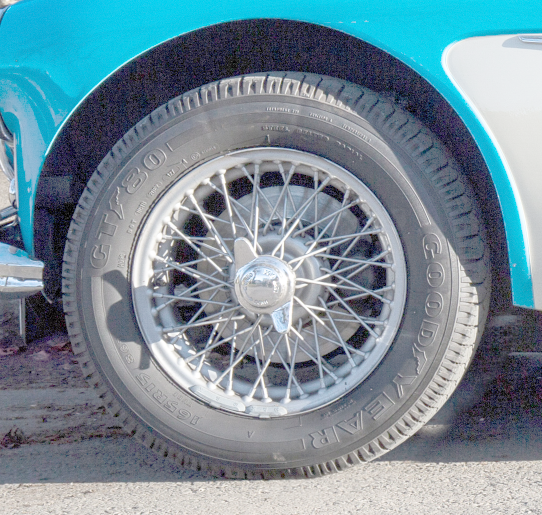
The first tool to try when making a selection of an element in a photo is the Object Selection tool. However brilliant it is, it won’t work all the time. In this image of a classic sports car, we will select the front wheel.
2. Wheel is too dark
The wheel is dark, as is the surrounding area, which makes it difficult for automatic selection tools to create an accurate selection.
It also makes it difficult for your to see how accurate the selection is.
3. Levels Adjustment Layer
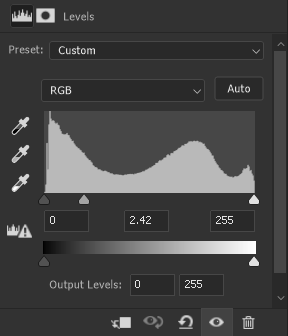
A Levels Adjustment layer is added, purely to lighten the area, so we can see the wheel more clearly. At the bottom of the Layers panel, click on the Adjustment button  . Select Levels.
The grey (middle) slider has been moved to the left to lighten. The Levels Adjustment layer can be adjusted later, or discarded. Alternatively you could brighten the image with Curves, or Brightness Contrast (although I recommend never using that for a permanent adjustment. See the tutorial on Levels [insert link]
4. Lighten the wheel
Now we can see the wheel more clearly. This will be essential later when we transform the selection accurately around the wheel. I've included it at this stage, so all following images are consistent.
5. Whole car selected

Using the Object Selection tool and positioning the cursor over the tyre, the whole car is selected.
6. Refine Object Select

Drawing around just the wheel with the Object Selection tool produces the selection below.
7. Unsatisfactory selection

This is still not acceptable and would need further refining. Instead, we will use the Elliptical Marquee tool, then Transform.
8 Poor selection result
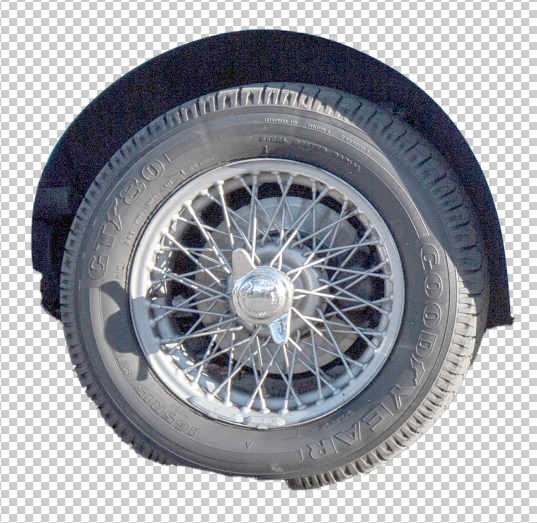
And this is how it looks when a layer mask is applied to the selection. Very unsatisfactory and that would require a lot of work to rectify. Instead, we will use the Elliptical Marquee tool, then Transform, to achieve an accurate selection.
9. Elliptical Marquee Tool
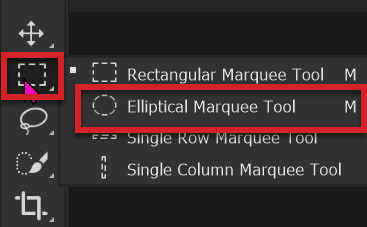
Select the Elliptical Marquee tool from the Toolbar. It shares the button with other Marquee tool. By default the Rectangular Marquee tool is the visible button, but it will show the last tool used.
10. Feather 0px

Consider feathering (blurring) the edge, to help blend your edit into the photo. A feather of 0 will produce a hard edge. The feathering amount depends on the size of the area you are selecting, so I suggest a feather of around 2px, but experiment if that is too much or not enough. Set the Feather amount before using the Elliptical Marquee tool.
11. Create rough selection

Click and drag to create an elliptical selection. This doesn't have to be accurate, as that's what we will do accurately in the next steps using Transform.
12. Wheel is not perfect circle
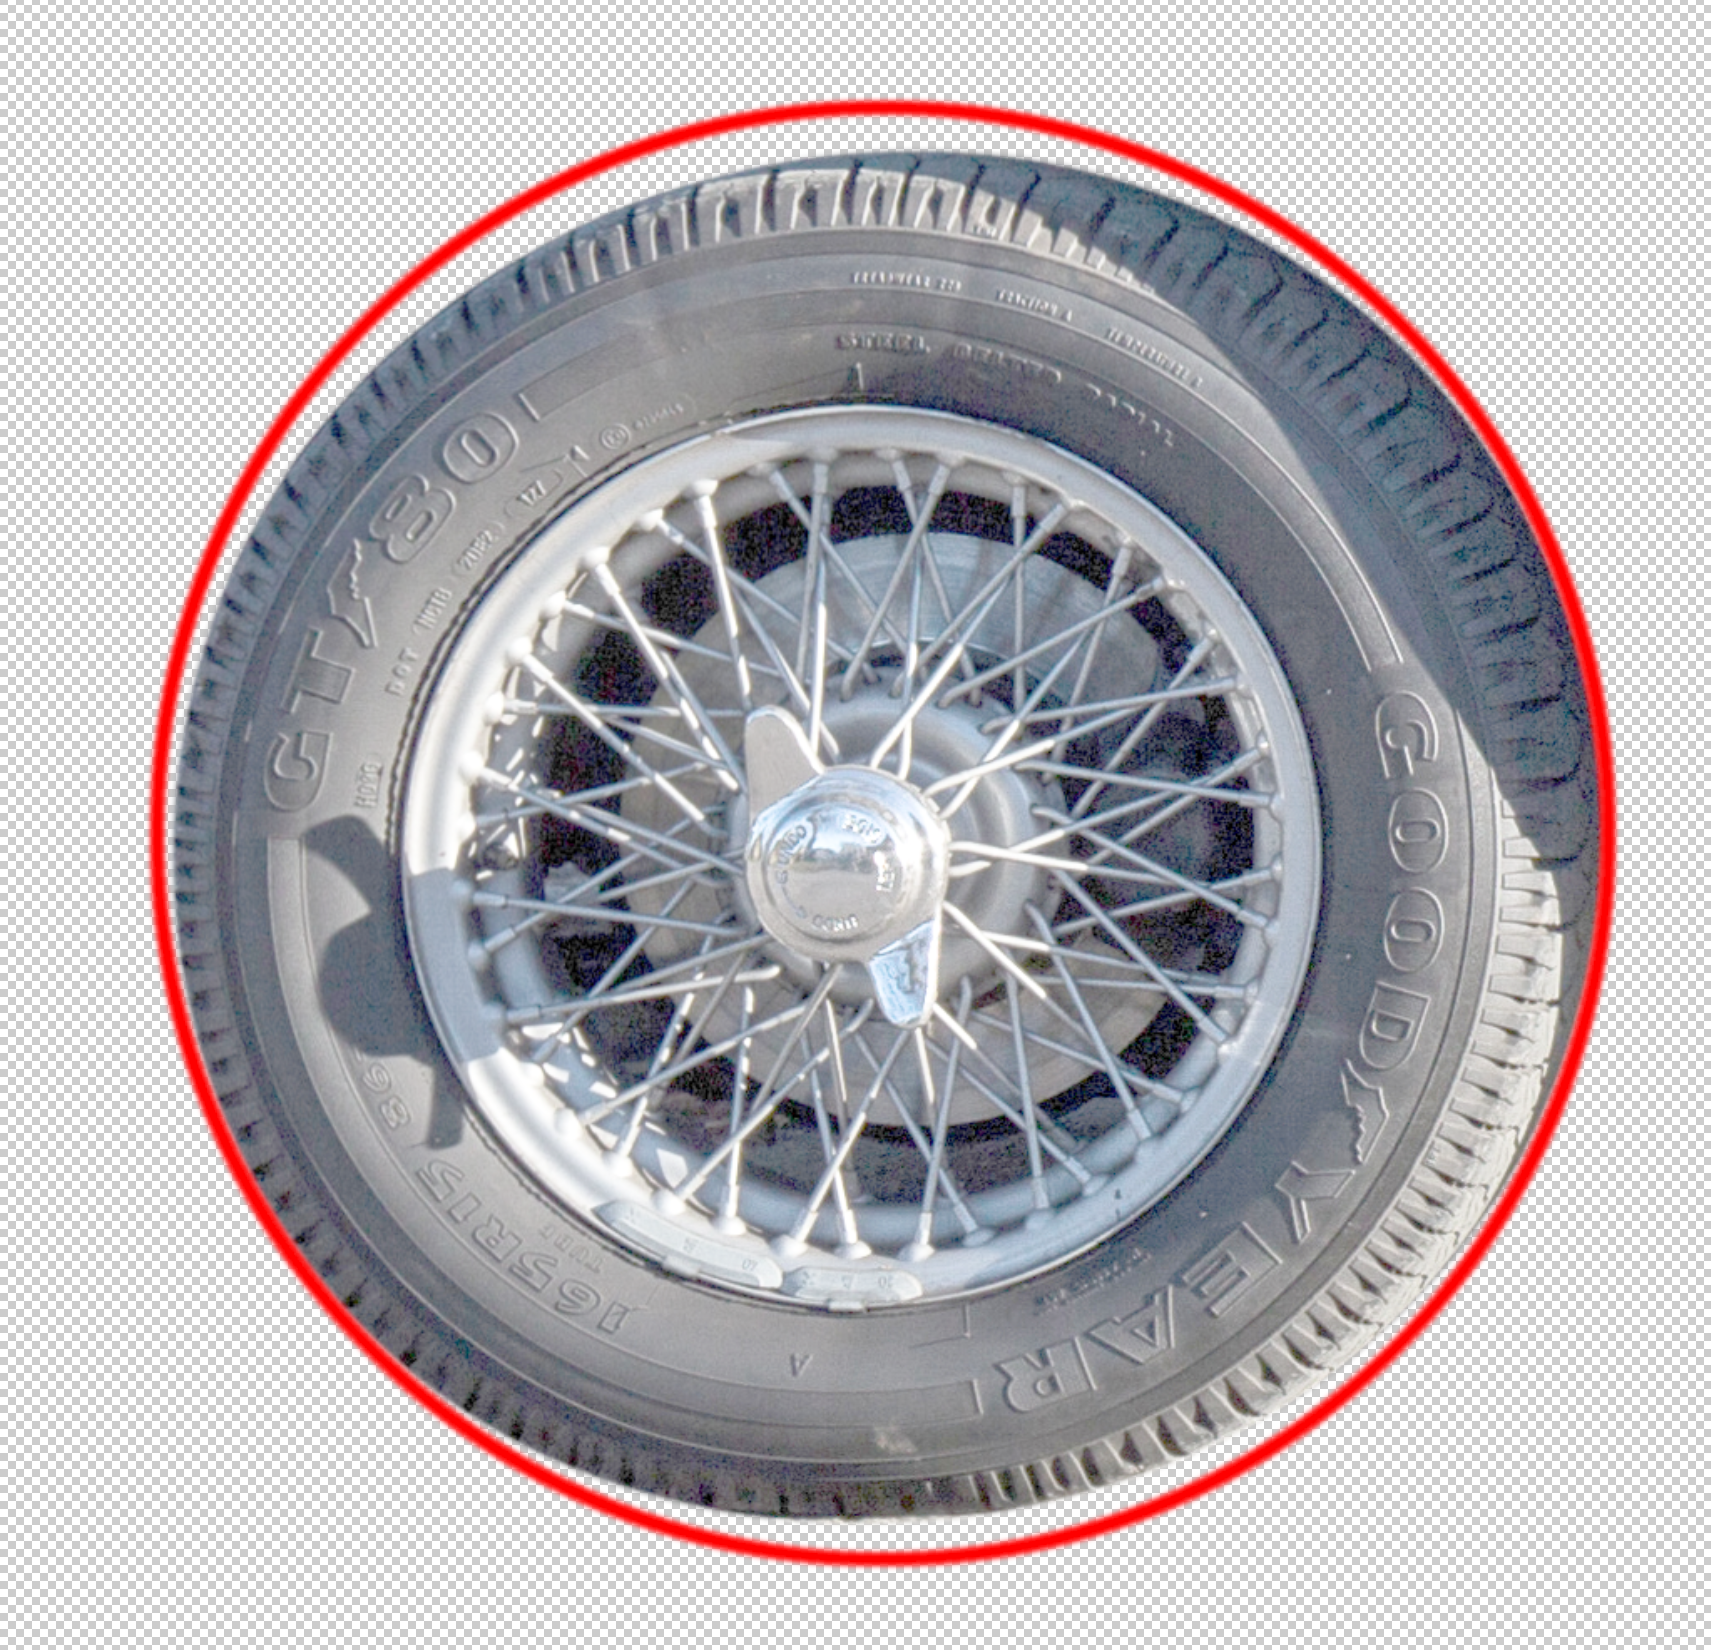
The red circle illustrates that the wheel is not perfectly round. We will need to Transform the selection.
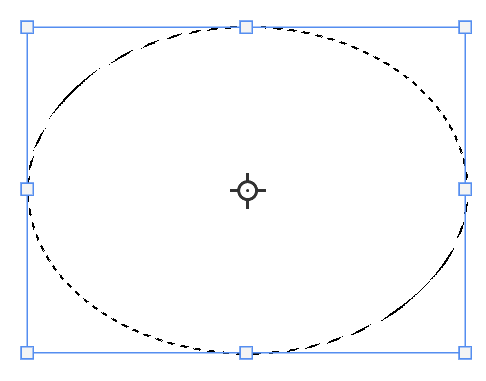
13. Transform Selection
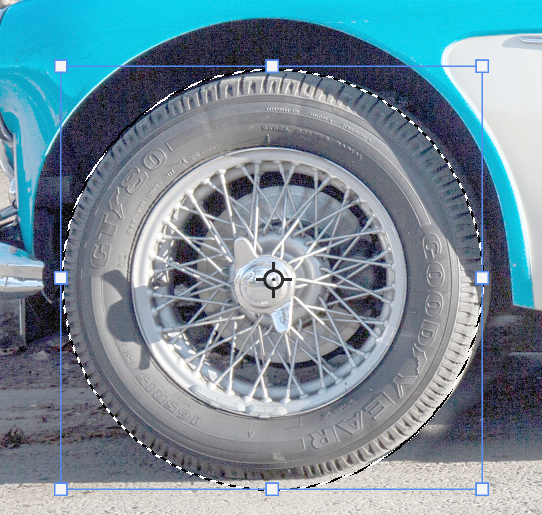
From the menu: Selct > Transform Selection.
Click and drag any of the white "handles" to adjust. In recent versions, the aspect ratio will be maintained, whichever handle you drag. Press and hold the Shift key to adjust each handle independently.
14. Acceptable selection
This isn't perfect, but it is often good enough for many situations. In this image, there is an imperfect fit around the 2 o'clock and 8 o'clock positions, as well as at the bottom of the tyre, where it is flattened against the road. Sometimes you can't achieve perfect accuracy by Transform Selection alone and will need to use other Transform tools.
15. Transform menu
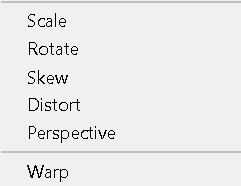
From the menu: Edit > Transform. You then have several tools; Scale, Rotate, Skew, Distort, Perspective, Warp. I've found Distort, Skew and Warp to be the most effective for most situations. In this case, select Warp.
Despite the wheel not being perfectly round, we now have a good selection.
16. Warp for perfect result

A grid and handles will appear over your selection. You can either drag the handles (small blue circles on the end of arms), or just click and drag anywhere in the selection. This allows you to make changes to one area, while leaving other areas unchanged. Note that I've adjusted for the flat area at the bottom of the wheel, where it meets the road.
Summary
Transform Selection is a very useful tool in achieving accurate selections.
If you are making a selection of an object, such as a wheel that was photographed at an angle and therefore doesn't appear as a perfect circle, Transform Selection will be very helpful. You may also have to do more than simply resize the selection, such as using skew, distort or warp, to make it fit.
