Page updated: 24 March 2026
Convert Point Tool
An essential tool used in conjunction with paths and anchor points
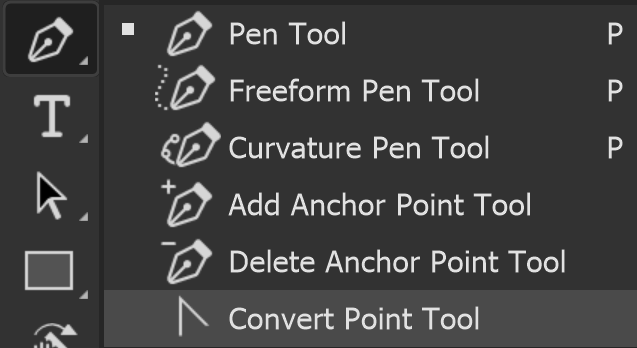
The Convert Point Tool allows you to convert anchor points between smooth points and corners.
If an anchor is a corner, click and drag the anchor to introduce handles, with which you can control the curve.
If handles and curves already exist on an anchor, when you click it with the Convert Point Tool, it resets it to a corner, i.e. it removes the curve. You would need to click and drag to reintroduce the handles.

ON THIS PAGE
Tool Presets

You can create and save a Tool Preset for any tool. This will remember settings that you choose. Presets for brushes are much more useful than for some tools. If you wish to use presets, you have the option of either creating a tool preset or a brush preset. Right click on the Tool Presets button to reset the tool to default settings.
How to use the Convert Point Tool

When you have an existing path, you can delete anchor points from it with this tool. However, if you are using the Pen Tool, Freeform Pen Tool or the Curvature Pen Tool, you can just click on an existing anchor to delete it. The cursor will indicate this, showing a - (minus) sign.
1. Anchor Points placed accurately

Here is the completed path. However before creating and positioning the handles, we need to ensure the anchor points are accurately placed.
2. Select Convert Point Tool

Select the Convert Point tool, which shares the button with the Pen tool.
3. Zoom in

Zoom in, as I've done here. This is essential for accurate positioning of the anchor points.
Note the cursor, which is the regular icon for the Convert Point tool.
Don't click on an anchor point yet. If you do and then try to move the anchor point, you will move the whole path.
4. Direct Selection Tool

Press and hold the Ctrl key and then click on an anchor point. Note that you now have a different cursor. By holding the Ctrl key, you have temporarily changed the tool into the Direct Selection tool.
Now you can move each anchor point individually.
Use the arrow keys on the keyboard to "nudge" the anchor point.
Note that if you try to click, that will add the handles and the Convert Point tool will then be expecting you to drag and position the handles.
5. Ctrl + click to select

Note that after you have pressed and held the Ctrl key, then clicked on an anchor point, it turns solid in the color you set in options.
You can now click on each anchor point in turn. You don't need to keep pressing the Ctrl key.
6. Accurate Anchor Points

Zoom in close and take care to position each anchor point accurately. In the case of this egg, if the outline is indistinct, then consider what you want to achieve. In this example I want a perfect selection of an egg and I will then mask (erase, but better) the background, then add a new different colored background behind the egg.
So I will ensure that I place the anchor points within the egg. If I lose a very slight part of the edge, it won't be seen.
7. Check Anchor positions

Go round each anchor point and check and adjust their position, using the arrow keys on the keyboard.
8. Adjust Handles

After carefully positioning all the anchor points, I'm ready to add and adjust the handles, that control the curves.
9. Click Anchor & Drag

With the Convert Point tool, click on an anchor point and drag in the same direction as you added the anchor points. This creates the handles, that are a key part of using the Pen tool. We'll get back to these in a moment, but for now, just click and drag on each anchor point to create the handles.
10. Establish Handles

I have clicked and dragged the next anchor point and now have two sets of handles. At this point, I'm not trying to position them accurately.
11. Handles on each Anchor

I've now created handles at each of the anchor points, so it's time to start using the handles to control the curves.
12. Control the Curve

The shape of each segment (between the anchor points) is controlled by both the angle and the length of both of the handles, at each end of the segment.
If the curve is consistently the same shape, then as a general guide, each of the opposite pair of handles should be doing equal amounts of the work, i.e. they should be about the same length. Note the handles in this and the next step.
There is a "knack" to adjusting the handles, but you can only achieve that by having a go yourself.
13. Keep Curve Smooth

Although, using the Convert Point tool, you can adjust the handles independently of each other, you should keep your handles in-line, (i.e. straight), to ensure a smooth curve. If you don't have your handles in line you will get a kink in your curve.
In this screenshot and the next, please note how the handles are in a straight line as indicated by the green lines.
You can also adjust the curves by clicking directly on the path and dragging.
Beginners will probably find this easier.
Summary of the Convert Point Tool
You can select the Convert Point Tool, but often it's not necessary to do so. If you're using the Pen or Freeform Pen tool, press and hold the Alt key and it will turn the Pen Tool into the Convert Point Tool, while the Alt key is pressed. When you release the Alt key, the tool reverts back to the Pen, or Freeform Pen Tool, thus saving you time switching between tools.
