Page updated: 14 June 2026
Layer Masks
Learn how to use one of Photoshop's essential tools
Layer Masks are one of the most used and most important tools in Photoshop. They are non-destructive and are permanently editable, giving you great flexibility when masking unwanted areas of the photo.
Layer Masks allow you to mask parts of a layer. When an area is masked, it is not visible and appears as if it has been erased. The result is the same as viewing a layer where part of the layer has been erased.
Using a Layer Mask is much more flexible than erasing. Masking is non-destructive and allows you to unmask any area, at any time, while the image remains unchanged. The changes are only being made to the mask and this is permanently editable.
Related subjects;
Adjustment Layers
Layers Basics
The Histogram
ON THIS PAGE
Things to Understand About Layer Masks
- Foreground & Background Colors are an integral part of using Layer Masks.
- Layer Masks are black and white (and shades of Grey).
- White = Visible.
- Black = Masked (hidden).
- Gray = partially hidden/visible.
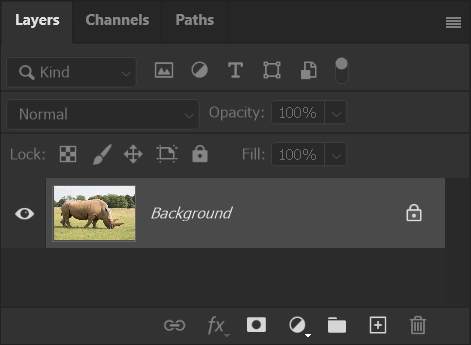
- You can add a Layer Mask to any layer by clicking on the Layer Mask button at the bottom of the Layers Panel.
- Layer Masks are included automatically with any Adjustment Layer you add.
- When you have a selection active and add a Layer Mask, or an Adjustment Layer, the selection is applied directly to the Layer Mask.
- To edit an existing Layer Mask, you must select it by clicking directly on it. If you just select the layer, your actions will be applied to the layer, not to the Layer Mask.
- You can have only one pixel Layer Mask per layer. If you add a second, it will be a vector mask.
- You can add a Layer Mask to a Layer Group, which is a method to use a second Layer Mask on an image.
- You can have multiple Adjustment Layers, each with their own Layer Mask, to edit different parts of the image in different ways.
- You can invert a Layer Mask by Ctrl+I.
- You can view and edit a Layer Mask directly, viewing the mask in black and white. This is very useful in checking a Layer Mask and seeing things that you can't see directly in the image.
How to Use Layer Masks
There are different ways to use Layer Masks. You can add a Layer Mask, then edit it with various tools and selection tools. Or you can create a selection and apply the Layer Mask to the active selection.
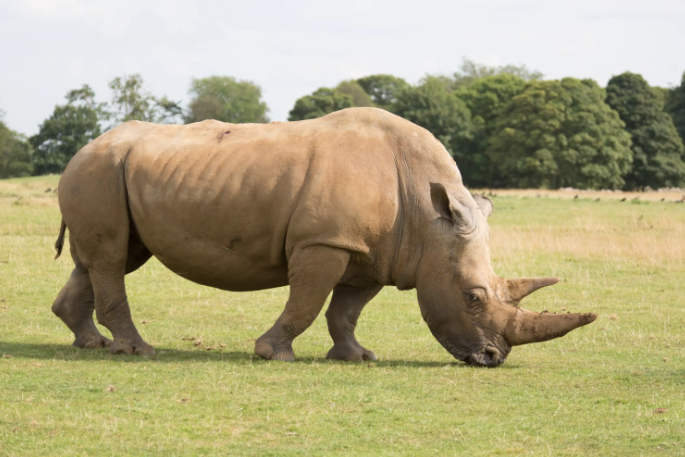
In this task I will first make a selection of the rhino and then add a Layer Mask, which will effectively remove (mask) the background. We can then add a new background and I will add an empty layer and fill with color.
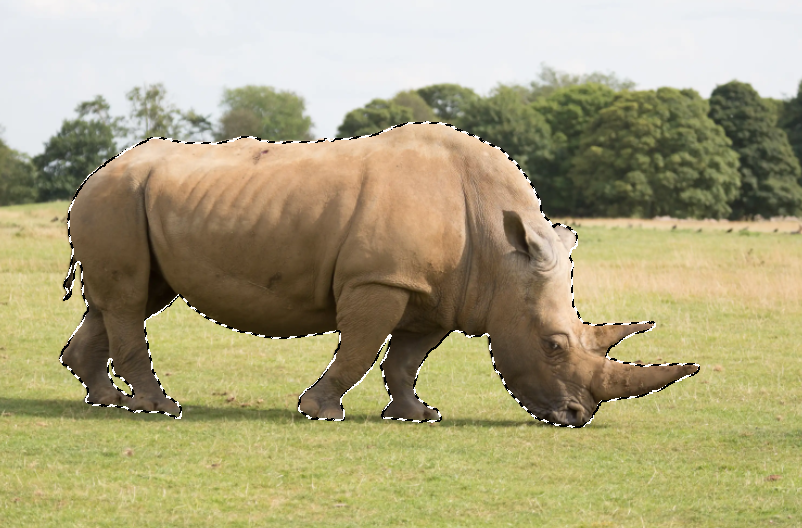
1. Make a Selection
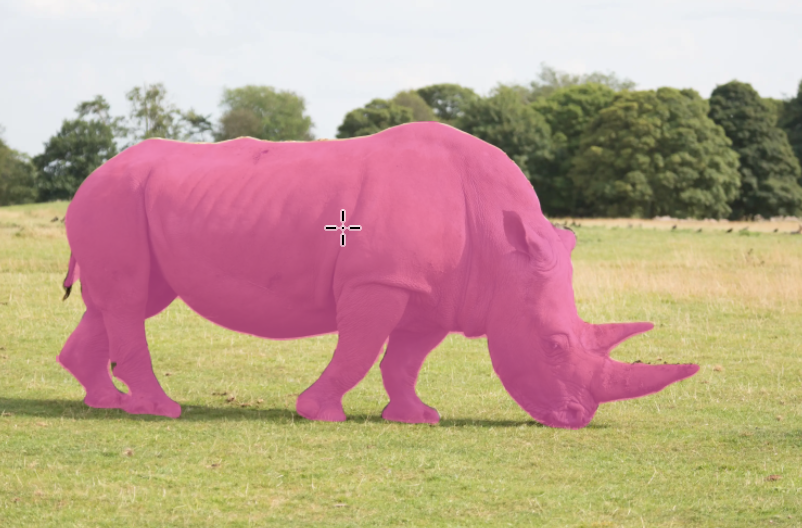
I've used the Object Selection Tool to make a selection. Just position the cursor over the object and the object it finds is highlighted in pink / pale magenta. Just click to create a selection. In this case it's done a great job of making a good selection.
See here more information on the Object Selection Tool.
2. Object Selected
The selection looks good, but you don't really know how good until you apply the Layer Mask.
Sometimes the selection doesn't look great, but when you apply the Layer Mask, it can be better than was indicated by the "marching ants".
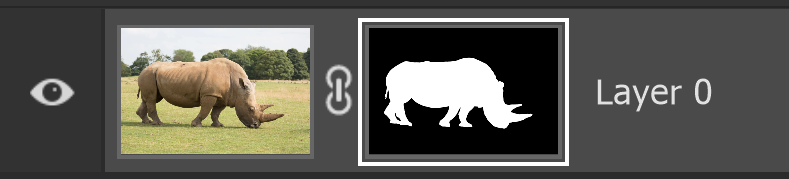
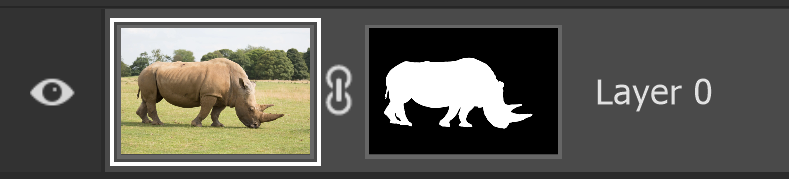
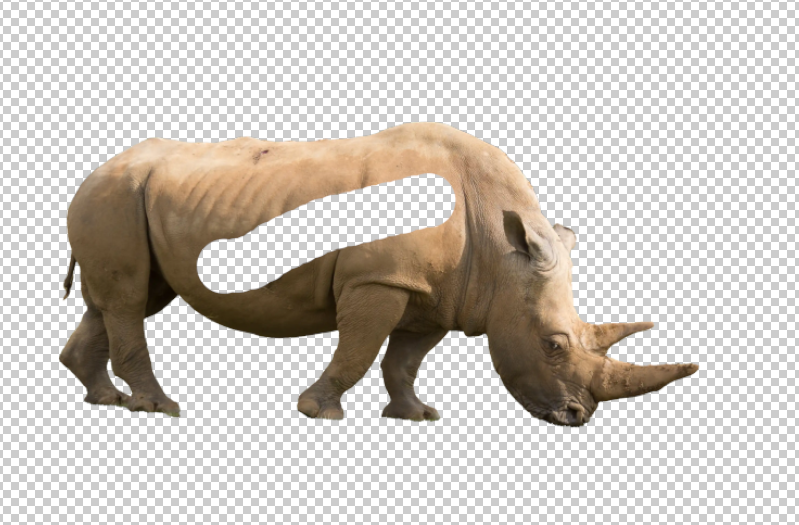
3. Add Layer Mask
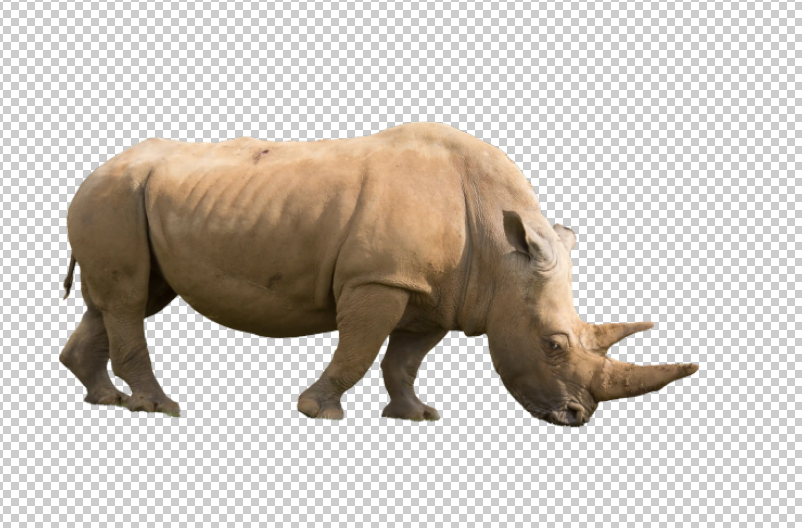
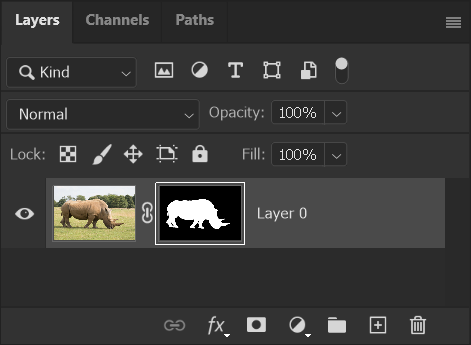
In this case the Object Selection Tool has done a good job of making a selection.
The white/gray checkerboard pattern represents transparency in image editing programs.
Although the mask looks good, I always view the image against a temporary layer with a different color background. This shows up any flaws in the layer mask. In this image, I don't think it's necessary, but I'll share the technique, as I find it very useful. In the next steps I will add a new layer, then fill with a color that shows the rhino selection very clearly.
4. Add Empty Layer
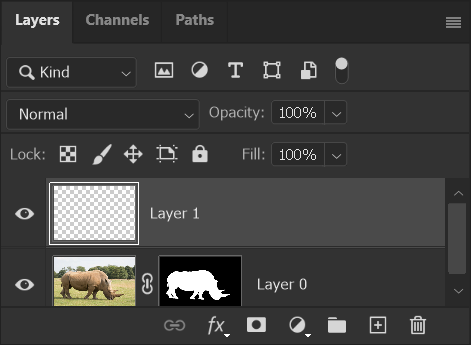
To view the layer and examine the quality of the Layer Mask clearly, I will add a new empty layer, that I will fill with a color.
I use this technique all the time, to view the quality of the Layer Mask and then refine if necessary.
5. Move Empty Layer beneath Object Layer
When you add a new layer, it is always added immediately above the currently selected layer.
I have clicked on the layer to select it, then dragged it beneath the layer of the rhino (layer 0).
Watch for the blue line that indicates where the layer will be moved to.
6. Empty Layer Underneath
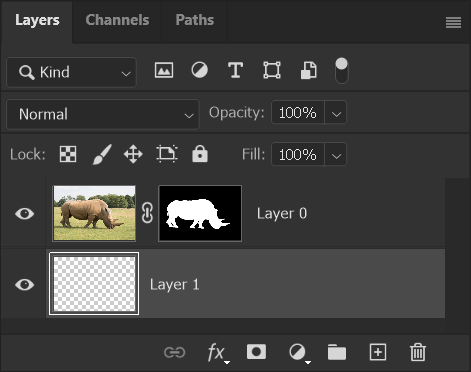
The empty layer is now underneath the image layer.
7. Fill with Color
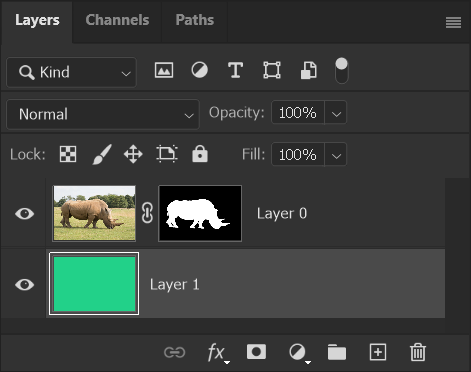
I have filled with a color. To fill a layer, go to the Edit menu and select Fill, then in the Contents box, select Color and click in the Color Picker to select a color.
8. Color Shows Detail
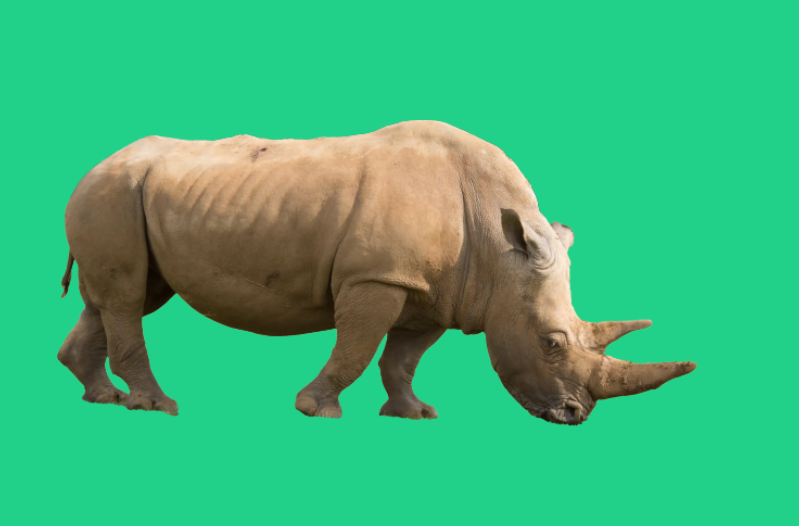
The colored layer can be seen through the area that was masked with the Layer Mask.
Adding a colored layer, as I've done here, is a technique that I use a lot when masking, so I can check the quality of the layer mask. You can then edit the layer, or delete it.
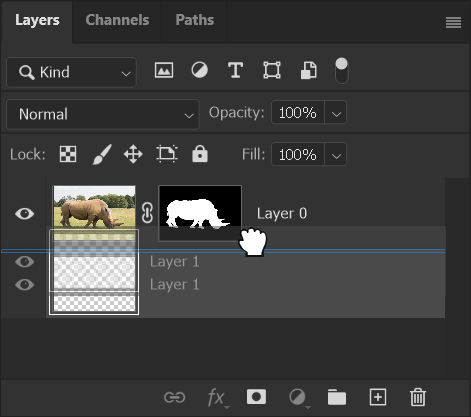
9. Select Layer Mask
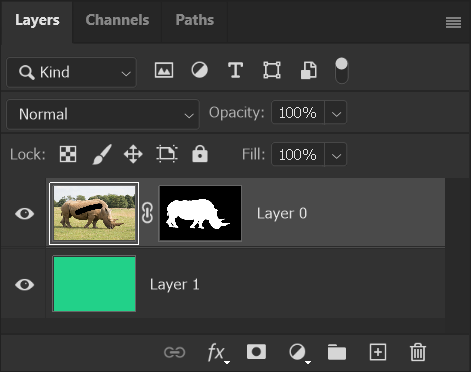
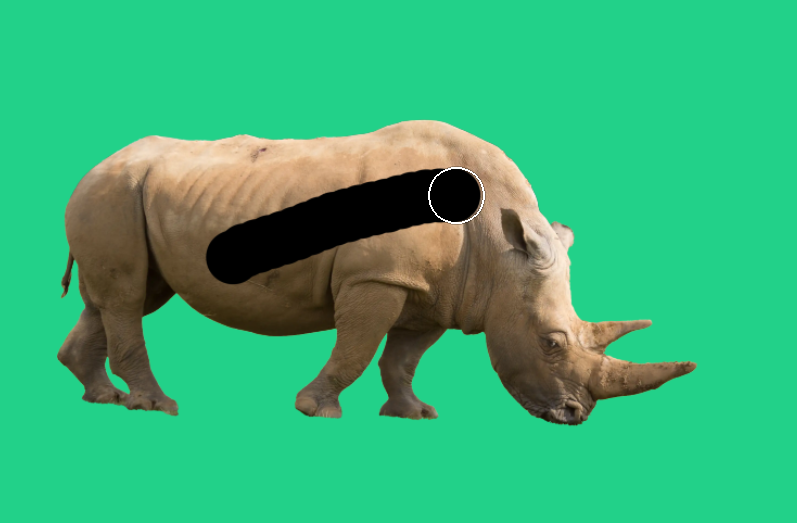
If you edit the layer mask, make sure you select it first. Here I have not selected the layer mask, so the layer is selected. When I brush with the Brush tool and black, I am painting directly onto the image layer. If this happens, undo (Ctrl+Z), or click the previous state in the History panel.
You can also see the black line on the layer thumbnail on the image layer.
10. Edit Layer Mask
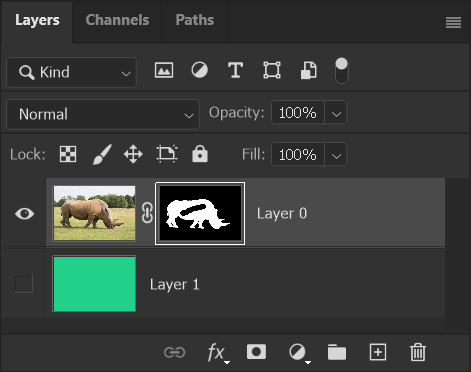
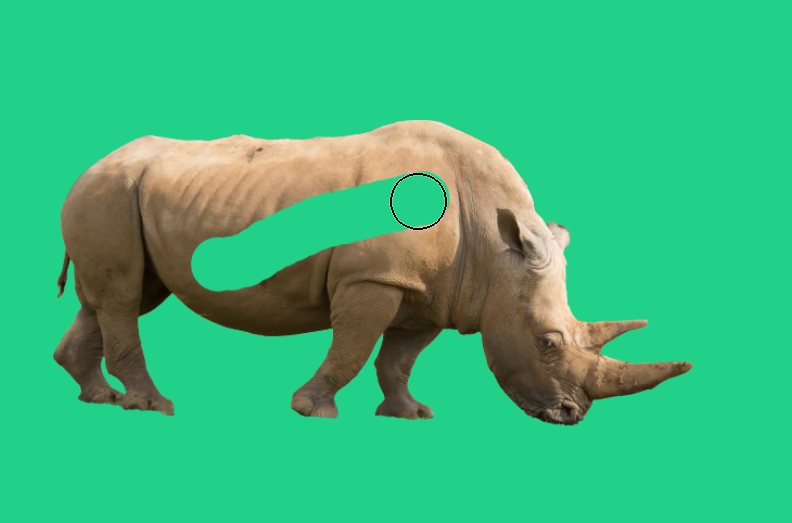
To edit the layer mask, click on it to select it. You will see a white highlight around the layer mask.
This time when I paint with the Brush tool and black, on the layer mask, it masks part of the image.
11. Layer is Selected
The white highlight around the layer thumbnail shows the layer is selected, not the layer mask.
12. Layer Mask is Selected
The white highlight around the layer mask shows the layer mask is selected, not the layer.
13. View Transparency
The colored layer is now hidden, so we see transparency. Select white and paint with the brush to unmask areas of the image.
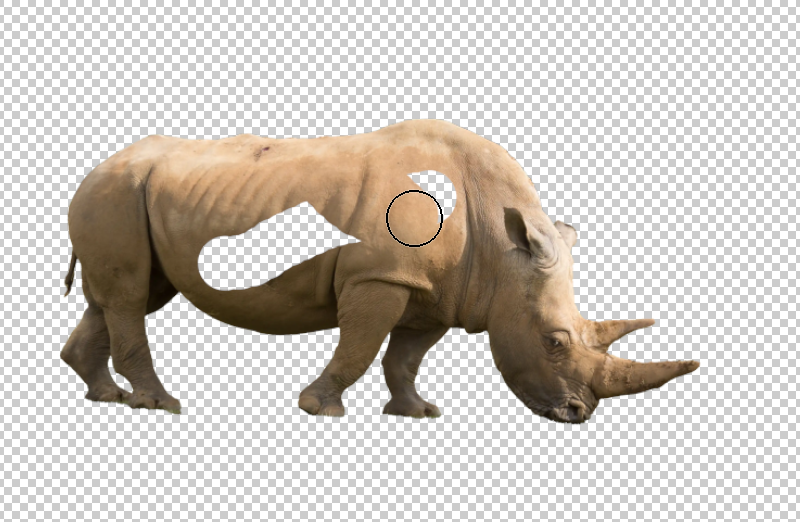
14. Paint with White

I have painted a little more with white, to unmask the image and show more of the rhino.
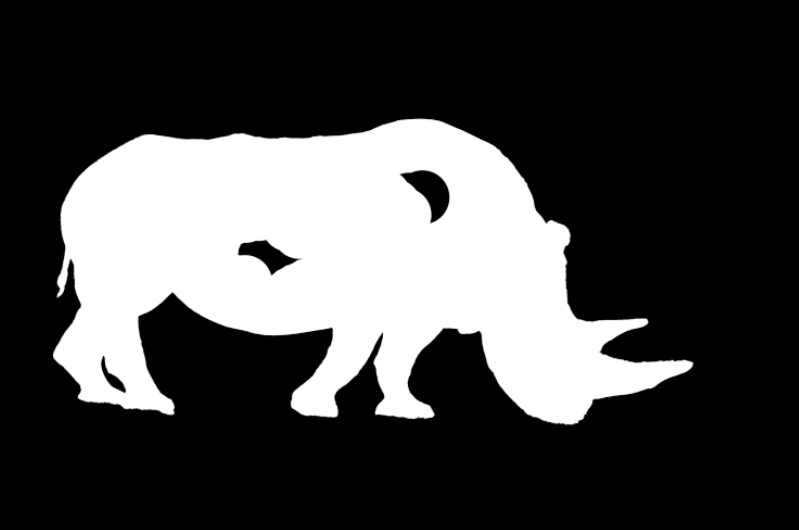
You can also inspect the layer mask directly. Press and hold the Alt key and click on the layer mask. You will see the layer mask in black and white. This can be helpful to check the masking and it can show up areas that have been missed, which can sometimes be easier to see in black and white, than in an image.
You can edit directly onto the layer mask. In this layer mask, I can see two areas of black in the rhino. I can paint over them with the Brush tool and white. I can either do this while viewing the layer mask, or viewing the image - provided the layer mask is selected.
After viewing the layer mask, to return to seeing the image, just click anywhere on the image layer, outside of the layer mask.
15. Save in .psd Format

If you have spent any time creating and editing the layer mask, it's a good idea to save the image in a format that supports layers, such as .psd, or .tif. If you save in the jpeg format, the image will be saved as you see it, but you will lose the layer and layer mask and not be able to edit it in the future.
For more information, see Image Formats.
Summary of Layer Masks
Layer Masks are a very important and essential tool in image editing, particularly to a good quality. They allow you to edit non-destructively and are permanently editable.
Troubleshooting
Image layer is selected, instead of Layer Mask.
If you select the layer, but not the layer mask, then what you do will affect the layer, instead of the layer mask. Beware of accidentally painting directly onto your image, instead of the Layer Mask. Click directly on the Layer Mask thumbnail to select it. When you click on the layer mask, it is highlighted - see steps 11 and 12. If you click any other part of the layer, or the layer thumbnail, you will be working directly onto the image itself. Get used to checking whether you have the layer, or the layer mask selected.
Nothing happens when you paint.
If you are painting on an unmasked area of an image with white, nothing will happen, as white reveals, but the image is aready revealed. Switch foreground and background colour (press the X key). Make sure you have selected the correct layer and that layer is visible. Also check that there is no current selection. From the Select menu, select Deselect if it’s available.
When you paint, the area is only partially erased or restored.
Press the D key to restore Default colour. If you paint on a layer mask with any color other than black or white, it will be interpreted as a shade of gray, which, on a layer mask affects opacity. Also check the opacity of the tool you are using in the Tool Options bar. For full effect it should be 100%, although if you are aiming at a more subtle effect, then choose less than 100%.
After making a selection, press Delete, but nothing happens.
Try pressing the X key to switch foreground and background colors. Then press Delete.
