Page updated: 14 June 2026
Lightroom Classic Library Views: Grid, Loupe, Compare, Survey & People
A Simple, Beginner‑Friendly Guide to Lightroom’s Viewing Modes
Lightroom Classic gives you five different ways to view and navigate your photos:
- Grid for viewing lots of images together
- Loupe for viewing one image at a time
- Compare for comparing two images
- Survey for comparing a number of images
- People View for viewing imagew with people in them
Each one is designed for a different stage of your workflow — from browsing thousands of images at once to making precise decisions between similar shots.
Most beginners only ever use Grid or Loupe View, and never realise how much faster their culling and organising becomes when they understand the strengths of each viewing mode. Grid View is perfect for big‑picture browsing, Loupe View helps you inspect a single photo in detail, Compare View lets you choose between two similar images, Survey View helps you evaluate a small group, and People View automatically detects and groups faces.
This tutorial walks you through each view step by step. You’ll learn what each mode is for, how to switch between them quickly, and how to use them together to build a smooth, efficient workflow for reviewing and organising your photos.
What You’ll Learn
- What each Library View is for — Grid, Loupe, Compare, Survey and People View
- How to switch between views quickly using keyboard shortcuts
- When to use Grid View for fast browsing and organising
- How Loupe View helps you inspect focus, detail and composition
- How Compare View makes choosing between two similar photos easier
- How Survey View helps you evaluate a small group of images at once
- How People View detects and groups faces automatically
- How all five views fit together into a smooth, efficient culling workflow
ON THIS PAGE
Switching Views

You can select each Library View from from the View menu.
However, if you are constantly switching back and forth, there are quicker ways to switch views.
In the menu, note the shortcut keys, (shown on the menu). Just press the key to go to that view. These shortcut keys are;
Grid - G
Loupe - E
Compare - C
Survey - N
People - O
I recommend you learn these, or at least the most common. G for Grid is easy and you'll use it a lot, so if you only remember one of them, make it this one.
An alternative to the menu, or shortcuts is using the Toolbar, which we'll look at next.
View The Toolbar
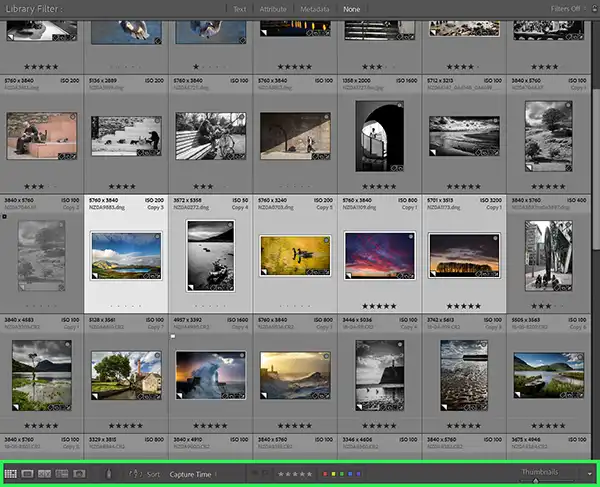
The Toolbar (when it's visible) sits underneath the images in Library Module (green highlight).
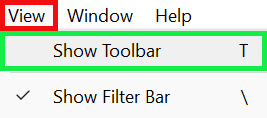
The Toolbar is useful for several things and I recommend you use it, but it may not be visible initially. To view the Toolbar, from the menu select: View > Show Toolbar.
Or press the keyboard shortcut T key (shown in the menu).
Lightroom Views


The Library Views are at the left of the toolbar. Click on each to change the view (or use the keyboard shortcuts, shown above).
Grid View (red) - Loupe View (green) - Compare View (orange) - Survey View (pink) - People View (blue)
Grid View
 Lightroom's Grid View, with 5 photos selected.
Click to view larger
Grid view is Lightroom’s command centre — the place where you can see your entire shoot at once. It’s designed for fast, visual organisation: you can browse hundreds of images, compare variations using Virtual Copies, flag favourites, view ratings and colour labels, and apply keywords and metadata.
Whether you’re culling a large number of images or managing a long‑term library, Grid view gives you the clarity and control to work efficiently and stay oriented inside even the largest folders or Lightroom Collections.
Loupe View
 Loupe View
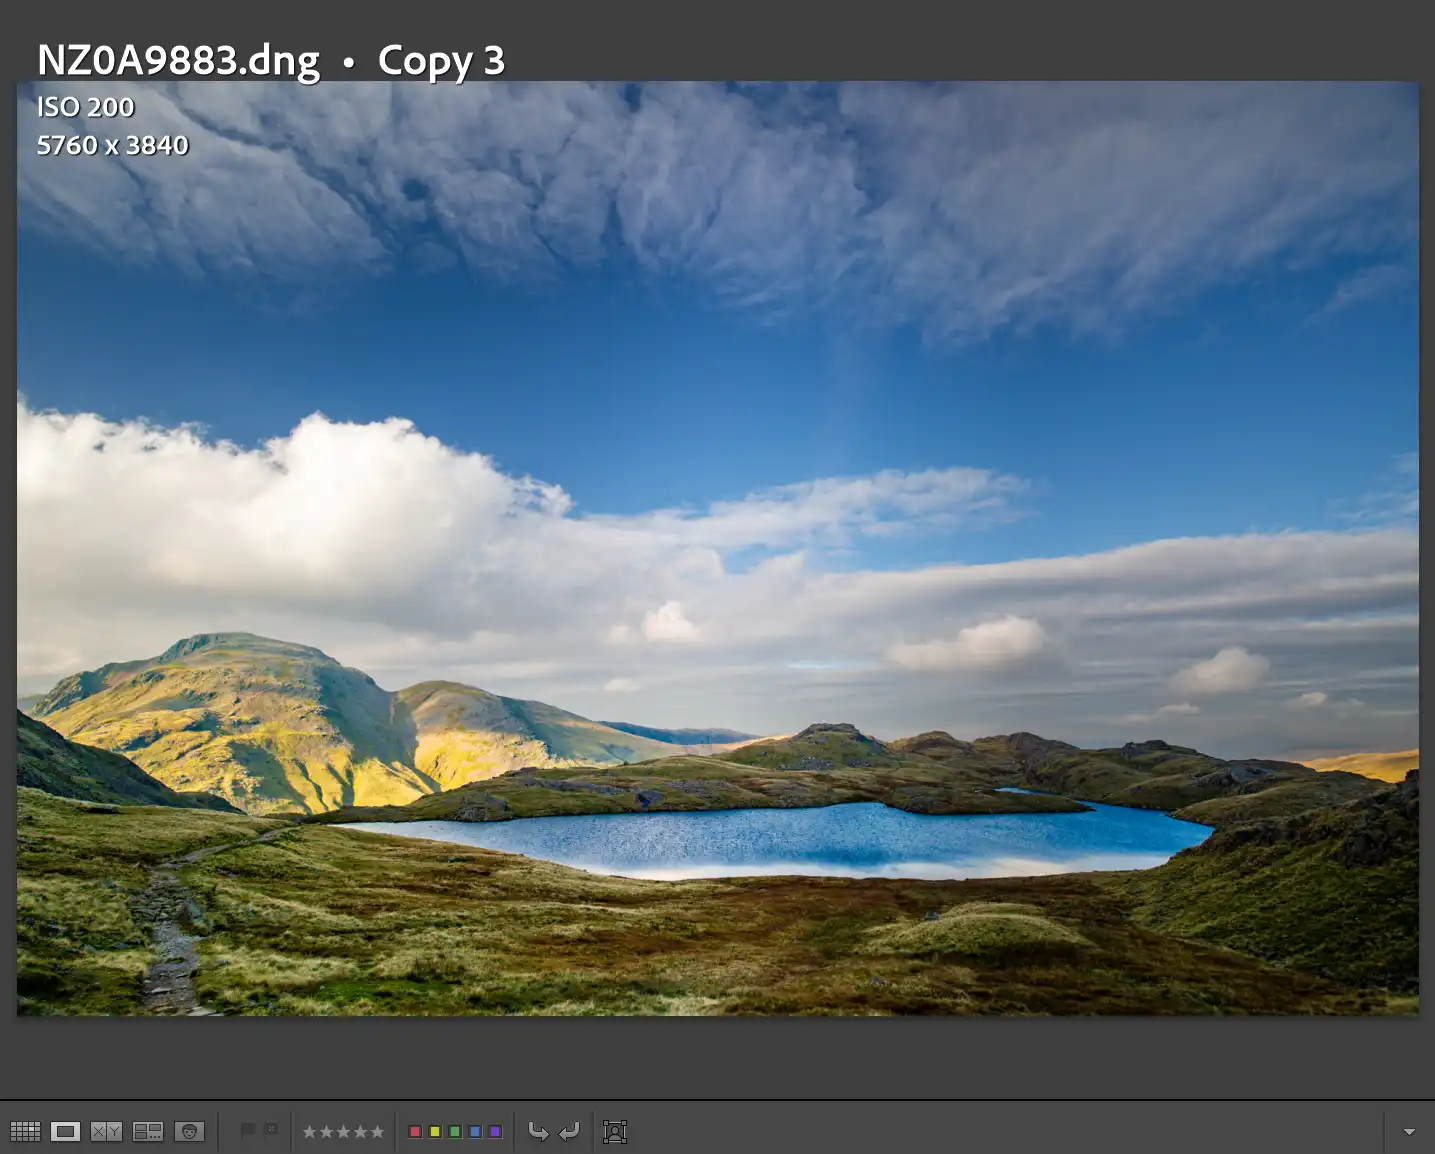
Click to view larger
Loupe view is where you view a photograph on its own. Instead of scanning thumbnails, you’re evaluating a single image at a size where focus, detail, expression, and overall composition and quality are easiest to evaluate.
If you highlight multiple photos in Grid View, in Loupe View, you will continually loop through only those images. This can be very helpful to compare several images fullsize, rather than using Compare or Survey Views. When you want to progress through all images, make sure that only one image is selected before entering Loupe View.
After culling, then editing images in the Develop Module, I will run through the images a final time in Loupe View, before exporting. In my experience Loupe View is faster than Develop Module for viewing images.
The Toolbar shows the star rating and color label. In this screenshot there is no star rating or color, label, but in the next step I have applied these.
Loupe View Background
 Choose background forLoupe View
Click to view larger
 Loupe View
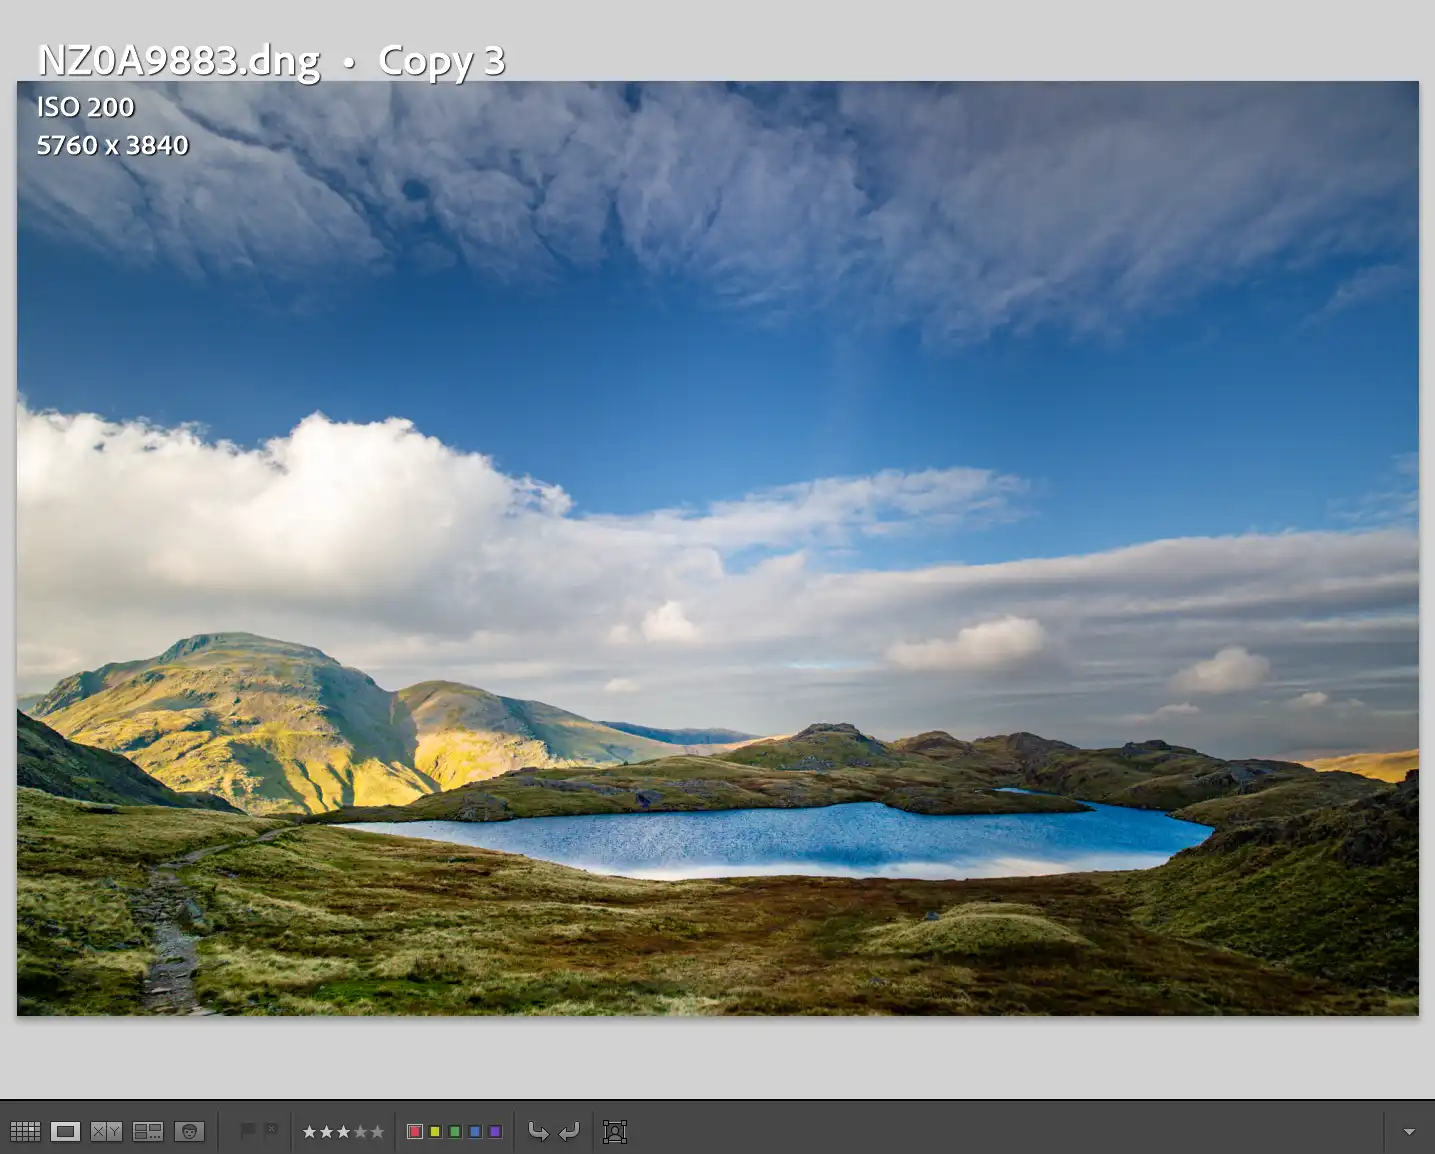
Click to view larger
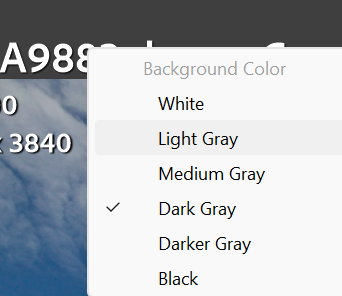
You can change the background color, around the image, by right-clicking on the bar at the top and selecting your preferred color.
The Toolbar shows the star rating and color labels. This image has a 3 star rating and a red color label.
Compare View
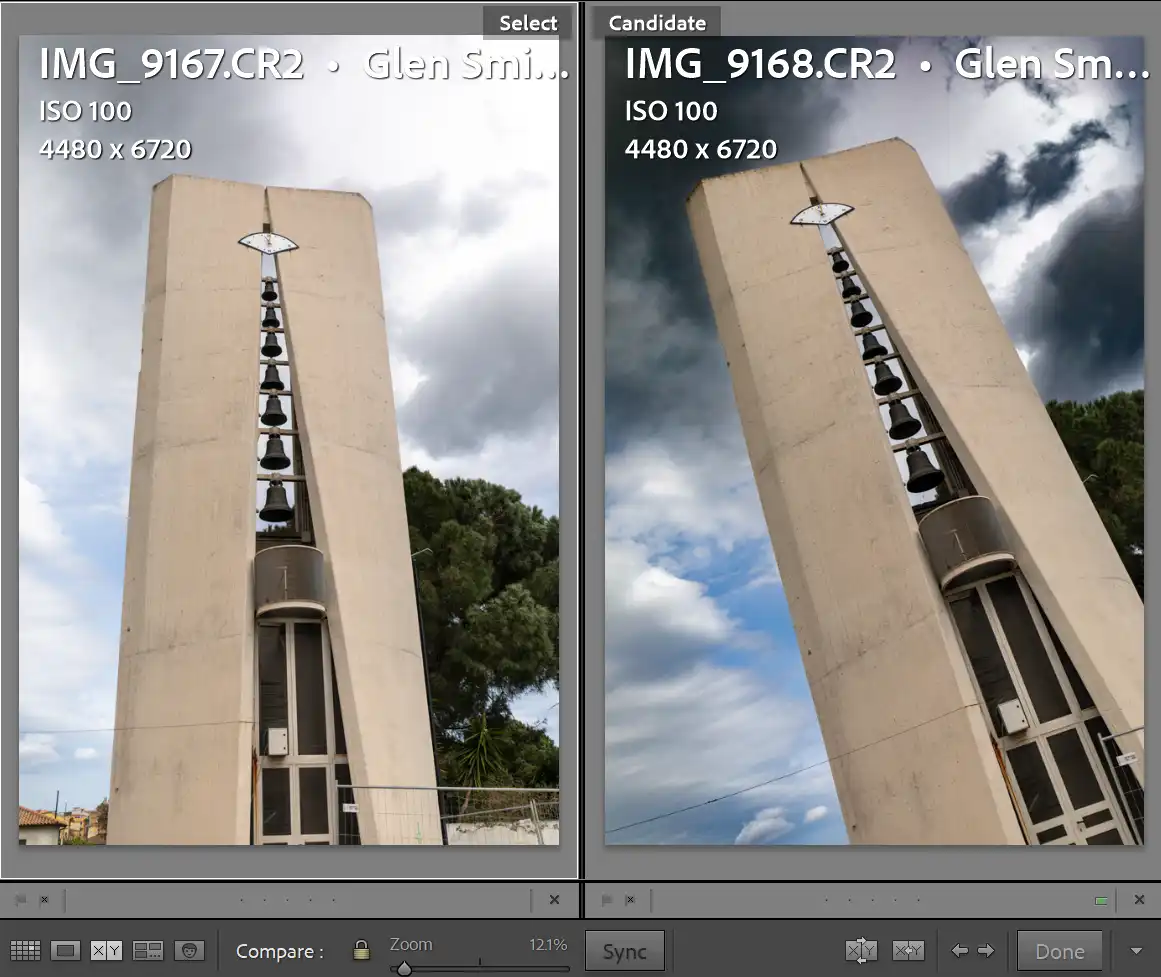 Two images in Compare View
Click to view larger
Use Compare View to compare two images. Compare any two images, but this is very useful for two very similar images. Seeing the images side by side can help make a confident choice between them. It shows a Select image alongside a Candidate, letting you flip through similar frames, check sharpness, evaluate expressions, and spot subtle differences that aren’t obvious in Grid or Loupe. Whether you’re choosing between near‑identical shots, or narrowing down a final set, Compare view gives you a clean, side‑by‑side workspace that makes tough decisions easier and more consistent.
To use Compare View, you start by choosing a Select image — the frame you want to judge everything else against. Lightroom locks it on the left. Then you move through the filmstrip, one image at a time, with each new frame appearing as the Candidate on the right. You can zoom, pan, and sync both images so you’re evaluating them under identical conditions. If the Candidate is better, you promote it to become the new Select and continue comparing from there. If it isn’t, you keep moving. This simple Select‑versus‑Candidate rhythm lets you work through a whole sequence of near‑duplicates quickly and consistently, without losing track of which frame is currently “winning.”
It's faster to use Compare View almost entirely from the keyboard. You tap the arrow keys to move Candidates forward or backward, press “X” to reject a weak frame, or “P” to flag a strong one. If a Candidate beats your Select, you hit the “Make Select” button (or press Return) and Lightroom swaps them instantly. Zooming is synced by default, so checking sharpness is as simple as tapping the spacebar. This keeps the whole process fast, fluid, and focused.
Survey View
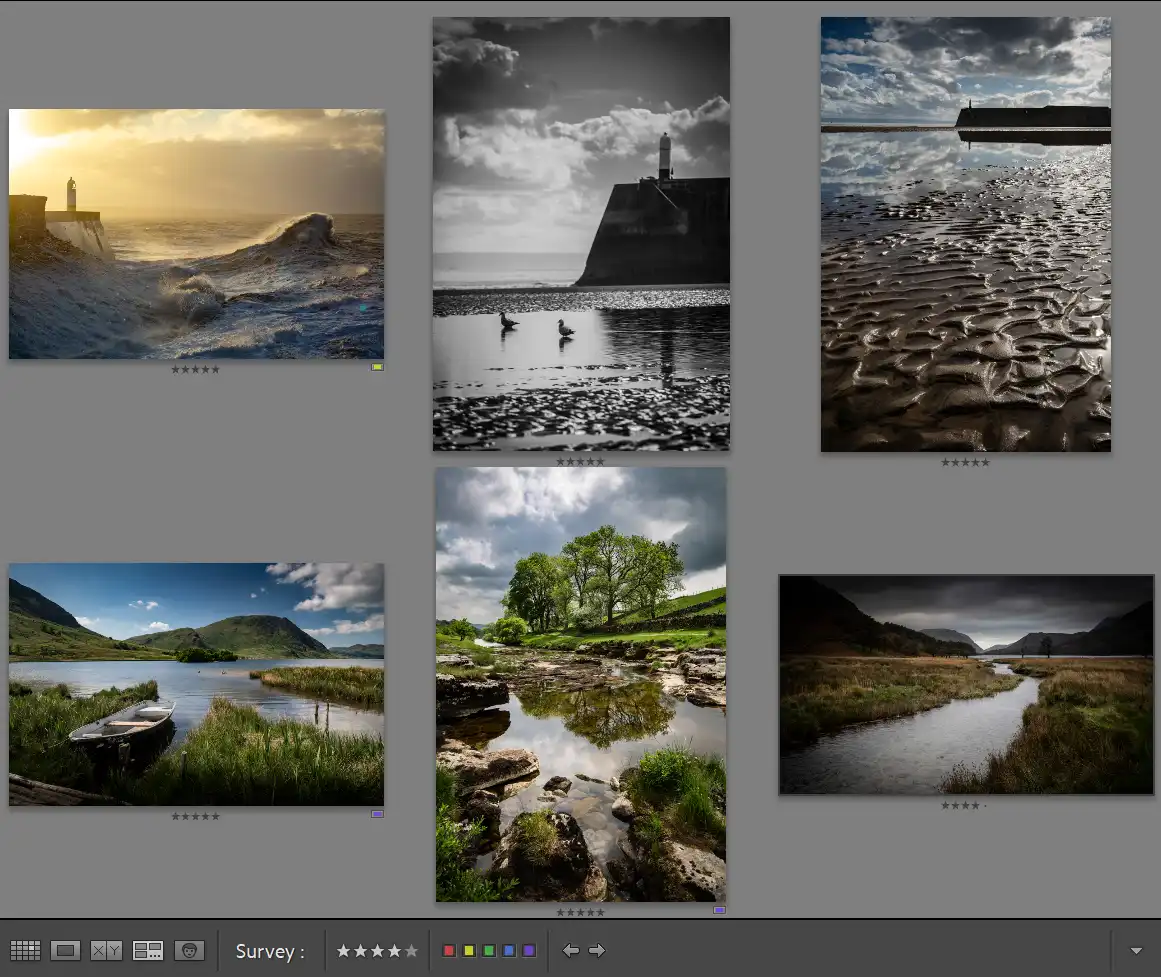 Six images in Survey View
Click to view larger
Survey view allows you to evaluate a whole group of images together. Instead of comparing pairs, Lightroom shows every selected image at once, letting you narrow your choices. It’s ideal for refining a portrait sequence, choosing the best angles from a location shoot, or reviewing variations of a product shot.
One downside of Survey View is that the more images you have in Survery View, the smaller they are. But as you deselect images, the remaining ones automatically get larger.
People View
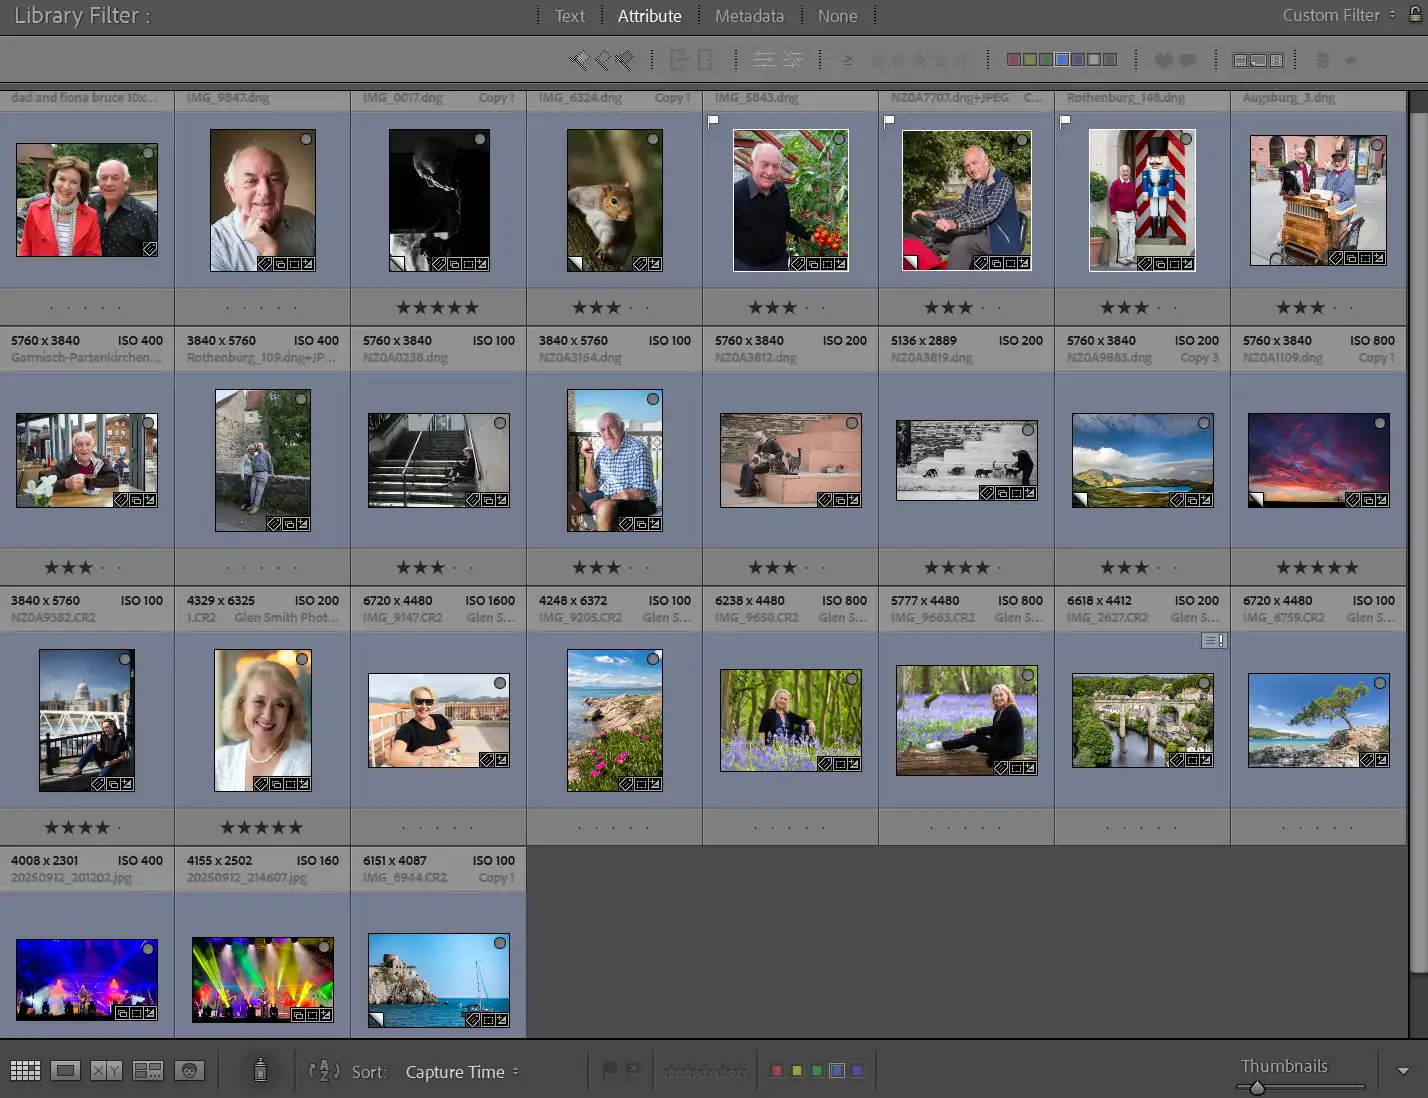 Grid View including images of people
Click to view larger
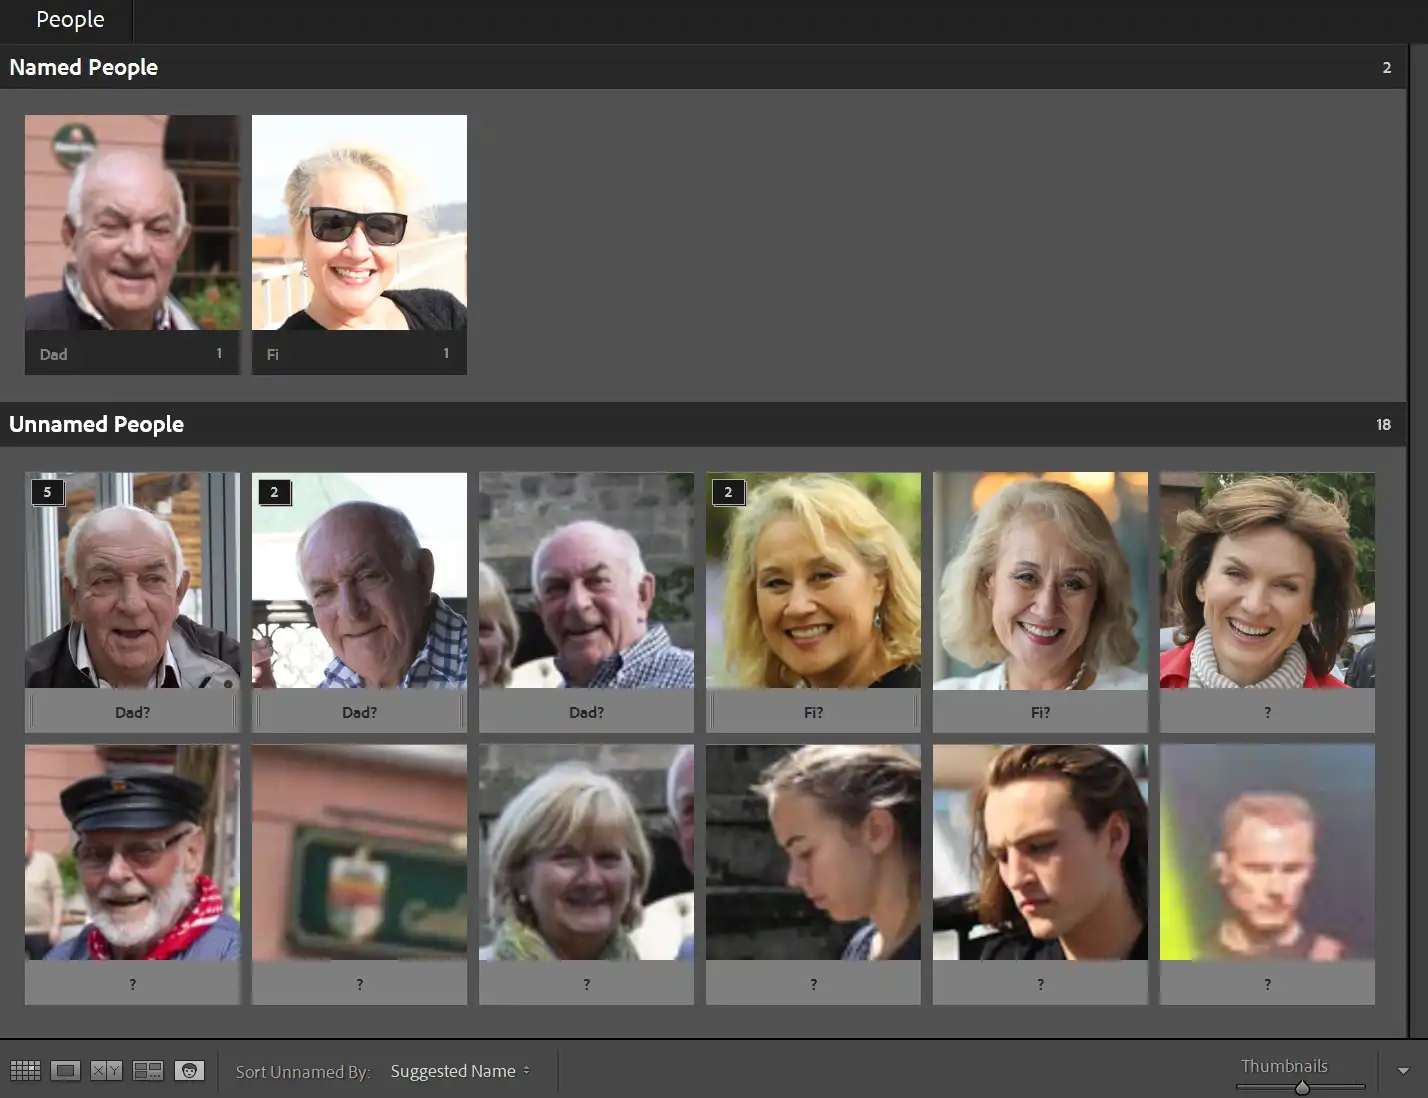 People View of same images
Click to view larger
People view is Lightroom’s face‑recognition workspace, designed to help you organise photos by identifying the people in your images. Instead of scrolling through hundreds of thumbnails, Lightroom groups faces automatically, letting you name individuals, merge duplicates, and build a clean set of person‑based collections. It’s especially useful for any project where the same people appear repeatedly. Once trained, People view becomes faster and more accurate, turning what used to be a tedious manual task into a quick, visual way to keep your library organised.
To use People view, you switch to the People workspace and let Lightroom scan your images for faces, which can take time, depending on the number of images. It will display clusters of similar faces, each representing a potential person. Move the cursor over the image and click to accept or reject, or name the person.
As you name more people, Lightroom learns from your choices and becomes better at recognising them in future. You can also drag unnamed faces into existing people, hide faces you don’t want tracked, or correct mistakes with a single click. Once set up, People view becomes a powerful way to filter your library — you can instantly pull up every image of a specific person, even across years of shoots.
This is a brief overview of People View. A more detailed tutorial will be coming very soon.
Summary
Lightroom’s Library module gives you several different ways to review and organise your images, each designed for a specific stage of the workflow. Grid View provides the broad overview — the fast, visual way to browse large numbers of images, apply metadata, and stay oriented inside big folders or Collections. Loupe View lets you evaluate a single photograph in detail, checking focus, and overall quality. Compare View is for choosing between two similar frames, showing a Select image alongside a Candidate so you can judge subtle differences with confidence. Survey View displays a group of images together, making it easy to spot outliers and narrow a set down to the strongest few.
People View works differently: it uses face recognition to group and identify individuals across your library, helping you organise shoots where the same people appear repeatedly. Because People View involves more steps and behaviours than the other views, it’s covered in a dedicated tutorial.
