Page updated: 14 June 2026
Lightroom Exposure vs Blacks vs Shadows
Understanding How Exposure, Blacks and Shadows Shape the Dark Tones
Introduction: Exposure vs Blacks vs Shadows
The Basic panel in Lightroom Classic includes several sliders that all seem to darken or brighten an image, but each one affects a different part of the tonal range. Exposure, Blacks and Shadows may appear similar at first glance, yet they each shape the lower half of the histogram in very different ways.
In this tutorial, you’ll learn exactly what each slider controls, how they interact with one another, and how to use them without crushing detail in the shadows or muddying the midtones. You’ll see how Exposure adjusts the overall brightness of the entire image, how Blacks set the darkest point in the histogram, and how Shadows recover or deepen detail in the dark midtones.
This is a practical, beginner‑friendly guide designed to help you understand the bottom half of the histogram and build a more confident, controlled editing workflow.
Related tutorials.
The HistogramPhotoshop Histogram Panel
ON THIS PAGE
Exposure
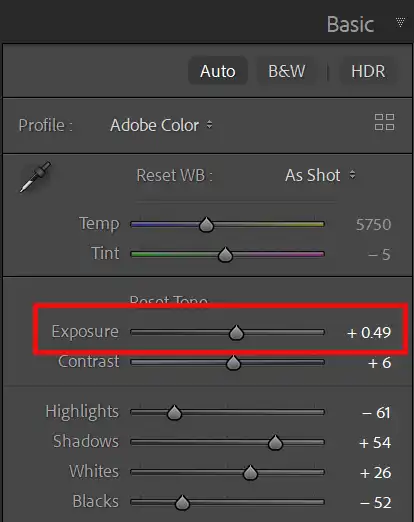
The Exposure slider adjusts the overall brightness of the entire image. It moves the whole histogram left or right, affecting shadows, midtones and highlights together. Exposure is the closest digital equivalent to changing the exposure in‑camera.
If the whole photo feels too dark or too bright, Exposure is the slider to start with. It sets the foundation for all other tonal adjustments.
Exposure affects the central part of the histogram most strongly, but it still influences the entire tonal range — including the darkest shadows.
Shadows
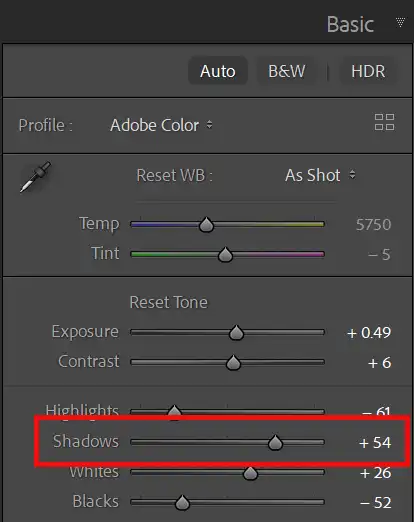
The Shadows slider controls the dark midtones — the area just right of the Blacks. These are tones that are dark but not pure black, such as shaded clothing, tree bark, hair detail and the darker parts of indoor scenes.
Increasing Shadows lifts detail in the darker areas without affecting the true blacks. Reducing Shadows adds depth and contrast, making the image feel richer and more dimensional.
Shadows are ideal for recovering detail without flattening the overall contrast of the image.
Blacks
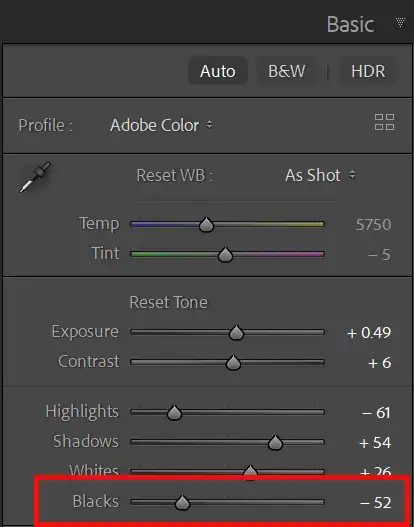
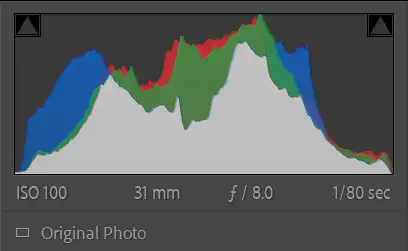
The Blacks slider controls the darkest tones in the image — the far left edge of the histogram. It sets the black point, determining how deep the darkest pixels can become.
Lowering Blacks increases contrast and gives the image a stronger foundation, but pushing it too far can crush shadow detail. Raising Blacks softens the deepest tones and can create a more muted, matte look.
Use the clipping warning triangles or press J to see exactly when the blacks begin to lose detail.
How These Sliders Work Together
Exposure sets the overall brightness. Shadows refine the dark midtones. Blacks set the darkest point in the image. Together, they give you precise control over the left half of the histogram.
A typical workflow might be:
- Set Exposure for overall brightness
- Raise Shadows to recover detail
- Lower Blacks to add depth and contrast, but avoid crushing detail
This combination gives you a clean, detailed image with strong tonal structure and controlled contrast.
Common Mistakes
Beginners often confuse these sliders because they all affect darker tones. Here are the most common issues:
- Using Exposure to fix blocked shadows — use Shadows or Blacks instead.
- Over‑lifting Shadows — this creates a flat, washed‑out look.
- Crushing Blacks too far — this removes important detail and makes prints look muddy.
- Ignoring the histogram — it shows exactly where detail is being lost.
Understanding the role of each slider makes editing faster, cleaner and more consistent.
Whereas I don't like to lose detail in highlights, I often deliberately lose a little detail in the shadwos, to create a punchy image. Of course it depents in what areas the shadows are.
Next Steps
Now that you understand how Exposure, Blacks and Shadows shape the lower half of the histogram, the next step is to combine them with the highlight controls for full tonal control.
Together, these sliders give you complete command over the tonal structure of your images from deep shadows to bright highlights.
Continue with the Develop Basics tutorial or explore the Lightroom Learning Path to build your editing workflow step by step.
