Page updated: 14 June 2026
The Photoshop Histogram Panel
This page is specifically about the Photoshop Histogram Panel, not to be confused with general information about an image Histogram.
Of course, these two subjects are closely connected, and yet they are different. General information about the Histogram should be a subject that all digital photographers and image editors should be aware of. The Photoshop Histogram panel is a specific panel in Photoshop that you may, or may not wish to use. It gives you information about the Histogram, but you also get Histogram information when using Levels, or Curves, or Camera Raw.
For general information about understanding a Histogram, how you can use it in image editing, how to use the Histogram on your camera to assist in adjusting exposure, and examples of understanding different histograms, please see The Histogram
The Photoshop Histogram Panel allows you to see the Histogram, either in brightness mode, or all three color chanels (red, green, blue).
If the Histogram panel is not visible, you can open it from the Window menu.
It's not absolutely vital to have the Histogram panel open all the time. Whenever you edit Levels or Curves, they both include the Histogram, so you can make adjustments based on the Histogram.
Related subjects;
Adjustment Layers
Layers Basics
Layer Masks
ON THIS PAGE
Reading The Histogram

You have choices as to what the Histogram panel shows. The following examples will show various options - all of them showing the histogram from this image.
Reading The Histogram
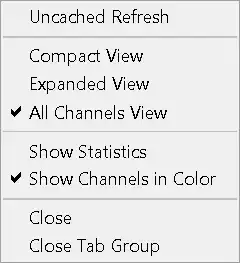
Click on the menu button in the top right corner of the Histogram panel, to show these options, which are covered below.
Compact View
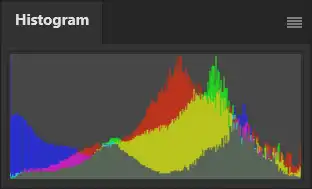
The Compact View just shows the Histogram, with whatever options you selected from those below.
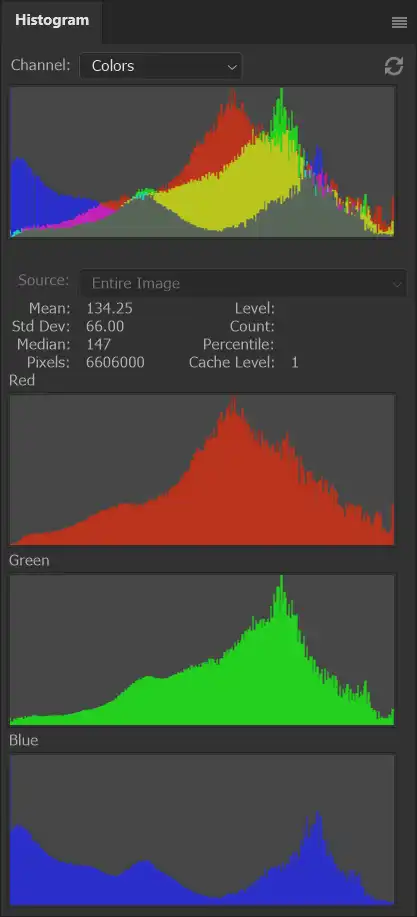
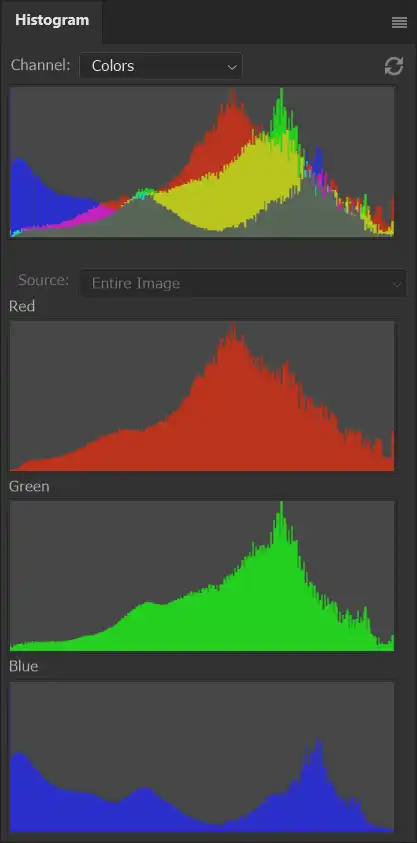
Expanded View - Colors
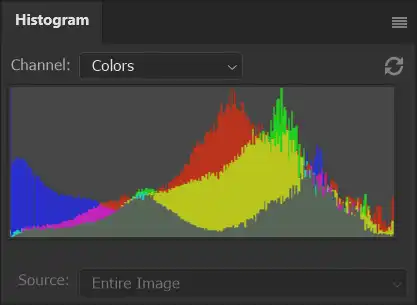
The Expanded View shows the options to select which Channel, and which Source.
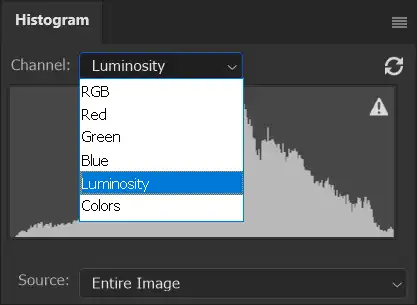
The two screenshots show the Colors and Luminosity options in the Channel options.
The Source is Entire Image. If you have different layers, you can choose to just view the histogram for each layer.
Source Options

You can choose between showing the histogram for the Entire Image, or Selected Layer. If you have an Adjustment Layer and it is selected, you can choose Adjustment Composite.
Expanded View - RGB
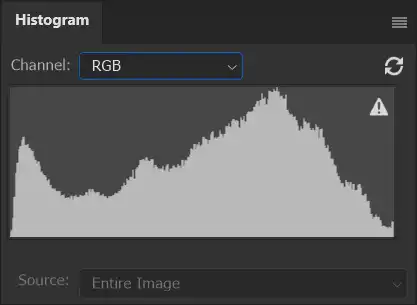
In Expanded View, this screenshot shows the RGB histogram.
The RGB histogram shows the brightness of the red, green, and blue color channels, with each channel represented by a separate graph. The more the graph rises to the right, the more saturated that color will be in the image. This histogram is useful for inspecting if you've "blown" out information in your image.
Also see the next step and comments about using RGB and Luminosity histograms.
Expanded View - Luminosity
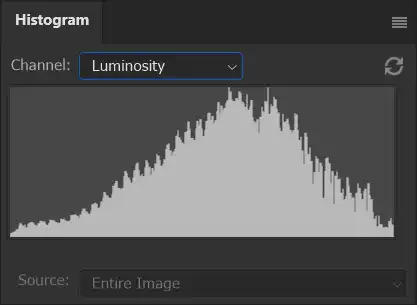
In Expanded View, this screenshot shows the Luminosity histogram.
The Luminosity histogram shows the range of tones from black to white, with the higher the graph, the more pixels with that tone. This histogram is useful for judging exposure and determining if an image is overexposed or underexposed.
Use both the luminance and RGB histograms. If the image is a vibrant subject, the luminance histogram might indicate that the exposure is correct, but the RGB histogram might show that one of the color channels is clipped, which may, or may not be important. You can identify these areas by pressing and holding the Alt key, while also pressing and holding the mouse button, while adjusting Levels, or Curves, or in Raw on different sliders.
Expanded View - Red Color Channel
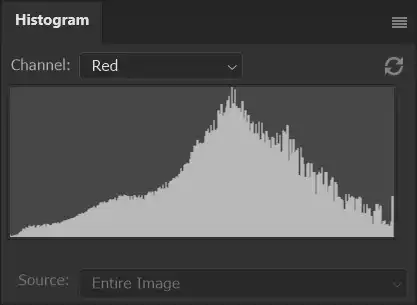
This screenshot shows the Red Color Channel being viewed in the Expanded View. It is shown in black and white because the Show Channels in Color option has been turned off. You can turn that on and off in the menu (see above).
Expanded View - Red Color Channel
The screenshot shows Expanded View, with the Red Color Channel selected from the Channels dropdown optins. These are in color, because Show Channels in Color has been selected from the menu options.
Expanded View - Red Color Channel
This time in Expanded View, Statistics has been turned on, from the menu options.
Expanded View - Red Color Channel

This screenshot shows the color channels in black and white because Show Channels in Color has been deselected in the menu options.
Alternatives That Show the Histogram
It is not essential to have the Histogram panel open all the time. When you edit Levels, Curves or the Camera Raw Filter, you will also see the histogram.
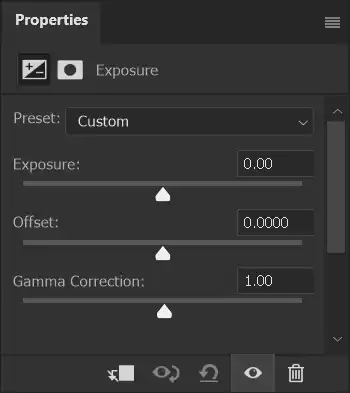
When editing using other tools, such as the Exposure and Hue/Saturation Adjustment Layers, you will need to view the Histogram panel if you wish to use the histogram while editing.
Alternative 1 - Camera Raw Filter
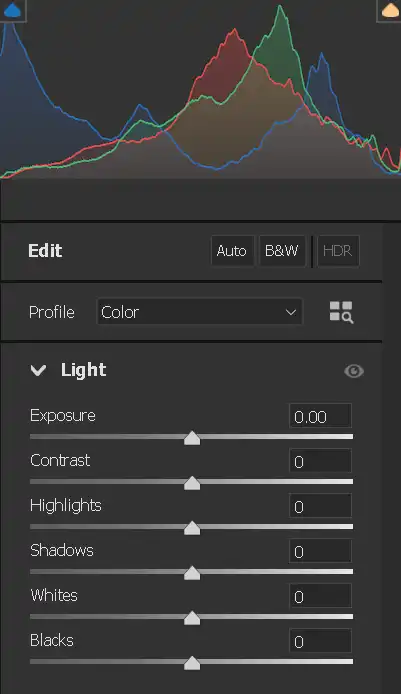
In the Filters menu, open Camera Raw Filter. When you adjust any of these 6 sliders, except Contrast, you will view the histogram.
Alternatives 2 - Levels Adjustment Layer


From the bottom of the Layers panel select the Adjustment Layer button and select Levels. In the Properties panel, you will see the histogram which you can edit.
Alternatives That Show the Histogram


From the bottom of the Layers panel select the Adjustment Layer button and select Curves. In the Properties panel, the histogram is visible behind the Curve.
Alternatives That Show the Histogram

Summary of The Histogram Panel
Understanding the Histogram is an important skill when taking photos, to adjust exposure, and then when editing photos to ensure you don't unintentionally "clip" part of the image (lose detail in highlights or shadows).
The Histogram panel gives you many options for using the histogram, although when adjusting the image using Levels, Curves or Raw, you can also see the RGB and separate color channel histograms.
