Page updated: 18 July 2026
Interactive Photoshop Toolbar PDF (2026)
Preview and download available on the Tools page.
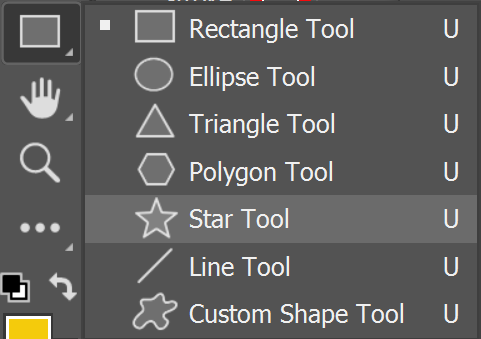
Star Tool
The Star Tool allows you to create star paths or shapes with several points.
You can also create other non-star shapes, for example flowers. The Star Tool is one of several shape tools;
Star Tool Options

Tap to view full size
Rotate your phone for easier reading
ON THIS PAGE
Tool Presets
You can create and save a Tool Preset for any tool, which will remember settings that you choose for that tool, so you can quickly and easily select different presets and settings for a particular tool. The degree of usefulness of presets varies, depending on the tool.
You can reset any tool back to its default settings by right clicking on the Tool Presets button and select Reset Tool. Take care not to Reset All Tools, unless that is intended.
Tool Mode
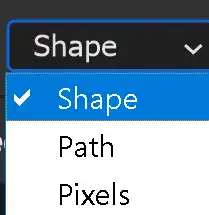
There are three options;
Shape Create a shape layer and color it.
Path Create path, which you can then easily convert into a selection.
Pixels You can apply the Star Tool directly to the pixels in the selected layer, but this will make changes directly to those pixels, which is destructive editing. Alternatively select the Path option in the Tool Mode, which you can turn into a selection, and then apply it to a Layer Mask. This option is non-destructive and permanently editable.
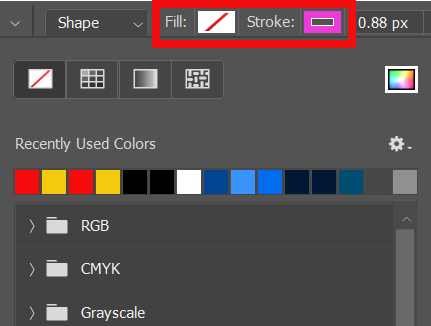
Fill
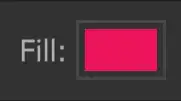
Fill will fill the area with the chosen color, gradient or pattern. Click to open the Fill Type and Color panel, shown below.
Note that Fill and Stroke panels are identical, but when the panel is opened from Fill, options will change the Fill settings.
Fill Type and Color
Choose from different Fill styles: Solid Color, Gradient, Pattern.
You can also select from recently used colors, or from a range of colors, arranged in various groups.
Stroke Size Scrubby Slider
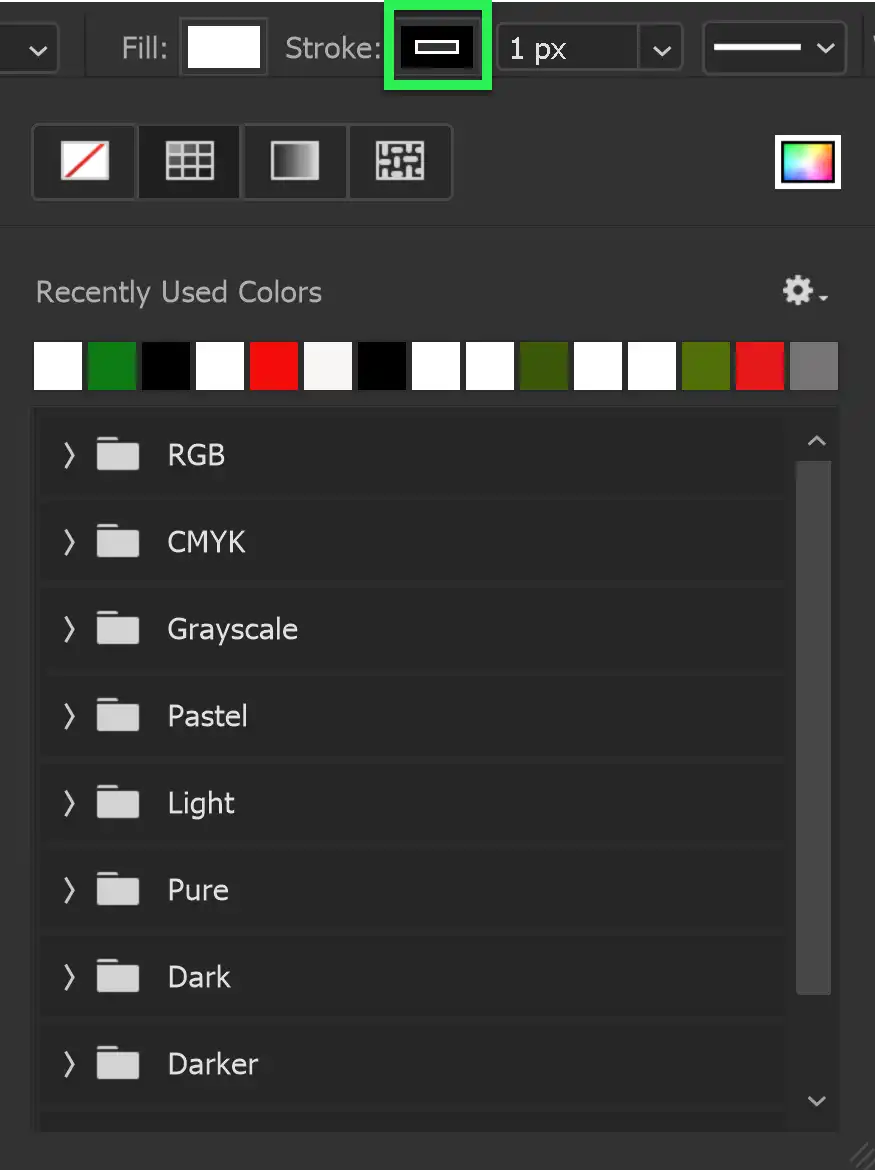
A Stroke in Photoshop is an outline. Strokes can vary in width, color and style.
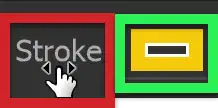
You can adjust Stroke Width either with the dropdown size box and the slider, or directly, using the Scrubby Slider (highlighted in red).
Move the cursor over the word "Stroke" and watch for the cursor to change to a hand+arrows. Click and drag to the left to decrease, or to the right to increase the width of the stroke. While dragging, you get a live preview, which is very useful.
The Stroke options are highlighted in green. Click to open the panel shown below.
Stroke Type and Color
Choose from different Stroke styles: Solid Color, Gradient, Pattern.
You can also select from recently used colors, or from a range of colors, arranged in various groups.
Note that Fill and Stroke panels are identical, but when the panel is opened from Stroke, options will change the Stroke settings.
Stroke Width

The Width of the stroke, also sometimes called Weight.
Stroke Options
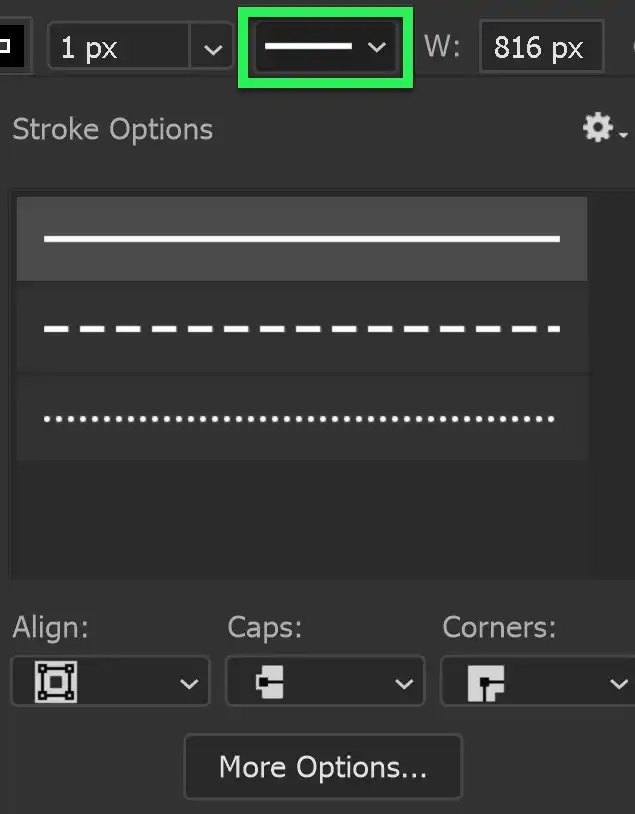
Choose the line style of the stroke and also choose options for Align, Caps and Corners.
Align: Align the Stroke Inside or Outside the path, or Centered on the path.
Caps: Caps are the beginning and end of a line. Choose from Butt, Square or Rounded Caps.
Corners: Where you have corners in a path, choose from Round, Bevel or Miter.
More Options: You can also select the above 3 options in More Options. You can also customize a Dashed Stroke.
Width and Height

This shows width and height and you can adjust them here, if you need a specific size. Otherwise, it's probably best to adjust them by clicking and dragging handles.
Path Operations
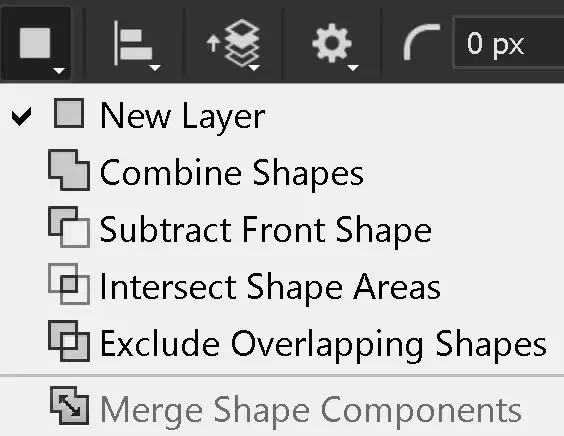
You can combine shapes by adding, subtracting, or intersecting.
Shapes interact in the same way as selections interact. For examples of how selections interact, see Selections Interactions.
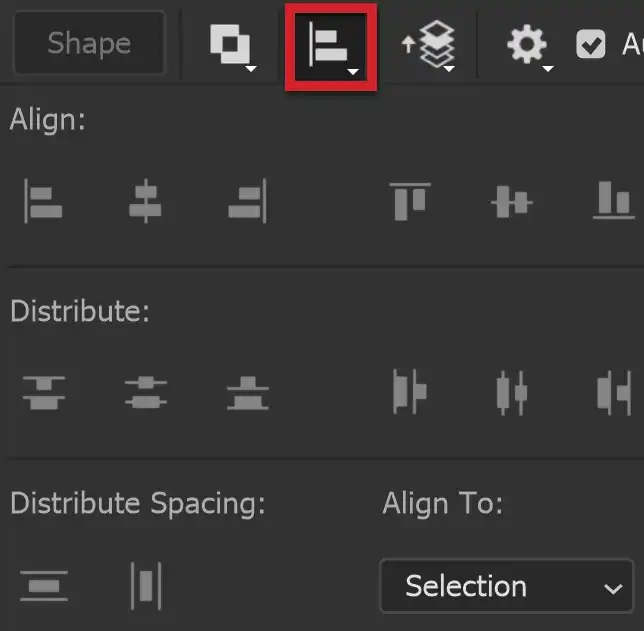
Path Alignment
Select options regarding Alignment and Distribution.
For more information, see Align & Distribute.
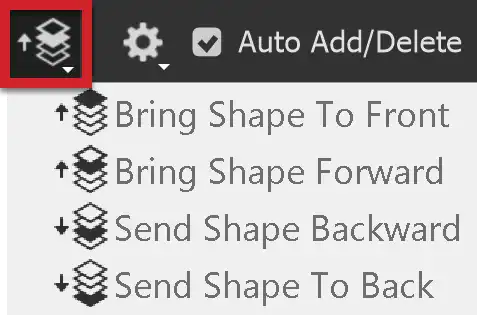
Path Arrangement
When you have multiple elements, you can arrange them by bringing forward, so they are in front of other elements, or sending back, so they are behind other elements.
Bring Shape to Front brings the shape to the front, so it is visible over all other shapes.
Bring Shape Forward brings a shape forwards, so it is in front of the next shape. It may still be behind other shapes.
Send Shape Backward Sends a shape backwards so it is behind other shapes. It may still be in front of other shapes.
Send Shape to Back Sends a shape to the back, so it is behind all other shapes.
Path Options
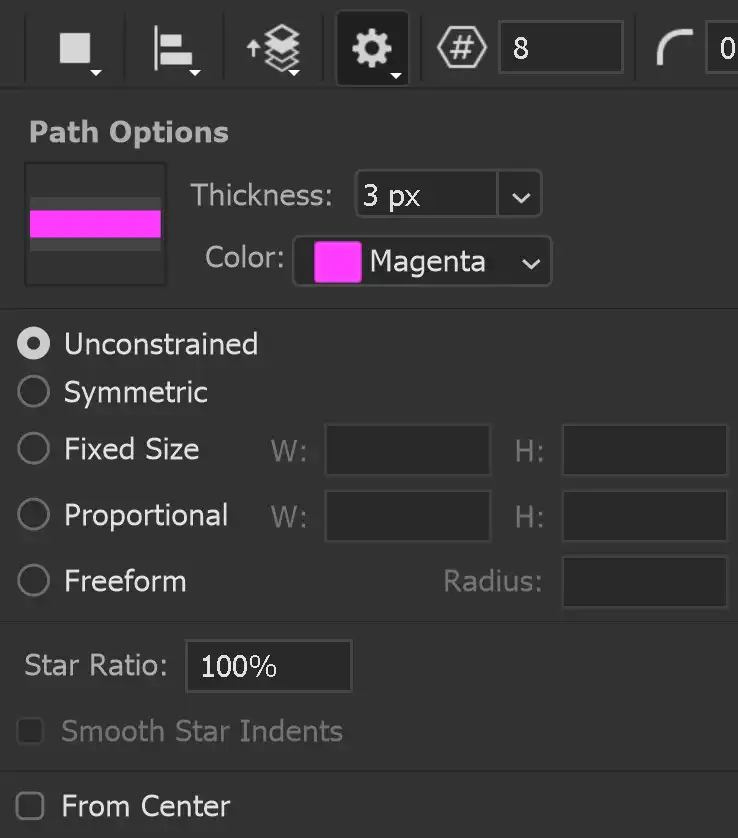
Set your preference for the path color and thickness for the visible path, while your work. This does not affect properties of the path such as stroke or fill.
Set other options for the Polygon; Unconstrained, Equilateral (all 3 sides the same length(, Fixed Size, Proportional.
You can also set an option to create the Polygon, as you draw, from the center.
Number of Points
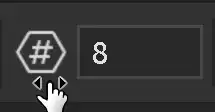
Set the number of points.
Outer & Inner Corner Radius
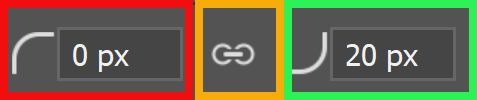
- Radius of Outer Corners, or points (red highlight).
- Radius of Inner Corners (green highlight).
- Lock or unlock Radius of Outer and Inner corners to each other (orange highlight).
Align Edges

Align vector shapes to the pixel grid.
How to use the Star Tool
The Star Tool is used for creating shapes or paths with any number of sides or points.
You can add rounded corners, add a stroke and fill, create a star shape, and more.
1. Select Star Tool
Select the Star Tool on the Toolbar. It shares the button with the Star Tool, so the visible tool will be the last one used.
2. Star Options

It is not necessary to select options before creating a star shape, as you can change them later. The thickness of the stroke will also depend on the size of the document and the size of the shape.
3. Number of Sides
Before you click and drag to create the star shape, you can choose the number of points of the star and the outer and inner corner radius options. It's not necessary to select these first as you can change all of these later.
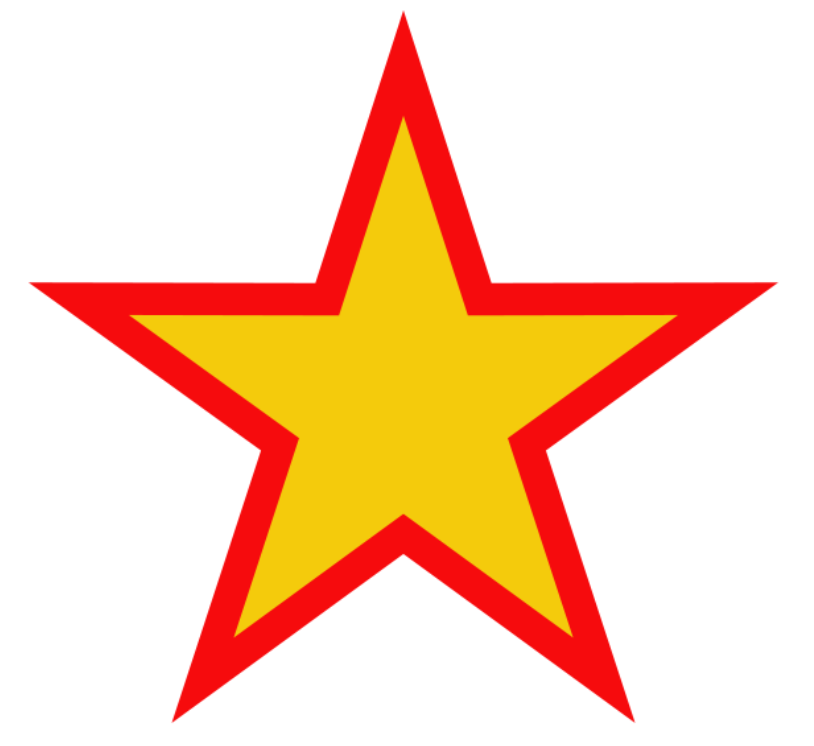
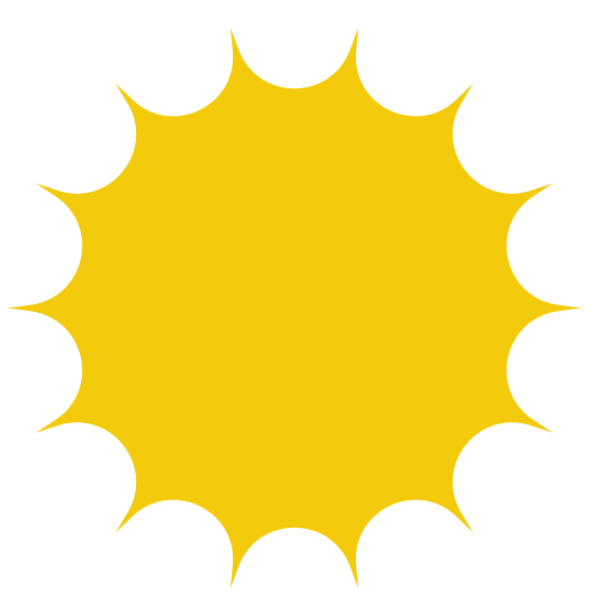
This star was created using the default 5 points and 0 degrees for Outer and Inner Corner Radius, i.e. no rounded corners.
If you select Stroke and Fill options before dragging the shape, they will be applied. But if you don't select these options you will just get a star shape without fill or stroke, but you can then apply these.
4. Add Fill and Stroke
You can add Fill and Stroke at this point, or after you've edited the star, (which we'll do in the following steps). Click on the Fill or Stroke options. the panel is the same for both with a range of colors, arranged in groups.
To add your own custom colors, before selecting Fill or Stroke, click on the Foreground or Background Color and select a color. It will then be shown here, as a recently used color.
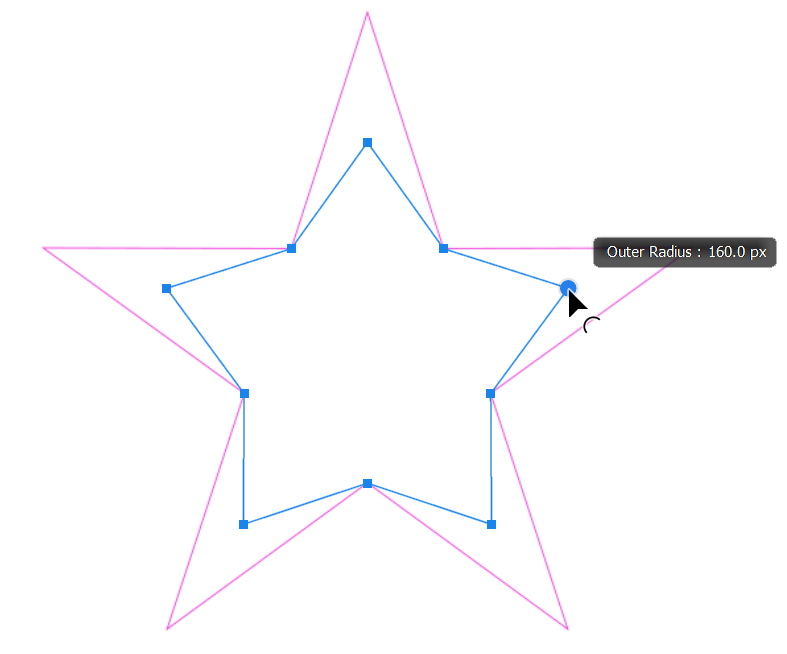
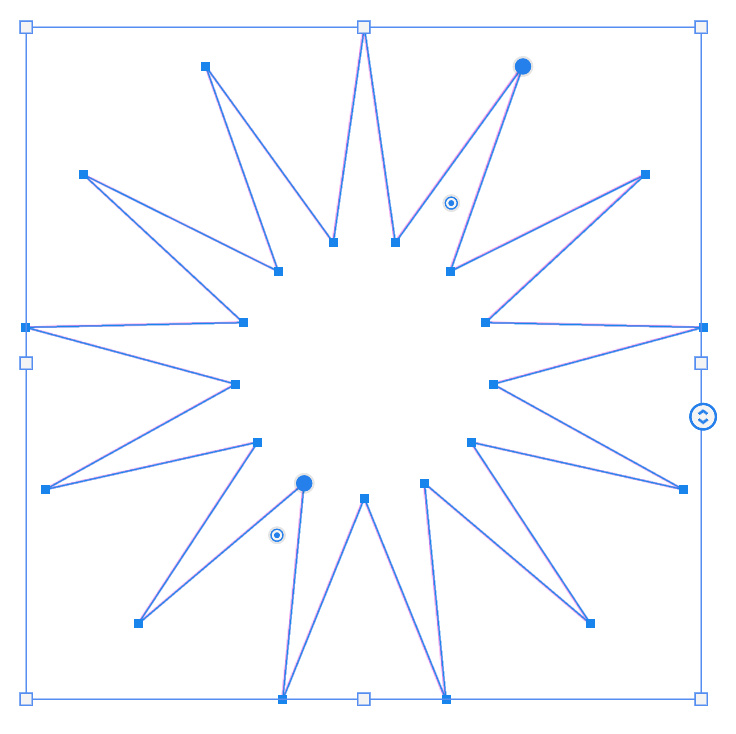
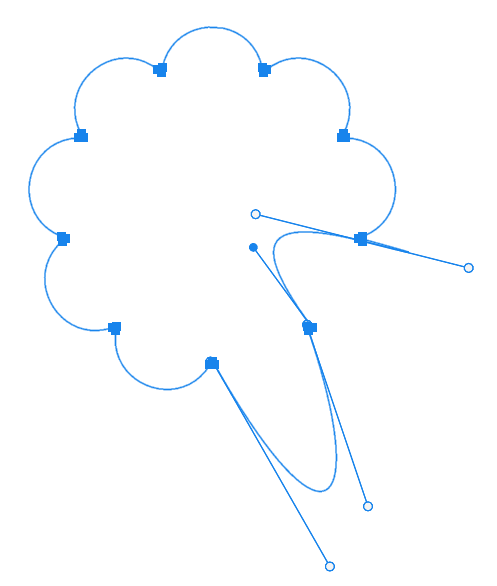
5. Outer Corner Radius
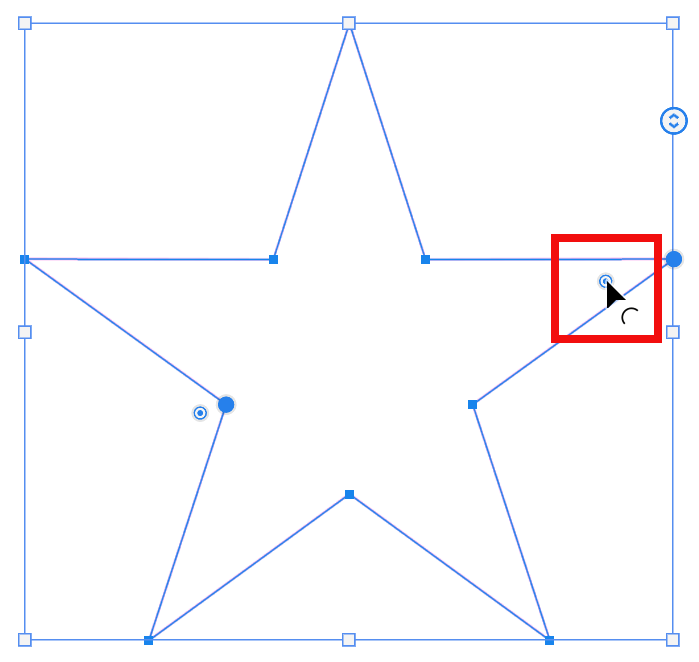
To change the outer radius, (the points), click and drag the handle (red highlight). As you drag you will see the radius changing. The pink lines show the original.
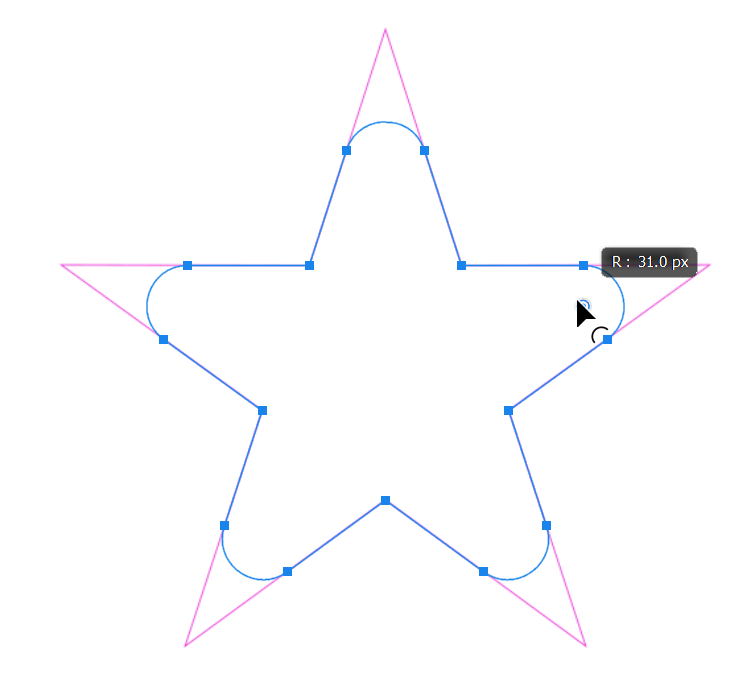
5. Inner Corner Radius
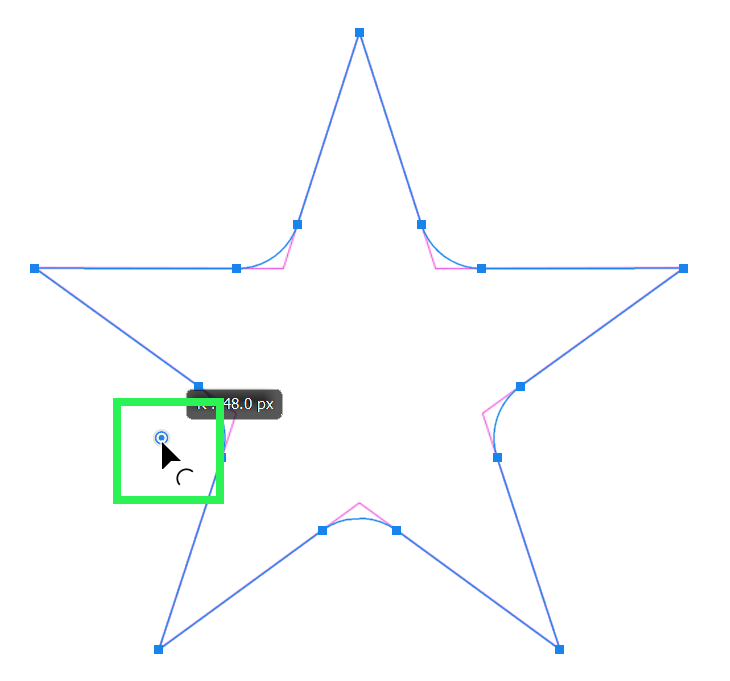
To change the inner radius, (the points), click and drag the handle (green highlight). As you drag you will see the radius changing. While you drag, the pink lines show the original.
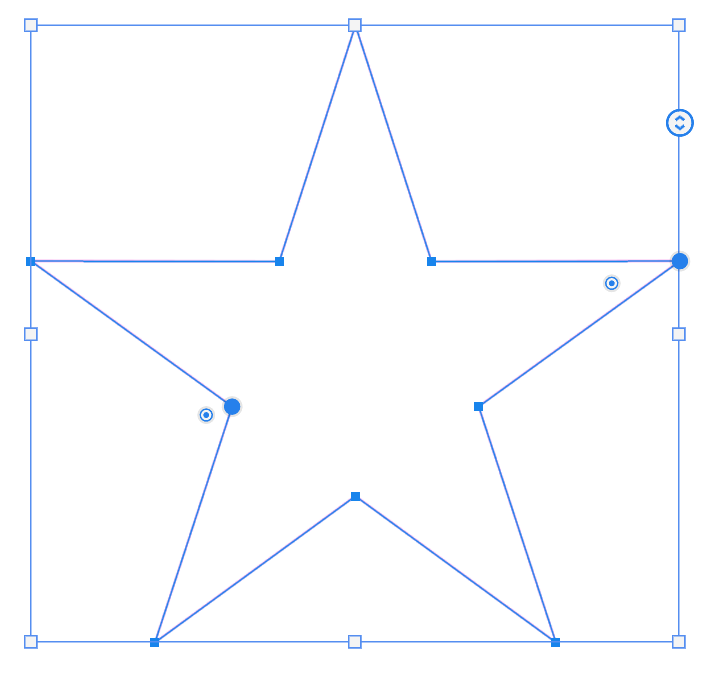
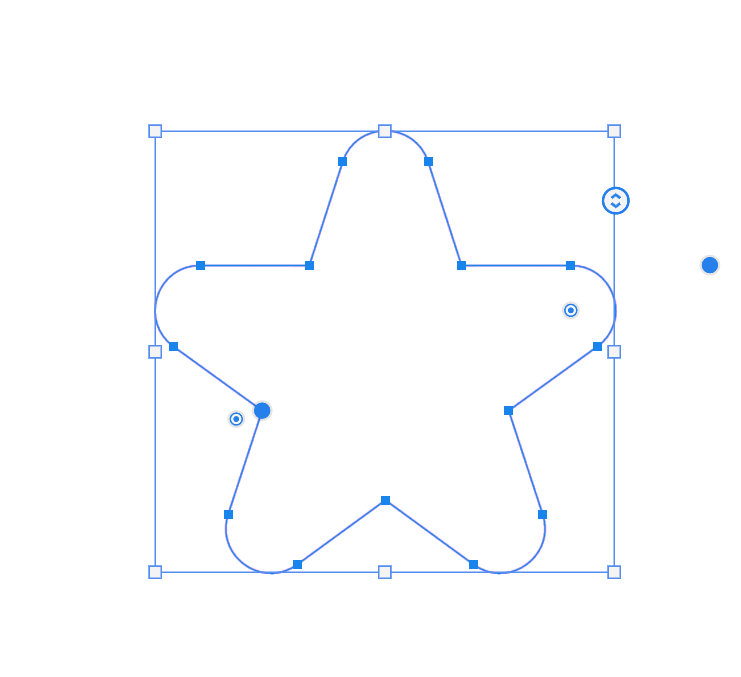
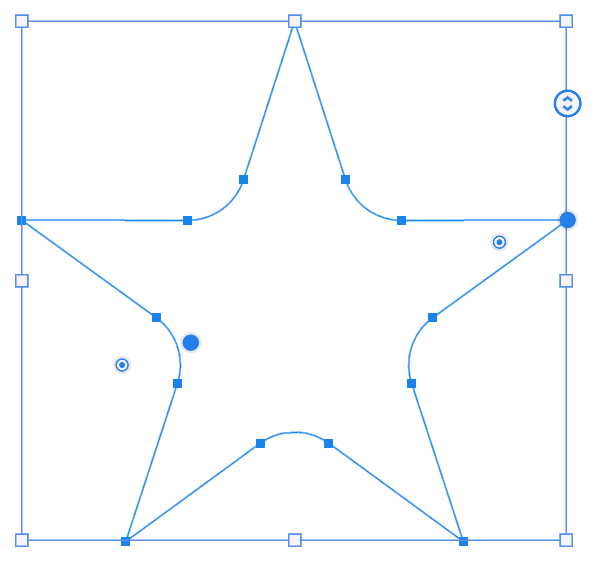
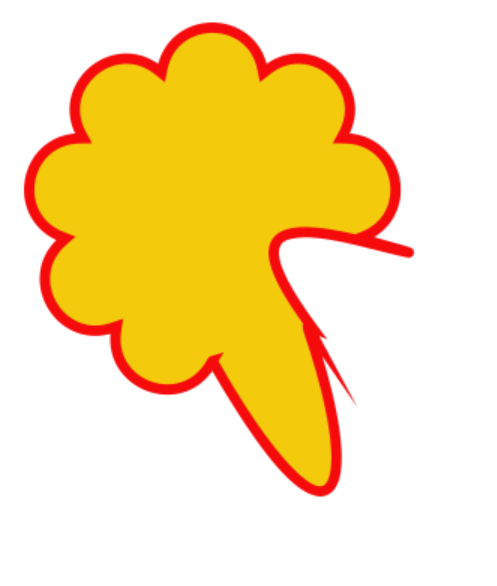
6. Point Length
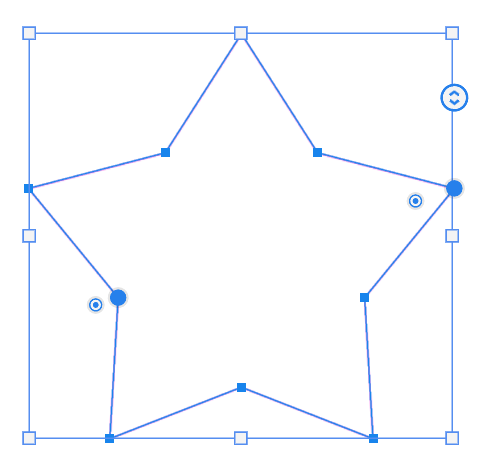
To change the length of the points of the star, click on the blue handles at each point and drag.
7. Number of Points
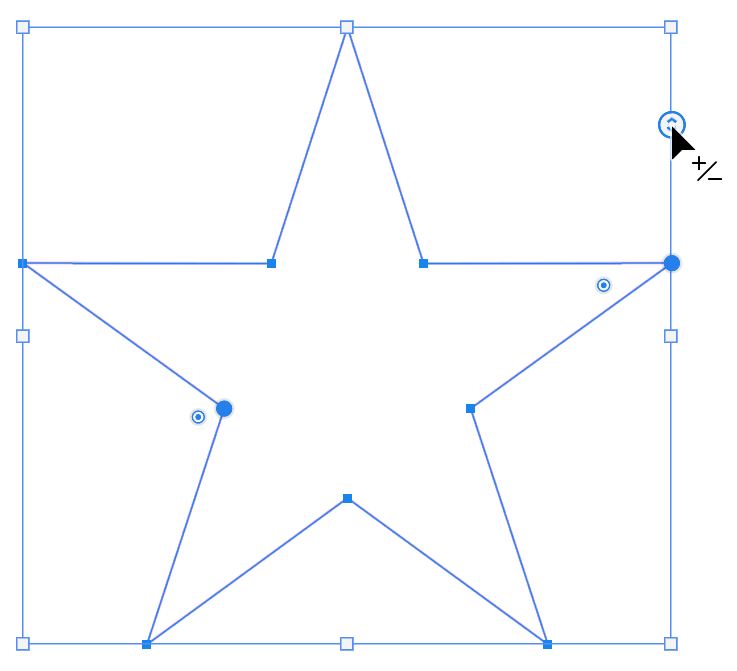
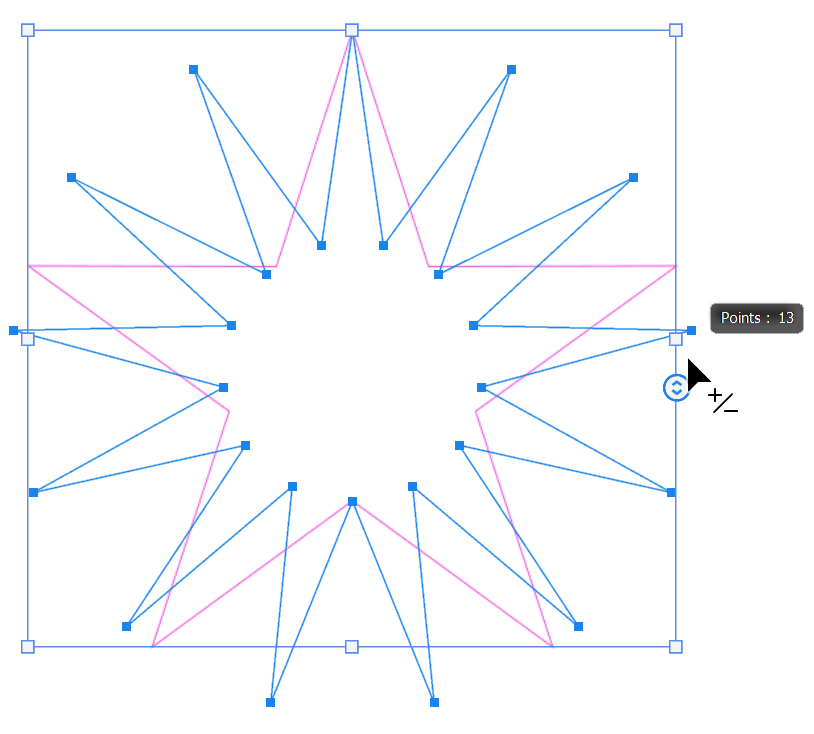
To change the number of points click and drag the handle on the right side of the bounding box. Drag down to increase the number of star points and drag up to reduce the number of points. You will see this happening as you drag.
8. Other Shapes
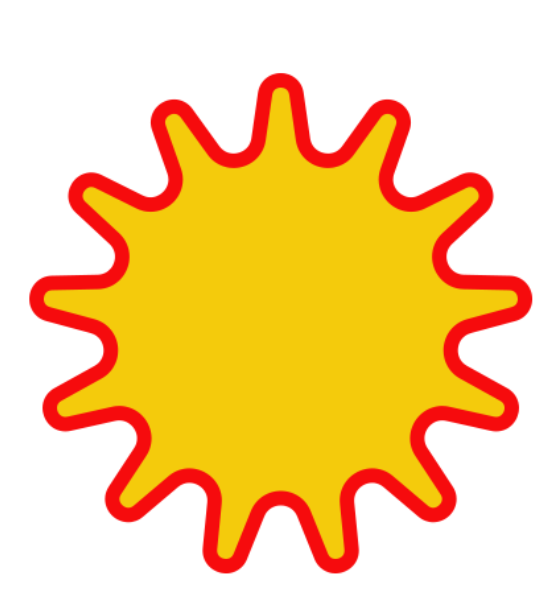
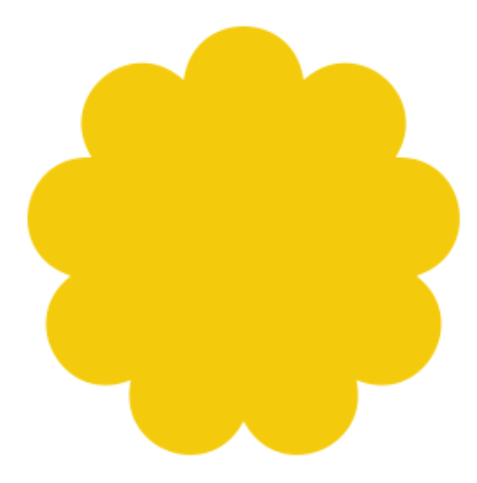
You can also create other shapes that are quite different to stars.
. Paths
You can convert the shape into a path which you can then edit with the Pen Tools. For more information see the Pen Tool tutorial.
Summary of the Star Tool
The Star Tool allows you to create not only star shapes, but many other shapes, quickly and easily. This tutorial has focused on creating shapes, but it can also create paths, which you can then further edit with the Pen tool.
