Page updated: 02 August 2026
Photoshop Select Sky vs Magic Wand: Accurate Tree and Sky Selections
Comparing Photoshop’s Select Sky, Select Object, and Magic Wand Tools
This tutorial provides a clear, real‑world comparison of Photoshop’s Select Sky, Select Object, and Magic Wand tools to make an accurate selection of the sky. The quality of the selection through the foliage of the tree exposes their differences with absolute clarity. You’ll see how each tool handles foliage gaps, crisp edges, and sky boundaries, and how their masks behave when applying a strong sky darkening adjustment. The rollover screenshots allow you to clearly examine and compare each mask and result in detail, helping you choose the right tool for the right part of the image.
Original and Edited Images
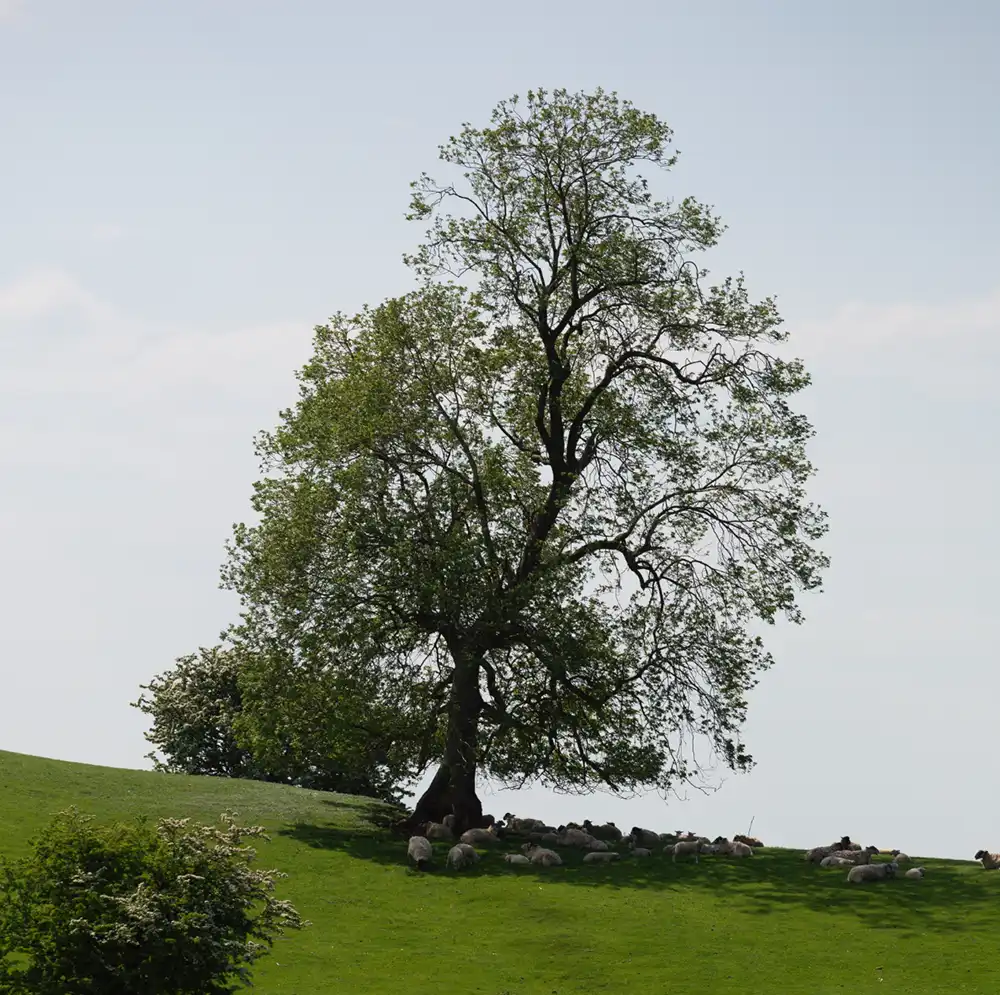
The original image. There is detail in the sky
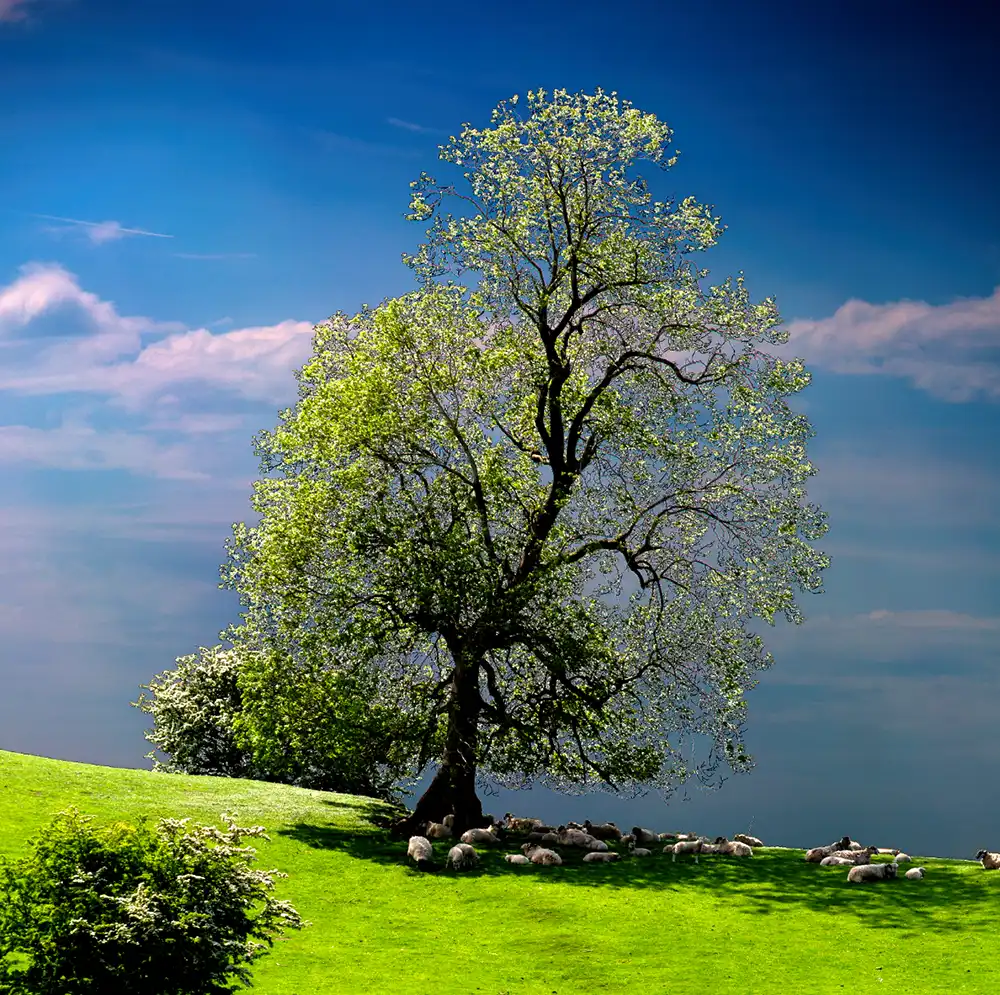
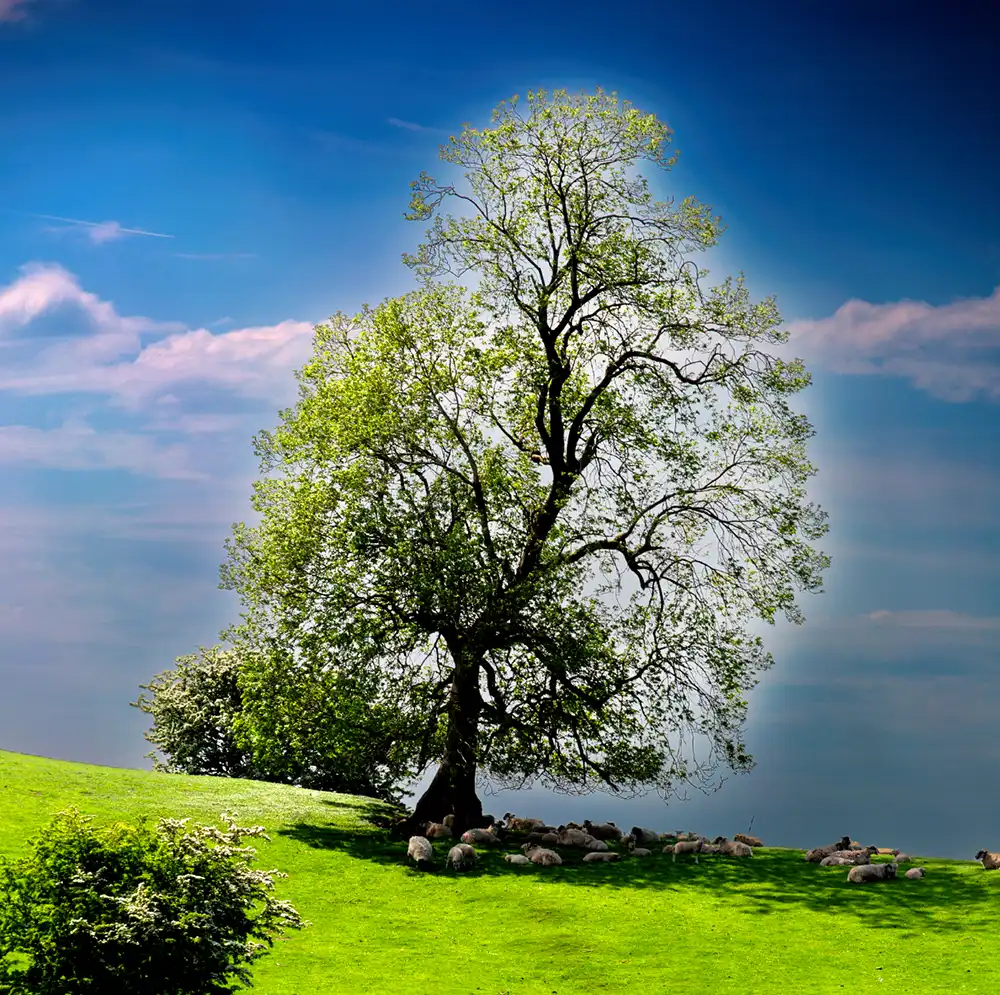
The image with over-strong edits to clearly show selection quality
One of Photoshop’s selection tools produced the edited result you see here, handling the tree and sky with far greater accuracy than the others. Which tool was responsible for this, and why did it perform so well? Read on to see the masks and results in detail — the outcome may surprise you.
ON THIS PAGE
1. Select Sky
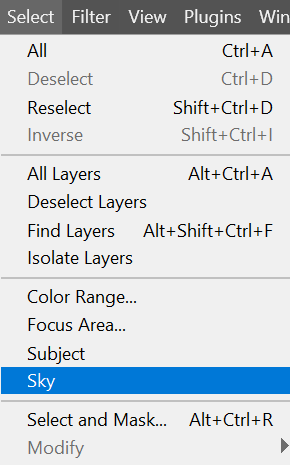
From the menu; Select > Sky.
Unlike other selection tools, this is not available in the toolbar.
Photoshop will then automatically select the sky in the photo.
2. Active Selection
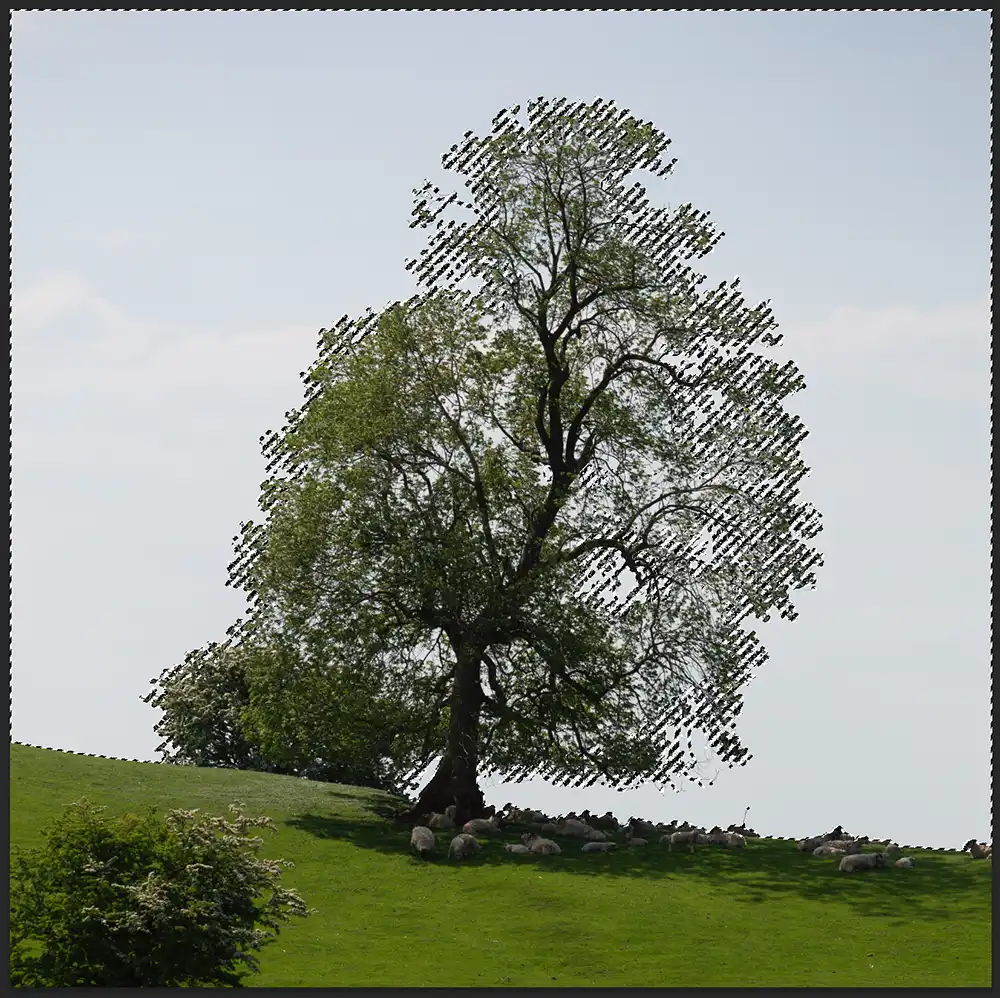
The sky is automatically selected, as shown by the "marching ants".
3. Add Levels Adjustment Layer

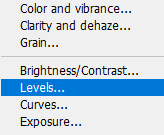
At the bottom of the Layers panel, click on the Adjustment Layer button and select Levels.
A Levels adjustment layer will be added and a Layer Mask will be applied automatically. All Adjustment Layers include a layer mask, which is automatically created from an active selection (visible "marching ants".
4. Adjust Levels
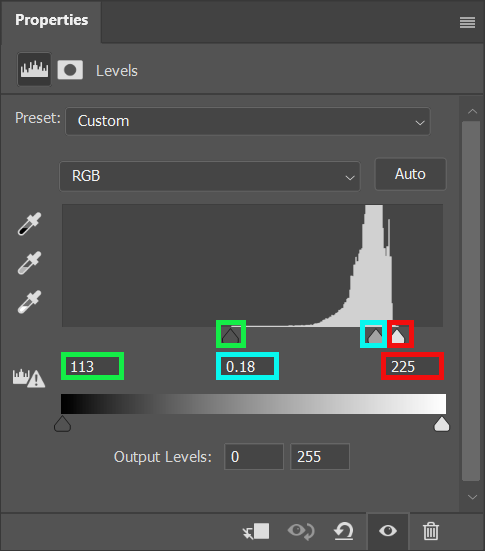
When the Adjustment Layer is added, initially you won't see any difference, until you edit Levels, using the Histogram. I've made the following adjustments;
- Black Slider (green boxes):
- Mid-Gray Slider (cyan boxes):
- White Slider (red boxes):
I have deliberately made strong adjustments, particularly with the Mid-Gray slider, to clearly show the deficiency in the Sky Mask, around the foliage of the tree.
If you only make slight adjustments, you may get away with a mask like this, but the point of this tutorial is to examine the quality of Select Sky through foliage
Related tutorial:
The Histogram
5. Object Select Identical to Select Sky
Select Sky didn't produce a great selection of the sky in this image, through the foliage of the tree so let's try another tool, such as Object Select, which normally produces good selections of objects. Object Select shares the tool button with the Quick Selection and Magic Wand tools. Just click once in the sky and let the tool automatically select the sky.
However, when I did this, it produced an identical selection to the Select Sky. These screenshots show the same Levels adjustments.
I checked this by placing the two layers on top of each other and changing the Blending Mode of the top layer to Difference. The Difference Blend Mode shows even the tiniest of differences between two layers. There were no differences, whatsoever.
6. Magic Wand Comparison of Layer Masks
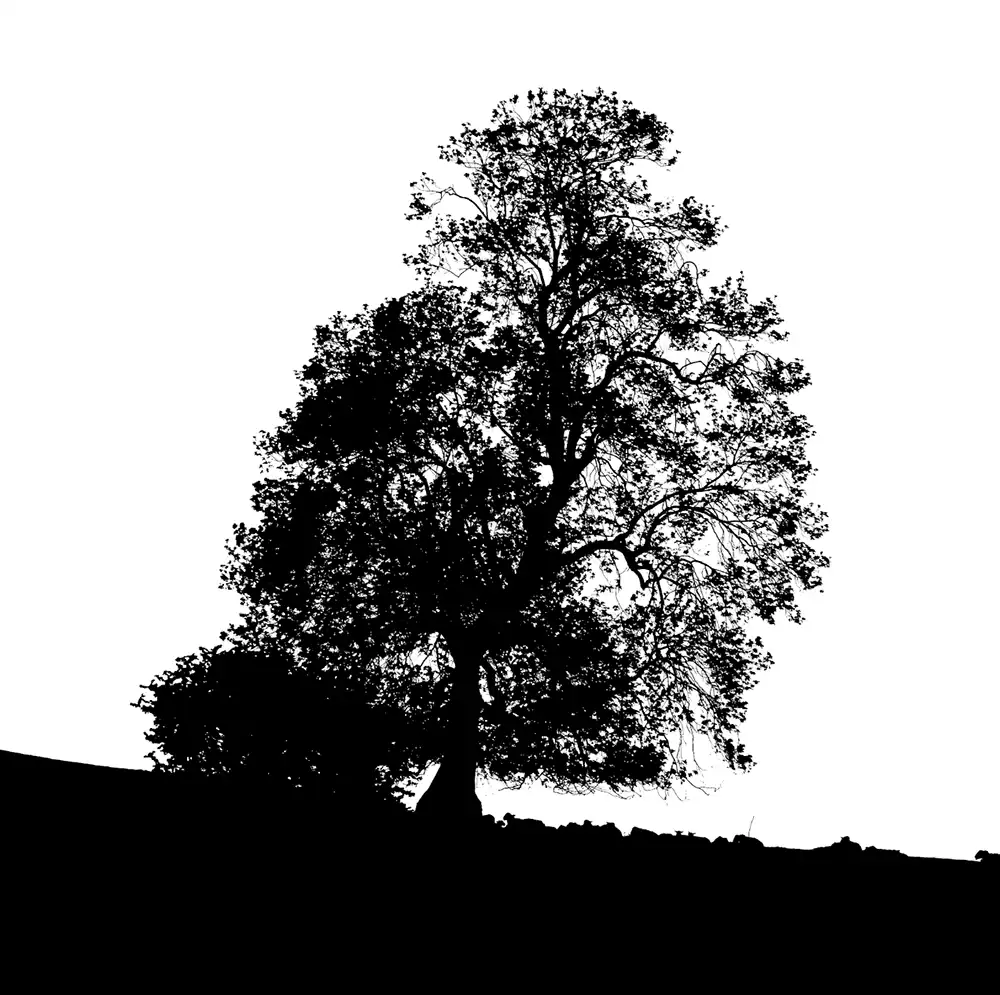
The Magic Wand layer mask shows areas within the tree are white, therefore perfectly selected
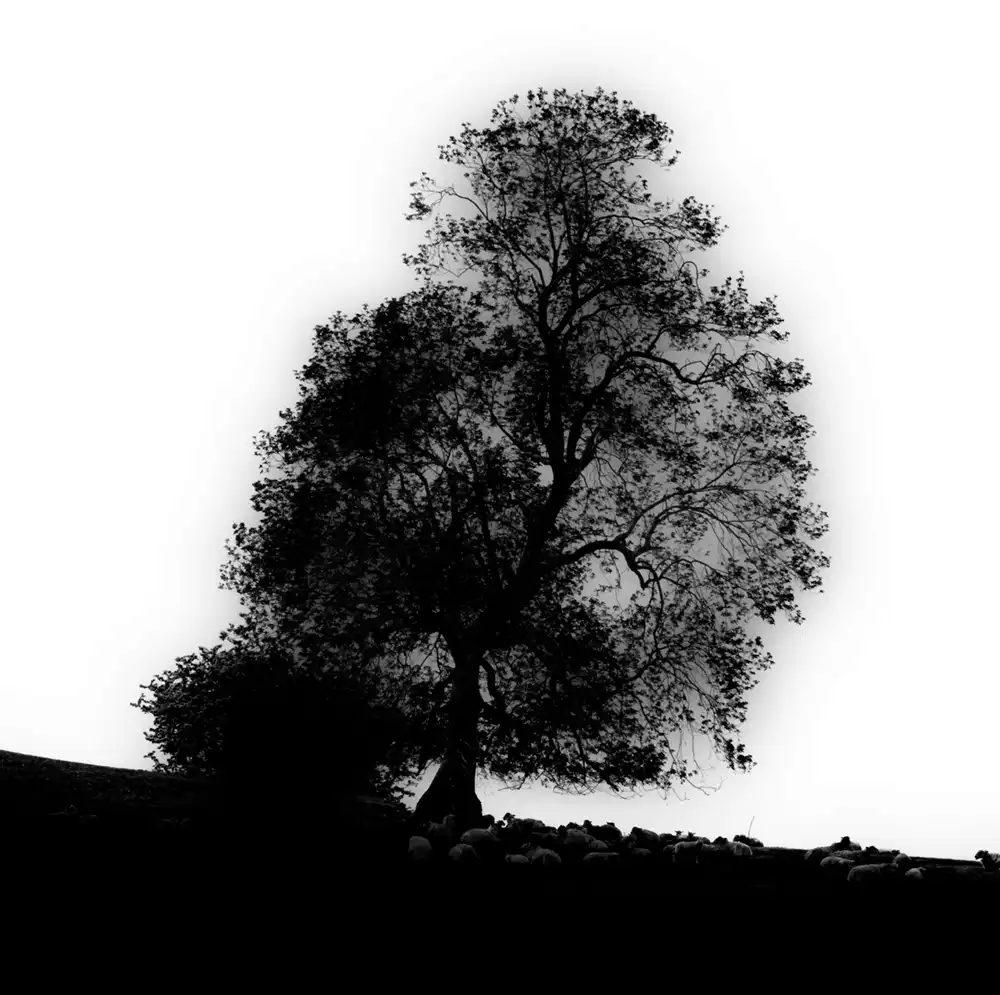
The Select Sky layer mask shows areas within the tree are gray, therefore not poorly selected
The Layer Masks clearly show the superior selection with the Magic Wand, compared to the selection using Select Sky (or Object Select, as they are identical).
On PC, inspect the layer mask by pressing Alt and clicking the layer mask. On a Mac, press the Option key.
Related tutorial:
Layer Masks
7. Magic Wand Edited Comparison
The Magic Wand selection has resulted in all the sky being edited by the Adjustment Layer
The Select Sky selection has resulted in far less of the sky behind the tree being edited by the Adjustment Layer
The first screenshot shows the edited version after using Magic Wand to select the sky. The second image shows the Select Sky / Object Select result, as discussed in previous step. Both images had the same Levels adjustments as detailed in step 4.
Magic Wand has achieved a far better quality selection of the sky among the tree foliage. Whilst the Select Sky and Object Select can make great selections of clear skies, when there is foliage present, or other similar instances of small detail, Magic Wand does a better job, even though it's one of the oldest tools in Photoshop.
8. Select Magic Wand Tool
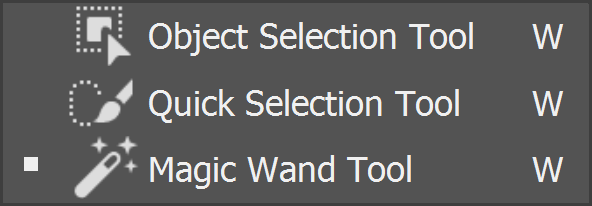
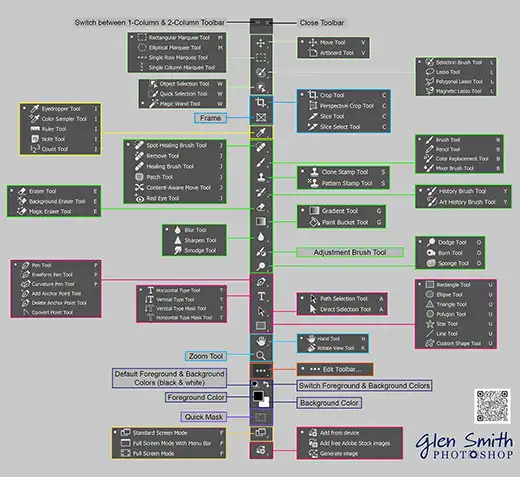
Select Magic Wand from the toolbar. It shares the tool button with the Object Selection Tool and the Quick Selection Tool.
Related tutorial:
A Comprehensive look at The Magic Wand Tool and all its options
9. Add to Selection
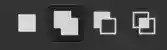
Select Add to Selection. This is the 2nd button and allows you to click multiple times in the image, which is important, so you select the full range of tones in the sky, especially between branches.
If the setting is on the first button - New Selection - each time you click, it will remove the previous selection and create a new selection.
It's important that you click in multiple areas to make a good selection.
Related tutorial:
Selection Buttons
10. Tolerance
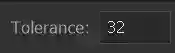
When you click in an image, Tolerance is the number of tones different from the place that you clicked, lighter and darker, that will be selected and added to the selection.
11. Contiguous

If Contiguous is selected, Magic Wand will only select pixels that are within the Tolerance of where you clicked and are touching other selected pixels.
To select areas within the tree foliage, you must ensure Contiguous is not selected.
12. Anti-alias

Ensure Anti-alias is selected. You can then forget about this setting and permanently leave it selected. It smooths pixels.
13. Click in Multiple Places
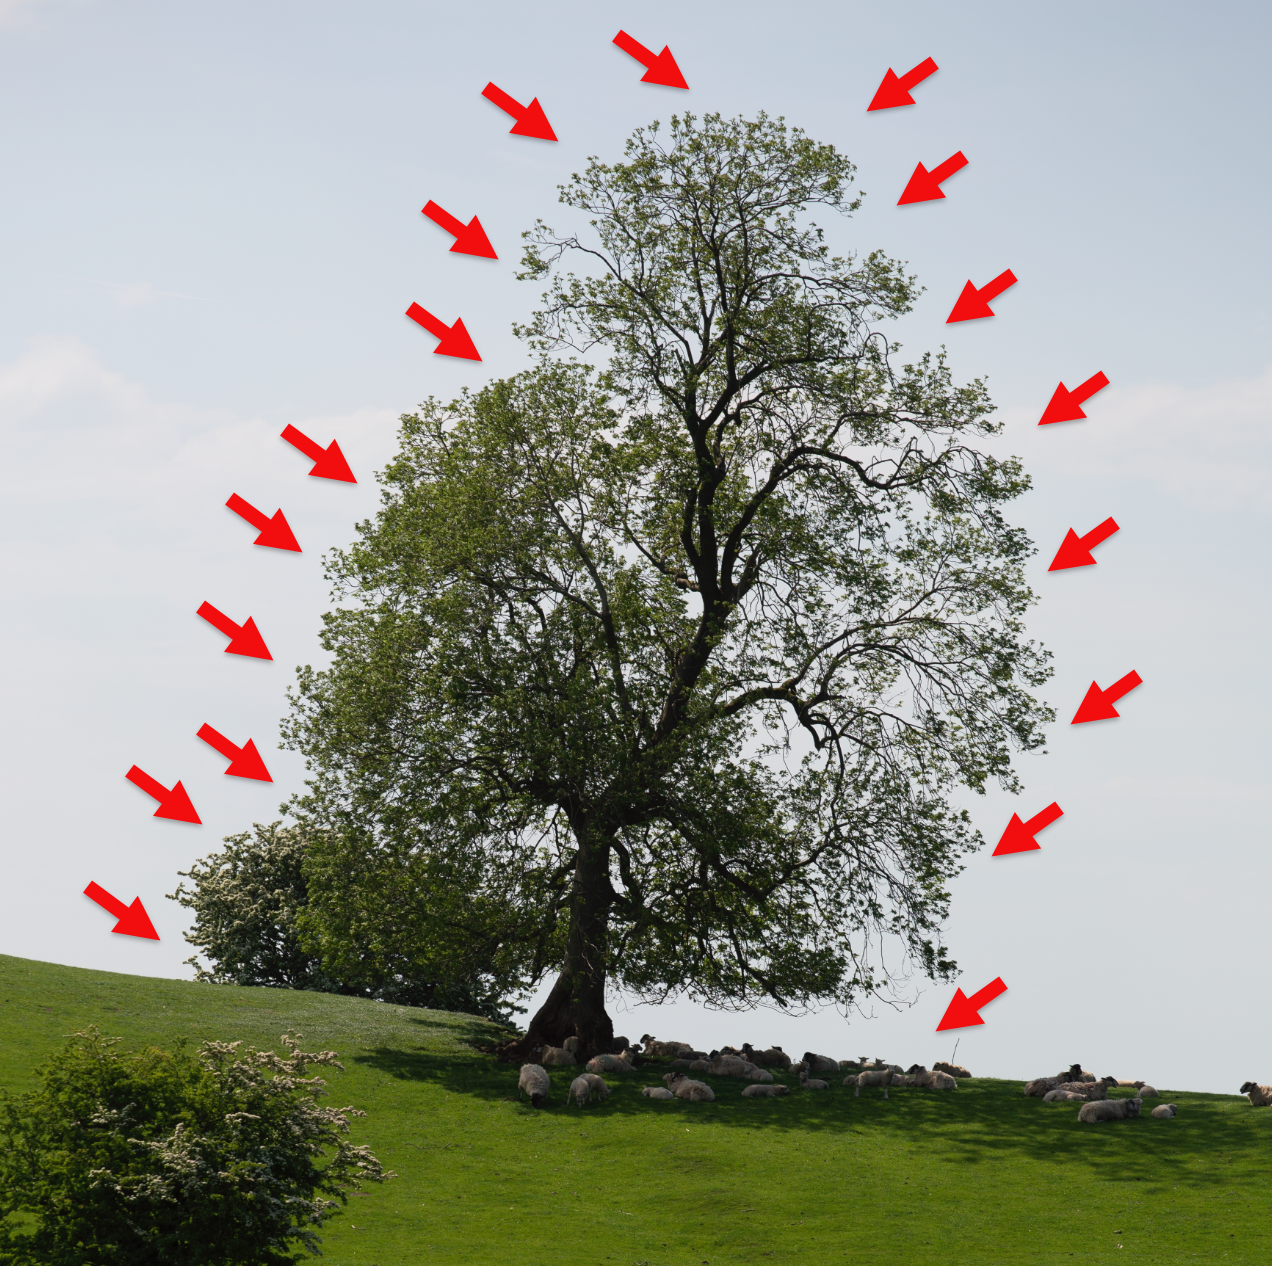
Click in multiple different places, both sides of the tree, to ensure you select all the different tones in the sky.
14. Levels Adjustment Layer
When you have selected multiple areas, click on the Adjustment Layers button at the bottom of the Layers panel. This is probably the easiest method, as you will always have the Layers panel open.
Or if you use the Adjustments panel > Single Adjustment, select Levels.
Or from the menu: Layer > New Adjustment Layer > Levels.
15. Layer Thumbnail & Mask

The layer thumbnail is selected

The layer mask is selected
When you have a layer mask on a layer, you can either select the layer itself, or the mask. The selected one is highlighted with a white box around it, as shown in the screenshots.
Because this is an Adjustment Layer (Levels) the layer thumbnail is a small representation of the Histogram. Double click the layer thumbnail to edit the Adjustment Layer. Adjustment Layers are non-destructive, so you can edit them as much as you wish, without affecting the quality of the image.
Related tutorial:
Layers Basics
16. Inspect Layer Mask
The layer mask shows area within the tree are gray, therefore not perfectly selected
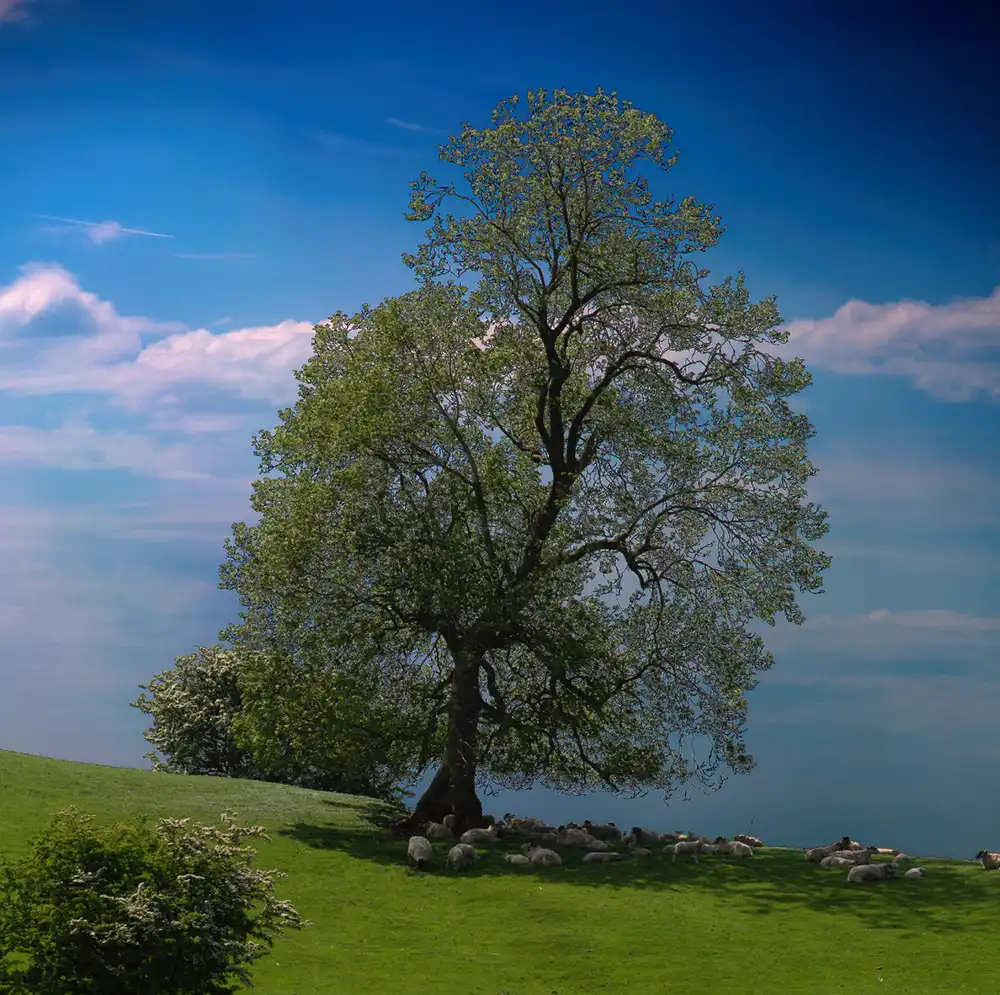
When an adjustment has been applied, it's clear that the sky within the tree has not been edited the same as the rest of the sky
After making a selection and in this case, adding a Levels Adjustment Layer, it's always a good idea to inspect the layer mask. To do this, just press and hold the Alt key on a PC (Option key on a Mac) and click directly on the layer mask. As far as I know, you can't inspect a layer mask on a phone or tablet.
Layer Masks are black and white, and shades of gray. In this mask the selected sky area should be white and outside the tree it is perfect white, so it has been perfectly selected, outside the tree.
However within the tree foliage, it's clearly not white, which shows that the sky area within the foliage has not been well selected.
In this example I have applied a strong edit to the sky, to make things clear, but if your edit was more subtle, it's good practice to inspect the layer mask.
17. Duplicate the Magic Wand Layer
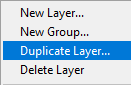
Duplicate Layer
The sky has been successfully edited, but to edit the tree separately, we will duplicate the Levels Adjustment Layer.
Right click the layer and select Duplicate Layer, or Ctrl+J, or click the + button at the bottom of the Layers panel. Or from the menu: Layer > Duplicate Layer.
18. Invert Layer Mask
Original Layer Mask
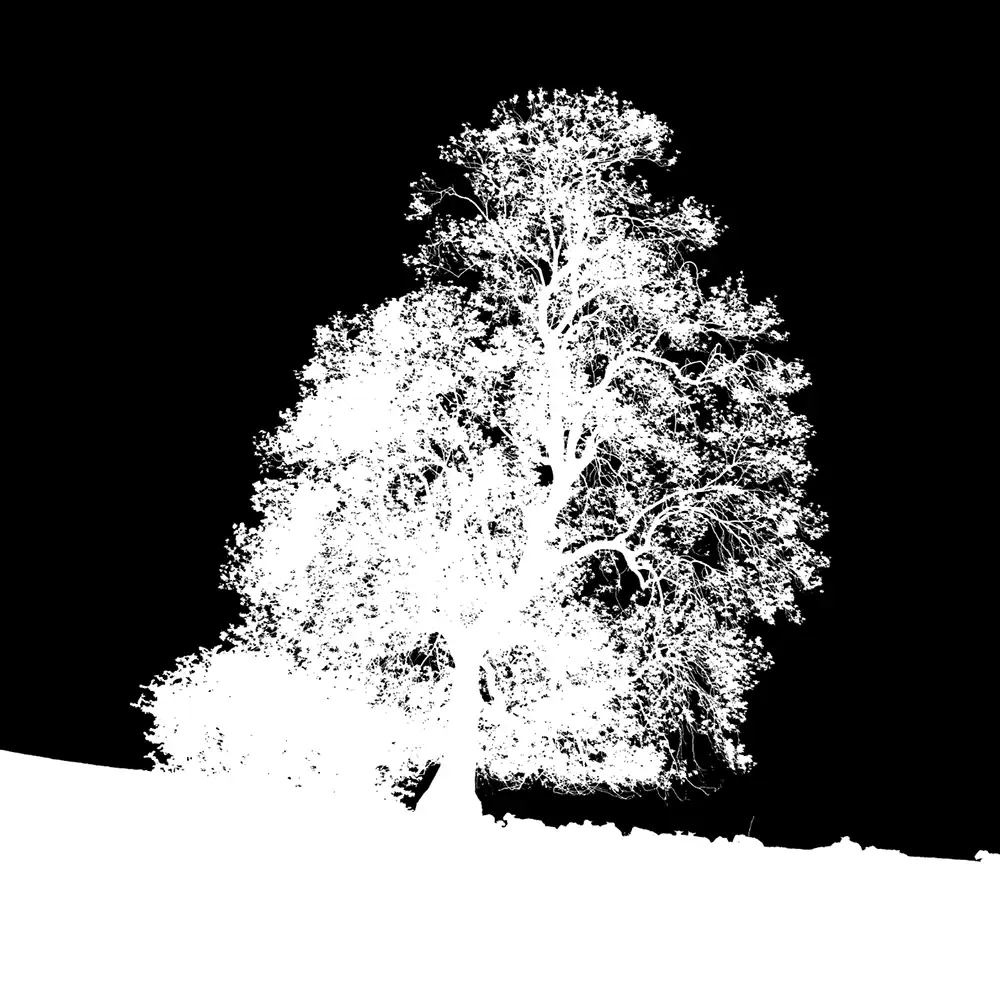
Inverted Layer Mask
Select the Layer Mask of the Levels Adjustment Layer.
Ctrl+I to invert the layer mask.
The original layer mask selected all of the sky. The inverted layer mask selects everything except the sky.
19. Edit Adjustment Layer for Tree
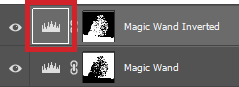
Original Layer Mask
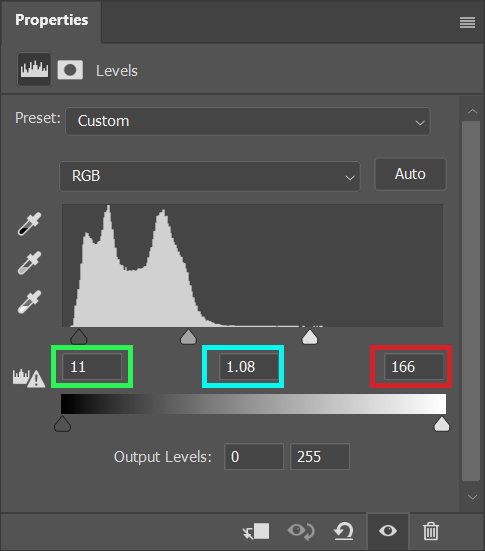
Levels Adjustment Layer settings
Double click the layer thumbnail of the adjustment layer - highlighted in red.
This opens the Levels Adjustment Layer, so you can edit the adjustments. The settings I used are:
- Black slider (green): 11
- Mid Gray slider (cyan): 1.08
- White slider (red): 166
20. Comparison of Tree Adjustment
Only sky is edited
Tree and sky are each individually edited
Again, I've made a strong adjustment, so changes can be seen clearly, to demonstrate the process.
Select Sky & Magic Wand - Comparison
21. Summary
Select Sky and Object Select can both make good selections in different situations, but for selecting the sky behind a tree and foliage, the Magic Wand Tool often does a better job. In this image, it's done a much better job.
Be prepared to try different selection tools. After making a selection and adding a Layer Mask, either on its own, or as part of an Adjustment Layer, it's a good idea to inspect the layer mask. In this case, both Select Sky and Object Select, the layer masks (which were identical), clearly showed an imperfect selection.
Using different selection tools will improve your skill. Some selections actually involve using multiple selection tools, for different parts of the selection.
For a similar set of 3 Lightroom tutorials
1. Lightroom Sky Mask + Add Color Range
2. Lightroom Subtract & Intersect Object
3. Lightroom Duplicate annd Invert Mask