Page updated: 26 July 2026
Subtract Intersect Object in Lightroom Classic
Remove Unwanted Areas from Your Sky Mask with Precision
In the previous tutorial, we improved the Sky mask by adding two Color Range selections to capture the blue sky more accurately through the branches of the tree. That gave us a much cleaner mask — but it also revealed a common issue: Lightroom often includes parts of the landscape, such as mountains or distant hills, inside the Sky mask.
In this tutorial, we’ll fix that by using Subtract → Intersect with Object, one of Lightroom Classic’s most precise tools for removing unwanted areas from a mask. By intersecting the Sky mask with a clearly defined object selection, we can cleanly exclude the mountains and ensure that only the true sky is affected by your adjustments.
This step is essential for natural‑looking edits, especially when the sky meets complex shapes or textured terrain. Once complete, you’ll have a far more accurate Sky mask — ready for the final tutorial, where we’ll duplicate and invert it to create a perfect foreground mask.
Although this tutorial uses a simple landscape scene, the techniques you’ll learn here apply far beyond skies, mountains, and trees. Subtract → Intersect with Object is one of Lightroom Classic’s most versatile masking tools, and it works brilliantly in all kinds of situations. Once you understand how to subtract with precision, you can use these steps effectively across a huge range of images and editing styles.
The edited version intentionally exaggerates the sky so you can clearly see
the benefit of adding to the Sky mask using Color Range.
These files are here to help you follow along with the tutorials. They are licensed for personal learning only and are not licensed for use in your own projects. Please do not share them elsewhere. Full download terms
ON THIS PAGE
Step by Step Example of Subtract from Mask
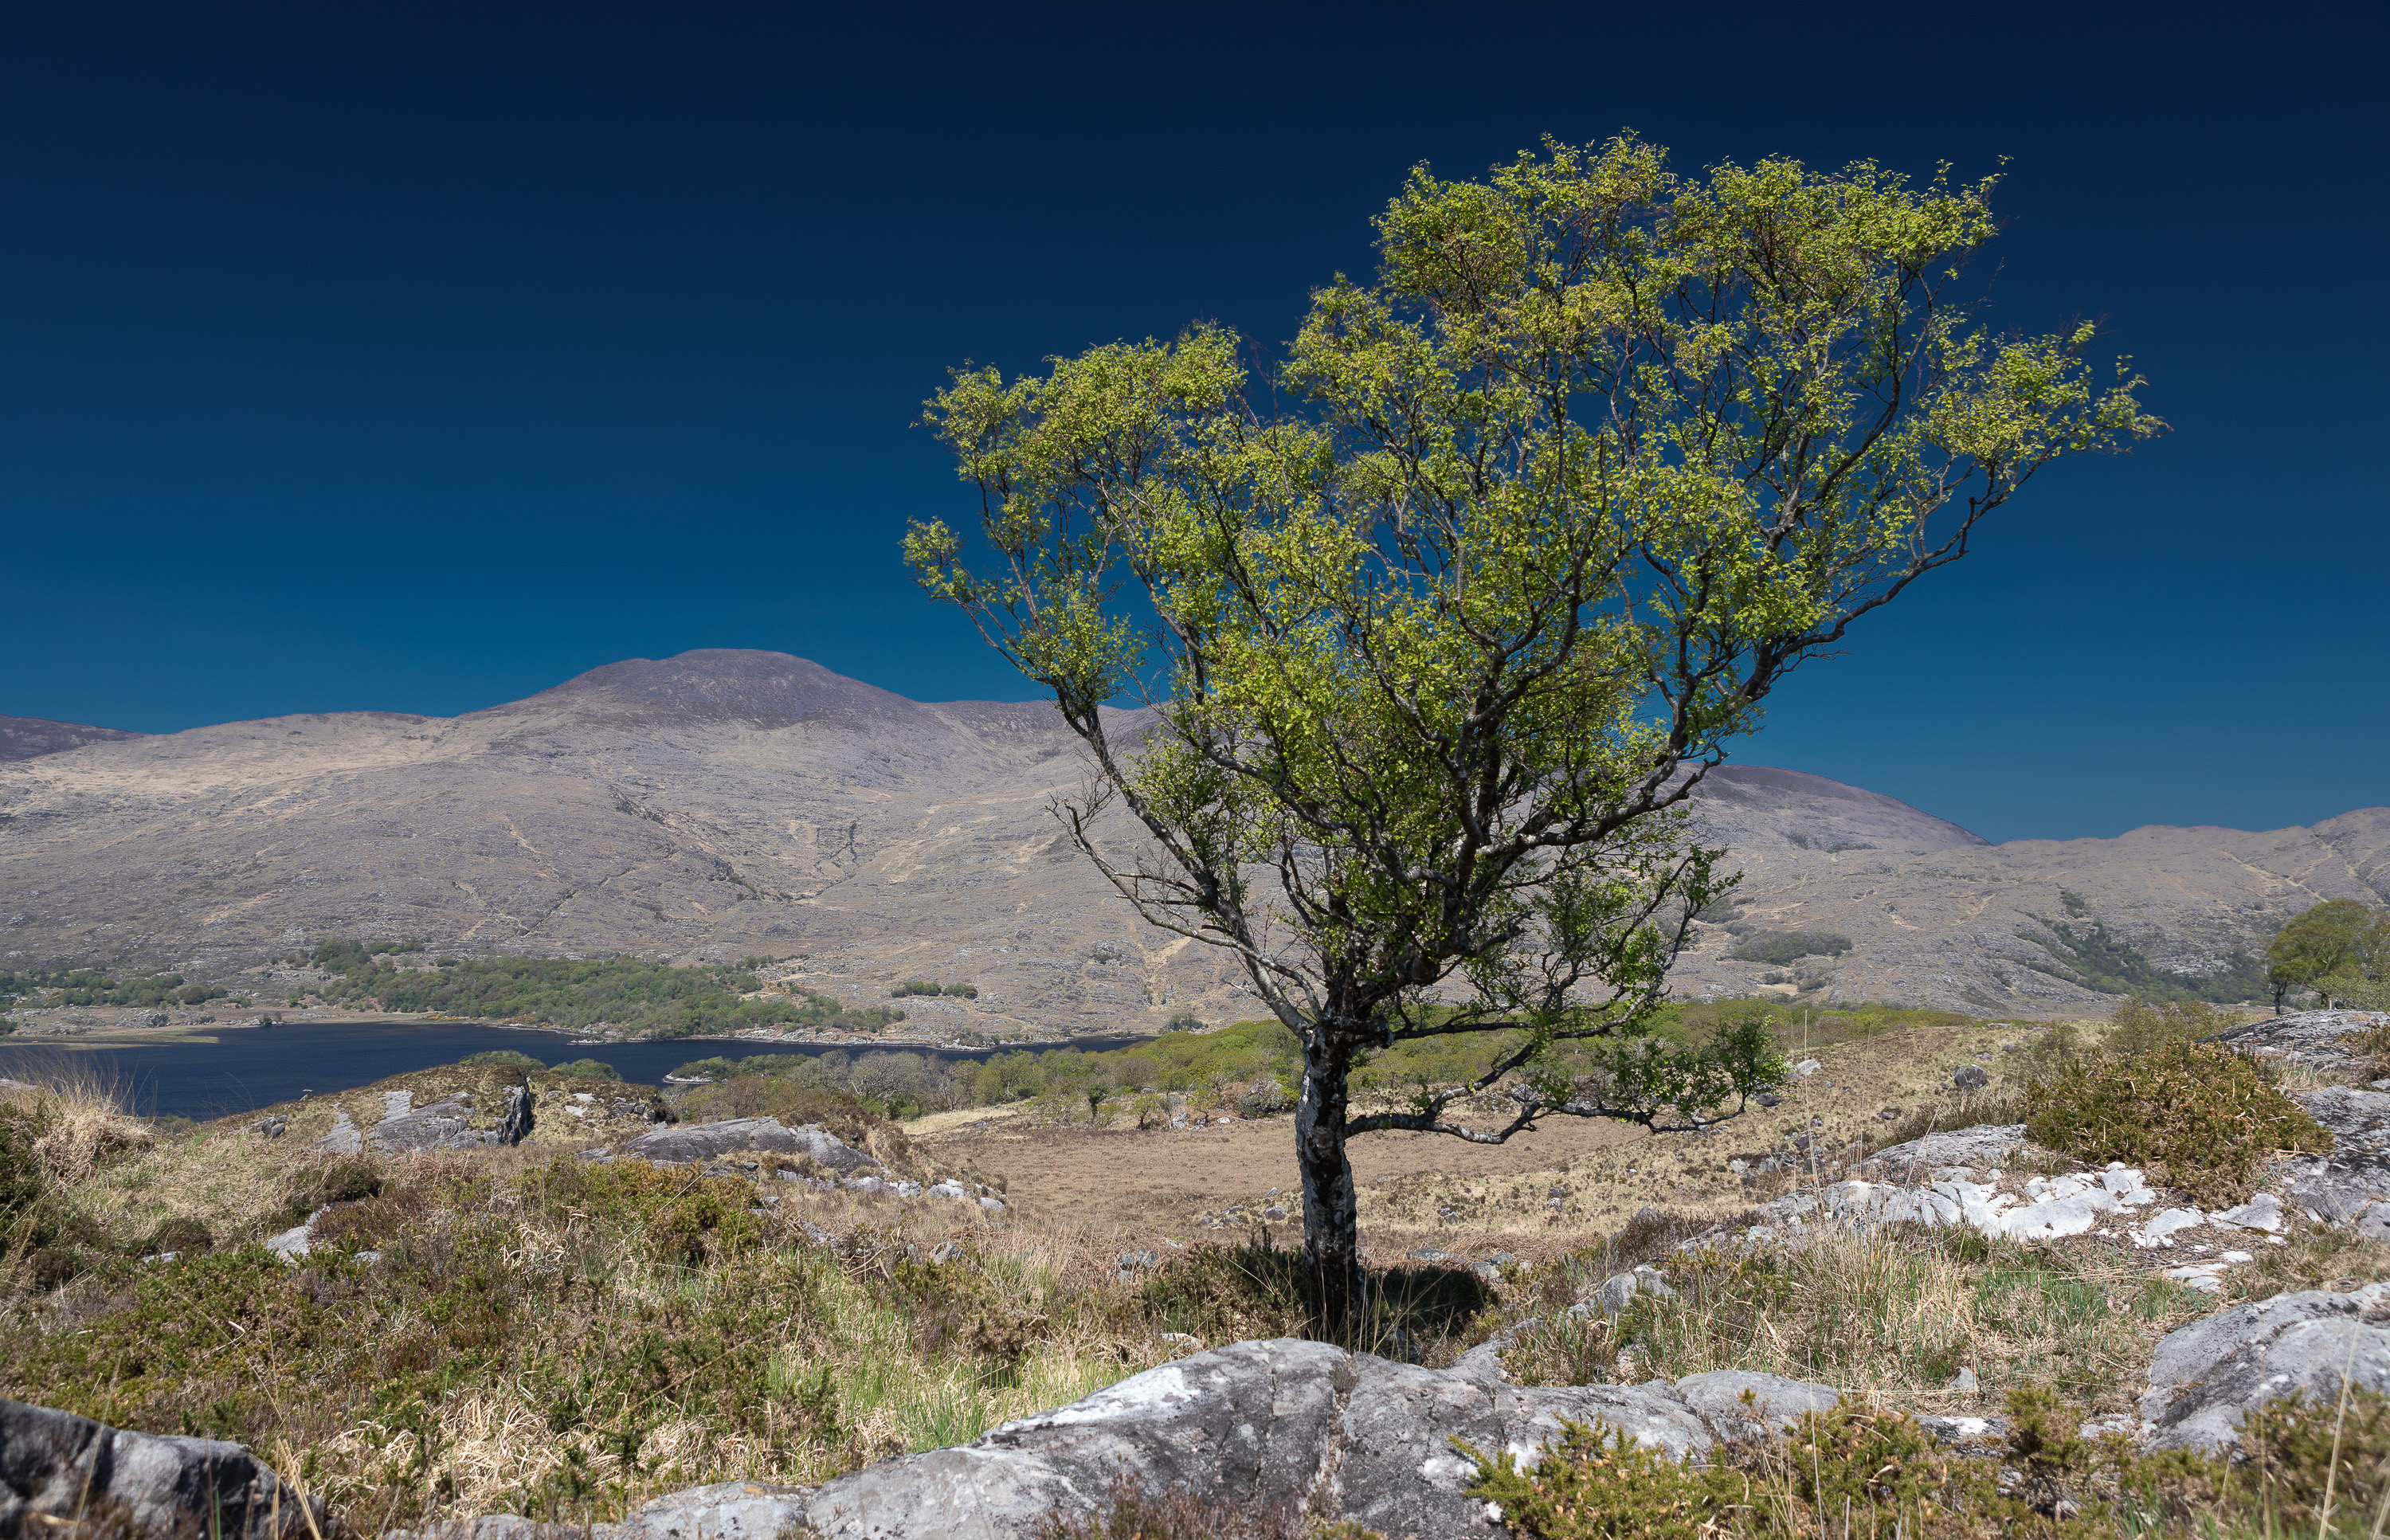 Photo and mask at end of tutorial 1
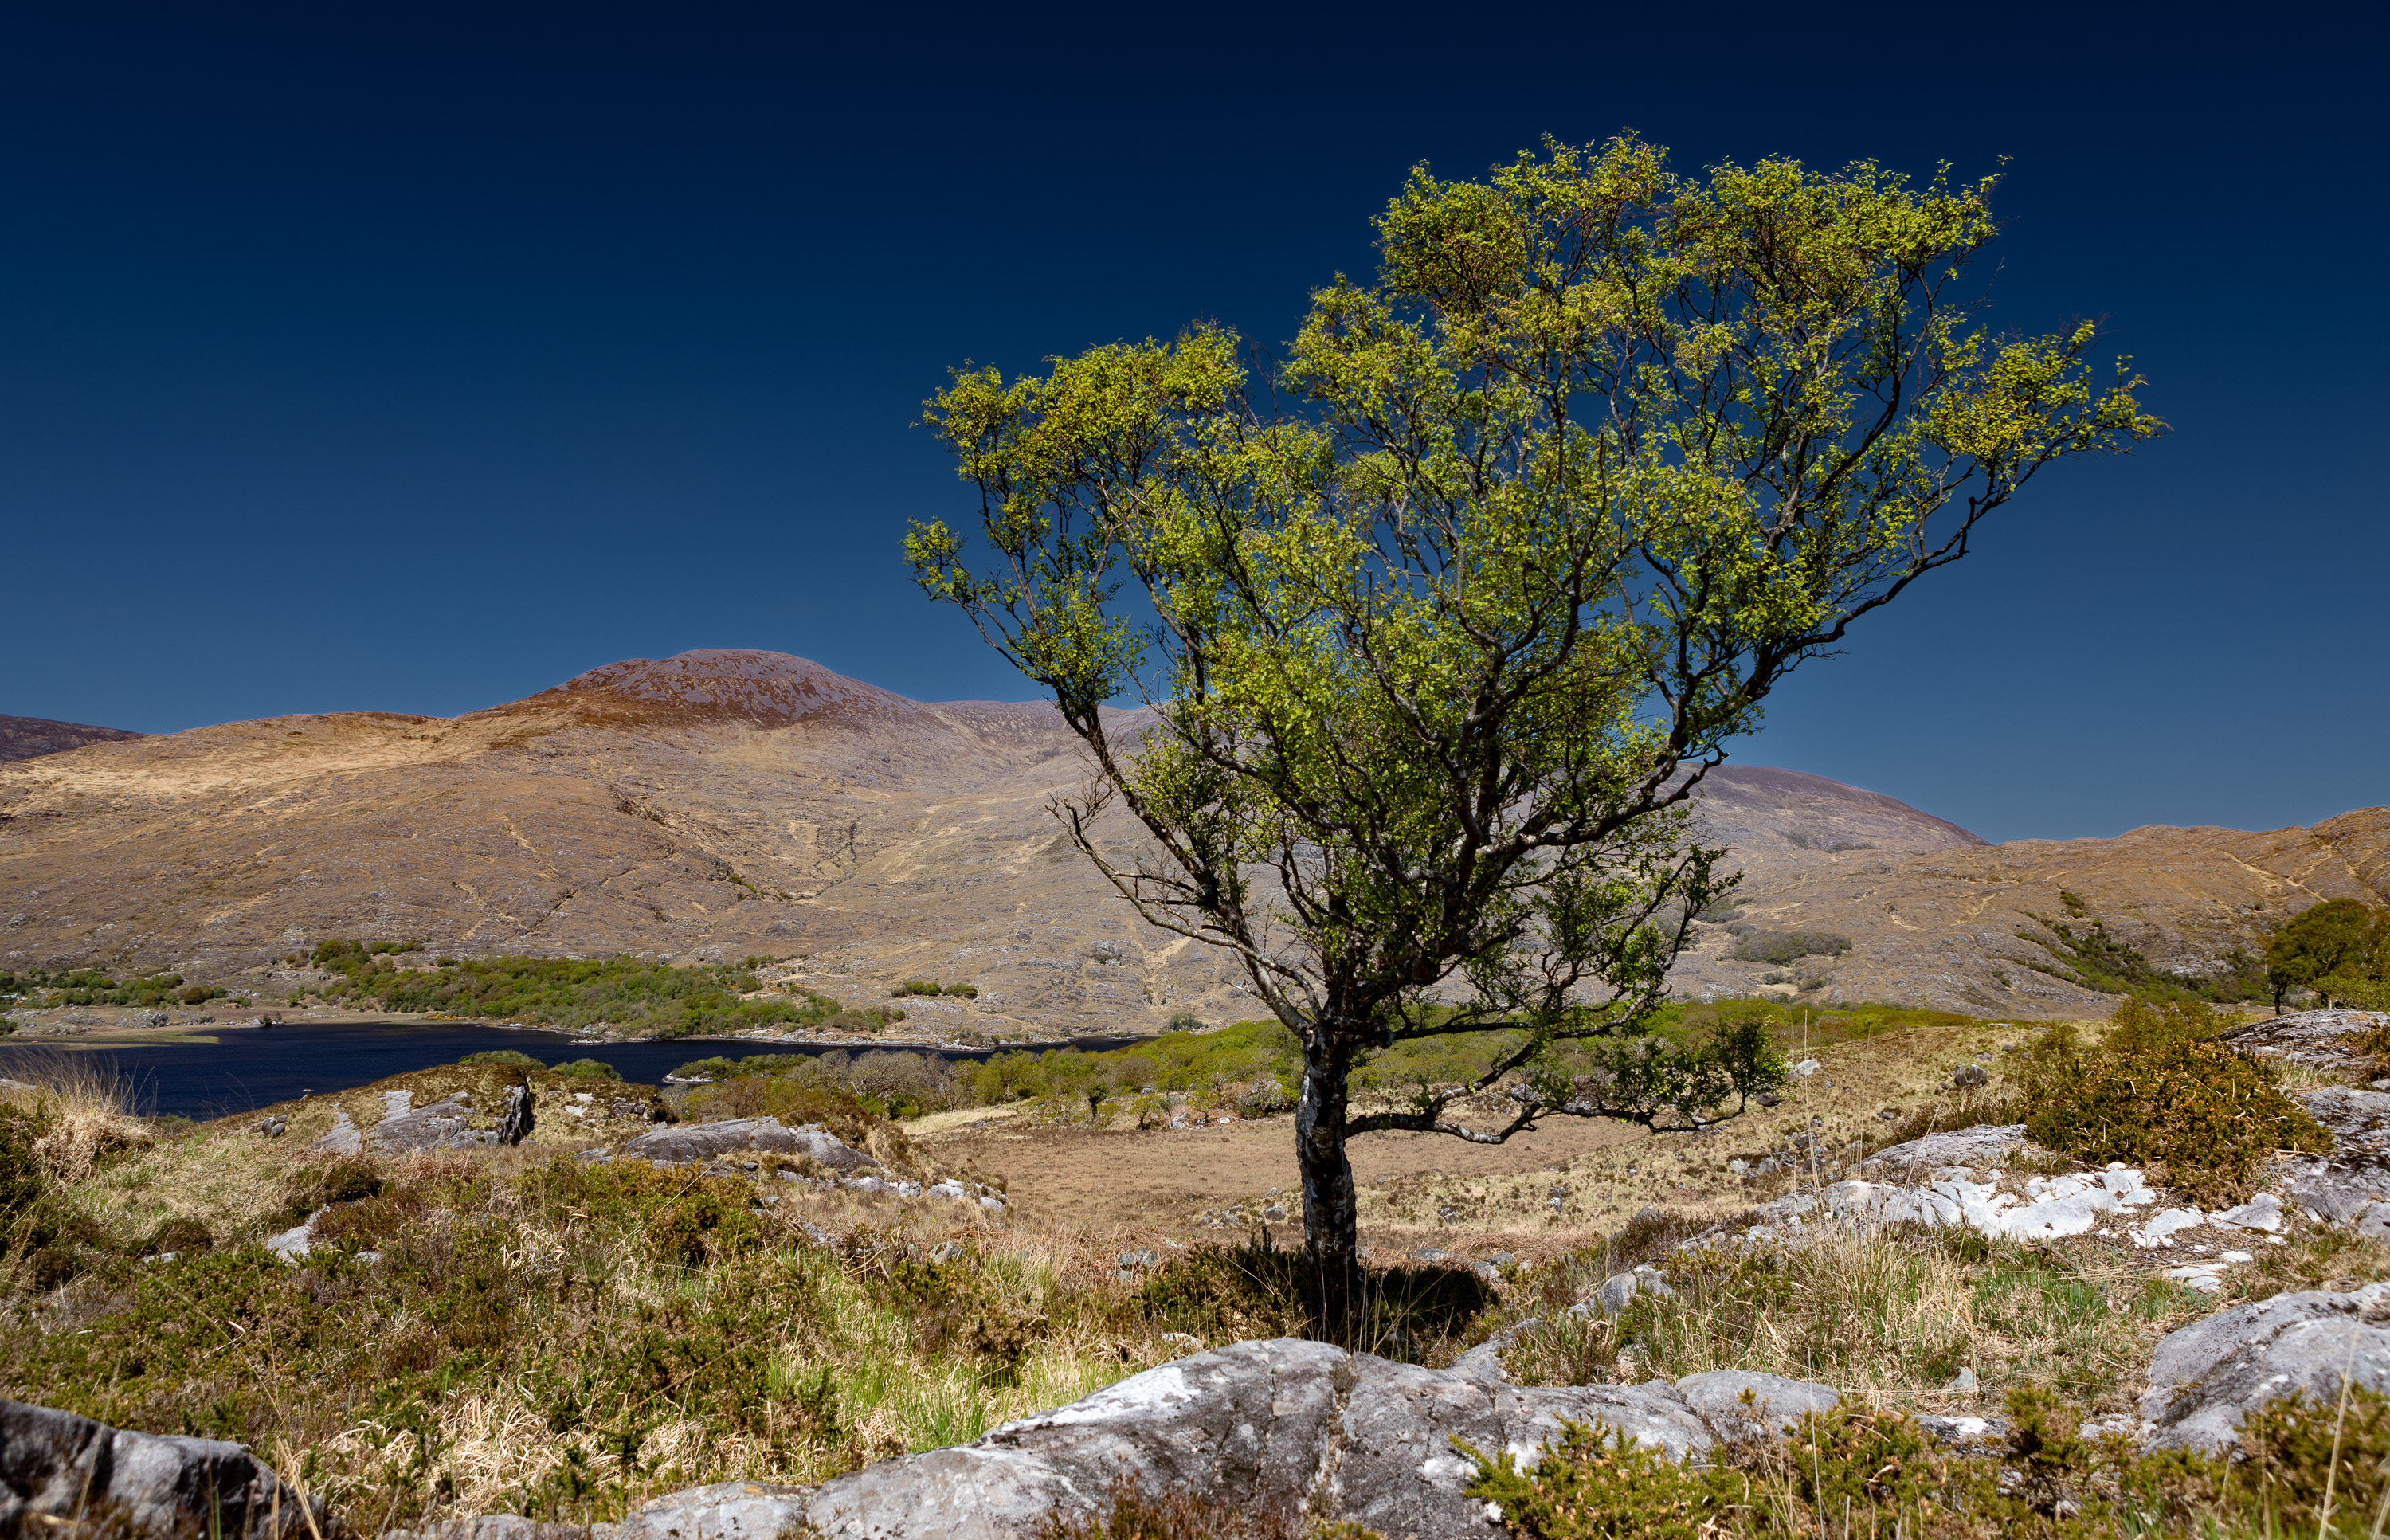 Final edited photo
This is the second part of a three‑tutorial sequence. In the next tutorial, we’ll refine the same mask by subtracting using Intersect with Object to tidy up the edges around the tree.
Tutorial 1: Add Color RangeTutorial 3: Duplicate & Invert Mask
What this tutorial includes.
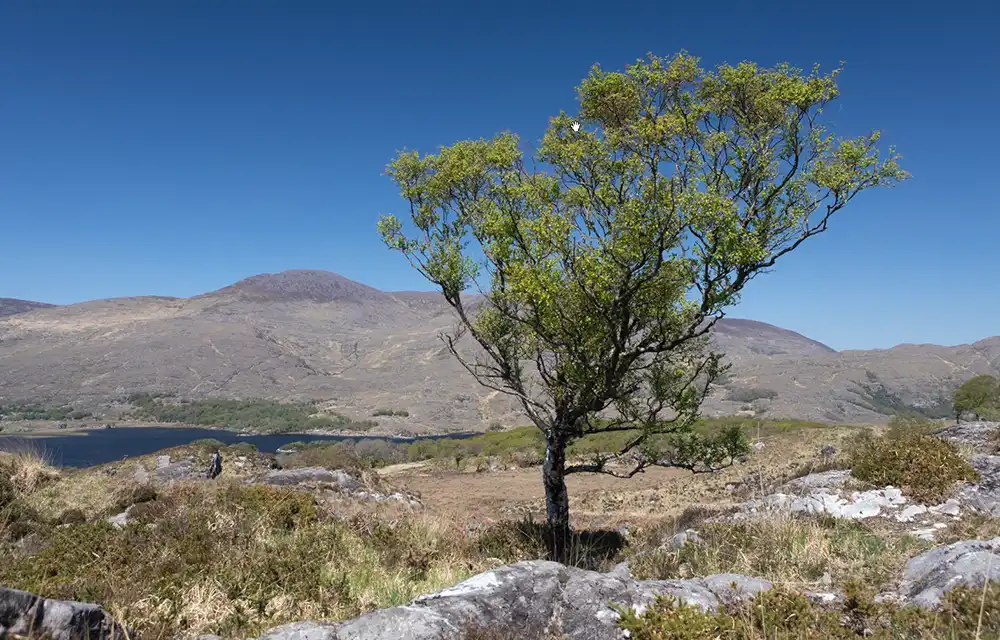
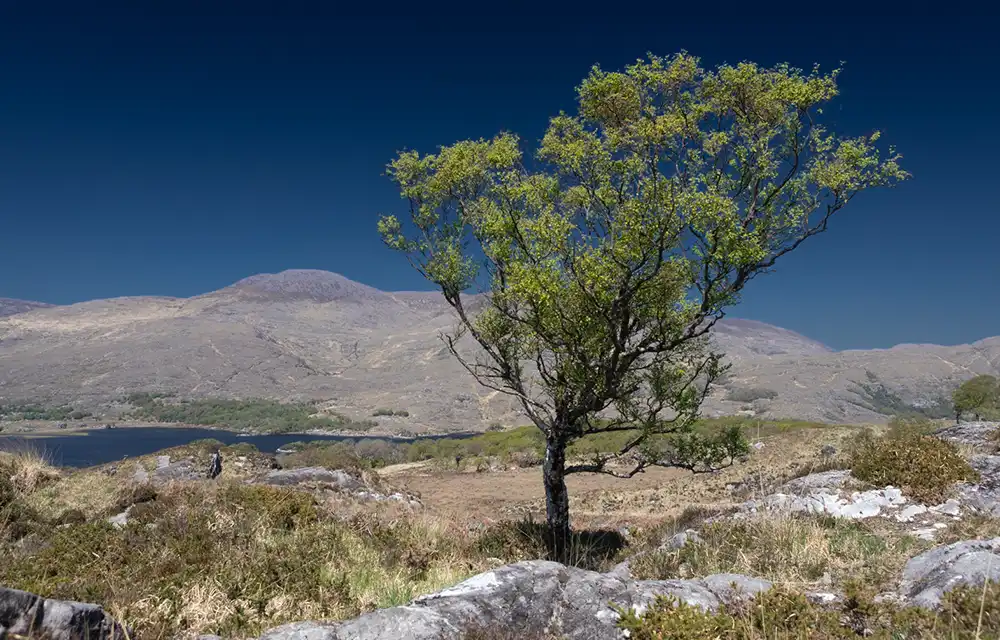
 Original unedited photo
This is the original unedited photo. The first tutorial in this series looked at improving the Sky Mask, using Add Color Range and this tutorial continues from that point.
This tutorial continues from the first tutorial. It will remove the mountains entirely from the sky mask.
Step 1. Use existing photo or download DNG
This tutorial follows on from the first tutorial, which added a Sky mask and then improved it by adding two Color Range masks. To follow this tutorial, continue with the downloaded jpg photo you edited, or download the dng photo, which has the masks already made.
Starting point: Use your finished image from Tutorial 1, or download the starting file for this lesson: tree-landscape-tutorial-1.dng
Step 1. Use existing photo or download DNG
This tutorial follows on from the first tutorial, which added a Sky mask and then improved it by adding two Color Range masks. To follow this tutorial, continue with the downloaded jpg photo you edited, or download the dng photo, which has the masks already made.
For instructions on downloading the tutorial photos, so you can follow along, see How to Download and Use Tutorial Photos
Step 2. Mask Contents
 Edited image after the first tutorial
 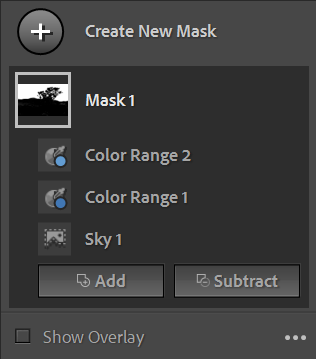 Second Color Range Mask
 This tutorial follows on from the first tutorial, which added a Sky mask and then improved it by adding two Color Range masks. To follow this tutorial, either continue with the downloaded jpg photo you edited, or download the dng photo, which has the masks already made.
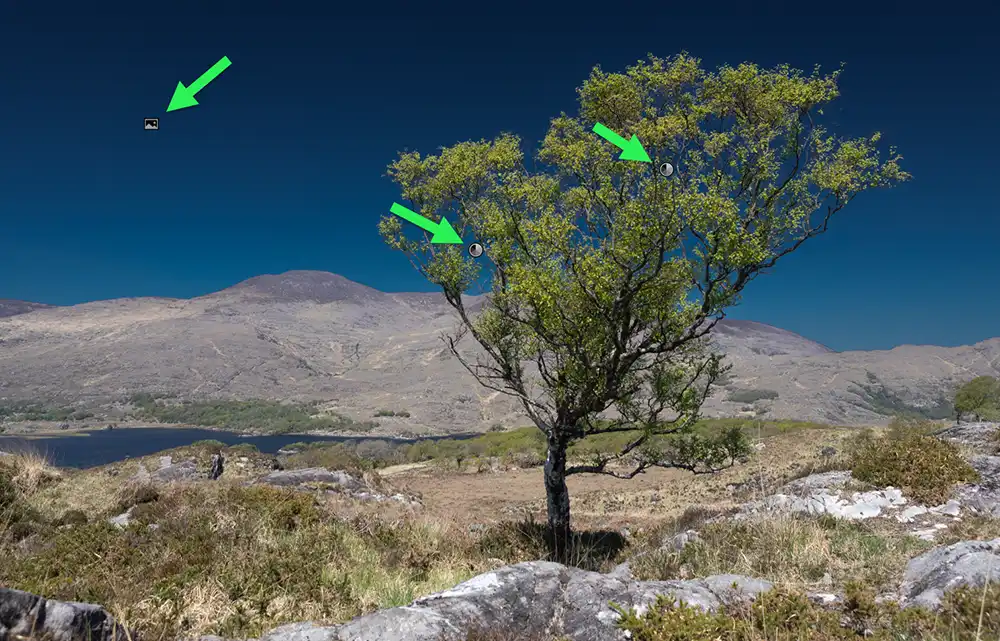
Step 3. View Each Mask
 Mask 1, showing the effect of all mask components
 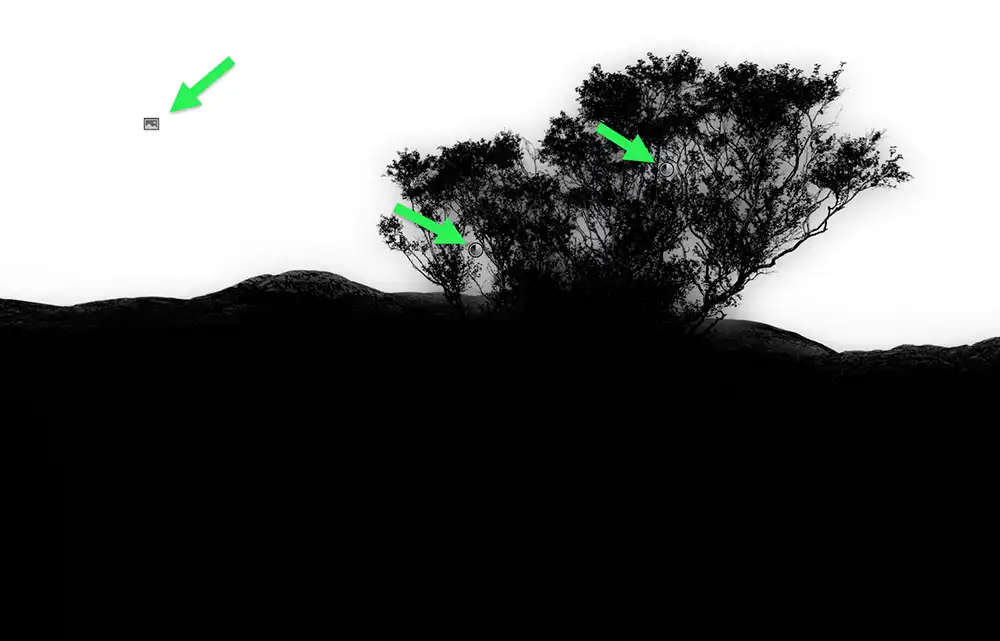 Sky Mask, showing the original Select Sky mask, arrow on left
 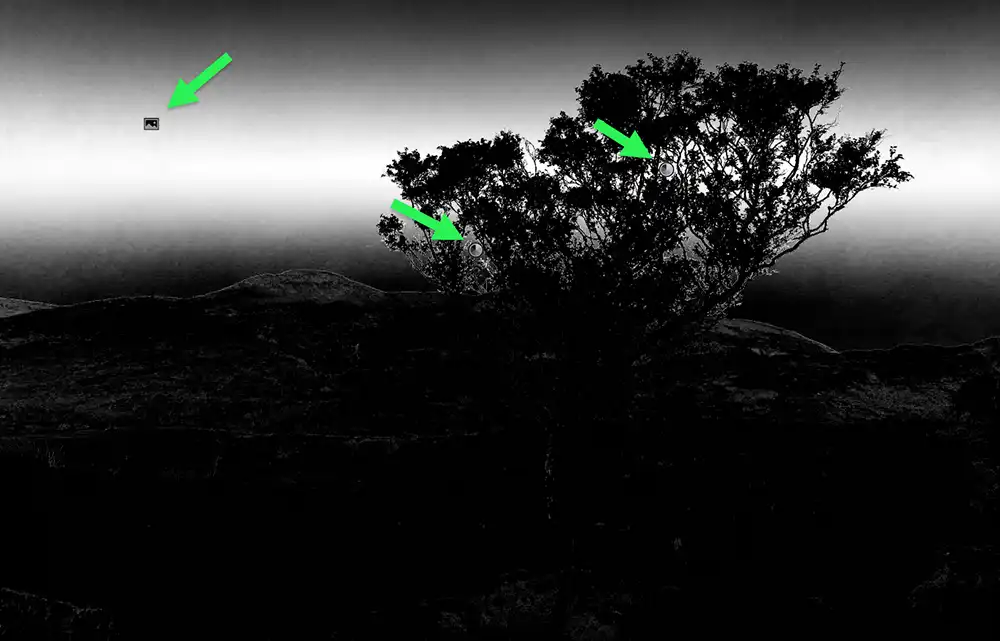 Color Range 1, shown by the arrown on the right
 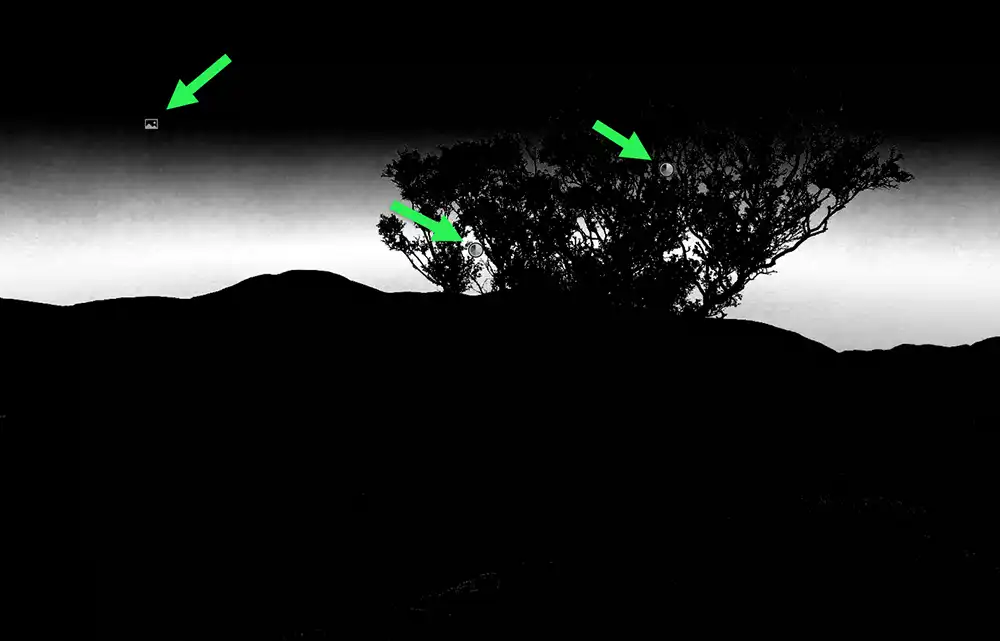 Color Range 2, shown by the lowest arrow
 The Mask Container (Mask 1) and the three Mask Components are shown here small, as a recap of the first tutorial. To see larger versions and the whole tutorial, visit Select Sky & Add Color Range
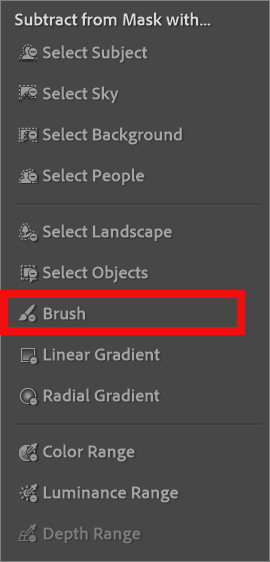
Step 4. Select Objects
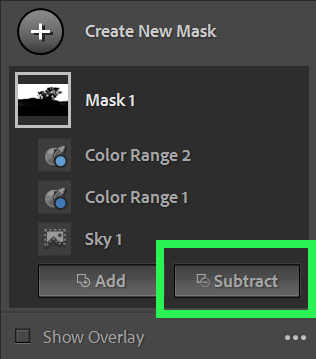 Subtract Button
 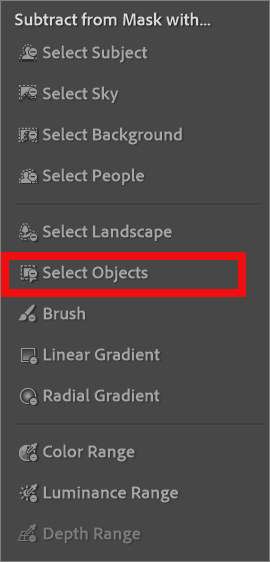 Select Objects
 Click on the Subtract button and then choose Select Objects from the dropdown list.
Step 5. Subtract with Select Objects
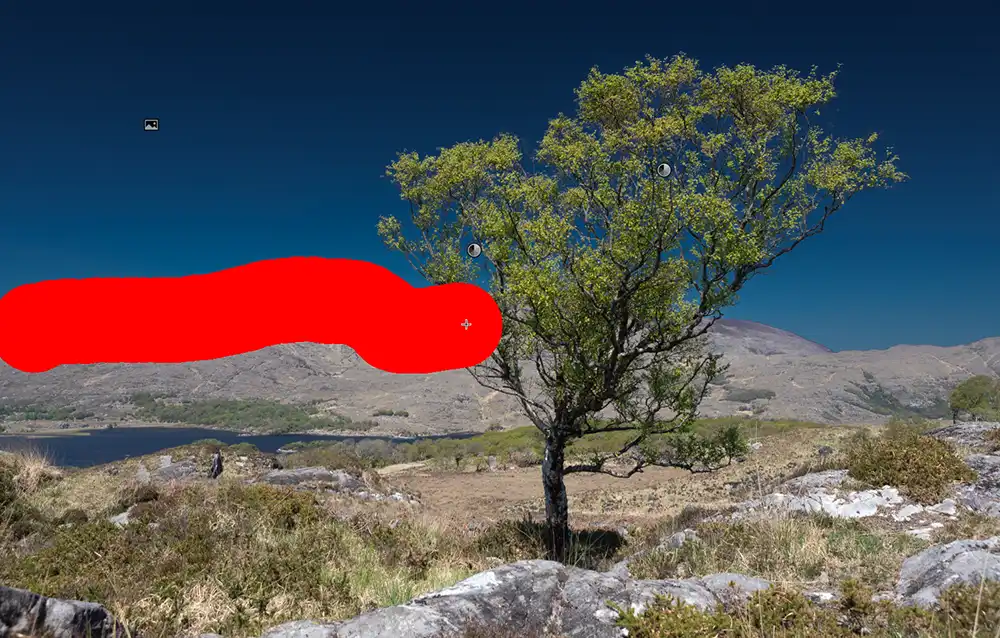 Brush with Select Objects
 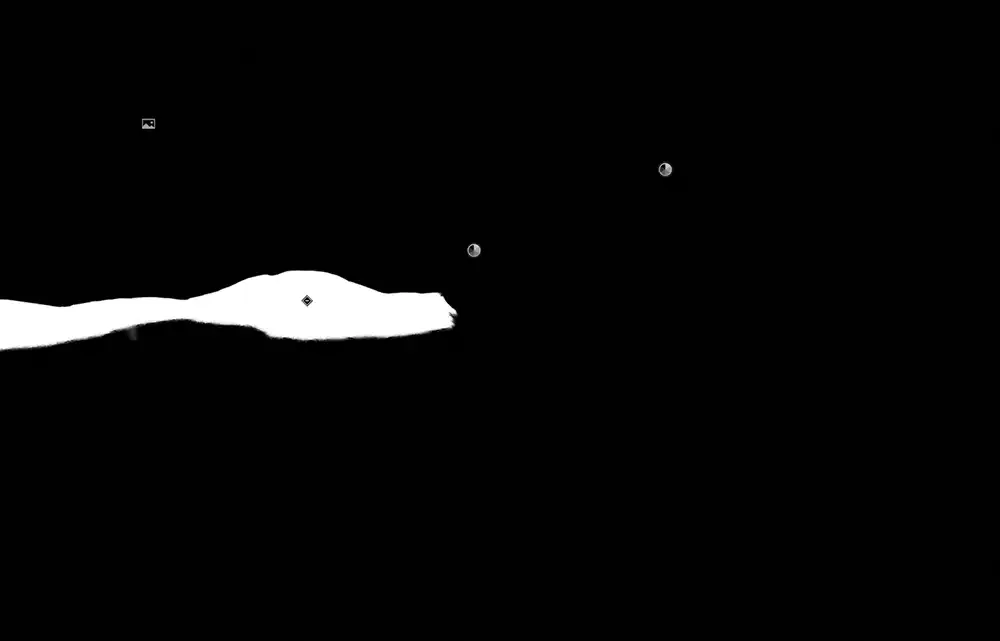 Automatically Selected Area subtracted from mask
 Adjust the size of the brush to be quite large. You don't need to feather the edge of the brush as selection is automatic. Select Objects has automatically selected the hard edge of the mountain and subtracted the area of the mountain that was previously part of the Sky mask. This can be shown clearly in the next step.
You could try selecting the whole line where the mountains meet the sky, but I found this method worked as well, if not better. In different photos, that's worth a try.
Step 6. Before and After Subtracting
 Mountain partially selected in Sky mask
  Subract > Select Objects has removed the mountain from the Sky mask
 The mountain has been removed from the Sky mask, so that edits to the Sky mask will now not affect the mountain at all. Before this step any adjustments to the Sky mask would affect the mountain.
This also prepares us for the next tutorial, where we will duplicate and invert the Sky mask, so that everything except the sky is selected and we can apply different adjustments to the tree and the mountains, without affecting the sky.
Step 7. Repeat Subtract Select Objects on other areas
Repeat these steps for each part that you wish to subtract from the mask. Click Subtract, then choose Select Objects and brush over the line where the mountain meets the sky.
You do not need to select anything except where the mountain meets the sky. You can easily subtract the rest of the ground by using a simple Brush, in the next step.
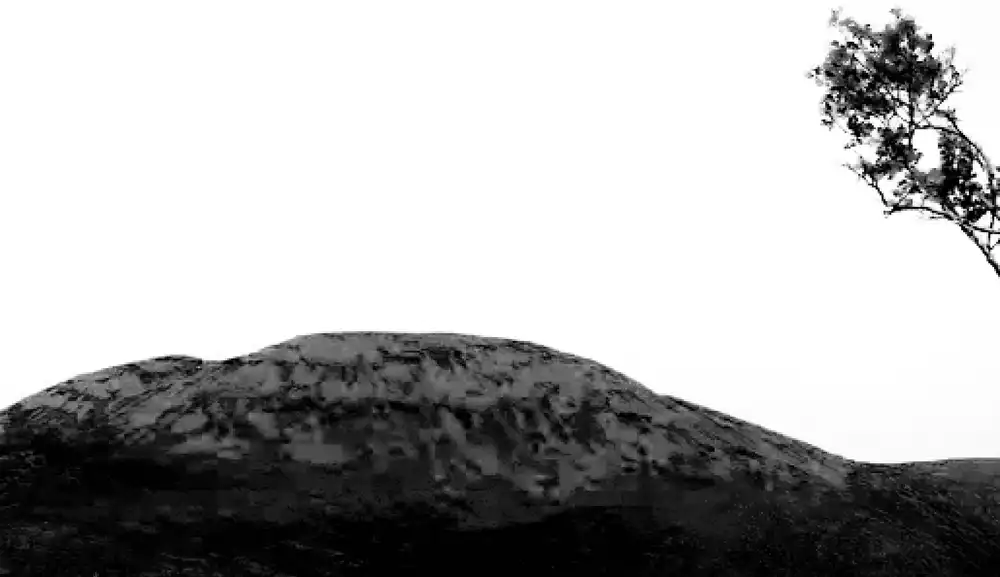
Step 8. Subtract with Brush
 Mountain partially selected in Sky mask
 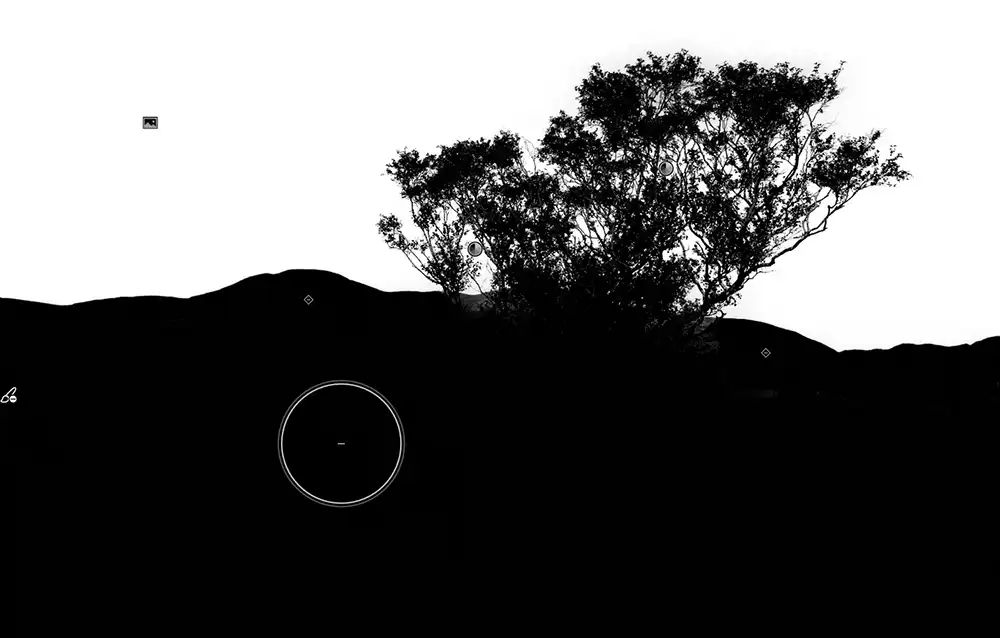 Mountain partially selected in Sky mask
 In any selection or mask, the crucial part is the edge - where the part you want meets the parts you don't want. If everything within a subject is solid, once the edge is accurately selected, you can manually tidy up the mask with the Brush. This works just as well in Photoshop on Layer Masks.
Click on Subtract and select Brush.
Brush over the rest of the area you want to subtract from the mask. Ensure you do not go over the line where the mountain meets the sky.
Final Thoughts
 Sky mask now does not affect any other area
 Lightroom's AI tools for creating masks work very well, but they are not perfect. Masks often need improving, but Adding To, or Subtracting From the original mask.
Following the first tutorial and this tutorial, we have have an accurate mask of the sky, which has got the detailed sky within the tree branches, but none of the mountains.
The next tutorial will build on this and create an equally accurate mask for everthing except the sky, so we can edit that.
