Page updated: 24 July 2026
Add to Mask with Color Range in Lightroom Classic
Expand a Mask by Targeting Specific Colours Lightroom Missed
In this tutorial, we’ll edit the sky using an AI‑generated Select Sky mask. As you’ll see, the initial mask isn’t perfect — it rarely is when Lightroom has to work through the branches of a tree. We’ll improve the mask using Lightroom Classic’s Color Range tool, one of the most effective ways to include areas Lightroom didn’t select automatically, especially skies, foliage, clothing, or anything with a strong, consistent colour.
Using a simple landscape photo, we’ll start with a basic sky mask and then use Add → Color Range to pull in the missing blue tones that Lightroom failed to detect. This gives you a cleaner, more complete mask without affecting the rest of the image.
Step by Step Example of Mask with Color Range in Lightroom Classic
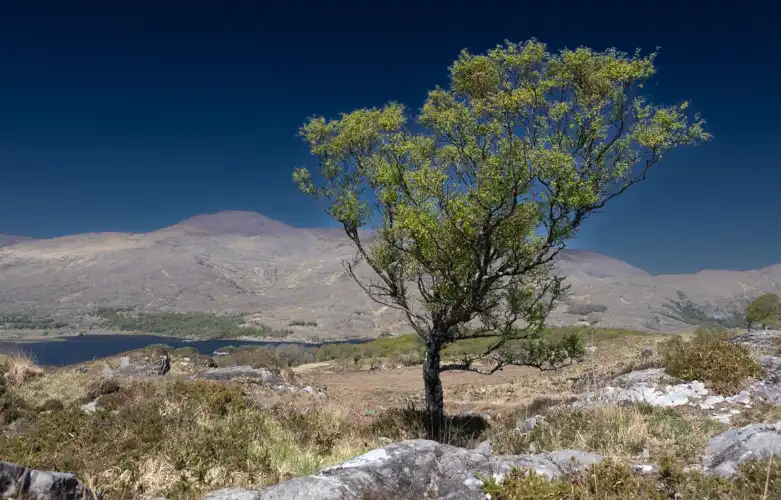
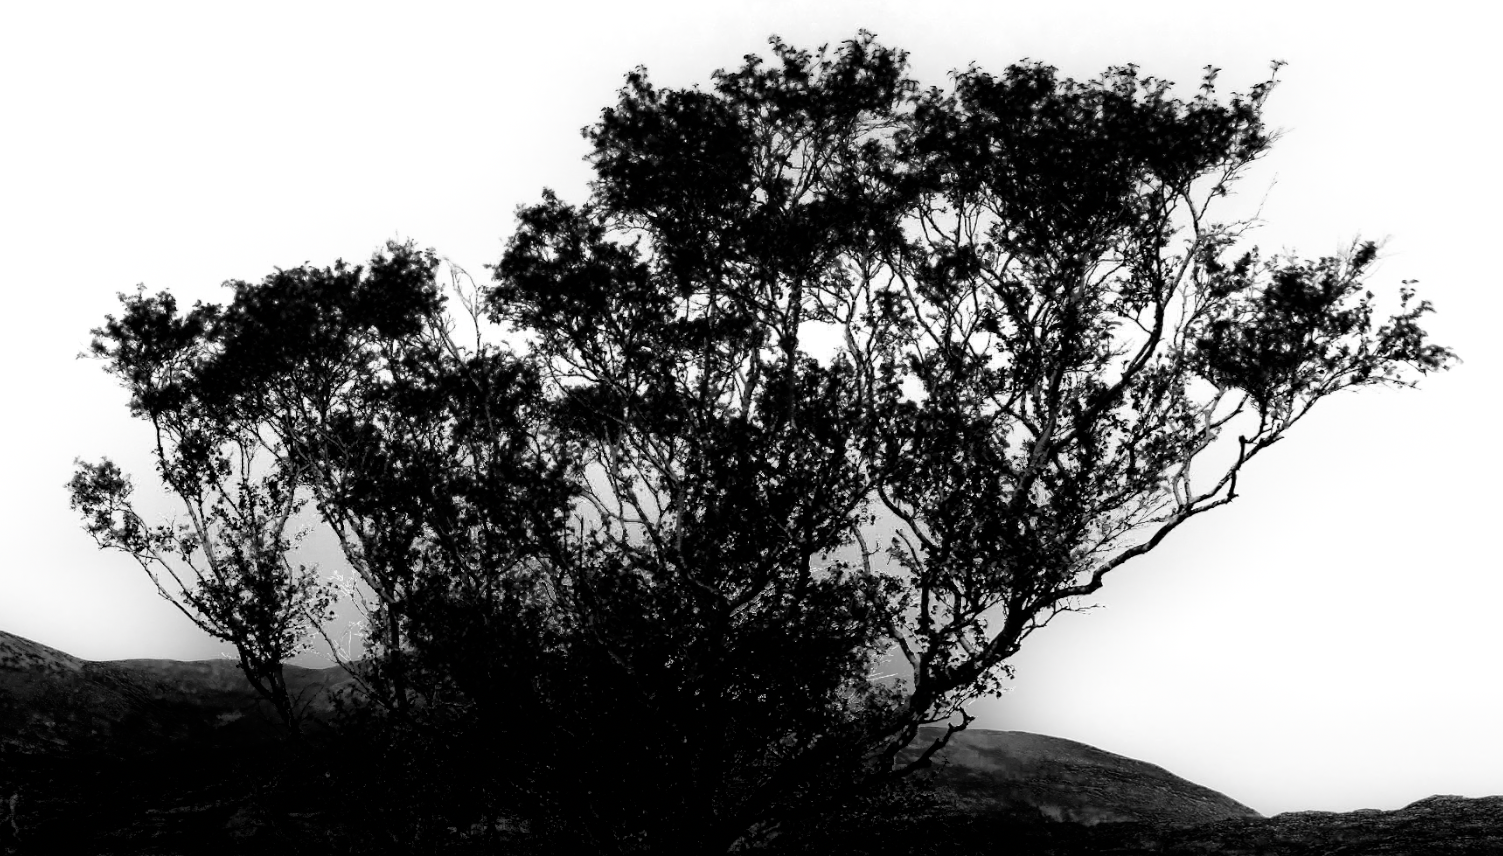
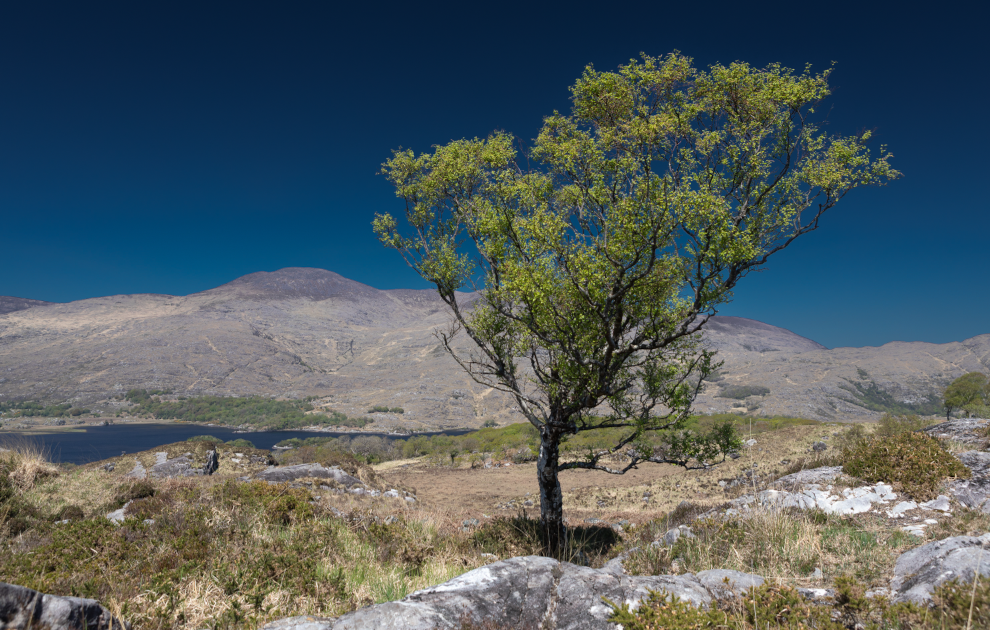
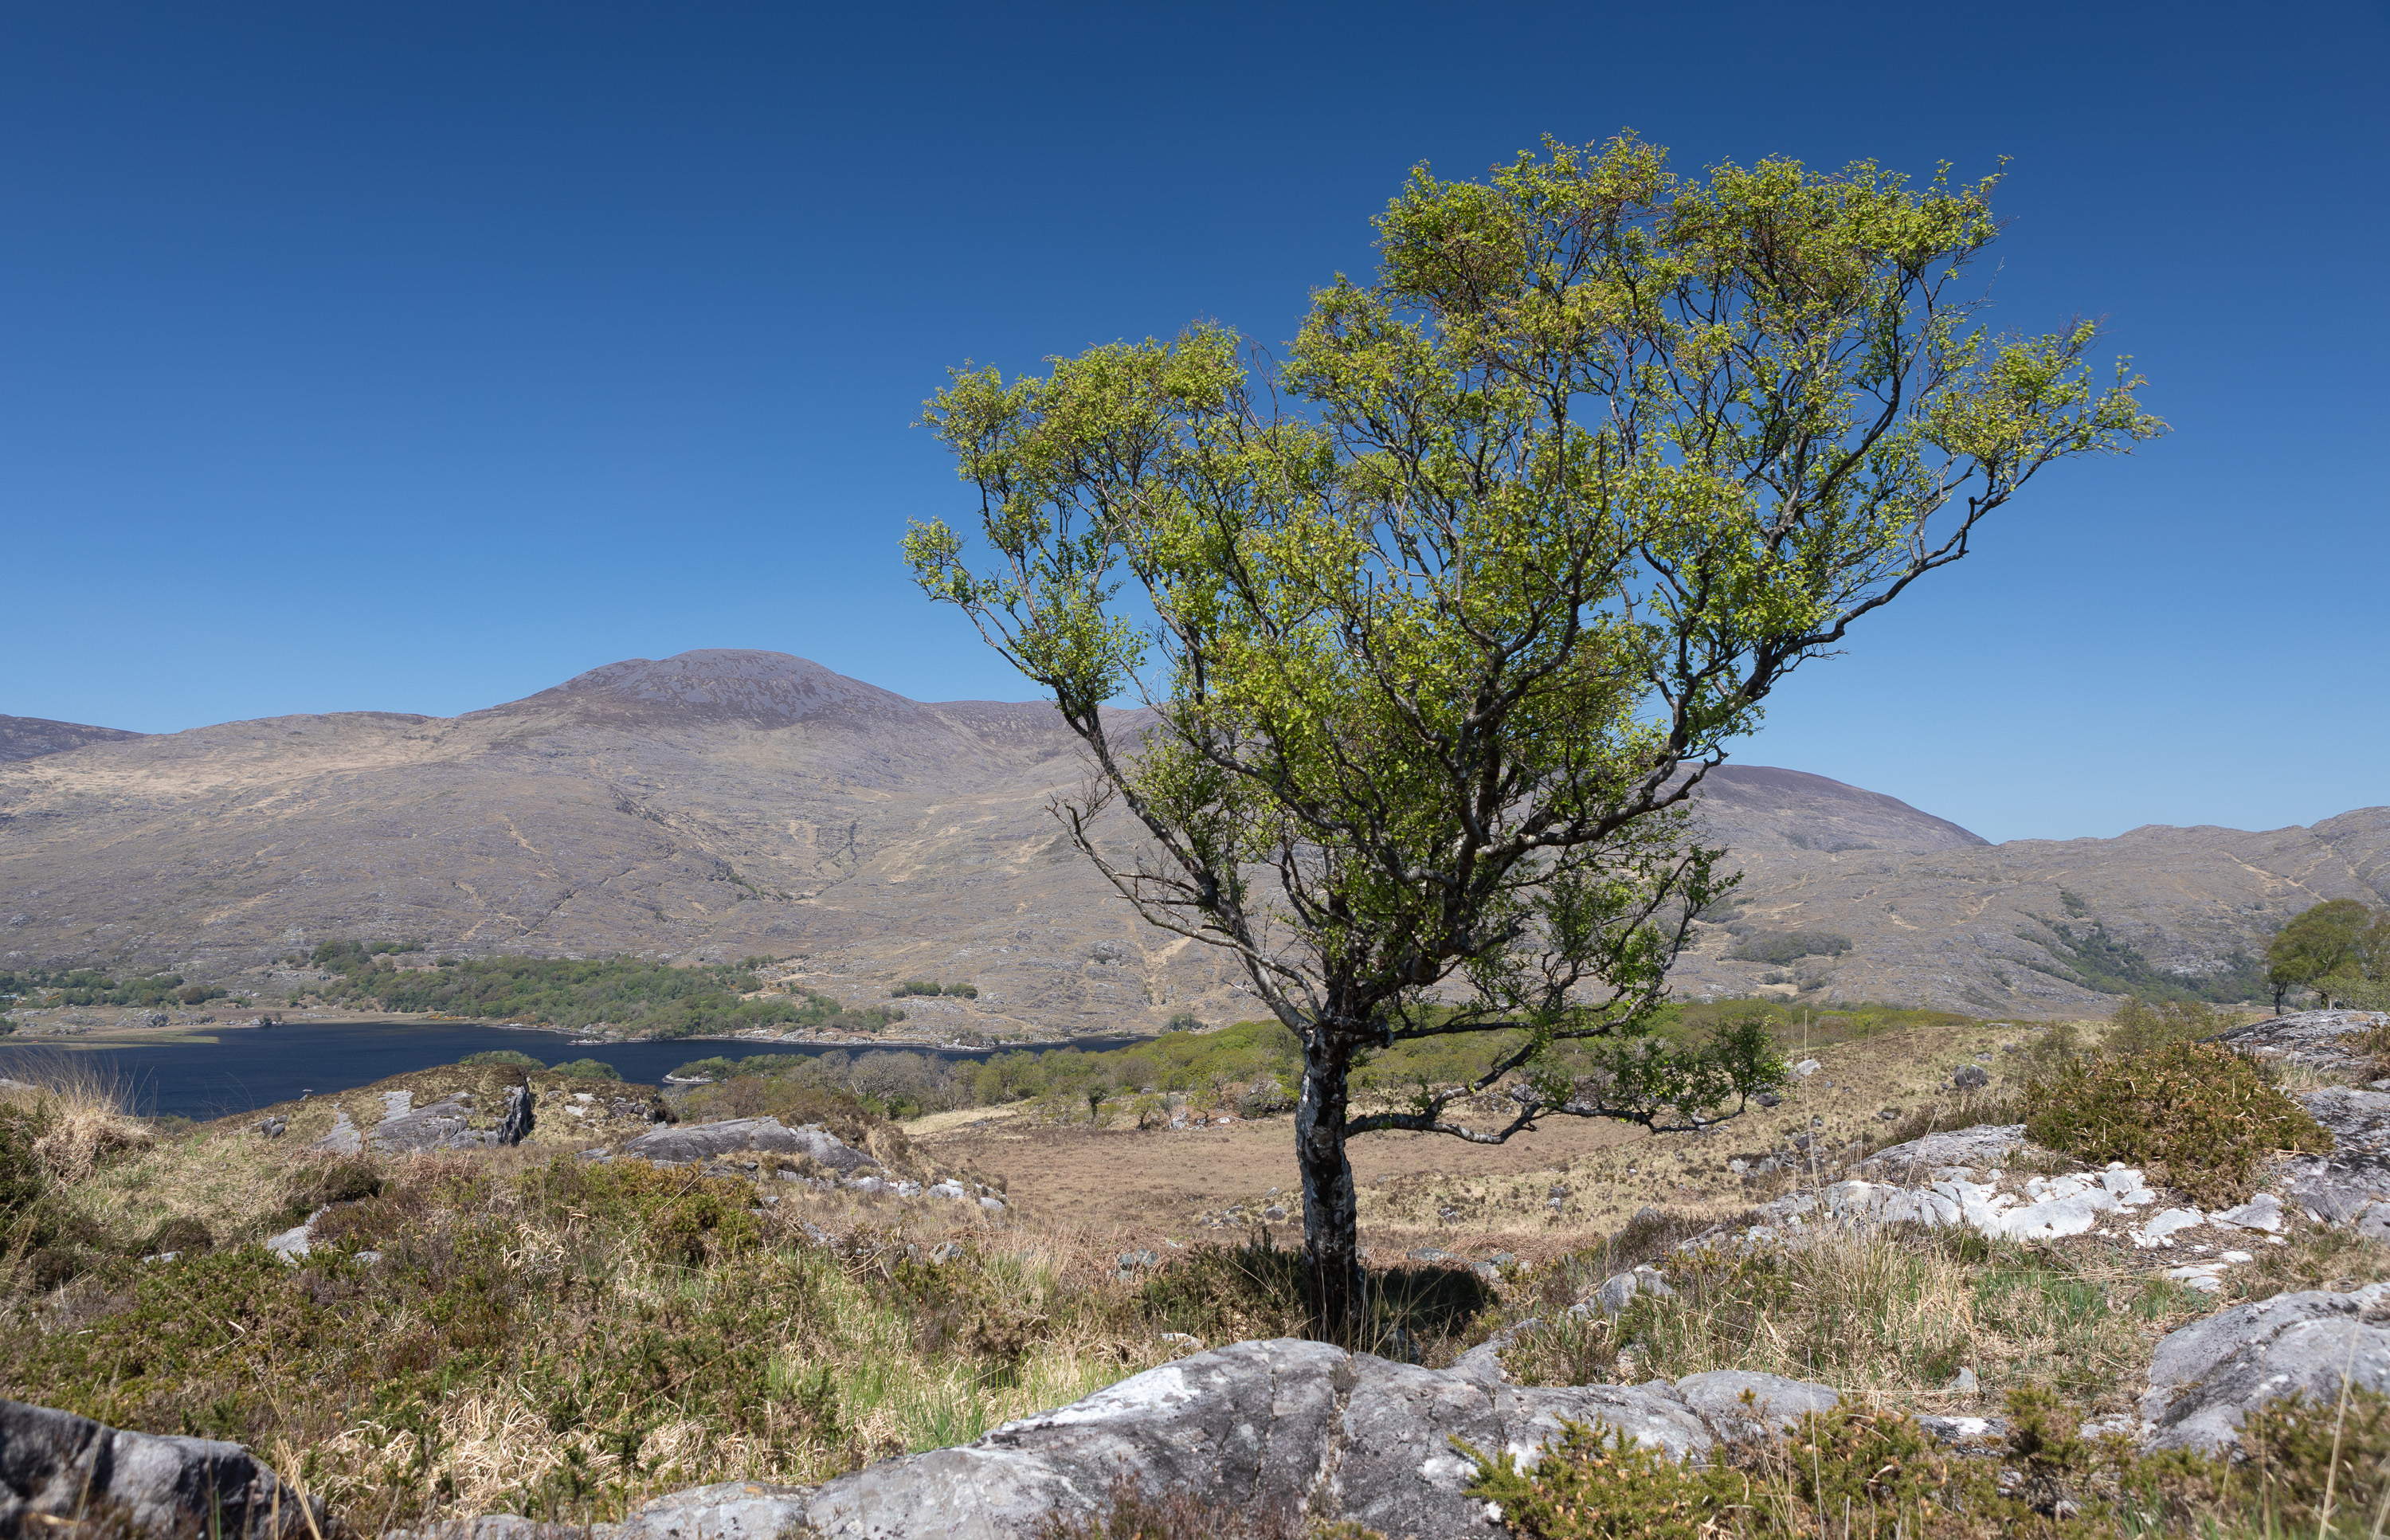
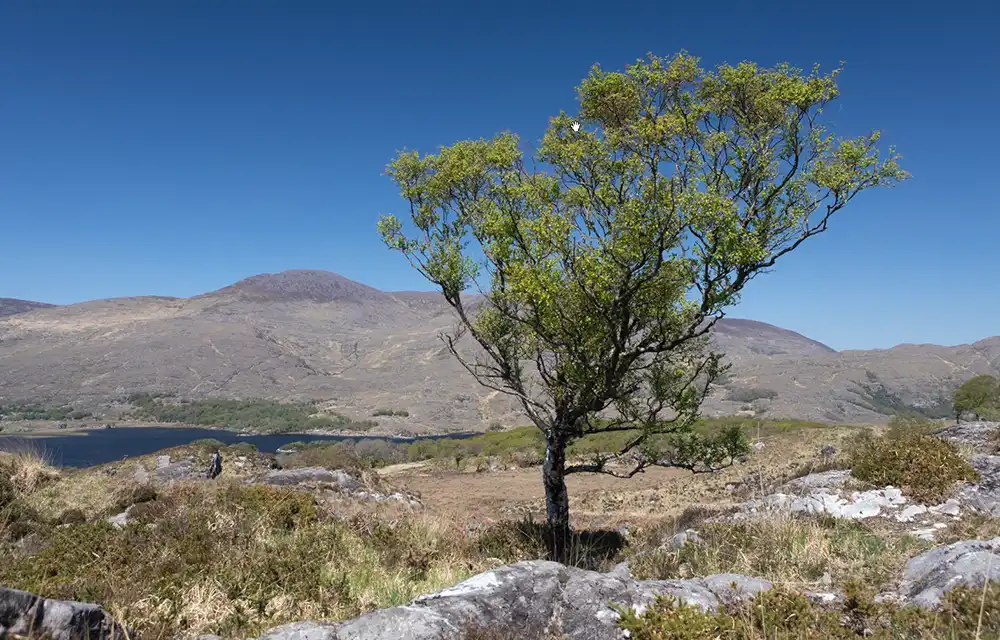 Original unedited photo
 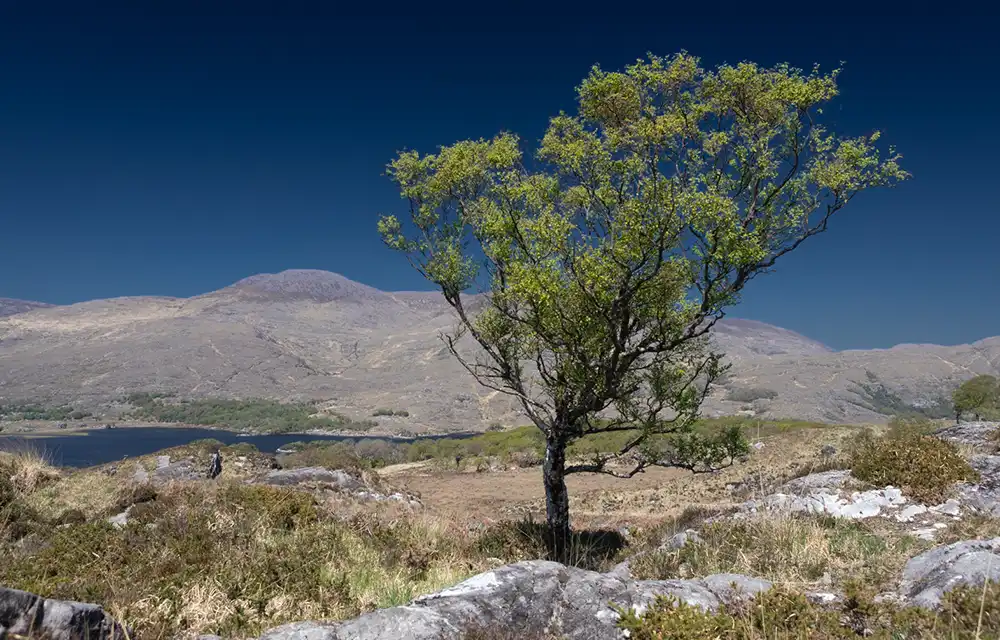 Edited photo, at the end of this tutorial, part 1 of 3 tutorials
 Note: The edited version intentionally exaggerates the sky so you can clearly see the benefit of adding to the mask using Color Range.
This is the first part of a three‑tutorial sequence. In the next tutorial, we’ll refine the same mask by subtracting using Intersect with Object to tidy up the edges around the tree.
Tutorial 2: Subtract Using Select ObjectsTutorial 3: Duplicate & Invert Mask
Final edited photo after tutorial 3
 Edited photo, at the end of part 3 of these tutorials
 Note: The edited version intentionally exaggerates the sky so you can clearly see the benefit of adding to the mask using Color Range.
In the third tutorial, we’ll take the finished mask and duplicate and invert it to create a perfect foreground mask — a powerful workflow you’ll use again and again.
Note (June 2026): Lightroom Classic doesn’t include the mask‑feathering and blending tools that Adobe added to Adobe Camera Raw in May 2026. Lightroom (cloud) has a basic Feather slider introduced in February 2024. Neither of these tools actually improves the selection itself — they simply soften the edge and hide imperfections. By using Add → Color Range (and later Subtract → Intersect with Object), we’re improving the mask at the source, not just hiding its imperfections. This produces a far more accurate result, especially around details like branches and leaves.
ON THIS PAGE
What this example includes
This tutorial will select the sky using Select Sky. Even in this photo, which should make it as easy as possible for Lightroom to select a plain blue sky, including withing the branches of the tree, the mask isn't perfect within the branches. We will improve it using Add > Color Range. As the tree is against a blue sky this is an effective tool.
The follow-on tutorial will look at how to completely remove the mountains from the Sky mask. The third tutorial will then show how to create a perfect mask for all the photo except the sky, so different edits can be applied, as shown in the above edited photo.
Step 1.
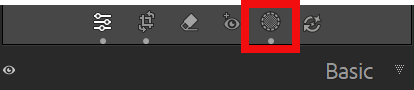 The Masking button
 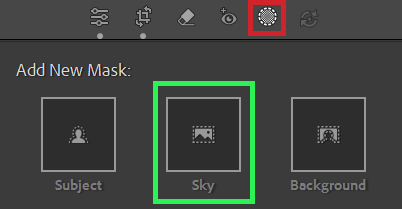 Select Sky button
 Click on the Masking button (red highlight), then click on Sky (green highlight).
Lightroom will then work to create a mask of the sky.
Step 2. Sky mask initial result
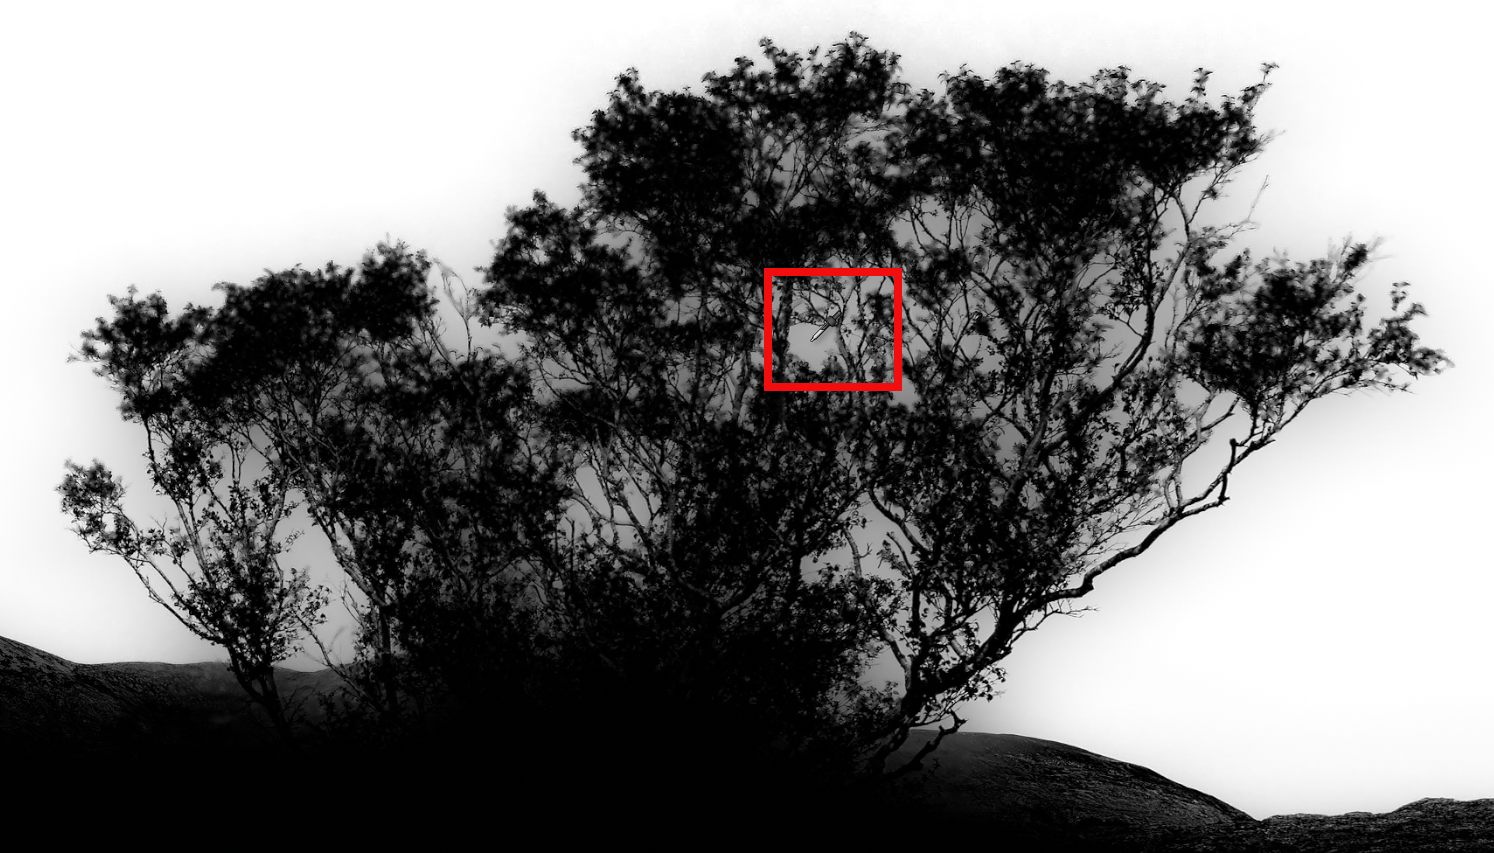
 Sky mask with darkened sky shows areas in tree not perfectly selected
 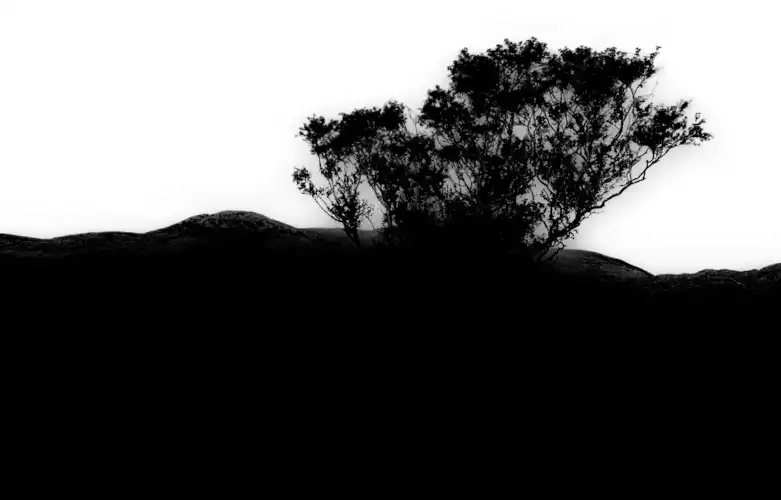 Sky mask shows the imperfect mask more clearly
 This is the result of the automatic masking of the sky which I've then darkened, to show the imperfections through the tree.
Looking at the mask itself shows this up more clearly. Perfect masking of the sky would show up as white between the branches, instead of gray. This can be seen more clearly in the next step, which shows close-ups of the tree.
Step 3. Sky mask close-ups
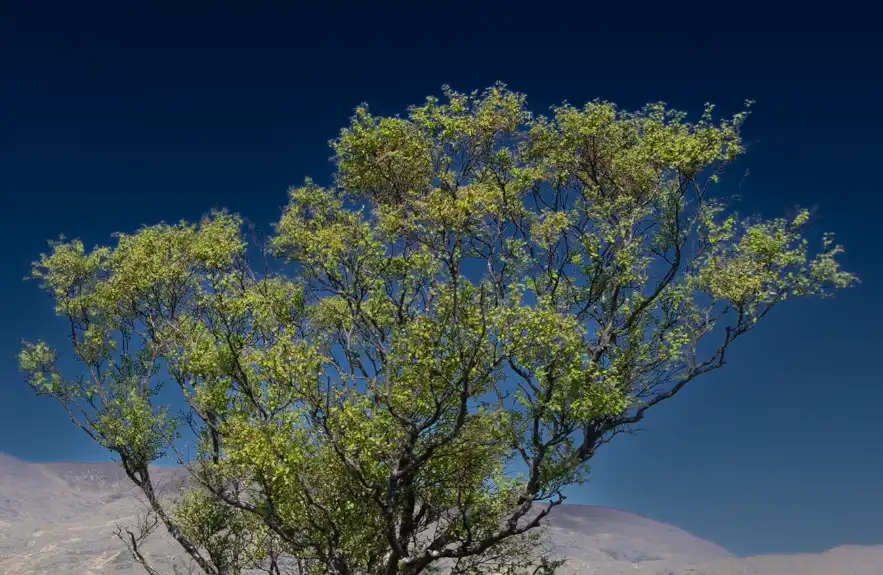 Close-up of Sky mask on the tree, showing sky between branches has not been darkened the same as the rest of the sky
 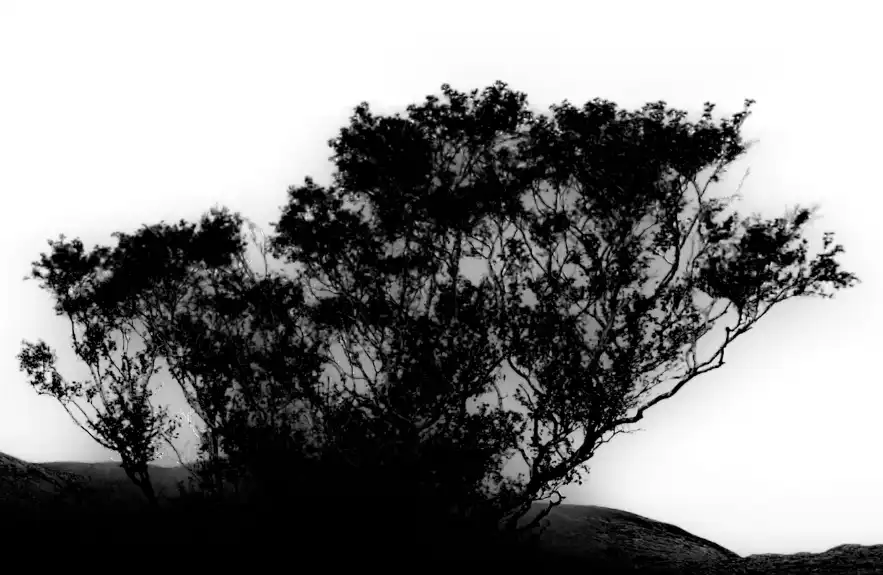 Close-up of the actual mask, showing more clearly the areas between branches are partially selected (gray instead of white)
 These close-ups of the previous step show more clearly how areas of the sky between the branches of the tree are not perfectly masked.
When viewing the actual mask (black and white), it shows the areas between the branches are gray, which means the areas are only partially masked. If they were perfectly masked, the areas would be white, as is the rest of the sky.
Step 4. Zoom In

In the Navigator panel, left side of screen at the top, zoom in to see detail more clearly.
- FIT: (red highlight) Fits the photo on the screen, so it fills the screen.
- 100%: (green highlight) View the photo at 100%. One screen pixel equals one image pixel, so quality can be assessed accurately.
- Various: (pink highlight) Select between 6% and 1600% zoom, to view detail very close-up
Click the small triangles, shown in the pink highlight, then from the dropdown list select a zoom level between 6-1600%.
You can also zoom in and out using the keyboard. Ctrl+ to zoom in and Ctrl- to zoom out.
Zoom in enough to see the detail clearly between the branches, so you are able to click accurately between the branches and not on the branches.
Step 5. Show Overlay
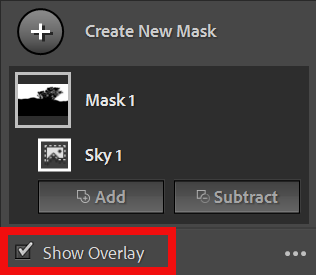

In the masks panel, tick the box to Show Overlay, so you can view the black and white overlay of the mask. This shows you clearly the areas between the branches, so you can accurately click on the sky.
After clicking you will then see the resulting mask more clearly.
Step 6. Add Color Range

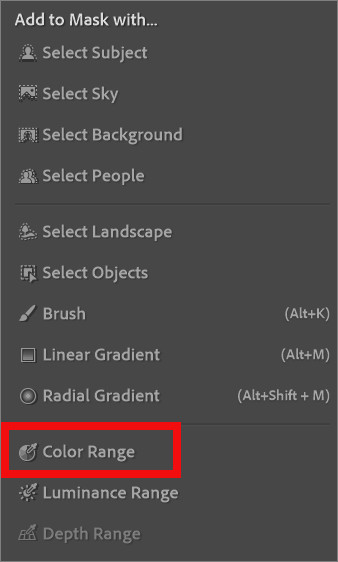
In the masks panel, click on Add.
Then in the dropdown, click on Color Range
Step 7. Where to Add Color Range?
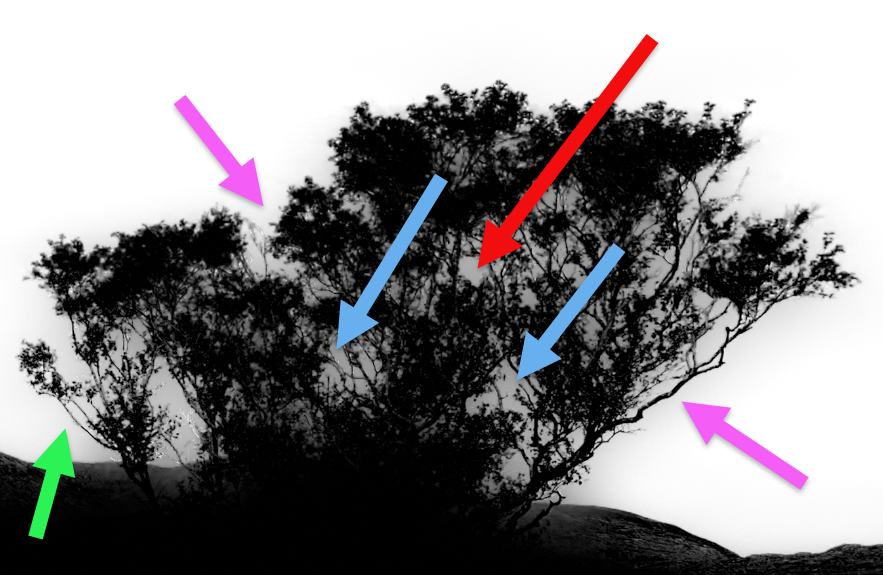 Arrows indicate areas to click, where the mask is gray
 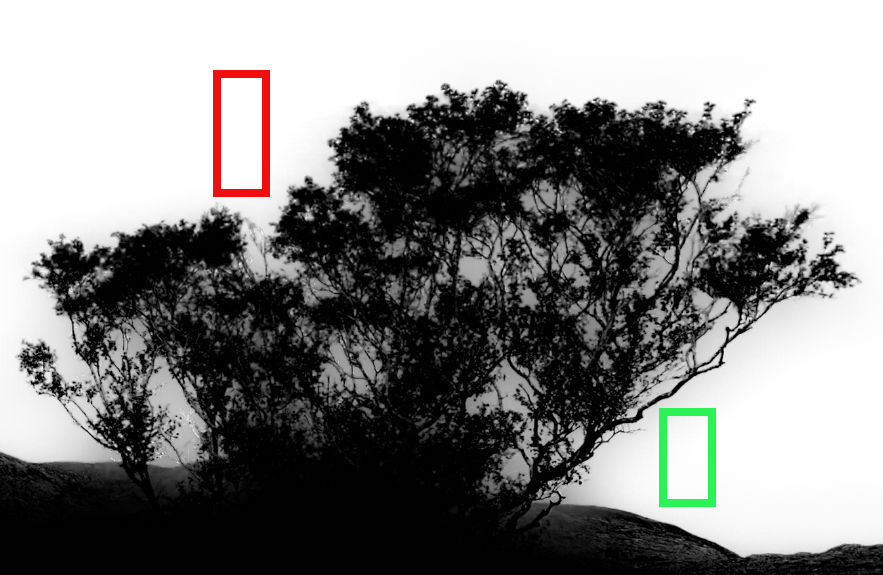 Rectangles indicate areas to click and drag, to select a range of colors
 Click in areas that appear gray when viewing the black & white mask overlay. You can click in one area for each Add or Remove mask and you can add multiple Add or Remove masks. You can also click and drag to add a range of colors.
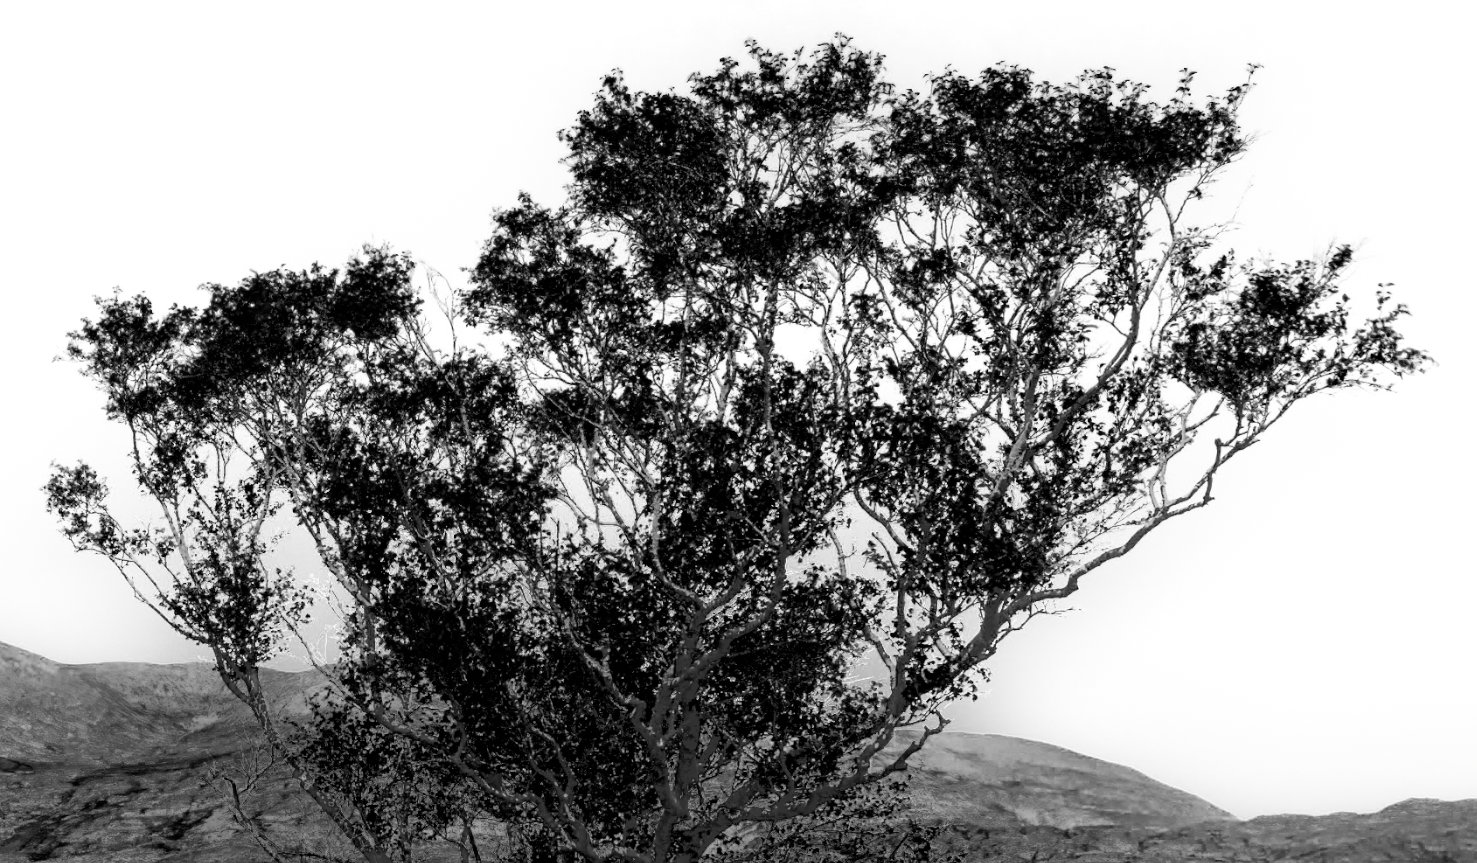
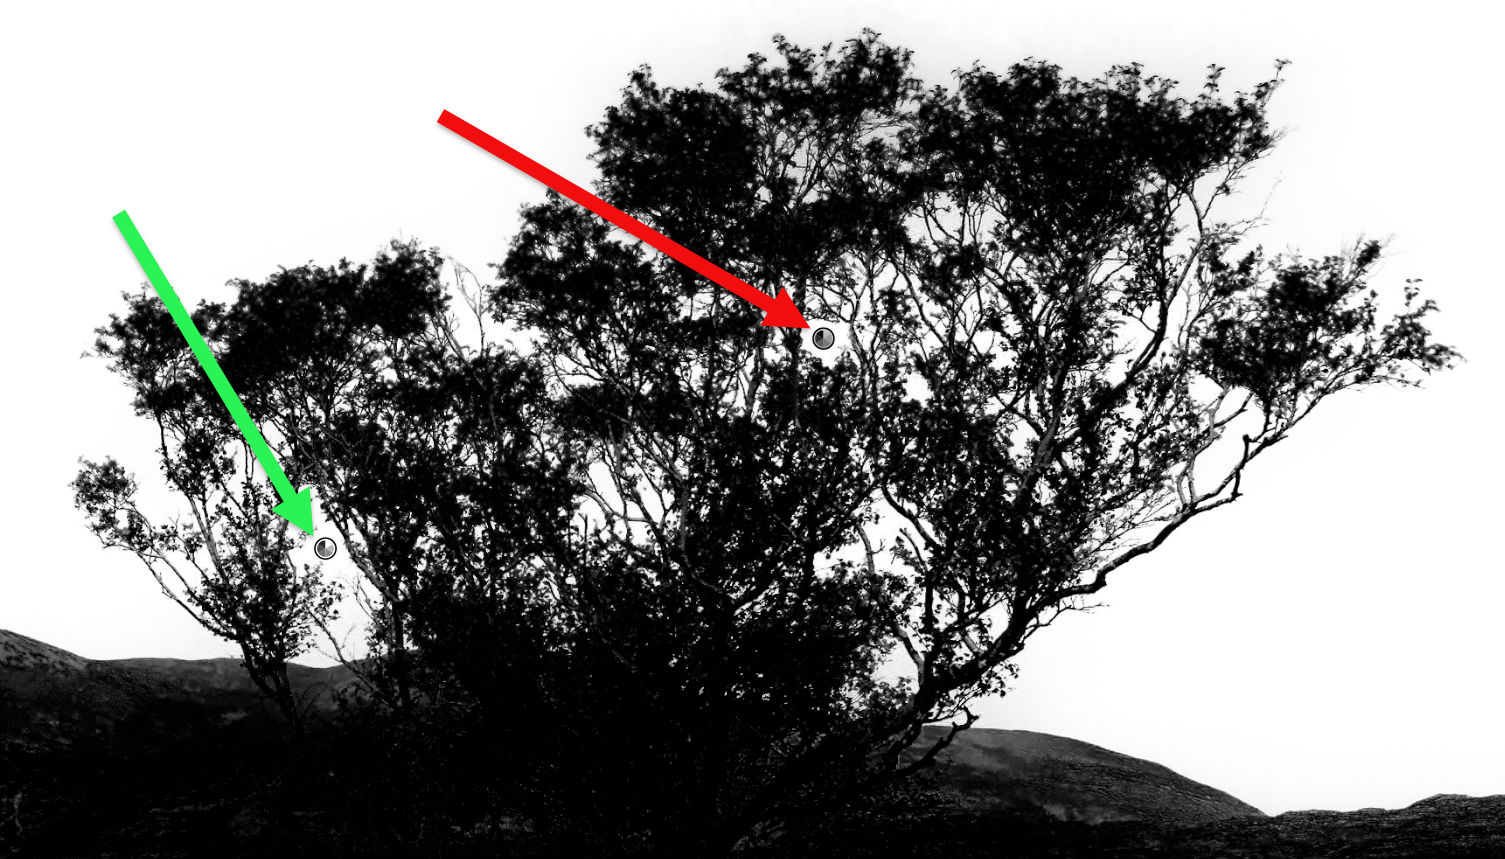
The blue sky is lighter at the bottom and gradually gets darker as it goes up. , in this photo I have just clicked in two areas, indicated by the red and green arrows. Any area within the branches would be a valid place to click.
The blue and pink arrows are also valid places to click, but in this photo, I didn't need to.
The next steps will show exactly where I clicked and the results.
Step 8. Add Color Range
 I clicked here
 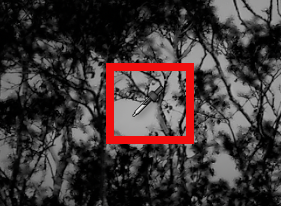 I clicked here
 I clicked in a central area, within the branches. Make sure you do not click on an area that you don't want, i.e. the branches or leaves, or this will select an incorrect color range.
If you're not happy with the result, you can either click again, undo, or delete the mask and try again.
Step 9. Evaluate mask
 Improved mask, but not perfect
 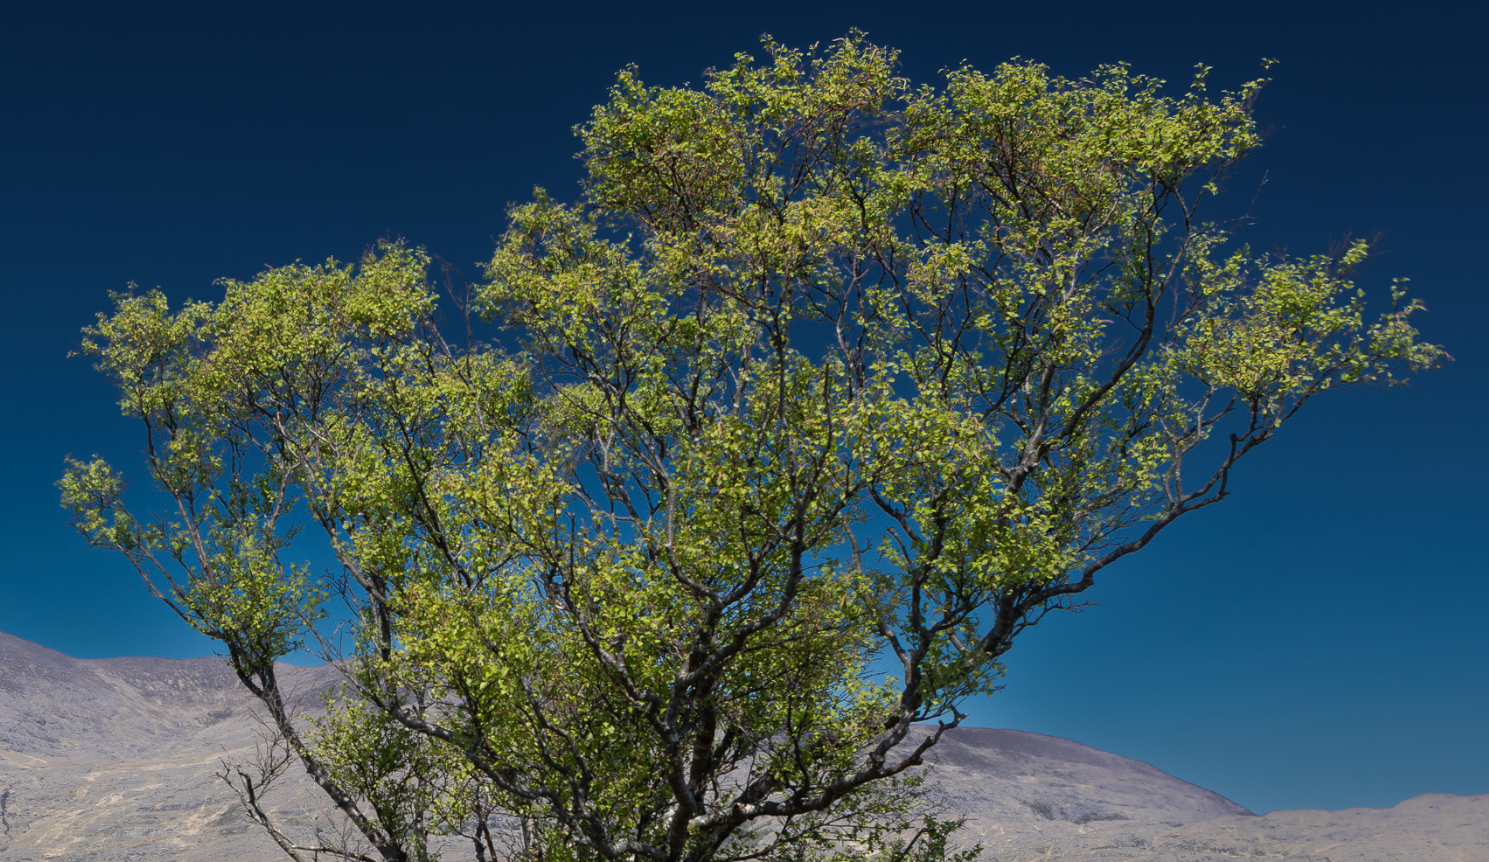 Improved mask, but not perfect
 This is the result of the previous step.
It's a big improvement over the original, automatic Sky mask. It isn't perfect, as is most clearly shown in the black & white mask overlay, but in many images, this will do absolutely fine.
Looking at the resulting photo, with the darkened sky, it's not obvious that the mask is imperfect at the point where the tree meets the mountains.
However, we can do better.
Step 10. Refine mask
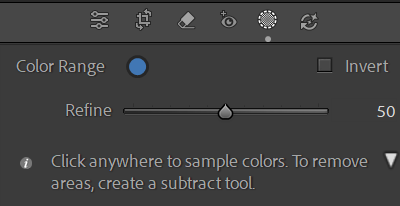 Refine Color Range, default settings
 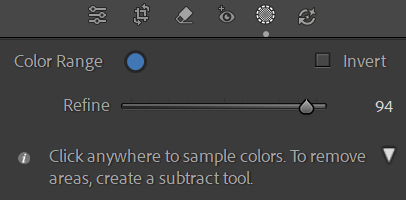 Refine Color Range, adjusted settings
 One option to improve the mask is to adjust the Refine slider. For this photo, we'll look at a better option in the next steps, but refining a Color Range is worth understanding, because in some situations it will be a perfect solution.
I've adjusted it almost to the maximum and the Sky mask within the tree is certainly improved, as shown below.
Note that although I've been working on the black and white mask overlay, the color of the sky that I selected with Color Range is shown in the blue circle.
Step 11. Result of Refine mask
 Refined mask, but not perfect
 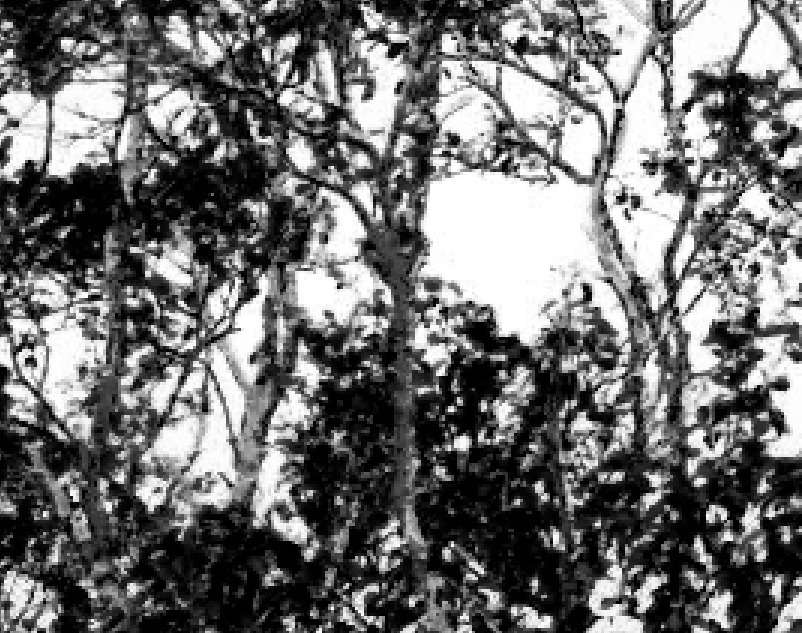 Close-up of Refined mask
 The sky mask, within the tree is better, but there are two issues. First, the mountains are included in the mask. They should appear as black on the mask overlay, to indicate they are not included in the mask but they are mid to light gray, indicating they will also be affected by much of the adjustment to the sky mask.
The mountains are not a major problem, as we could remove the mountains from the sky mask, (which we will do this in the follow-on tutorial).
The second issue is more serious. A close inspection of the mask overlay shows that parts of the branches are gray, instead of black, meaning that they will be included when editing the sky mask. They should be black on the mask overlay, so they will not be affected at all by the sky adjustments and can be edited on their own (which I cover in the third tutorial in this series).
Step 10. Add a Second Color Range
The red arrow shows where I clicked for the first Color Range and the green arrow shows where I clicked to add the second Color Range. Note that the locations of Color Range added to a mask, are indicated by the icons shown.
This is a good improvement to the Sky mask and in the next steps I will show comparisons of different steps.
Step 11. Close-up Comparison of Refine Mask vs 2nd Color Range
Refined first Color Range Mask 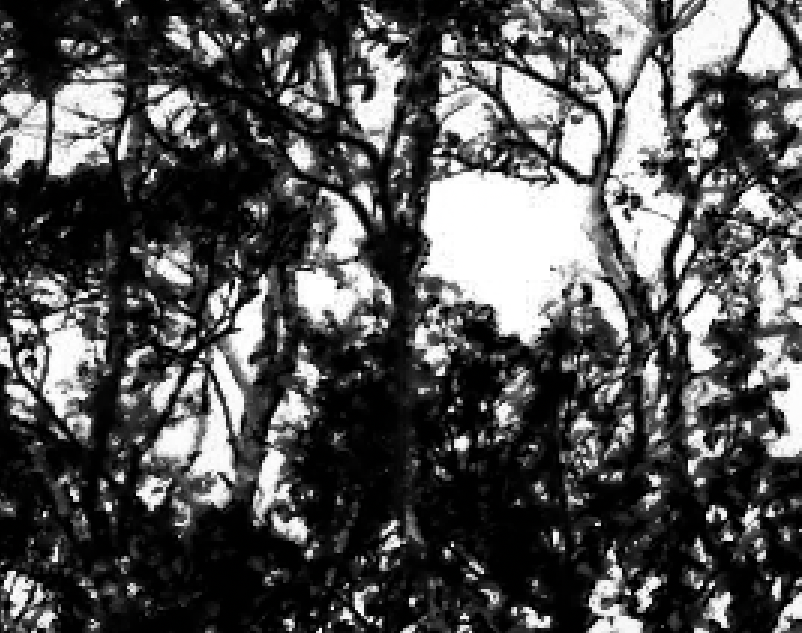 Second Color Range Mask
 Note; It's often more accurate to compare the actual black & white mask overlays, as they show things very clearly... literally in black and white (and shades of gray).
These two screenshots show clearly that the second Color Range Mask produces a better quality mask, compared to simply refining the first Color Range Mask.
Anything you want to not be affected by any edits you make, should show as black on the Mask Overlay. Anything you want to be 100% affected by your edits should show as white.
Anything showing gray will be partially affected by your edits. For some photos, this isn't an issue. For other photos it's a deal breaker and imperfect masking will totally ruin the effect you want to achieve.
Step 12. Mask Contents
 Refined first Color Range Mask
 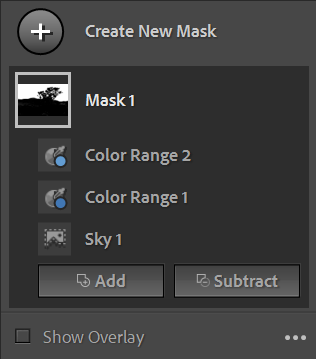 Second Color Range Mask
 In this tutorial there is one Mask containing three Mask Components. Note, this is how Adobe describes them.
- Mask 1 The top-level Container.
- Sky 1 Component 1 - Select Sky
- Color Range 1 Mask Component 2 - Color Range
- Color Range 2 Mask Component 3 - Color Range
Move your cursor over the icon for each component, or the Mask Container (Mask 1) and you will see that mask on your image. These are shown in the next step.
Step 12. View Each Mask
 Mask 1, showing the effect of all mask components
 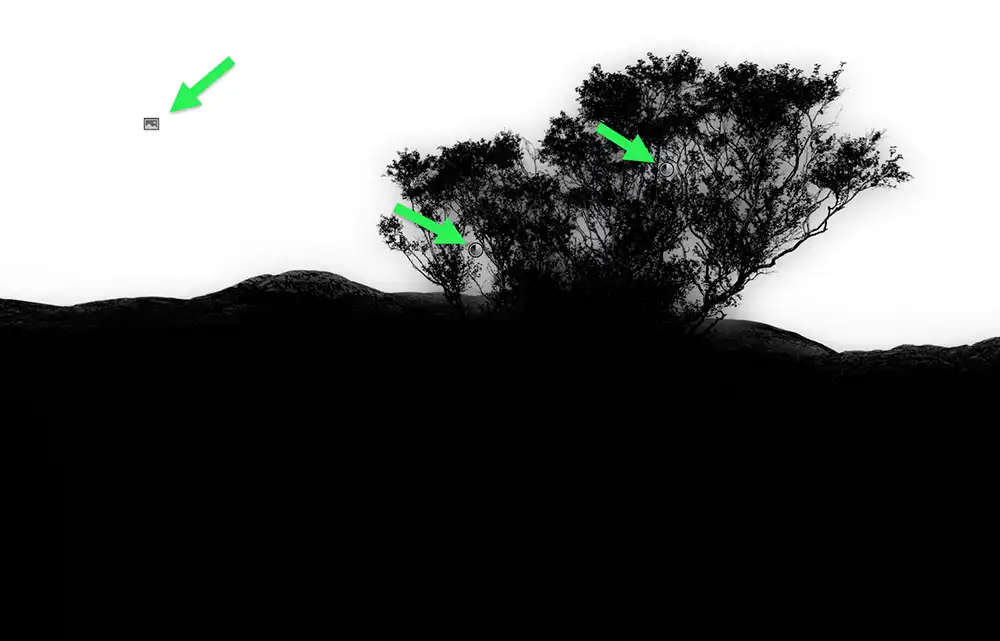 Sky Mask, showing the original Select Sky mask, arrow on left
 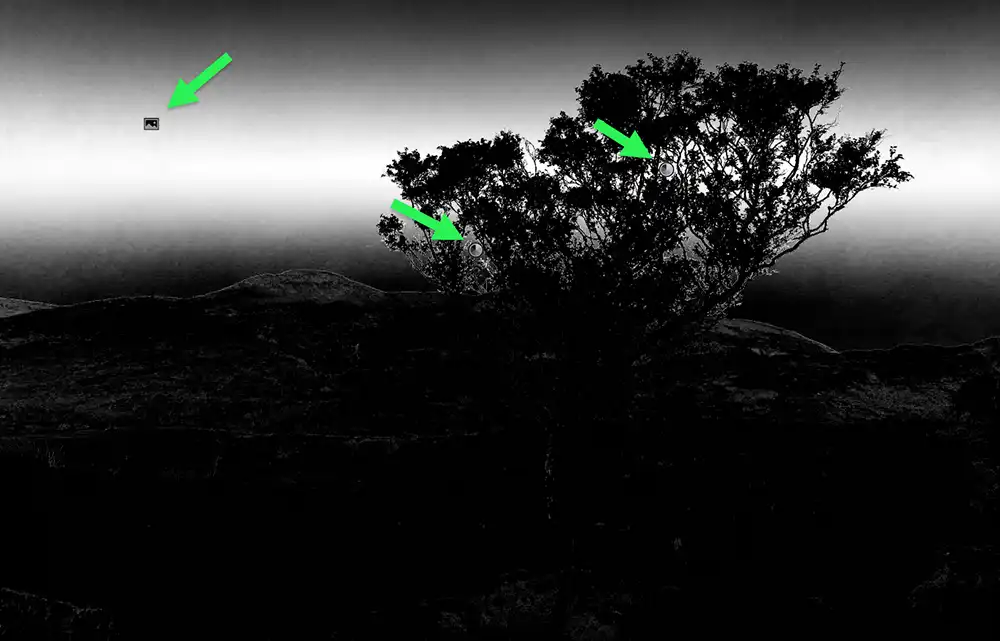 Color Range 1, shown by the arrown on the right
 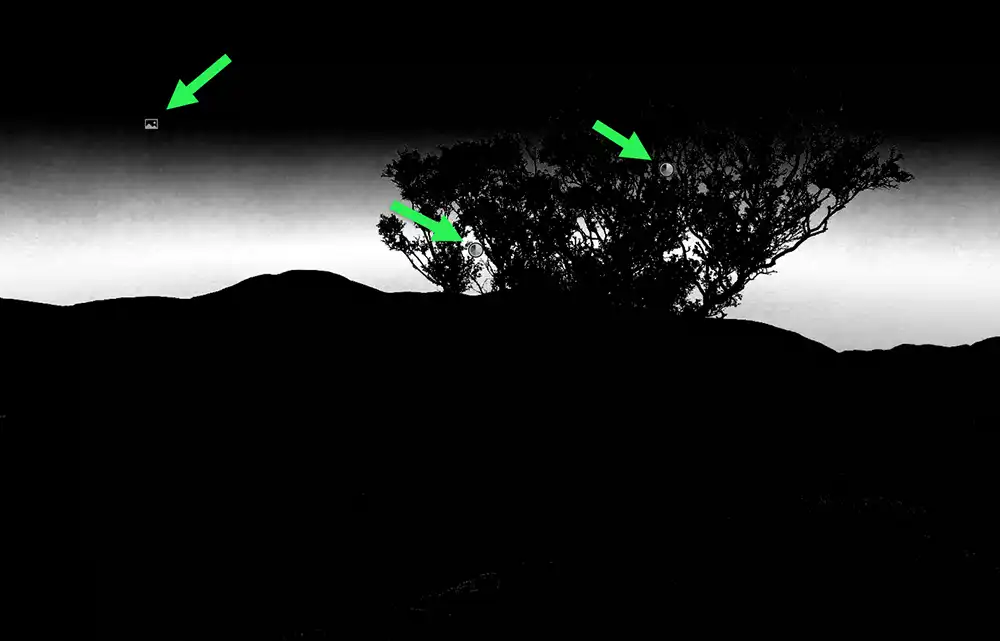 Color Range 2, shown by the lowest arrow
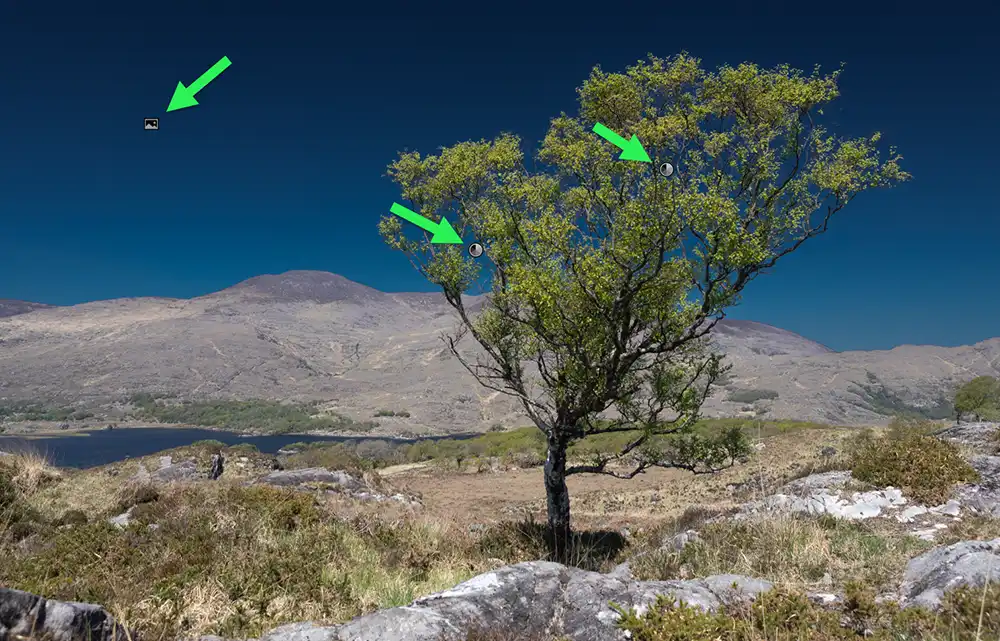
 When you move the cursor over the image, you will see icons indicating existing masks. Mask 1, top left shows the result of all the masks.
The other three screenshots show each Mask Component; Sky 1, Color Range 1 and Color Range 2.
You can rename these if you wish, but I've left them in their default names, which I thought would be easier to follow.
Summary of this tutorial
 The edited image in this tutorial - with just the sky edited
 Select Sky is very effective at automatically selecting a sky within an image. However, it is not perfect when faced with selecting sky through foliage on a tree and many other similar situations.
By adding to the mask using Color Range, in certain situations, such as in this image, you can dramatically improve the quality of the mask and the overall look of the edited image.
Get used to checking the black & white mask overlays, as well as viewing the edited image, as the mask overlays will often reveal issues that can go unnoticed in the edited image.
This is the finished image for this tutorial, but not the finished image for this set of 3 linked tutorials . There is still the issue of the mountains being partially included in the Sky mask, so the next tutorial will look at dealing with this. The third and final tutorial will look at creating a mask to edit everything except the sky.
