Page updated: 24 July 2026
Select Subject in Lightroom Classic
What Select Subject Does and When to Use It
Select Subject is Lightroom Classic’s most widely used AI‑powered mask and for good reason. With a single click, Lightroom analyses the entire image, identifies the main subject, and creates a precise mask around it. It’s designed to give you an instant starting point for targeted adjustments.
Select Subject is fast and is usually accurate. Lightroom evaluates edges, shapes, contrast, and context to determine what the viewer is most likely to focus on. From there, you can refine the mask with Add and Subtract tools, combine it with other AI selections, or use it as the foundation for more advanced masking workflows. I will look at these in future tutorials.
Note that the quality of the mask will depend on image content. We'll start with an simple image, but in future tutorials I will show you how to deal with more complex subjects.
If you’re new to masking, Select Subject is the quickest way to understand how Lightroom isolates areas for editing. If you’re experienced, it becomes the backbone of a fast, non‑destructive workflow that keeps your adjustments clean and intentional.
Not getting a perfect mask?
In some images, Select Subject struggles with fine edges. The next tutorial — Select Object — shows how to get a cleaner, more precise mask using the same Bald Eagle photo.
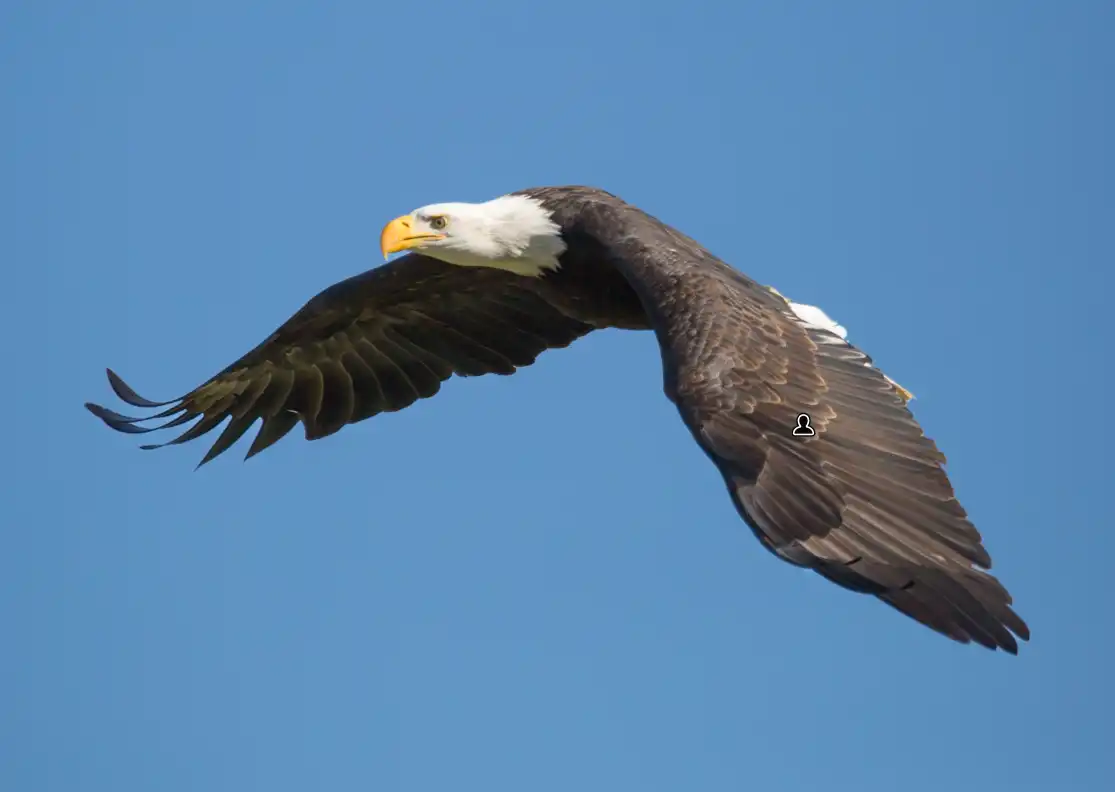
Download the Bald Eagle photo used in this tutorial
Feel free to download the photo and work along with the tutorial.
Please note: this file is provided for learning only and is not licensed for use in your own projects.
ON THIS PAGE
Step by Step Example of Select Subject Mask
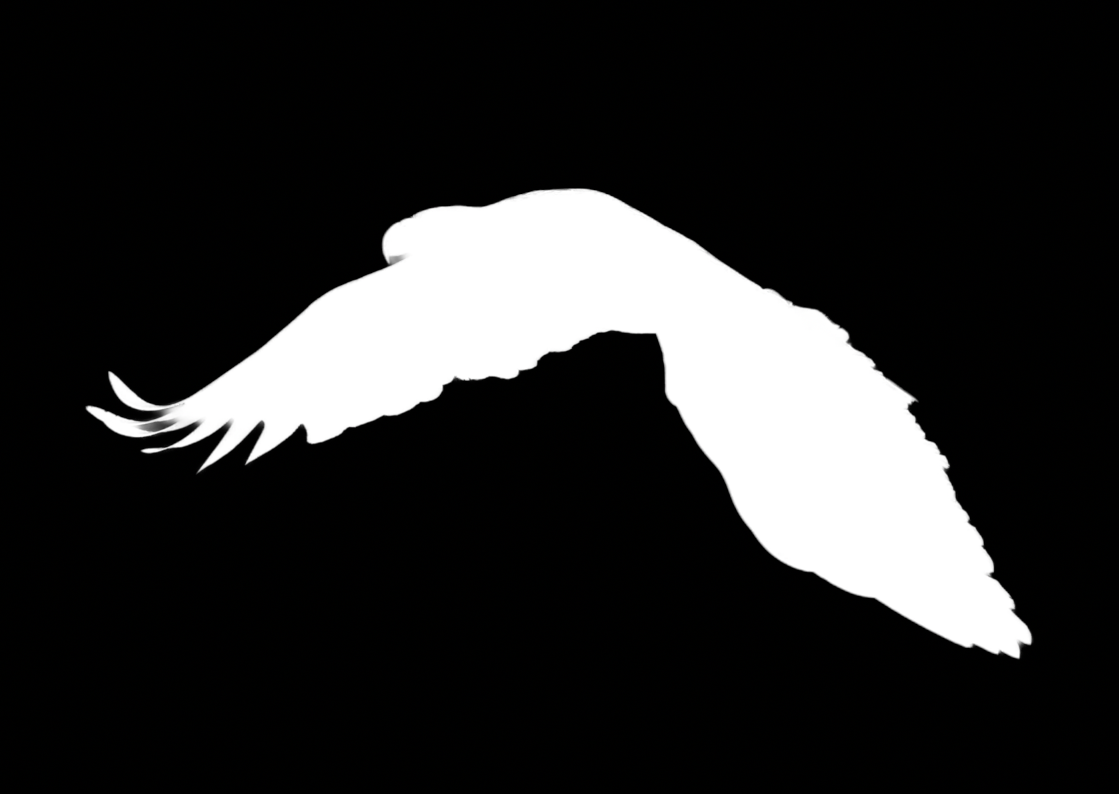
 Original photo
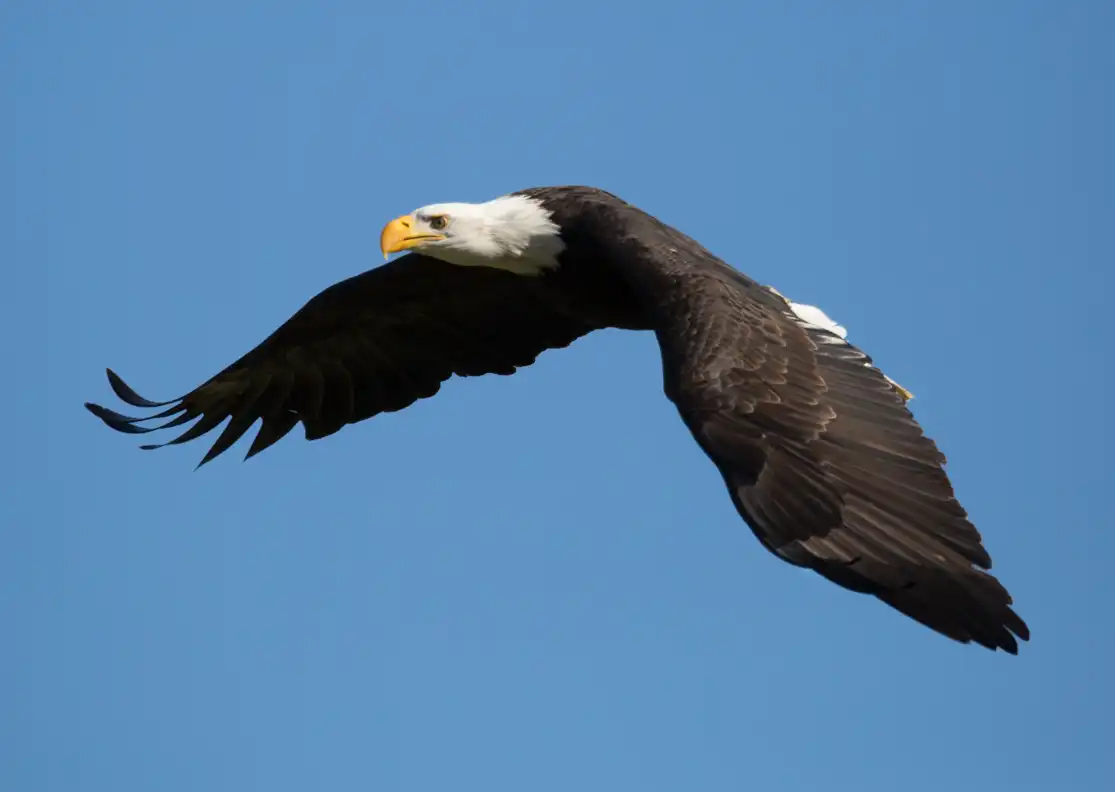
 The mask
What this example includes
This tutorial will select a simple subject, look at Overlay Options and make some localized adjustments to the subject. The mask isn't perfect, but it's good enough for most adjustments. Future tutorials will look at refining the mask.
Step 1. Open the photo and the Masking panel
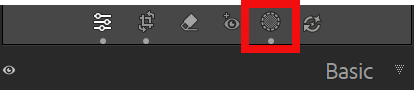 Select the masking button
 Open your photo in the Develop module, by pressing D on the keyboard or select Develop. This is where all local adjustments and masks are created. On the right‑hand side, locate the Masking icon above the Basic panel. Click it to open the Masking panel, which shows all existing masks and the options for creating new ones.
Step 2. Create a Select Subject mask
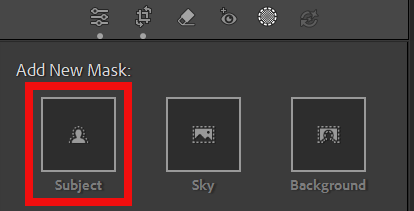 Choose Select Subject
 In the Masking panel, click Select Subject. Lightroom analyses the image using Adobe’s AI to find the main subject. After a short processing step, a new mask appears in the list, and the subject is highlighted with an overlay. This becomes your starting point for targeted adjustments.
Step 3. The Mask Panel
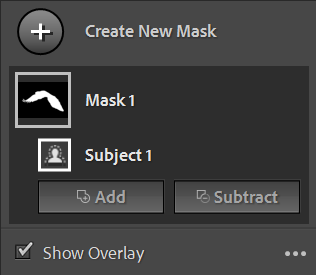 Default Mask Name
  Renamed Mask Name
 In the Masking panel, Mask 1 has been created for Subject 1. You can rename these masks if you wish. If you have multiple masks, it's helpful to name them, just as you would name layers in Photoshop.
When Show Overlay is ticked you will see the mask wherever the cursor is. When Show Overlay is unticked and the option to Automatically Toggle Overlay is selected, you will only see the mask when you move the cursor over the mask.
Step 4. Overlay Options
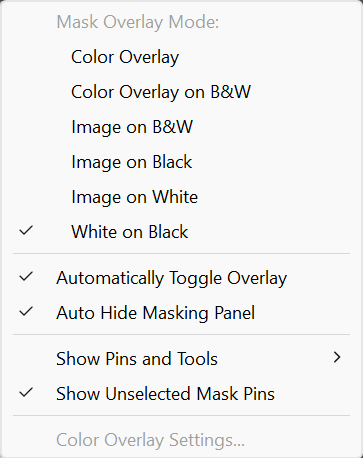 Overlay Options
 You have a number of options for how the overlay looks.
Examples of these are shown in the next step.
Step 5. Examples of Overlay Options
To help you evaluate a mask, there are a number of overlay options. The default is white on black, but switching to a different overlay can be useful at times. Even in these small images, using the Image on B&W (3rd example below) and on (4th example below) overlays, you can see tiny areas of sky at the left edge of the wing. We will look at these in the next tutorial.
You can also see these issues in the other overlays, but only if you are really looking hard (and you're aware of an issue). The point of this is; they are easier to spot with different overlays, and this will vary from image to image. Be flexible and for masking where precision is important, try different overlays.
 Color Overlay: Shows the masked area with a solid colour, making it easy to see the overall shape of the selection.
 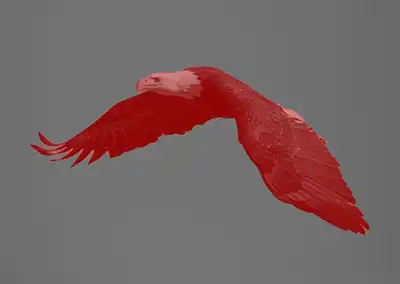 Color Overlay on B&W: Turns the unmasked area black and white so the colored overlay stands out more clearly against the rest of the image.
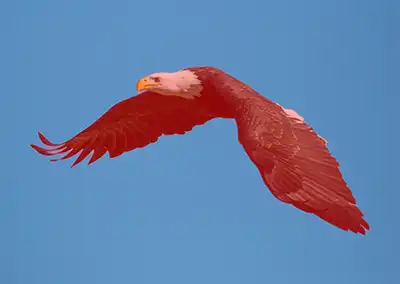
 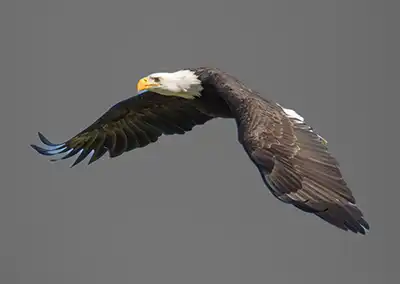 Image on B&W: Keeps the masked area in colour and turns everything else black & white, helping you judge how well the subject is isolated. A small area of blue is visible on the left wing tip.
 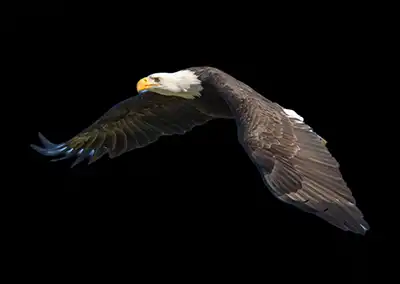 Image on Black: Displays the unmasked area on a pure black background, which is excellent for spotting halos, gaps, and soft edges. A small area on the left wing tip shows an area to inspect.
 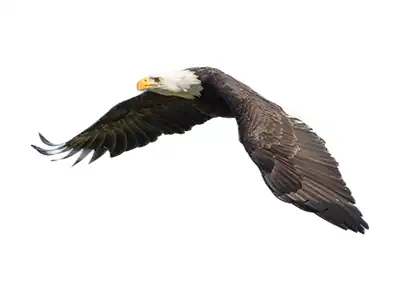 Image on White: Shows the unmasked area on a pure white background, making it easy to see dark fringing or uneven transitions.
 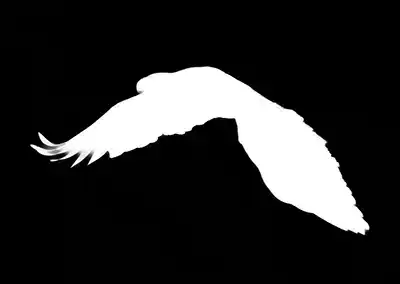 White on Black: Renders the mask as a white silhouette on a black background, giving the clearest possible view of fine detail and edge accuracy.
 Step 6. More Overlay Options
 Overlay options
 - Automatically Toggle Overlay: Shows the overlay only while you’re actively editing the mask, keeping the view clean the rest of the time.
- Auto Hide Masking Panel: Closes the Masking panel automatically when you start brushing or adjusting, giving you more room to work.
- Show Pins and Tools: Controls whether the mask pins and tool icons are visible, helping you keep the workspace tidy when needed.
- Show Unselected Mask Pins: Displays pins for other masks even when they’re not active, useful when working with multiple overlapping masks.
- Color Overlay Settings…: Lets you change the overlay colour and opacity so it’s easier to see against different types of images.
Step 7. Check the Mask
 Review the overlay
 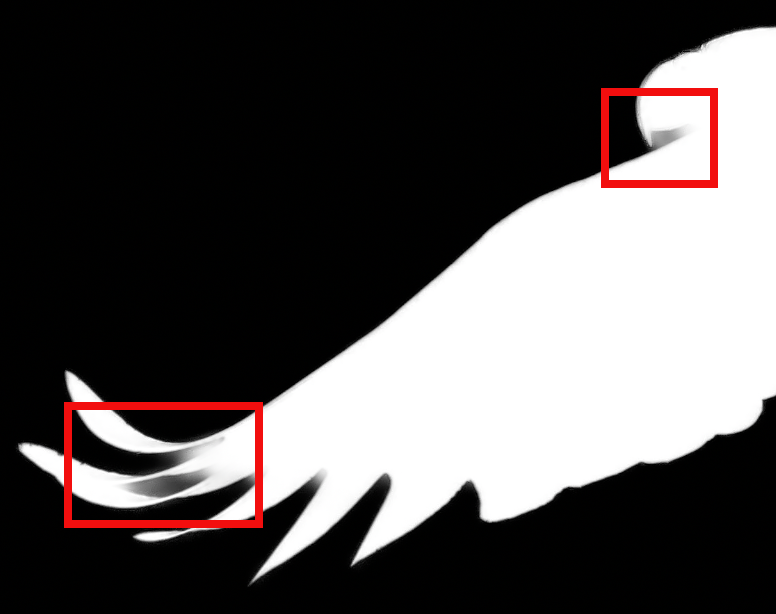 A closer look at the overlay. Depending on your adjustments, this could be good enough, or would need improving.
 Inspect the overlay to see what is included and excluded. Even when the mask is not perfect, it's often good enough that you won't notice anything. In this image, it's not perfect around the left edge of the wing, but try your adjustments and see if you can notice the result in the finished image. If you can't see anything, then you need do nothing further.
If you can see the editing affecting parts that you don't want it to, then you will need to refine the mask, using Add, Remove or Intersect, using a variety of tools, which we'll look at in the next tutorial.
Step 8. Apply targeted adjustments to the subject
Edit only the subject With the Select Subject mask active, use the sliders in the right‑hand panel to adjust only the subject. Common tweaks include increasing Exposure and Shadows to brighten the subject, adding a little Clarity or Texture for detail. In this image I have lightened the shadows, to show more detail under the left wing.
Step 9. Invert or duplicate the mask for the background
 Create an opposite mask for the background Original background
 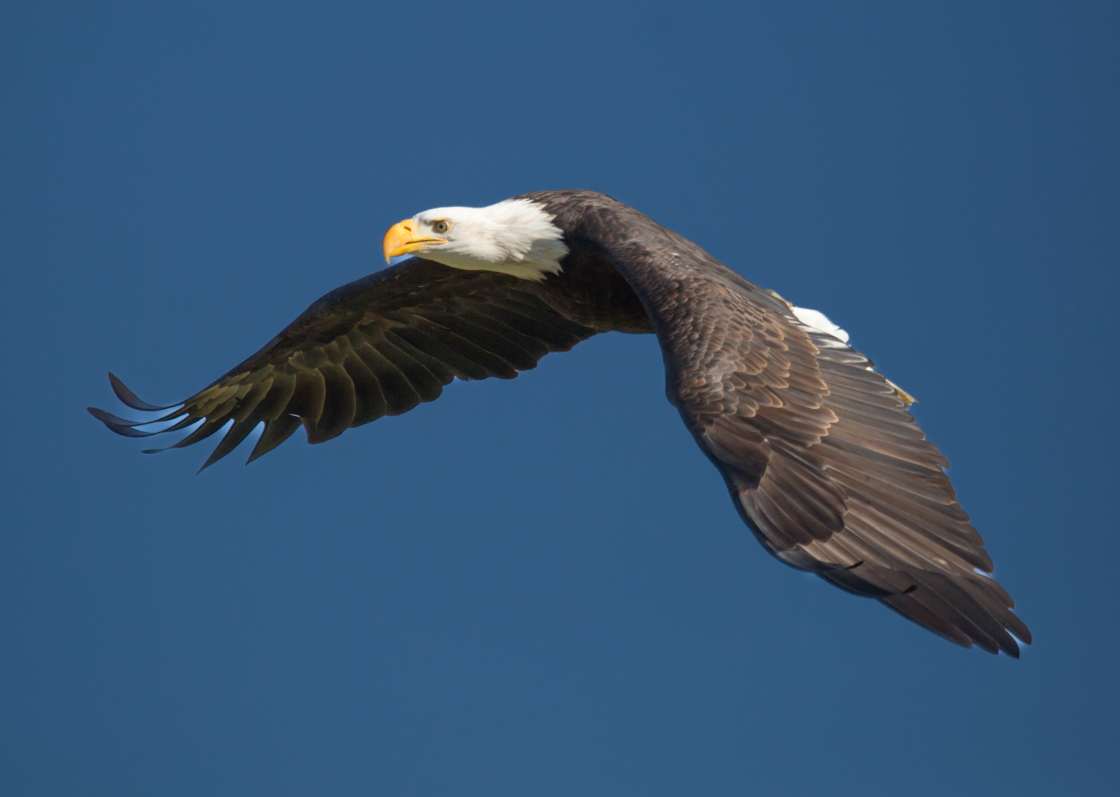 Darkened background needs improved mask
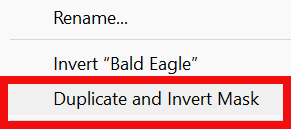
 To adjust the background instead of the subject, right‑click the Select Subject mask and choose Duplicate and Invert Mask. The new mask now targets everything except the subject. Use this to gently darken, soften, or desaturate the background so the subject becomes the clear focus without looking over‑edited.
You could also select Background from Masks, but if you've spent time refining the subject mask, it will save you having to refine the background mask if you duplicate and invert the mask.
If I only lightened the birds wing, I wouldn't absolutely need to refine the mask, but when the sky is darkened, I do need to refine the mask
Step 10. Review the overall balance
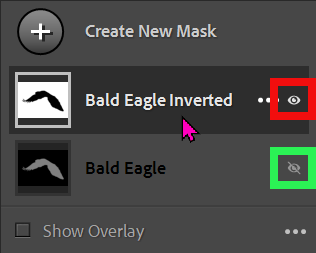 Visibility "eye"
 Toggle the mask visibility to check that the subject looks natural and the adjustments support the image rather than distract from it. Fine‑tune the sliders if anything feels too strong.
Mask visibility is indicated by an "eye", just like layer visibility is indicated in Photoshop.
The red highlight shows the Bald Eagle Inverted mask is visible.
The green highlight shows the Bald Eagle mask is not visible.
Final Thoughts
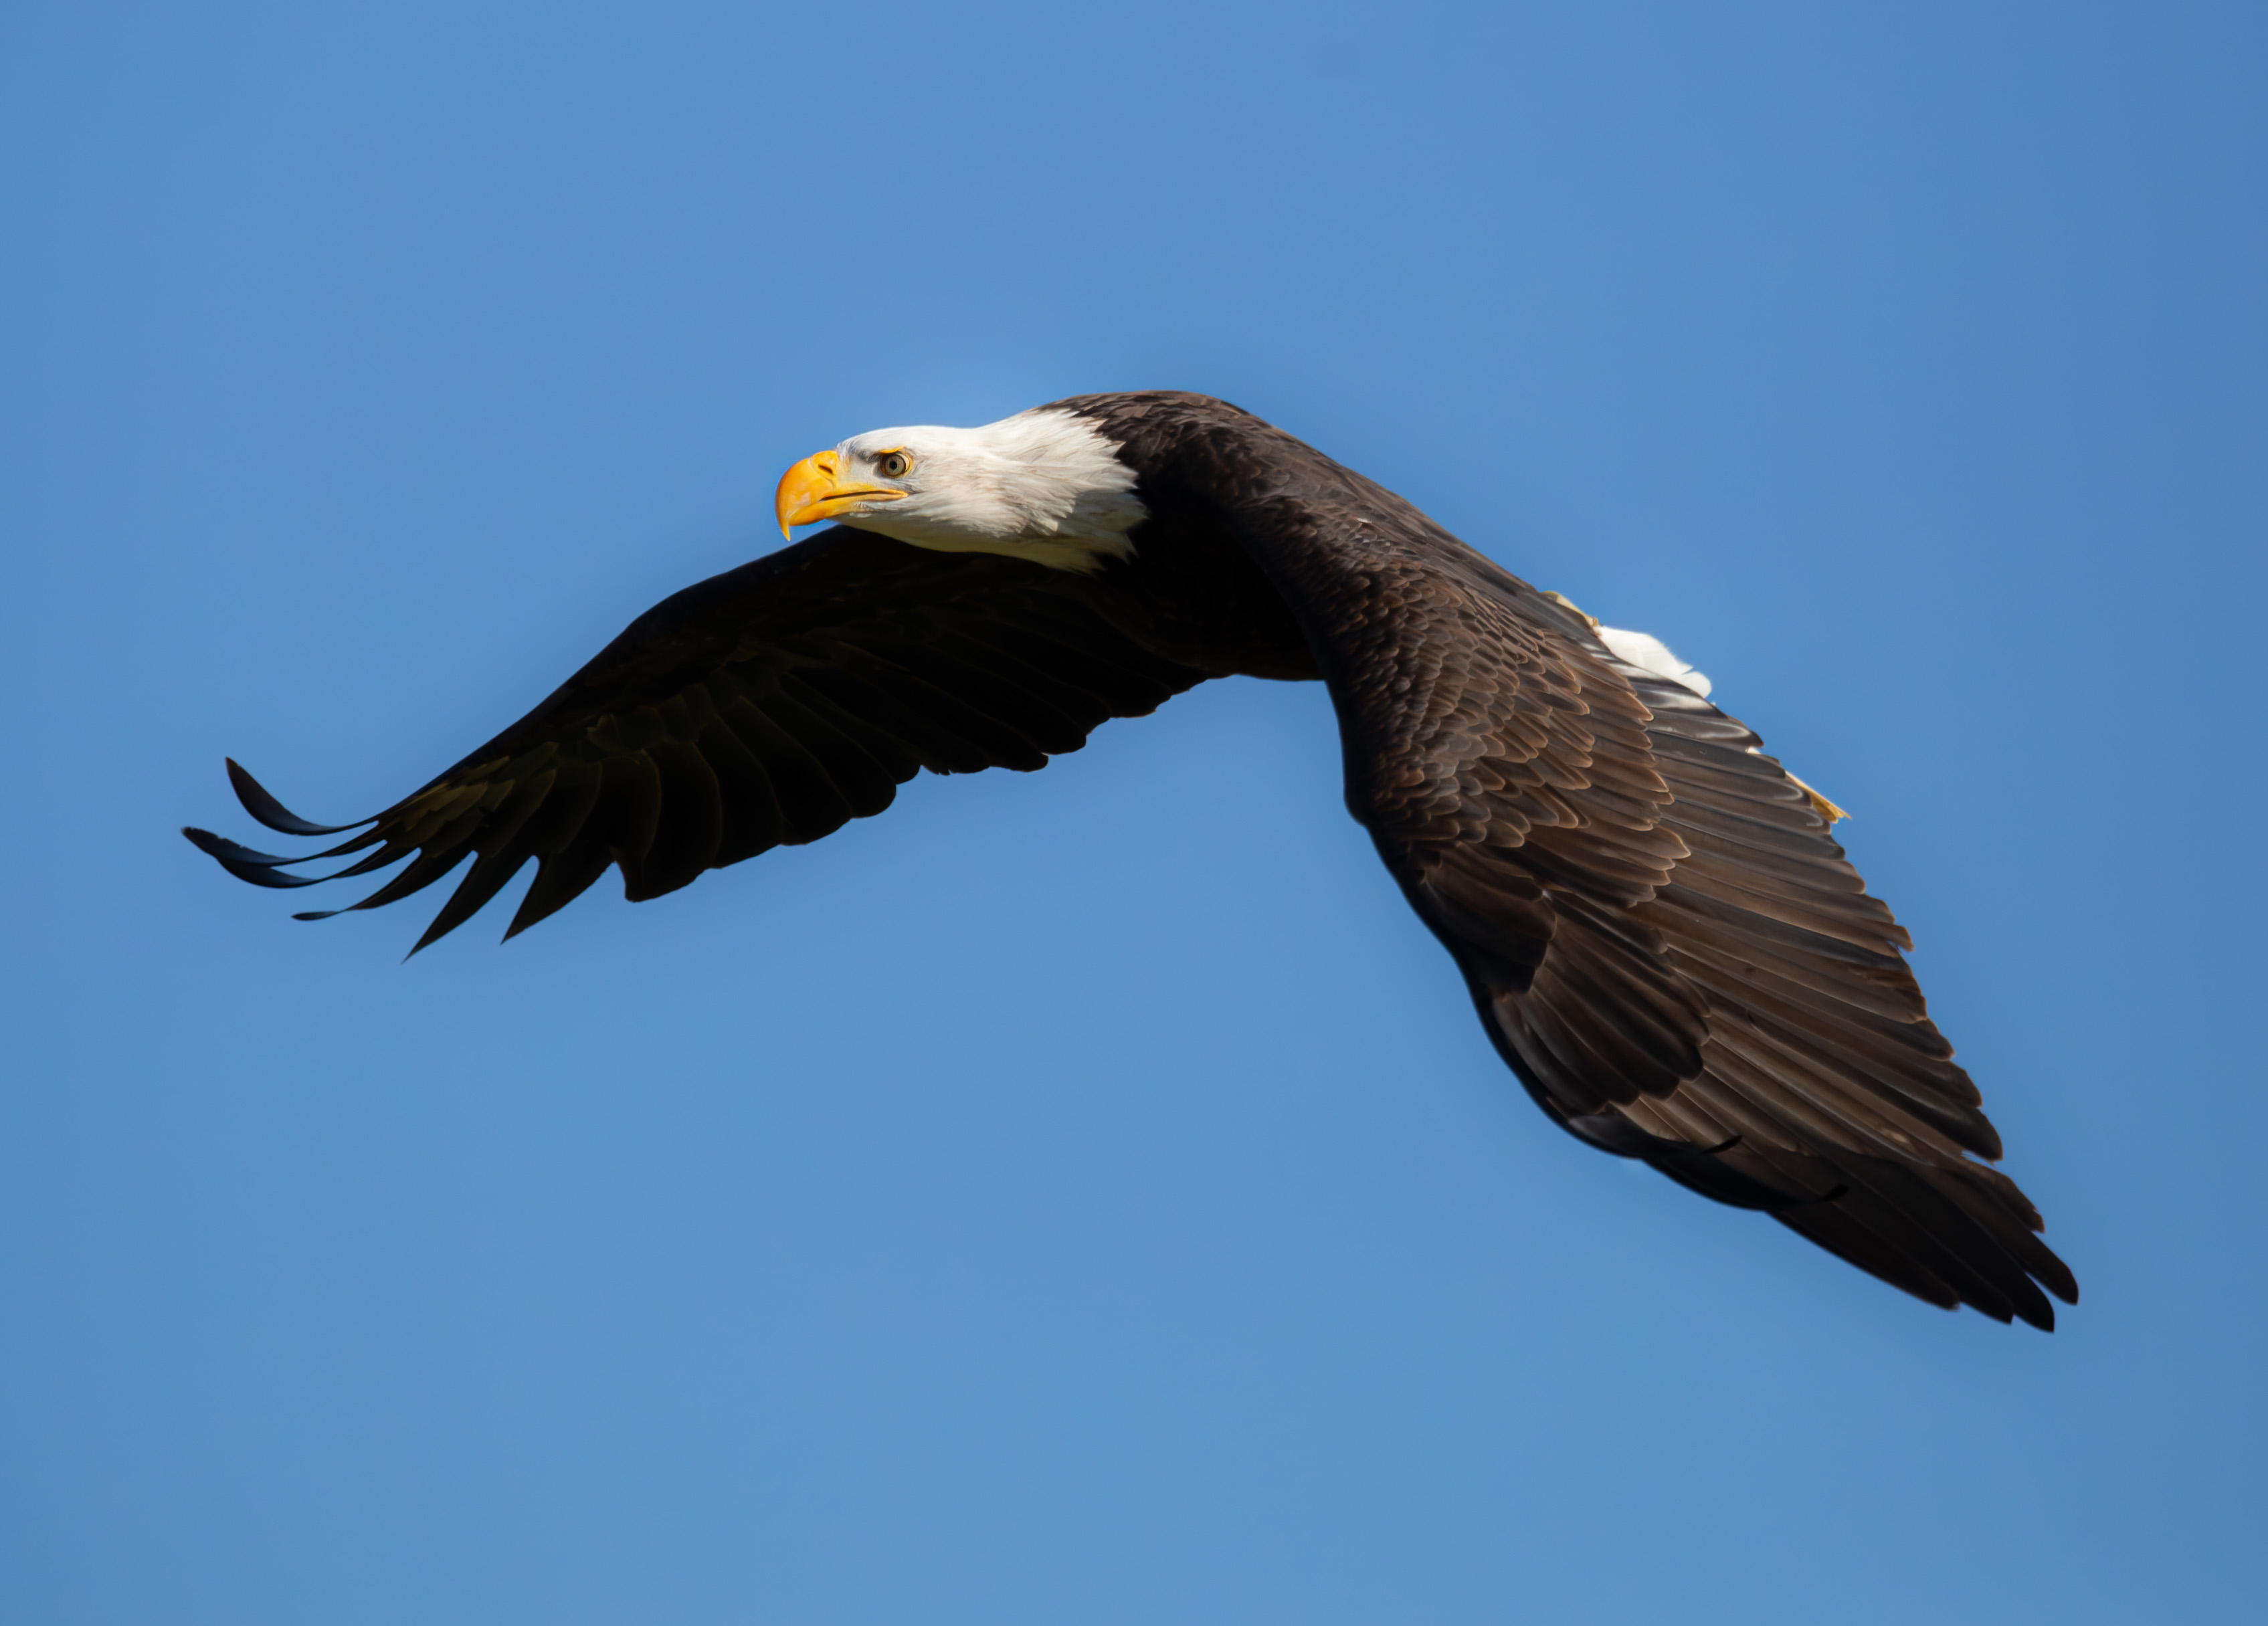
A clean, natural result Select Subject is one of Lightroom Classic’s most effective tools for fast, accurate masking. In this image, if we only lighten the shadows under the bird's left wing and don't edit the sky, it's perfectly acceptable
However, as shown in step 9, if editing to darken the sky, the mask is not good enough.
In this image, this is easy to fix and the solution may surprise you. See the next tutorial to see how to get a perfect mask for the bird and the sky. You can also download the image to try it yourself.
