Page updated: 24 July 2026
Duplicate and Invert a Mask in Lightroom Classic
Edit the Foreground Separately by Reversing Your Sky Mask
In the previous tutorial, we refined the Sky mask by subtracting from the mask with Select Objects and Brush, to cleanly remove the mountains from the sky adjustments. Now, in this final part of the series, we’ll take that finished Sky mask, duplicate it, and invert it so we can edit the tree and mountains independently from the sky. This is one of Lightroom Classic’s most useful masking techniques, giving you complete control over both halves of the scene without rebuilding any selections from scratch.
Yes, there are other tools to mask different parts of a landscape image, but when you've spent time creating an accurate mask of the sky, then refined it using Add and Subtract with various tools, it's efficient to use a duplicated and inverted version to edit the other parts of the image.

The edited versions intentionally exaggerate the sky so you can clearly see
the benefit of adding to the Sky mask using Color Range.
These files are here to help you follow along with the tutorials. They are licensed for personal learning only and are not licensed for use in your own projects. Please do not share them elsewhere. Full download terms
ON THIS PAGE
Step by Step Example of Subtract from Mask
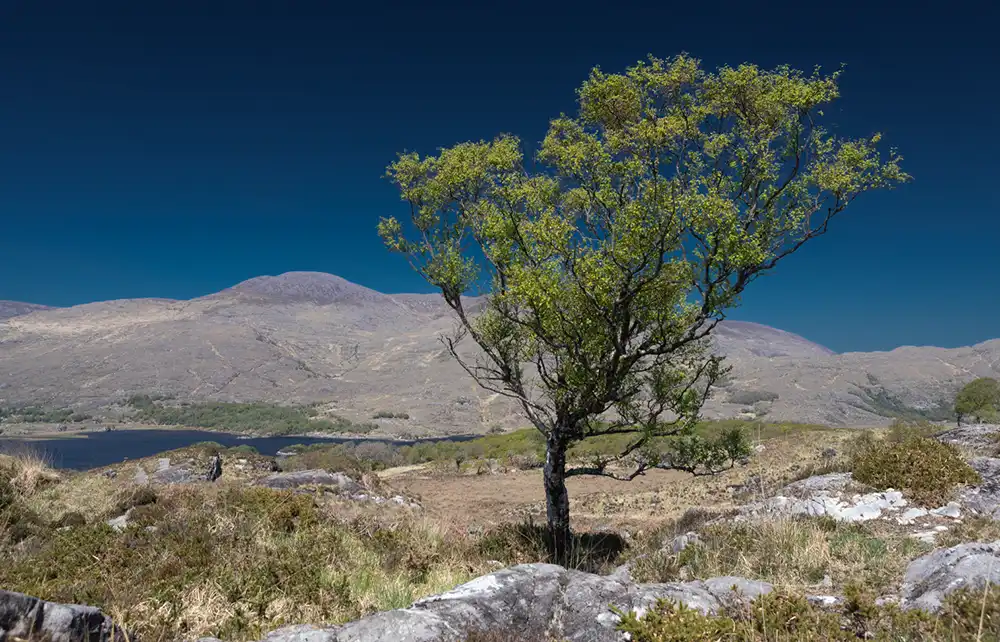
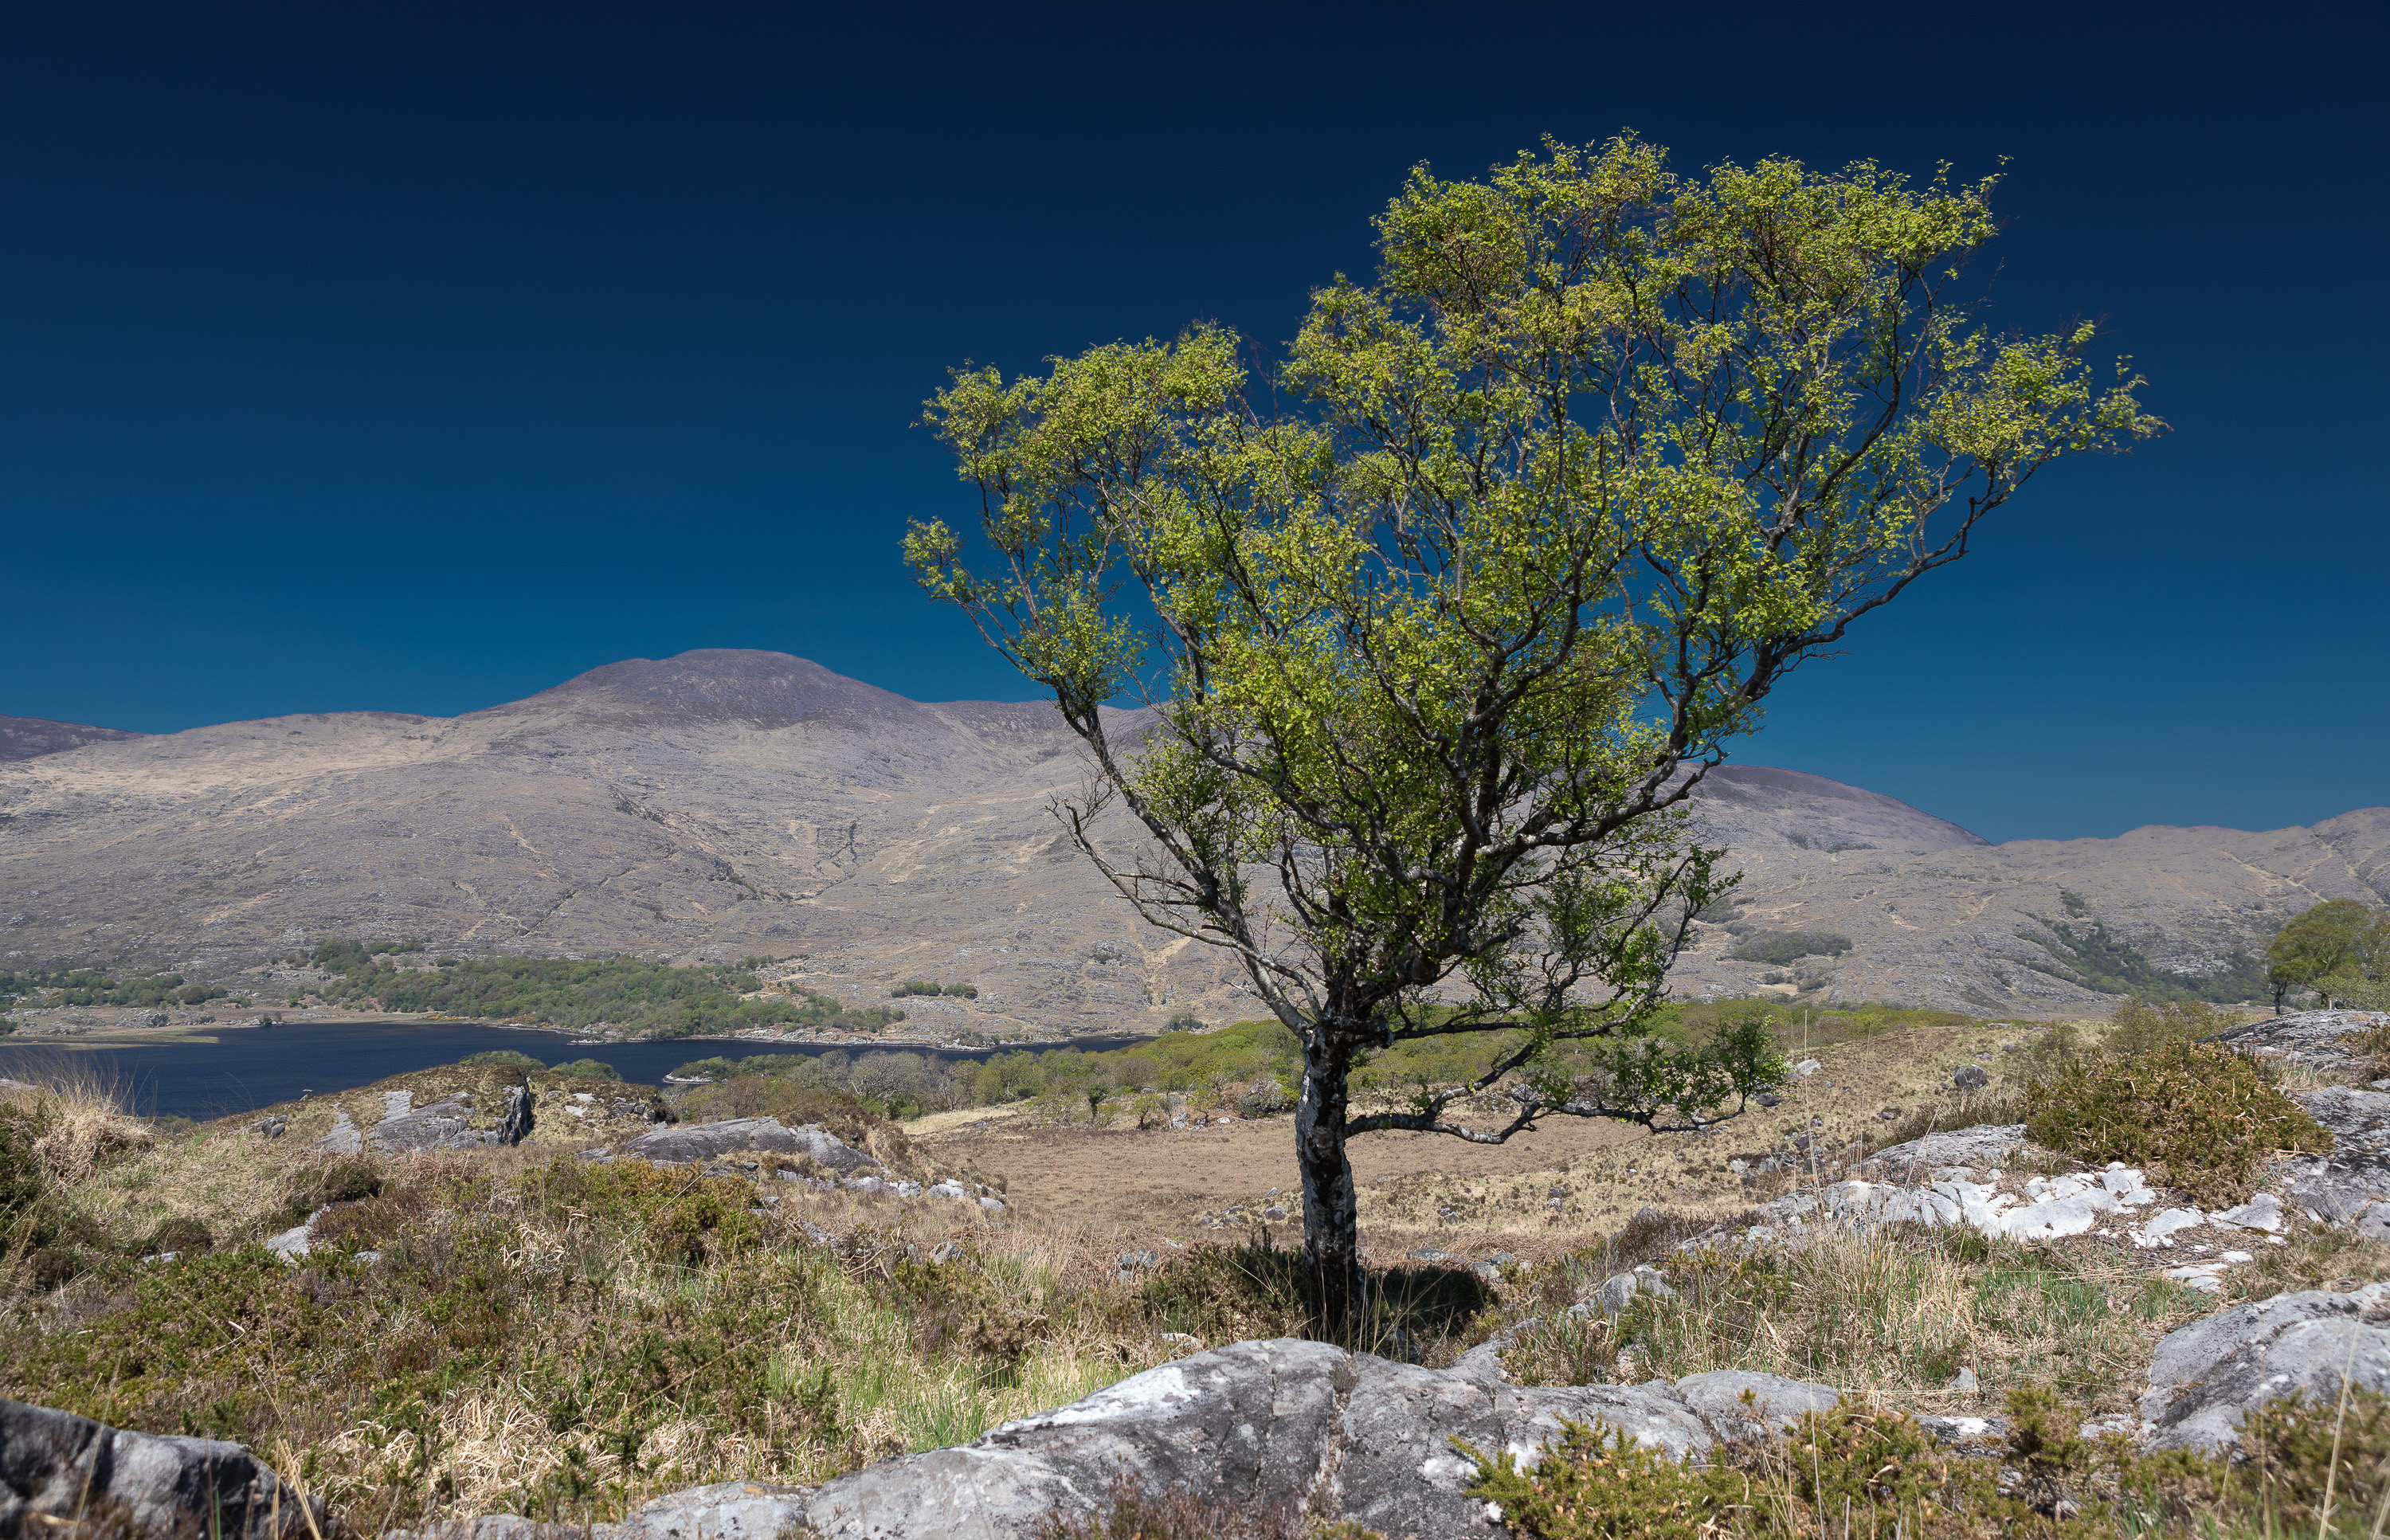 Photo and mask at end of tutorial 2
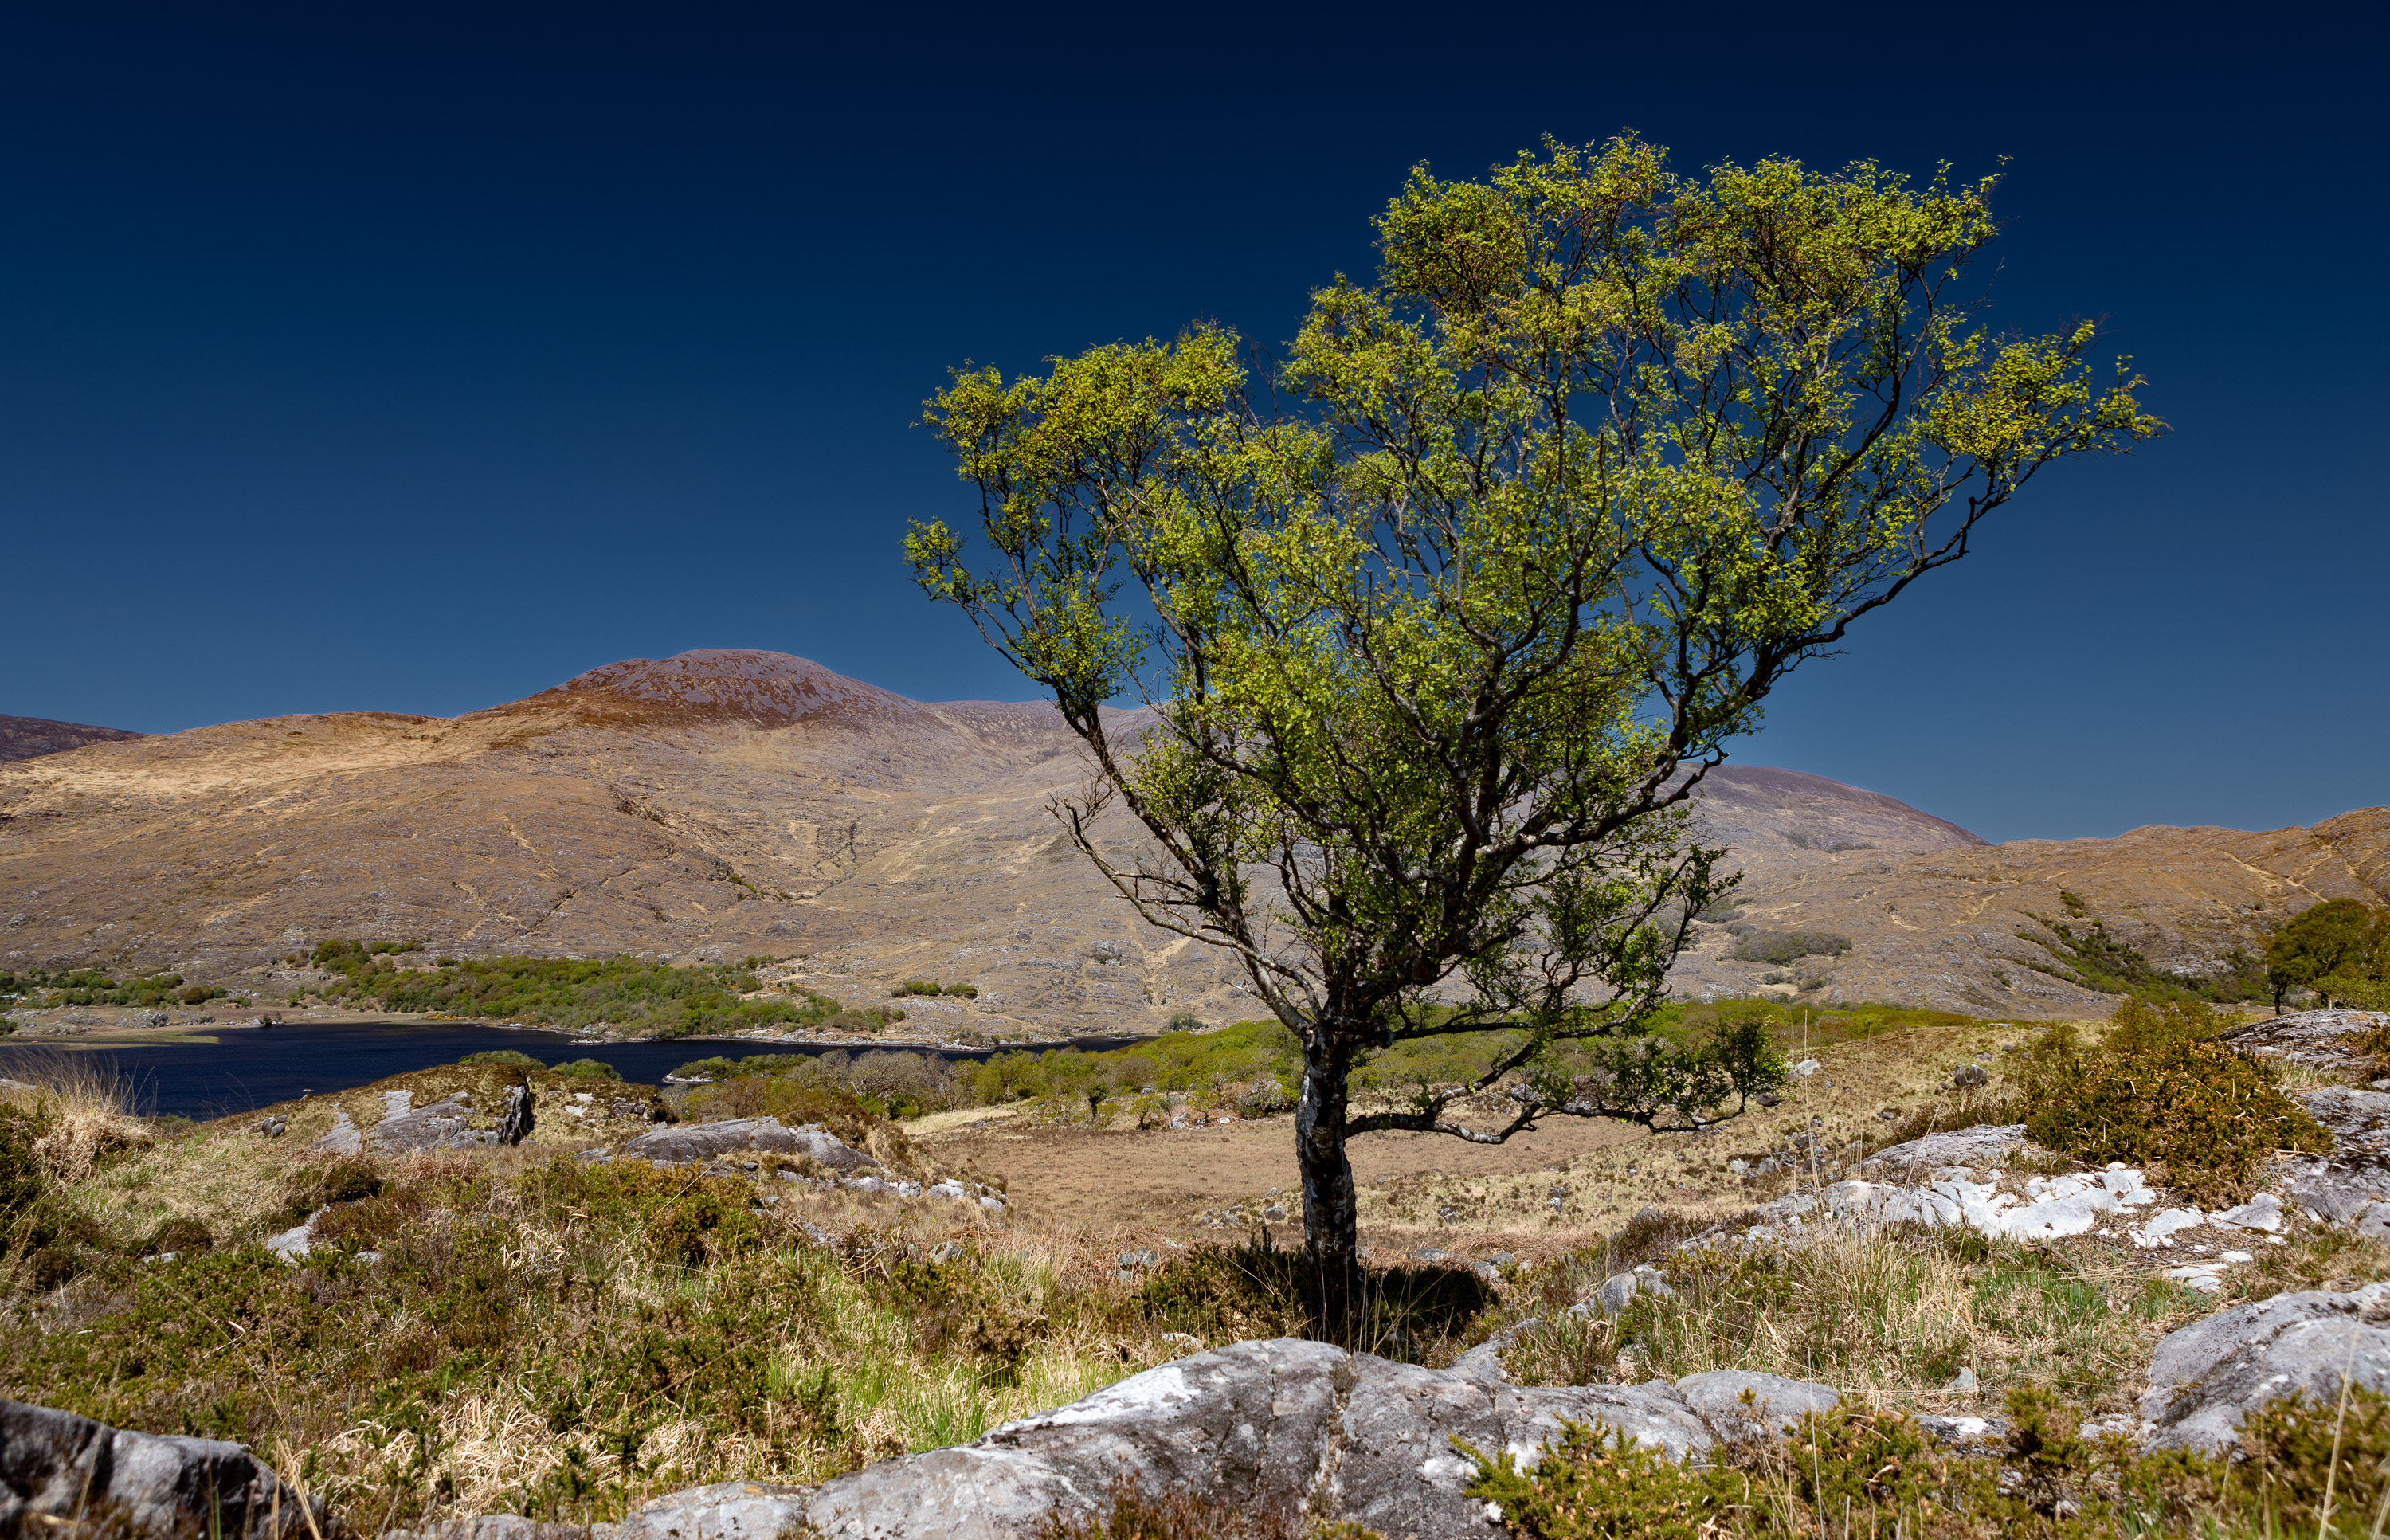 Final edited photo
This is the third part of 3 tutorials. In this tutorial we will duplicate and invert the mask we created in Tutorial 1 and then refined in Tutorial 2. We will then edit all of the image, except the sky.
Tutorial 1: Add Color RangeTutorial 2: Subtract with Select Objects
What this tutorial includes.
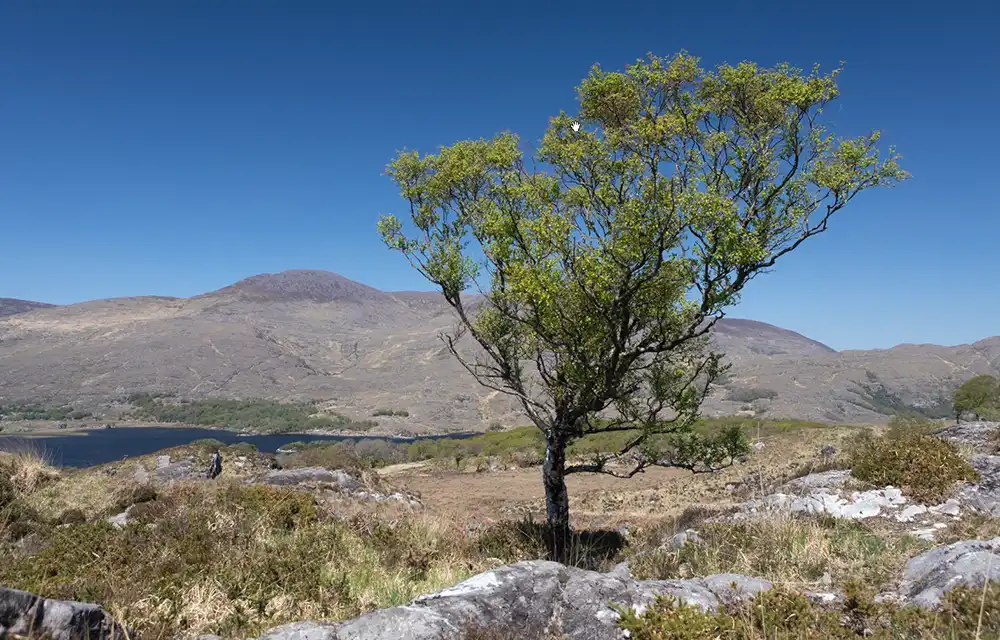
 Original unedited photo
- How to duplicate and invert your refined Sky mask from Tutorial 2 to target the tree and mountains
- Editing the foreground separately from the sky using the inverted mask
- The downloadable lesson 2 DNG so you follow this tutorial without completing the first two tutorials
- The final downloadable DNG so you can compare your result to mine
Step 1. Use existing photo or download DNG
This tutorial follows on from the first two tutorials. Tutorial 1 added a Sky mask and then improved it by adding two Color Range masks. Tutorial 2 removed the mountains from the sky mask.
If you have followed those two tutorials, you can carry on with your image. If you are jumping in here, you can download the DNG with the masks from tutorial 2.
For instructions on downloading the tutorial photos, so you can follow along, see How to Download and Use Tutorial Photos
Step 2. Mask Contents
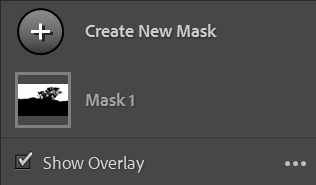 Mask 1 contains all the Mask Components
 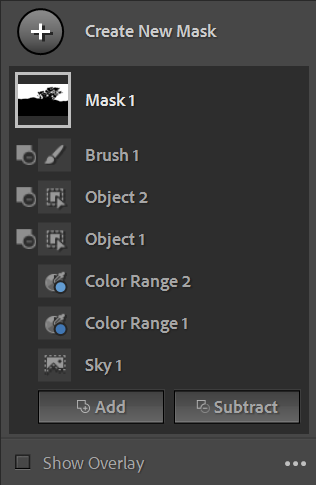 Click on Mask 1 to view Mask Components
 When you click on a Mask 1 (Mask Container), you will see the Mask Components. That is Adobe's terminology for all the different masks, including any Add / Subtract Masks that you have added.
Step 3. Duplicate and Invert Mask
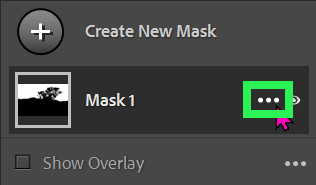 3 dots menu button
 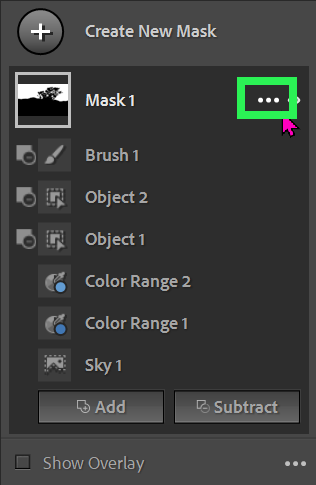 3 dots menu button
 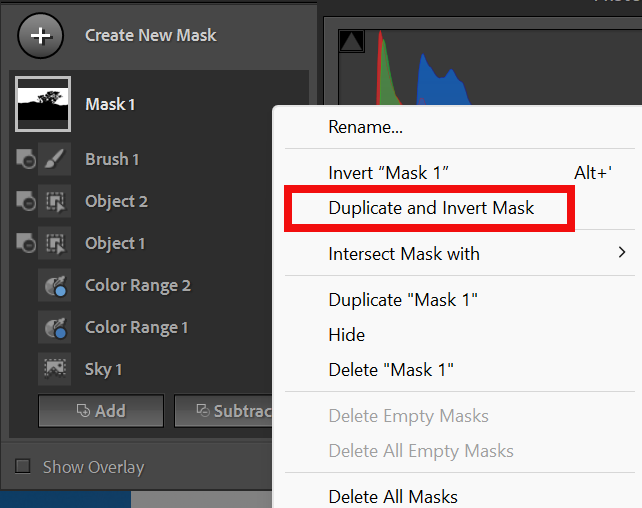 Click the 3 dots menu button to view Mask menu options
 Whether you have the Mask Components visible or not, to view the 3 dots menu button, move the cursor over the Mask Container (Mask1) and they will appear (my cursor is colored pink and is visible hovering over the 3 dots.
Click on the 3 dots and you will see the options. Select the option; Duplicate and Invert Mask.
This does what it says on the tin. It will duplicate the mask, including all the mask components that you created in the last tutorial, and in a single step, it also inverts it, so the mask is the exact opposite of the one we created in tutorial 2.
Step 4. Inverted Mask Contents
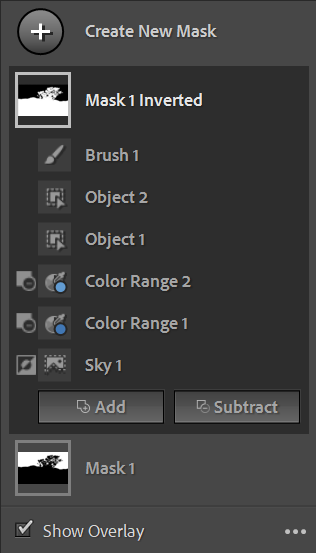 Edited image after the first tutorial
 A new mask is added, called Mask 1 Inverted
It contains the exact same Mask Components of Mask 1, as it was duplicated.
Because it was also inverted, each mask component and the Mask Container, are the exact opposites of Mask 1.
Step 5. Mask and Inverted Mask
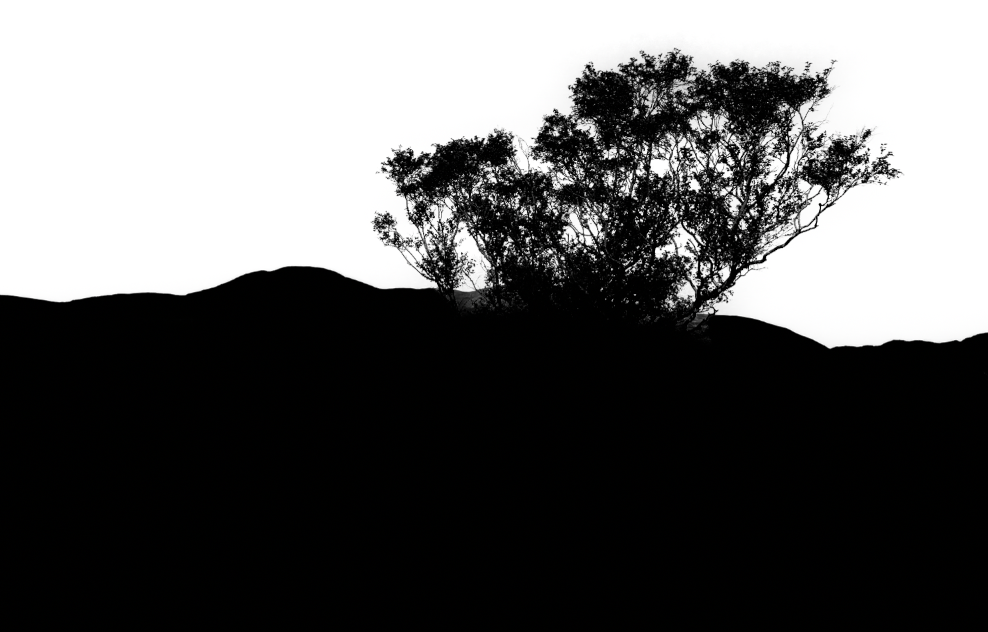 Mask 1
 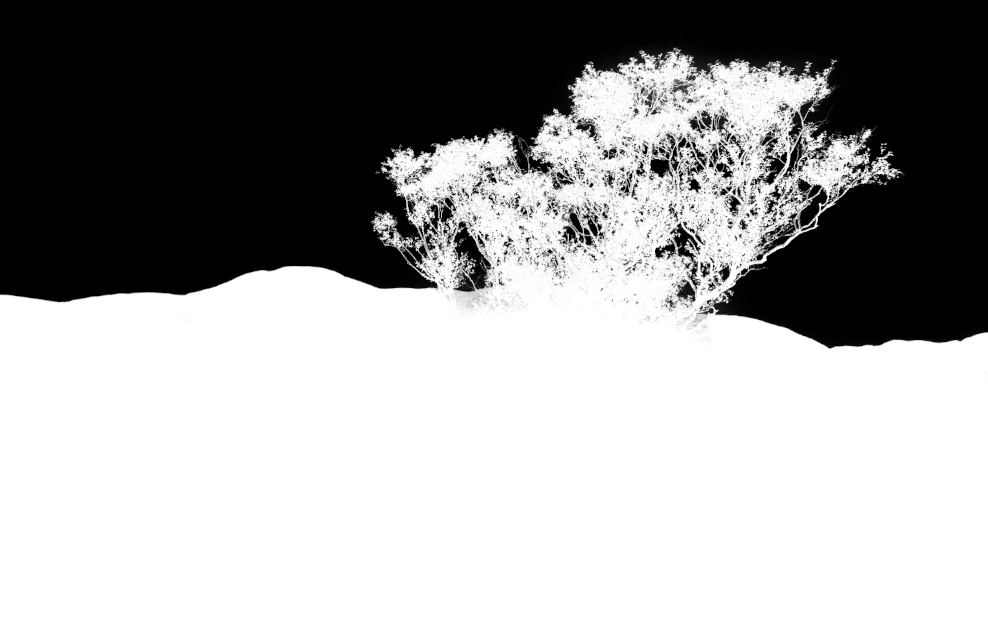 Mask 1 Inverted
 Mask 1 Inverted contains the exact same Mask Components of Mask 1, as it was duplicated.
It also has the same quality as Mask 1, that we worked to refine in tutorial 2, so it's perfect for adjusting everything except the sky, including accurately masking the branches and foliage of the tree.
Step 6. Editing Inverted Mask
 Result of editing Mask 1 Inverted Mask 1 Inverted
 Mask 1 Inverted contains the exact same Mask Components of Mask 1, as it was duplicated.
It also has the same quality as Mask 1, that we worked to refine in tutorial 2, so it's perfect for adjusting everything except the sky, including accurately masking the branches and foliage of the tree.
Step 7. Final Edited Image
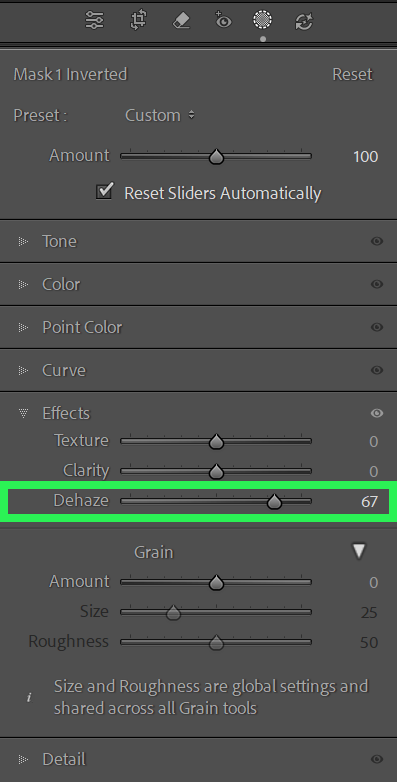 Mask 1 Inverted - Dehaze increased
 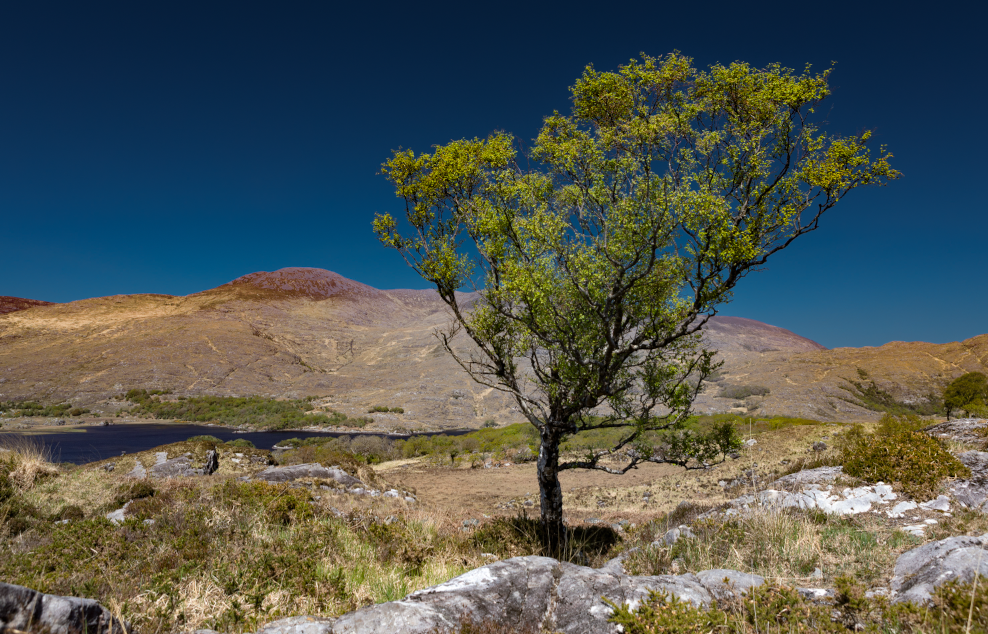 Result of editing Mask 1 Inverted
 In this example, to keep things simple, I have only adjusted Dehaze, increasing it to 67.
Final Thoughts
The final edited image Lightroom's AI tools for creating masks work very well, but they are not perfect. Masks often need improving, by Adding To, or Subtracting From the original mask.
Following the first two tutorials, we have have been able to accurately adjust the sky and the rest of the image independently of each other.
The result is an improved image, but it still retains a natural look
