Page updated: 12 April 2026
Lightroom Crop Tool
A Beginner-Friendly Guide to Straightening, Reframing and Improving Composition
The Crop tool in Lightroom Classic is one of the simplest and most powerful ways to improve the composition of your photo. Whether you want to straighten a horizon, remove empty space, change the aspect ratio or refine the framing, the Crop tool gives you full control without permanently altering your original image. As with everything in Lightroom, it is non-destructive, meaning that it doesn't change your original image file.
In this tutorial, you’ll learn every option inside the Crop tool, including how to rotate the image, how to use overlays, how to lock and unlock aspect ratios, how to flip the crop, and how to use the Angle slider, the Ruler, or general cropping for precise straightening. This is a clear, beginner‑friendly guide designed to help you feel confident using the Crop tool for the first time. For many people who have used the Crop tool many times before, you may also learn something.
Crop Tool Options
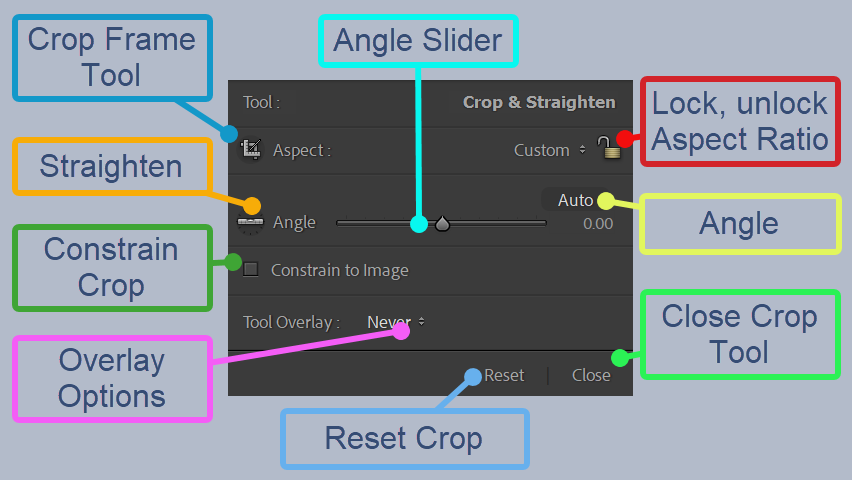
- Crop Frame Tool: Click and drag on photo to create custom crop.
- Straighten: Select, then draw horizontal or vertical line to straighten photo.
- Constrain Crop: Don't allow crop beyond image boundary.
- Overlay Options: Choose whether or not to have an overlay to aid in cropping
- Angle Slider: Drag to rotate image.
- Lock, Unlock Aspet Ratio: Lock to maintain aspect ratio when cropping. Unlock to crop unconstrained.
- Andle: Shows the angle image is rotated.
- Close Crop Tool: Closes the Crop Tool, but selecting other tools will also close it, or confirming a crop.
- Reset Crop: This resets the image back to its original fullsize.
1. Opening the Crop Tool

To open the Crop tool, click the Crop icon in the Develop module, in the mini toolbar immediately above the Basics Panel.
Or press the R key on your keyboard. This is a highly recommended keyboard shortcut, as you will use it a lot.
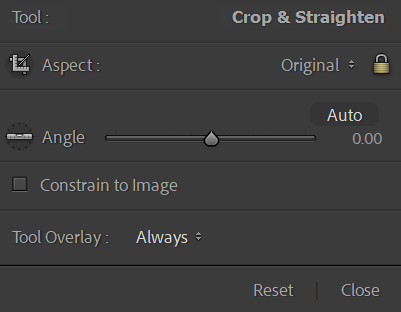
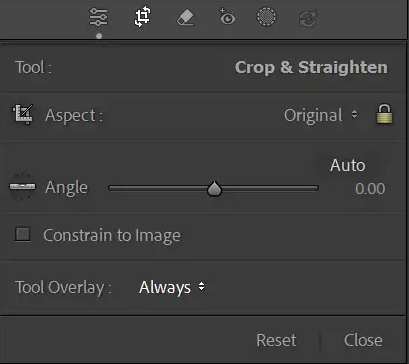
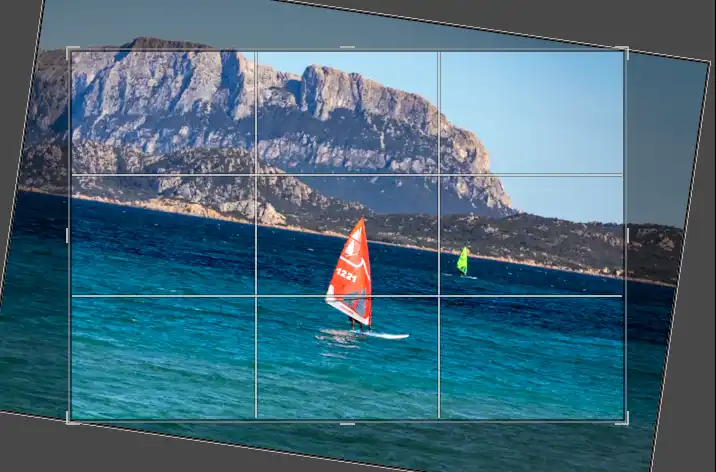
2. The Crop Tool Panel
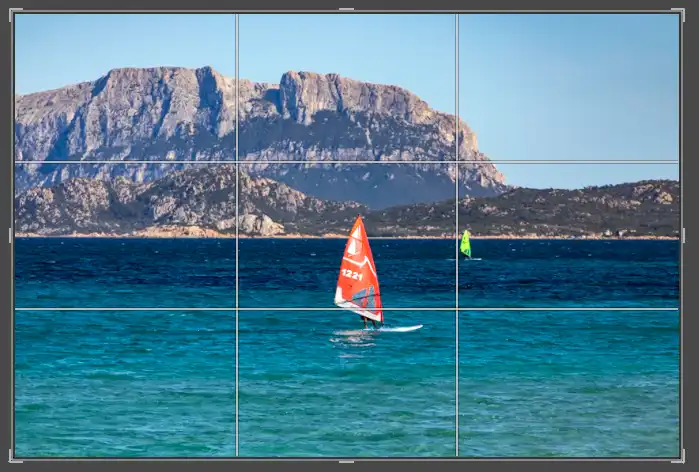
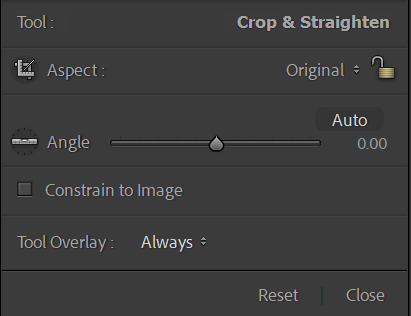
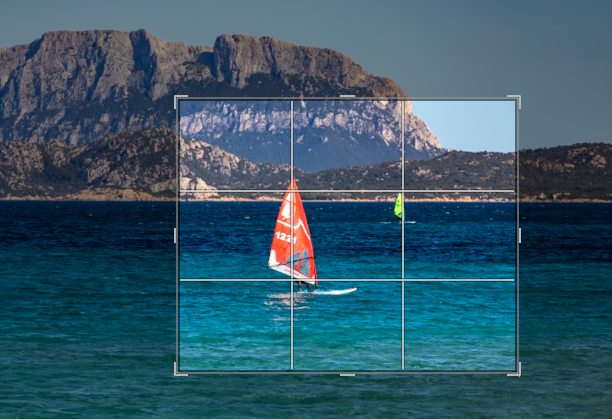
This activates the crop overlay and reveals all the cropping options in the right-hand panel. The image will display a bounding box with adjustable handles that you can drag to change the framing.
Click the Lock icon to lock, or unluck it. If the Lock icon is locked it will preserve the current Aspect Ratio, (image proportions). So when you drag to crop the image, the aspect ratio is maintained. If the Lock icon is unlocked you can drag the handles as you wish.
Pressing R again, or Esc, or selecting another tool, will close the Crop tool, but your crop settings remain applied until you reset or change them.
3. Dragging the Crop Handles
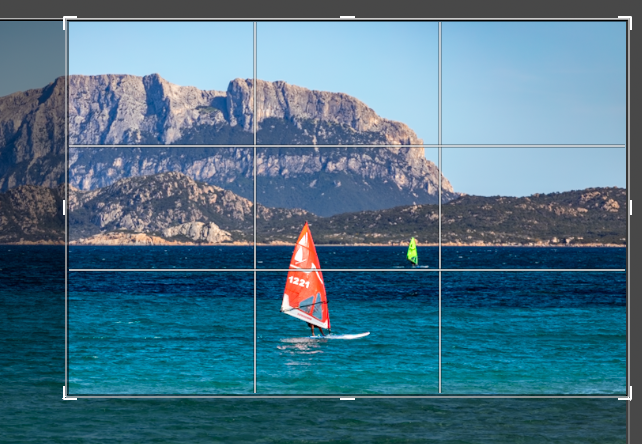
You can resize the crop by dragging any of the corner or side handles. Corner handles adjust both width and height, while side handles adjust only one dimension. As you drag, Lightroom shows a live preview of the new composition, helping you refine the framing with precision.
Or you can just click and drag straight on the image. This will create a crop box and you can then adjust the handles.
Dragging inward removes parts of the image, while dragging outward restores areas you previously cropped. Because Lightroom crops non‑destructively, you can always return to the full image at any time.
Use the handles to remove distractions at the edges, tighten the composition or shift the visual balance of the photo.
Once the Crop tool is active, Lightroom dims the area outside the crop to help you focus on the new composition. You can adjust the crop at any time, and Lightroom will always preserve the original image data.
4. Moving the Image Inside the Crop
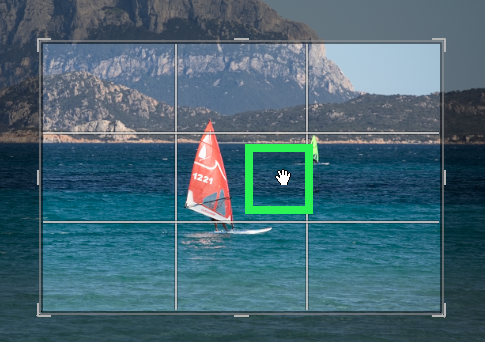
Instead of moving the crop box, you can click and drag the image itself to reposition it within the crop. This is useful when you want to keep the crop size the same but adjust what part of the image is visible inside it. The cursor will change into the Hand icon (green highlight).
Dragging the image allows you to centre your subject, remove distractions or shift the horizon without changing the overall crop dimensions. This technique is especially helpful when working with fixed aspect ratios.
Lightroom will prevent you from dragging the image beyond the edges of the crop, ensuring you never reveal empty space.
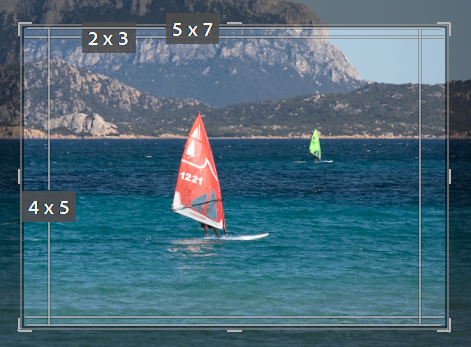
5. Choosing an Aspect Ratio
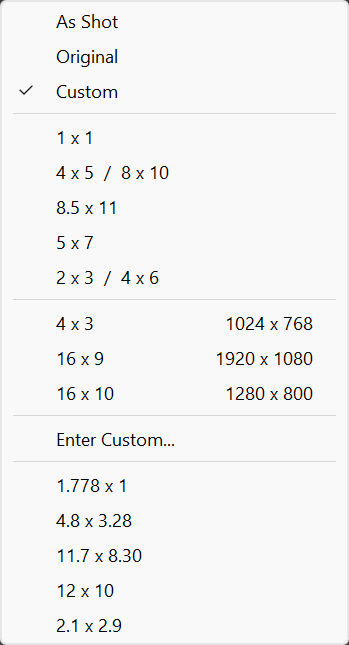
The Aspect Ratio menu lets you choose how wide or tall your crop should be. You can select common ratios such as 4x5, 1x1, 16x9 or the original camera ratio. Each ratio changes the shape of the crop box and helps you prepare images for printing, social media or specific display formats.
When you choose a ratio, Lightroom locks the crop shape so it cannot be stretched freely. You can still resize the crop, but the proportions remain fixed. This ensures consistent framing across multiple images.
If you need full freedom, choose the Custom or Free options to unlock the ratio and adjust the crop to any shape you prefer.
6. Locking and Unlocking the Aspect Ratio
The padlock icon controls whether the aspect ratio is locked or unlocked. When the lock is closed, the crop maintains its proportions as you resize it. When the lock is open, you can freely stretch the crop horizontally or vertically.
Locking the ratio is useful when you want consistent framing across a set of images or when preparing photos for a specific output size. Unlocking the ratio gives you full creative control when you need a custom composition.
You can toggle the lock at any time without losing your current crop settings.
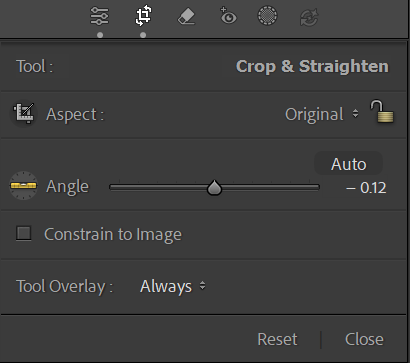
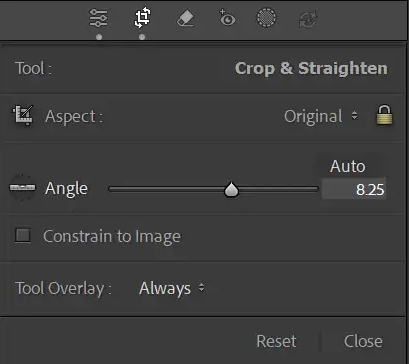
7. Straightening with the Angle Slider

The Angle slider lets you rotate the image to correct tilted horizons or leaning verticals, or to introduce an angle. Drag the slider left or right to rotate the image, or enter a precise value for exact adjustments. Lightroom automatically adjusts the crop to avoid empty corners as you rotate.
My preferred method to rotate an image, or to correct a tilt is by moving the cursor outside the crop area. The cursor changes into a curved, double-headed arrow. Click and drag.
You can also click the Angle tool icon and draw a line along a horizon or vertical edge in your photo. Lightroom will rotate the image to match the line you draw, making straightening quick and accurate.
Use the Angle slider whenever your photo feels slightly off‑balance or when architectural lines need correction.
8. Using Auto Straighten
The Auto button attempts to straighten the image automatically by analysing the horizon and vertical lines. This can be a quick way to correct minor tilts without manually adjusting the Angle slider.
Auto works best on photos with clear horizontal or vertical references, such as landscapes, buildings or seascapes. If the result isn’t perfect, you can fine‑tune the rotation manually.
Auto never crops more than necessary, preserving as much of the image as possible while still correcting the tilt.
9. Using Ruler to Straighten
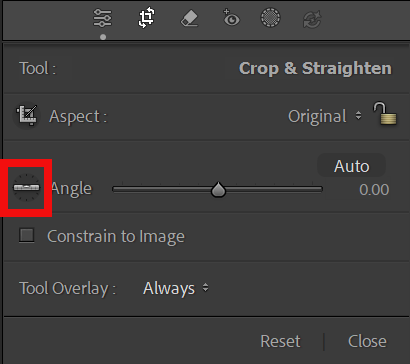
Click on the Ruler (red highlight), then click and drag in the image along a line that should be horizontal or vertical. Lightroom will automatically straighten the image.
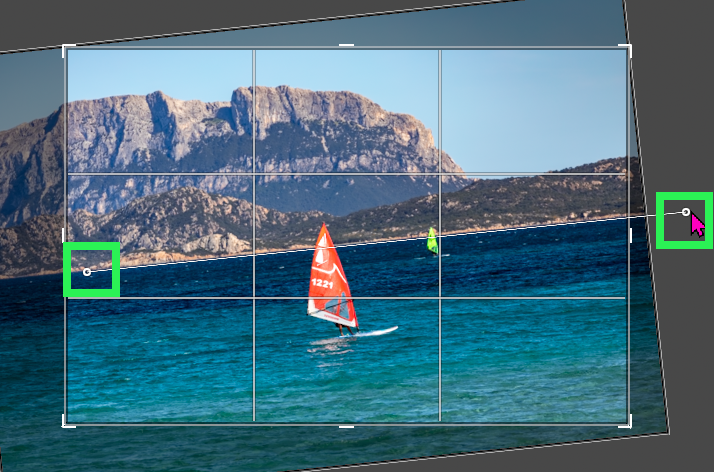
10. Straighten by Dragging

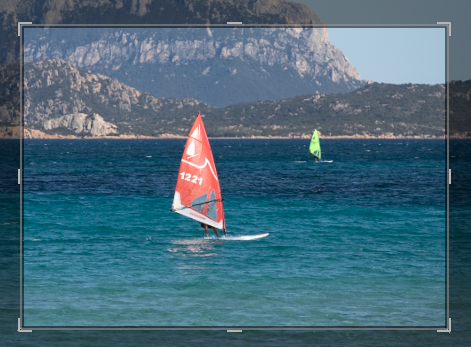
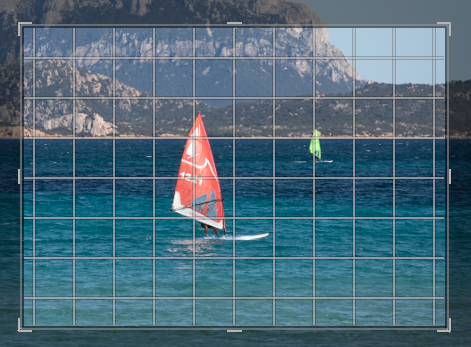
Despite the previous three options to straighten an image, my preferred method is this one. Just move the cursor outside of the crop area (red highlight) and watch for the cursor changing into a curved, double headed arrow.
Then click and drag. While you do this, there are numerous gridlines in the crop area, which makes it easy to straighten.
11. Crop Overlay or Not?
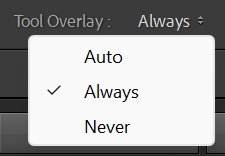
You can choose whether or not to have an overlay to aid your cropping.
Click the Tool Overlay dropdown menu and select from Auto, Always or Never.
The next step will look at the different options for overlays. There are more than you might think.
12. Changing Crop Overlays
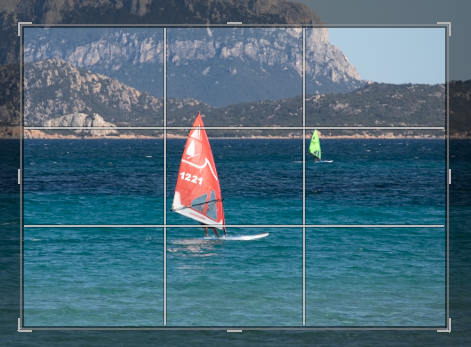

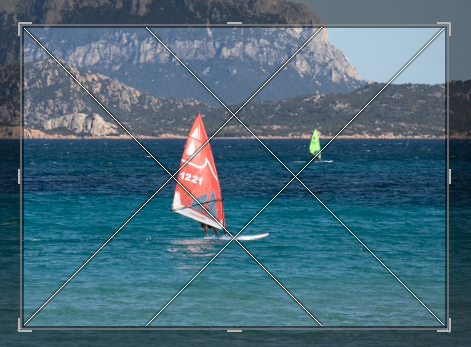


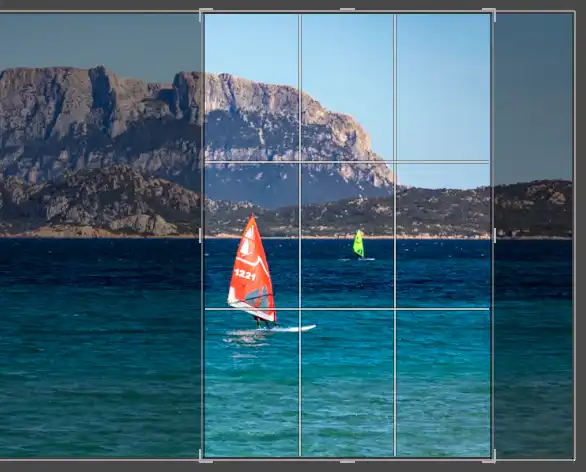
Pressing the O key cycles through different crop overlays, such as Rule of Thirds, Golden Ratio, Diagonal, Triangle and more. These overlays help you refine your composition by aligning key elements with visual guides.
Each overlay offers a different way to balance the image. For example, the Rule of Thirds is ideal for general composition, while the Golden Spiral can guide the viewer’s eye through the frame.
The overlays that are not symmetrical can be flipped or rotated by pressing Shift+O, giving you even more flexibility when composing your shot.
13. Flipping the Crop
You can flip the crop horizontally or vertically by pressing the X key.
Flipping does not rotate the image; it mirrors it within the crop boundaries.
14. Resetting the Crop

The Reset button restores the crop to the full image, removing all adjustments you’ve made. This is helpful when you want to start over or compare your cropped version with the original framing.
Tip: If you want to experiment with differently cropped versions, create Virtual Copies. Unlike duplicating actual files, Virtual Copies add almost nothing to the filesize.
Resetting the crop does not affect any other edits in the Develop module. It only resets the crop and rotation settings.
You can also double‑click the Crop tool icon to reset the crop instantly.
Summary of the Crop Tool
The Crop tool is a simple tool, but an absolutely essential tool. Cropping your image is often a very powerful way to improve the impact of the photo.
Tip: Use the keyboard shortcut R to quickly access the crop tool, as you will be using it a lot.
