Page updated: 21 November 2026
Lightroom Adaptive Color Profile – Balancing Exposure and Color
Using Adaptive Color, Linear Gradient Masks and Basic Panel Adjustments
Although demonstrated using an architectural photograph, these techniques have wider applications in landscape, cityscape and other types of photography.
This is the second part of a four-part tutorial series exploring Lightroom Classic's tools for improving architectural photographs. Following the perspective correction covered in Part 1, Lightroom Transform Perspective Tutorial, this tutorial focuses on improving exposure, enhancing image detail and refining the overall appearance of the same Budapest courtyard photograph.
The photograph presents two particular challenges:
- The upper part of the courtyard is considerably brighter than the lower areas, which are in deep shadow. I'll demonstrate how Lightroom's Adaptive Color Profile and a Linear Gradient mask can help balance exposure and reveal more detail.
- A wide-angle polarizing filter has produced uneven saturation across the sky. In Part 3, I'll show you how to use Lightroom's Point Color controls to address this and make more precise color adjustments.
Although demonstrated using an architectural photograph, these techniques have wider applications in landscape, cityscape and other types of photography.
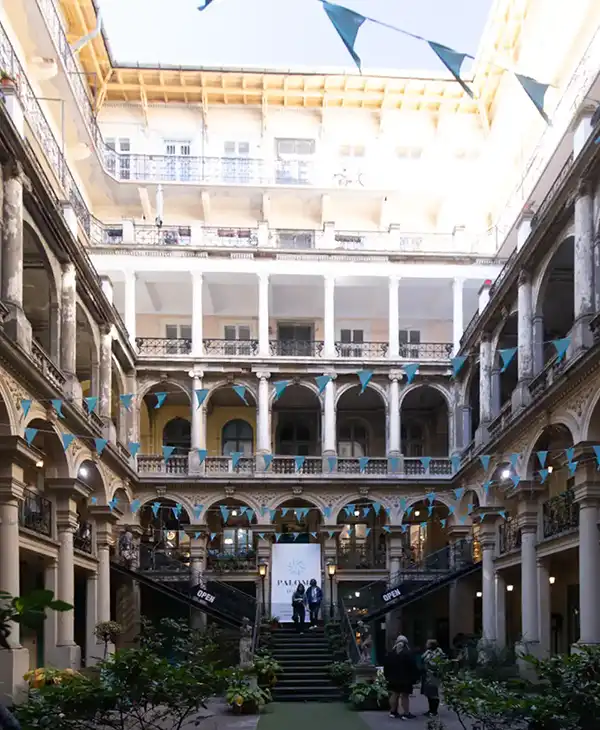 Image at the beginning of this tutorial (as it was at end of the Part 1 tutorial fixing converging verticals.).
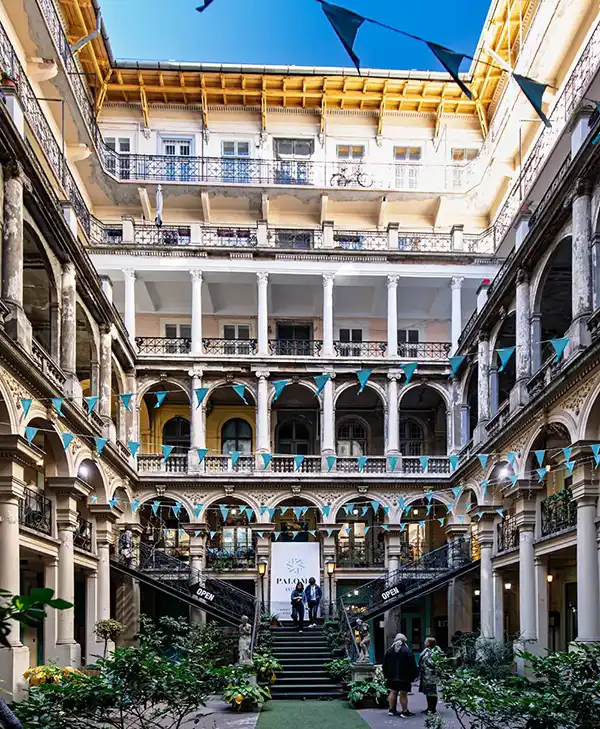 Edited image at end of this tutorial, after using Adaptive Profile, Linear Gradient Mask, Dehaze, Clarity and Texture. The uneven sky will be fixed in the next tutorial, part 3.
ON THIS PAGE
1. Adaptive Color Profile
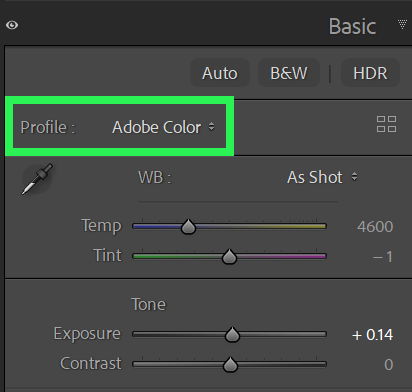 Select the profiles drop-down.
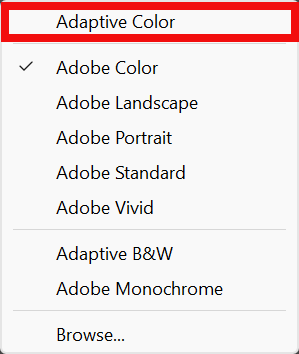 Select Adaptive Color.
Go to the Develop Module. Either press the D key or select Develop from the top menu.
Select the Basic panel.
Click in the Profile name to show the drop-down box of profiles (green highlight).
Select Adaptive Color (red highlight).
2. Comparison of Profiles
Notes on the 2 Images in this Comparison
Note that no editing took place with either image. The only thing that was changed is the color profile.
Adobe Color
Adobe Color is a standard profile that provides a balanced starting point for editing, with natural-looking colors, contrast, and tonal range. It is designed to work well with a wide variety of photographs.
Adobe Color is commonly the default profile for RAW images, although a different profile may be displayed if one was selected previously, or applied through Lightroom's import settings or an import preset.
Adaptive Color
Adaptive Color is an adaptive profile that uses Adobe's image analysis technology to adjust color, tone, and contrast according to the individual photograph. It aims to produce a more balanced and visually appealing starting point for editing, potentially enhancing detail, color separation, and tonal definition.
The results vary depending on the photograph, but Adaptive Color can often produce a noticeably different result from Adobe Color, without having to make individual adjustments yourself.
Tip: If you intend to use the Adaptive Color profile, apply it at the beginning of your color editing process, before making other color adjustments.
3. Selecting the Linear Gradient Tool
 Masks button
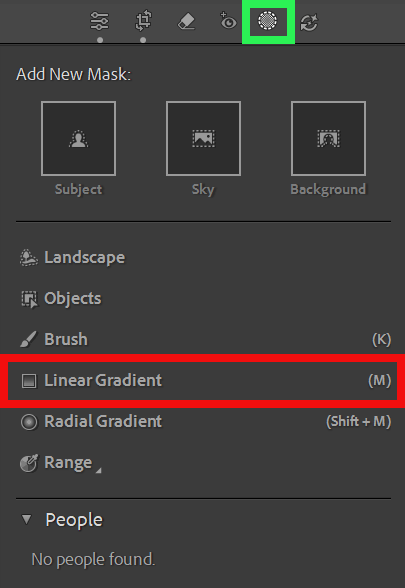 Select Linear Gradient
Select Masks (red highlight).
Select Linear Gradient.
4. Applying a Linear Gradient to the Image
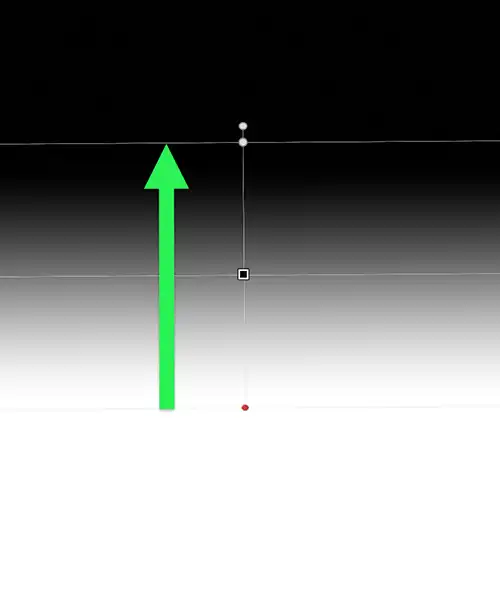 Green arrow indicates clicking outside the image, to rotate.
 Green arrow indicates clicking outside the image, to rotate.
Click and drag, as illustrated by the green arrow. The arrow indicates the direction and distance of your click and drag, from the starting point to the ending point.
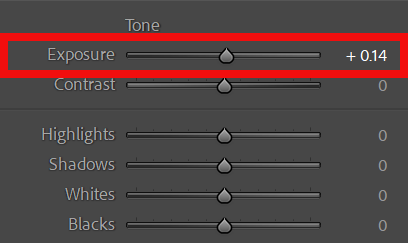
I have increased Exposure slightly, to maintain a natural appearance.
When creating a Linear Gradient, the area below the starting point will be fully affected by your adjustments, as indicated by the white area.
The area above the ending point will not be affected by your adjustments at all, as indicated by the black area.
Between the starting point and ending point, the effect will gradually transition from full strength to no effect, creating a smooth gradient.
Once created, you can adjust all aspects of the Gradient.
5. Linear Gradient Comparison
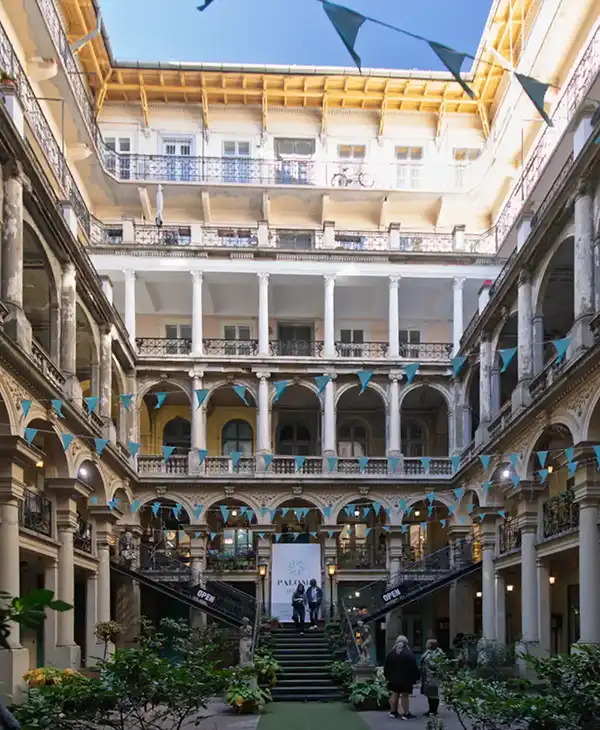
Notes on 2 Images in this Comparison
Before Gradient
The lower part of the image is in shadow, due to the nature of the building.
After Gradient
I have slightly lightened the lower area, but I wanted to maintain a realistic look, so this adjustment was small.
6. Enhancing Image Detail and Definition
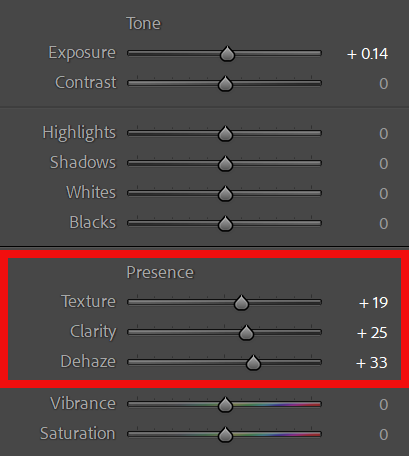 Basic panel showing the Texture, Clarity and Dehaze adjustments.
In the Basic panel I have made the following adjustments.
- Texture: +19
- Clarity: +25
- Dehaze: +33
Increasing Texture, Clarity and Dehaze has enhanced the detail, definition and contrast in the image. Texture brings out finer detail, Clarity strengthens midtone contrast, and Dehaze reduces the appearance of haze while adding depth and contrast, giving the image a more pronounced and defined appearance.
I regularly use Texture, Clarity and Dehaze when editing landscape or cityscape photographs. This is partly a personal preference, but I find that carefully increasing these settings can make a considerable difference to the overall appearance of an image. Used subtly, they can enhance detail, definition and depth without making the adjustments themselves particularly obvious.
7. Dehaze, Clarity, Texture
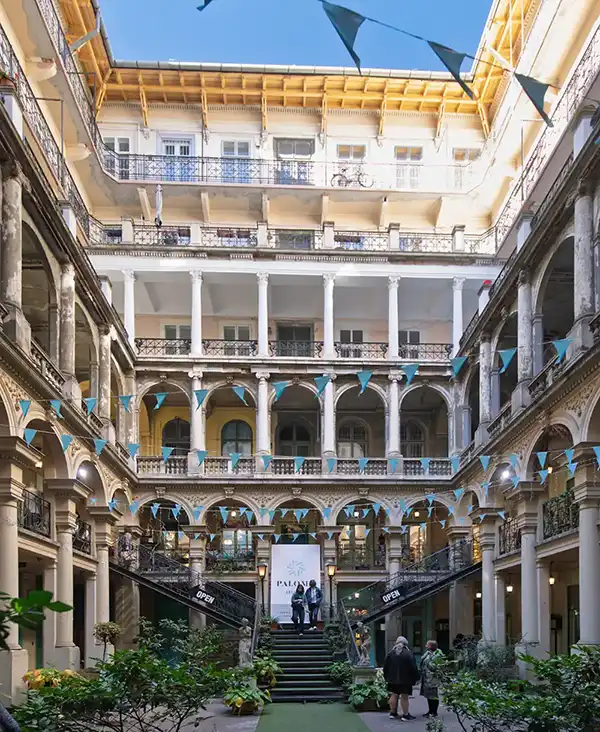
Notes on the 2 Images in this Comparison
Before Texture, Clarity and Dehaze
The image before increasing Texture, Clarity and Dehaze.
After increasing Texture, Clarity and Dehaze.
The adjustments add definition, contrast and depth while retaining a natural appearance.
8. Image Progress and Summary
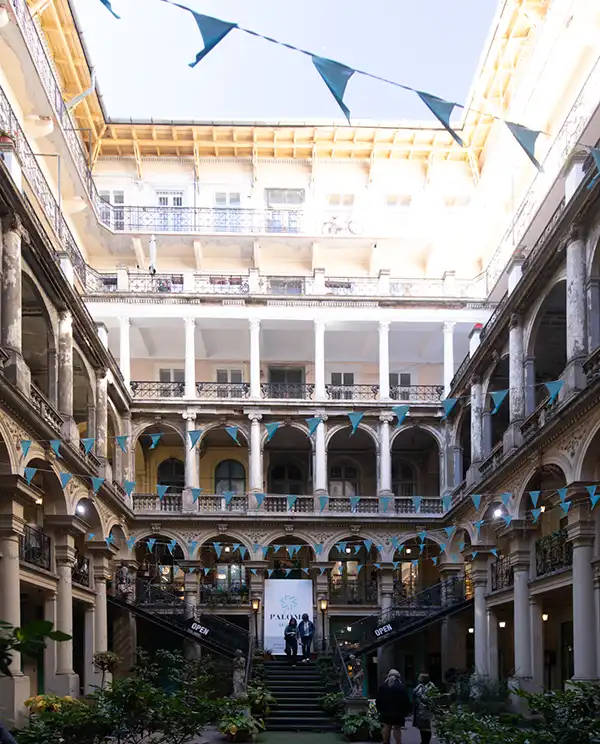 Image after Part 1 Image after Part 2
The first image shows the result after completing Part 1, Lightroom Transform Perspective Tutorial, where the perspective and composition were corrected using Lightroom's Transform tools. The second shows the progress made in this tutorial, with improvements to exposure, color and image detail.
Using the Adaptive Color profile, Linear Gradient masks and adjustments in the Basic panel, we've improved the overall appearance of the photograph while retaining a natural look. These techniques are useful for many types of photography, particularly landscapes, architecture and cityscapes.
Although this tutorial follows on from Part 1, the techniques covered can also be used independently, and on your own photographs.
In Part 3, we'll explore Lightroom's Point Color controls to even the color in the sky. We'll look at how to select individual colors and how the Variance and Range settings influence those selections. I'll use comparison rollovers to demonstrate some of the more subtle differences.
Part 4 will look at additional techniques using Point Color, to make selective color adjustments to specific small areas of the photograph without unnecessarily affecting surrounding colors.
