Page updated: 21 November 2026
Lightroom Classic Transform Tool - Fixing Converging Verticals
A Beginner-Friendly Guide to Correct Perspective and Geometry in Architectural Photography
This is the first of a four-part tutorial series exploring some of Lightroom's tools for improving architectural photographs. Using a challenging courtyard photograph, I'll demonstrate how to correct converging verticals and refine the composition using the Transform and Crop tools. The tutorials are aimed at beginner and intermediate users.
The original photograph presents three common editing challenges:
- Because the photograph was taken with a wide-angle lens in a confined space, the camera was tilted upwards, causing the building's vertical lines to converge and making the structure appear to lean backwards.
- There's a significant exposure difference between the upper half of the courtyard and the lower half, which is in shadow.
- The polarizing filter has produced uneven saturation across the sky, an effect that can be particularly noticeable with wide-angle lenses.
Part 1 covers perspective correction and composition. Part 2 Lightroom Adaptive Color Profile , explores balancing exposure, while Part 3 demonstrates precise color adjustments and part 4 takes precise color adjustments further.
The techniques covered in Parts 2 3 and 4 also have wider applications in landscape, cityscape and other types of photography.
 Original image with converging verticals
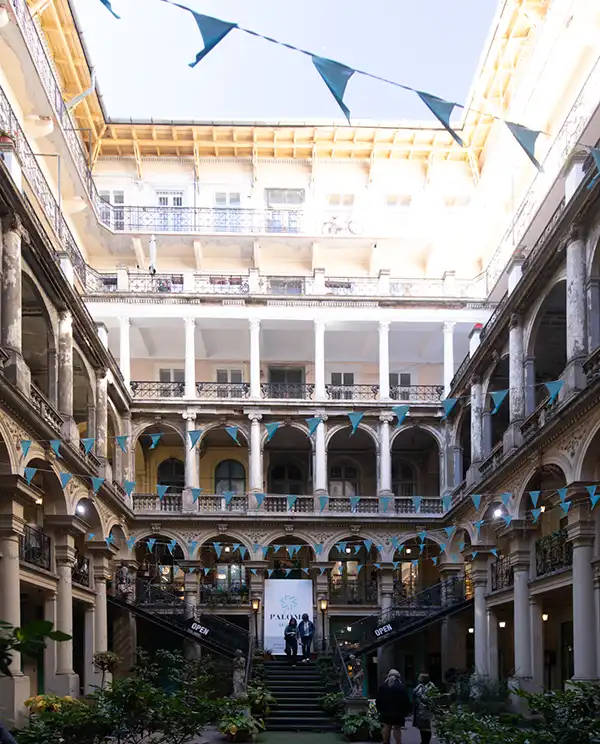 Edited image at end of this tutorial, corrected converging verticals.
Balancing exposure is covered in part 2.
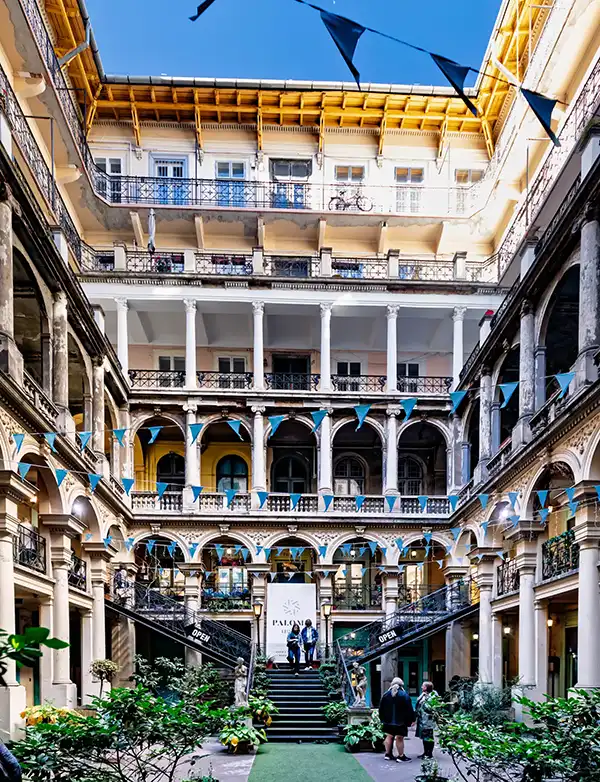 Final result after completing all four tutorials.
This smaller image shows the final result after completing all four tutorials. You can see how the perspective correction, exposure adjustments and precise color control work together to transform the original photograph.
Each tutorial is designed to stand on its own. You don't need to complete all four if your needs relate to just one or two of the topics covered.
Part 1 – Transform: Correcting Perspective and Refining Composition
Explore Lightroom's Transform tools to correct converging verticals and refine your composition. I'll also demonstrate how to use Aspect correction to add height that you can lose when adjusting verticals.
ON THIS PAGE
1. Lens Corrections
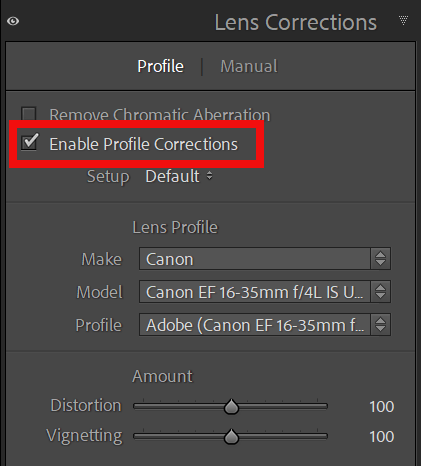 Lens Profile Corrections panel
Go to the Develop Module. Either press the D key or select Develop from the top menu.
Select the Lens Corrections panel.
Tick the box to Enable Profile Corrections. Don't change any settings. Lightroom should identify your lens automatically and apply the appropriate profile.
This automatically applies corrections for optical distortions associated with your lens. These corrections can be particularly useful with wide-angle lenses. The profile may also reduce vignetting caused by the lens.
See the next step and view the changes by clicking on the buttons to turn corrections ON and OFF.
2. Comparison of Corrections
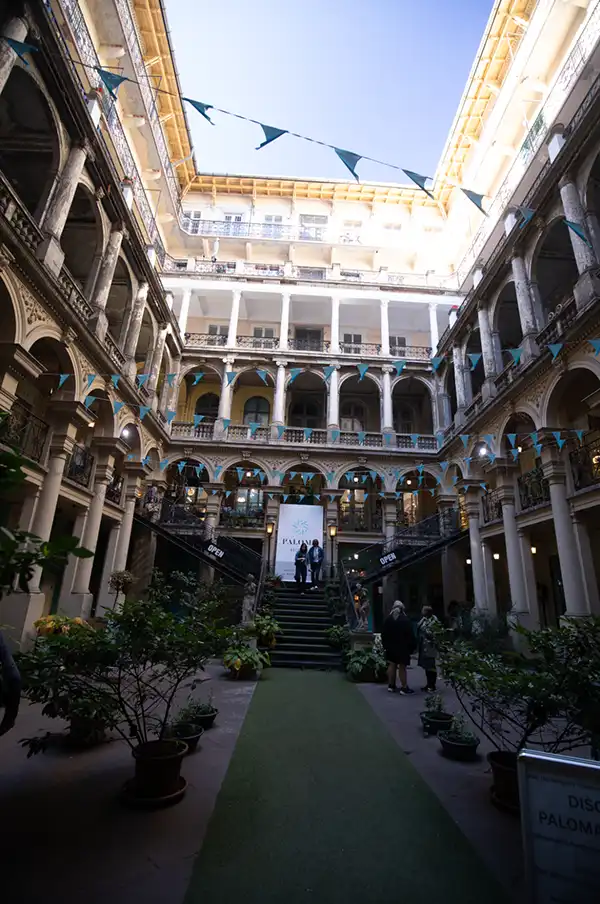
Note how the image changes and the vignetting that is visible in the corners.
Notes on the 2 Images in this Comparison
Corrections OFF
The original image shows darker corners, due to vignetting of the lens. Vignetting can occur with any lens, but its visibility varies considerably. When compared to the Corrections ON version, you will see changes in the lens geometry.
Corrections ON
With Lens Corrections enabled, vignetting in the corners is reduced and optical distortion is corrected. The difference is more apparent when comparing this image with the version with corrections turned off.
3. Straighten Image
 Crop button
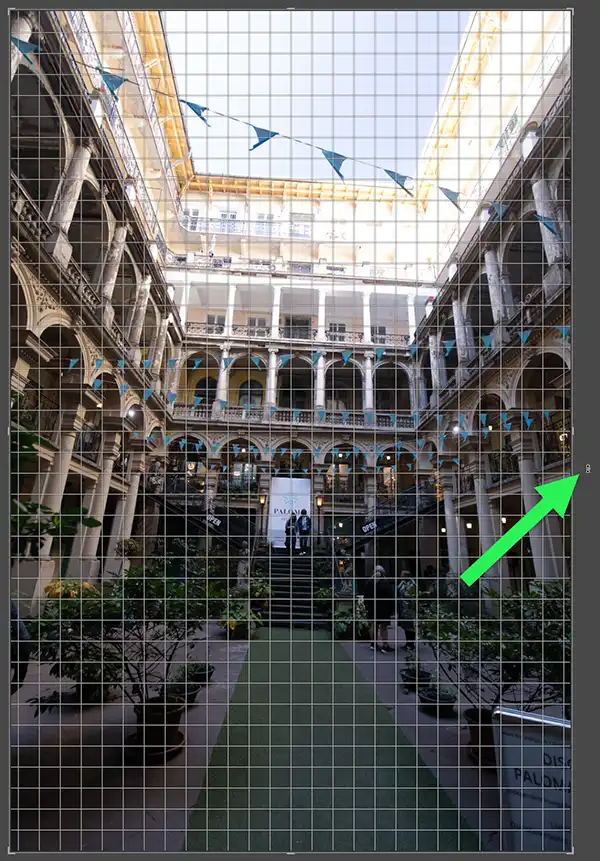 Green arrow indicates clicking outside the image, to rotate.
An easy way to straighten an image in Lightroom is using the Crop tool.
Select the Crop tool (red highlight), in the bar just above the Basic panel.
Or press R on the keyboard, which I recommend if you have a keyboard, as it's something you will use a lot.
Click outside the image (green arrow) and the cursor will change into a curved, double-headed arrow. Click and hold the mouse button to rotate the image. While holding the button, the Crop grid displays additional lines, making it easier to align vertical or horizontal features.
Click and drag to rotate, aligning a line with your chosen feature.
The Crop window can also be open at the same time as Transform, which we'll use in a few steps.
4. Comparison of Straightening
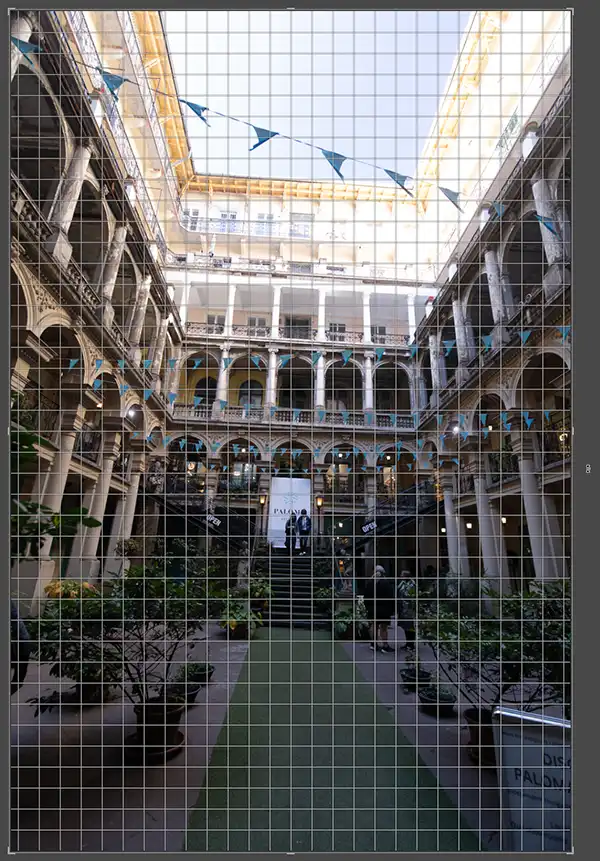
Notes on 3 Images in this Comparison
Compare the original image with the rotated version, then see how cropping removes the unwanted areas around the edges and produces the final composition.
Original
This shows the original image before straightening, with the building's horizontal features not yet level.
Rotated
This shows the rotated image, aligned to the horizontal part of the building, as indicated with the red line.
Cropped Image
This shows the result of the rotation and cropping, producing the final composition.
5. The Transform Panel
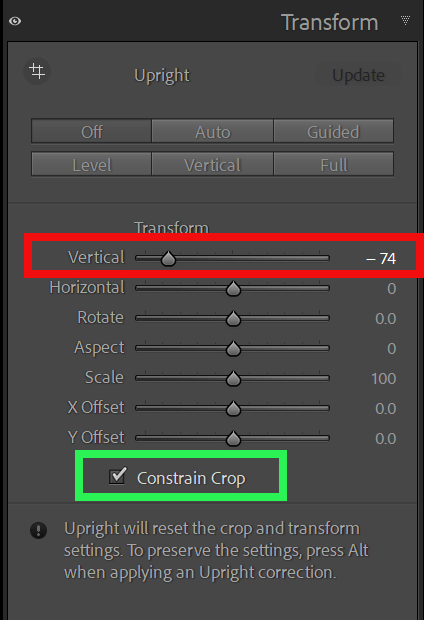 Transform panel with adjustment to Vertical and Constrain Crop turned on.
Drag the Vertical slider (red highlight) to the left, while watching the image, to straighten the verticals as desired.
If the image still needs rotating, or straightening, press R to open the Crop tool, if it's not already open. Or select the Crop tool from the bar above the Basic panel, as in step 3.
You can then adjust the crop, or rotation, while still viewing the Transform controls. I find this very useful.
Constrain Crop (green highlight): Turn this on to automatically crop the image within its boundaries, removing the empty areas created by the Transform adjustments.
Note: The notice about Upright at the bottom of the panel can be ignored for this tutorial.
Upright automatically corrects perspective and resets existing crop and Transform settings. Holding Alt when applying Upright preserves those settings. We won't be using Upright in this tutorial, as we'll be making the Transform adjustments manually.
6. Comparison of Transform
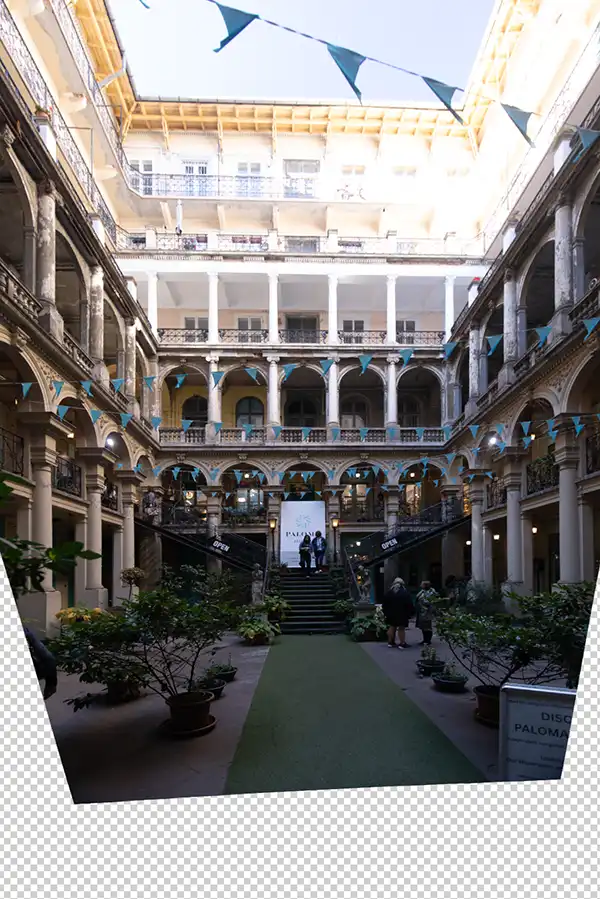
This comparison shows how the Transform and Crop tools can be used together. You can adjust perspective, crop and rotate the image without having to switch back and forth between separate panels.
Notes on the 3 Images in this Comparison
Transform without Crop
This shows how Transform looks when adjusting Vertical (previous step), but without the Crop tool also being used.
The Constrain Crop option in Transform is OFF.
Transform WITH Crop
This shows how Transform looks when adjusting Vertical (previous step), but WITH the Crop tool also being used. The Crop overlay is visible and you can crop and rotate, while still in Transform, which I find extremely useful.
The Constrain Crop option in Transform is OFF.
Constrain Crop
With Constrain Crop turned ON, the empty areas are automatically removed. The Crop overlay remains visible, allowing you to refine the crop and rotation while working in Transform.
7. Cropping in Transform
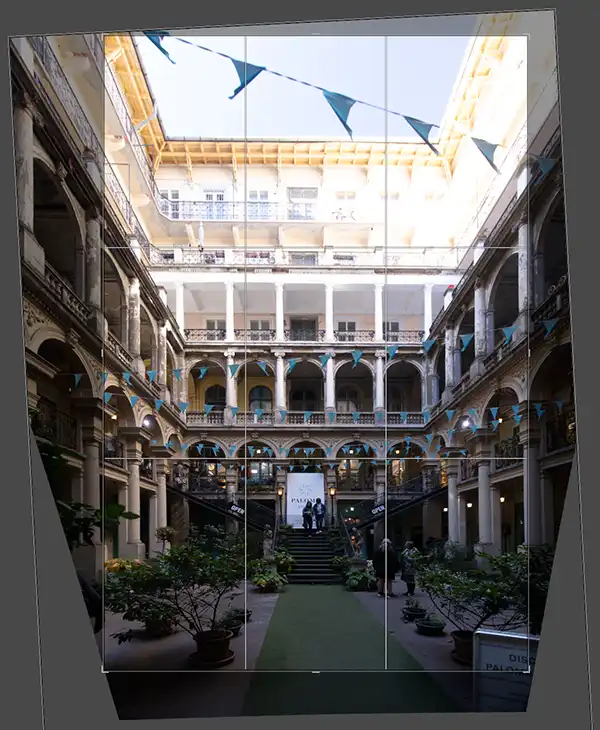
While working in Transform, you can also crop an image. If you are already in the Crop tool, then click on Transform. If you are in Transform, open the Crop tool, either by clicking on it in the bar above the Basic panel, or by pressing the R key on a keyboard.
Notes on the 3 Images in this Comparison
Before Crop
While in Transform, I also have the Crop overlay visible. I want to crop the lower part of the image to remove the sign in the bottom right corner and reduce the amount of green carpet.
Proposed Crop
The crop overlay shows how I've repositioned the crop handles to crop out the sign in the bottom right corner and reduce the amount of green carpet and empty space at the bottom. Constrain Crop is turned ON in the Transform panel, so that the cropped area stays within the bounds of the image. If you widen the crop, you may also need to drag the image upwards to reposition it within the crop area.
Cropped Image
This shows the result of applying the proposed crop and the final, cropped image (with Constrain Crop turned ON).
8. Adjust Aspect to Refine Proportions
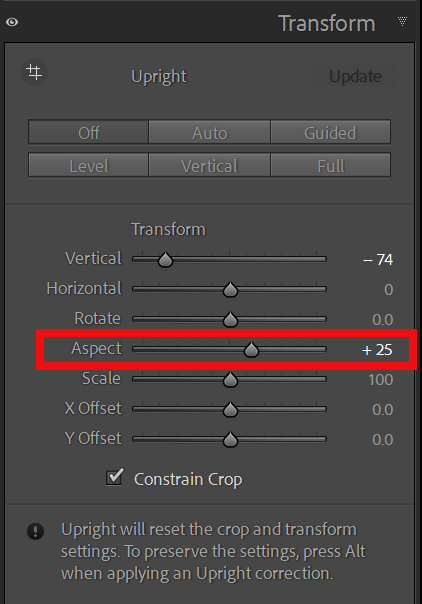 Aspect adjusted in Transform panel
Correcting vertical perspective can make the building appear compressed. Use the Aspect slider to adjust the proportions of the image, making it taller or wider as required. Watch the image as you make the adjustment and stop when the proportions look natural.
Drag the Aspect slider (red highlight) to the right, to increase the height of the image, or drag it to the left to increase the width of the image.
In this image we need to increase the height slightly.
Adjust as desired, while watching your image.
9. Comparison of adjusting Aspect
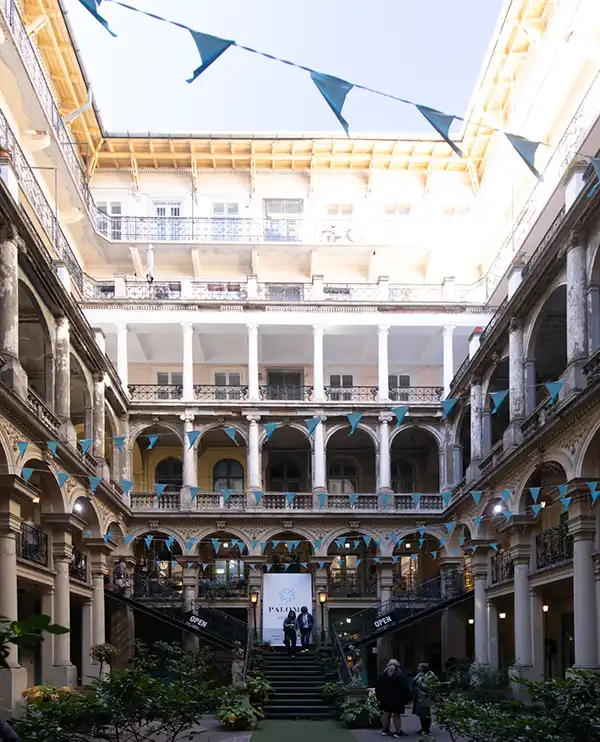
When correcting verticals, the building can appear slightly compressed. Use Aspect in the Transform panel to refine its proportions.
Notes on the 2 Images in this Comparison
Before adjusting Aspect
Correcting verticals can make a building appear slightly compressed.
After adjusting Aspect
Adjusting Aspect allows you to refine the proportions of the building, making it appear taller or wider as required.
10. Final Image and Summary
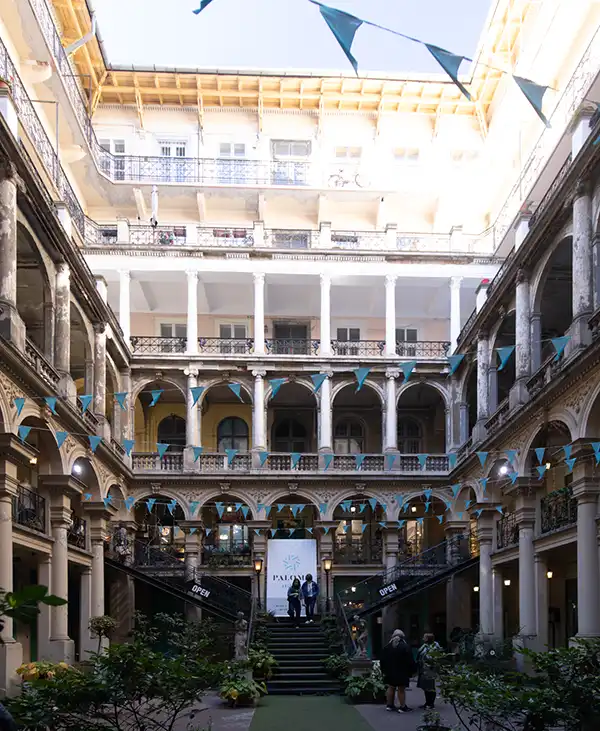 Final image from this tutorial
Final image after completing all four tutorials.
The first image shows the result after completing this tutorial. The second shows the final result after completing all four tutorials.
If your main aim is to correct common problems with architectural photographs, this tutorial may be all you need. Correcting converging verticals is fairly straightforward, and being able to adjust the crop and rotation while working in Transform makes refining the composition much easier.
The next tutorials take this further using the same photograph. In the original image, the upper part of the courtyard is much lighter than the lower part. The next tutorial, part 2, Lightroom Adaptive Color Profile , will balance the exposure while keeping the result believable.
The third and final tutorial will look at correcting uneven color in the sky and making precise color adjustments in specific areas of the photograph.
