Page updated: 12 July 2026
Lightroom Export Options Explained
Every Lightroom Export Option Explained
Lightroom’s Export Presets let you save all your export settings — size, format, sharpening, naming and destination — so you can export your photos quickly and consistently with a single click. They’re one of the biggest time‑savers in Lightroom, especially if you regularly export images for any purpose.
This page explains every checkbox, dropdown and setting in the Export window, including what each option does, when you might need it, and when beginners can safely ignore it. Lightroom includes many advanced and rarely used features, so this guide focuses on practical, plain‑English explanations that help you understand the purpose of every option without getting lost in technical jargon.
Related Lightroom Export Tutorials
Lightroom’s Export panel contains a lot of settings and options, so to keep things clear I have created three separate tutorials, each focusing on a different part of the Export workflow.
This tutorial » Lightroom Export Options Explained – a complete reference guide to every Export option, with plain‑English explanations of what each setting does and when you might need it.
How to Create Lightroom Export Presets – a clear, step‑by‑step guide to creating, updating and managing export presets for fast, consistent exporting.
Recommended Lightroom Export Settings for Beginners – simple, reliable export settings for everyday use.
ON THIS PAGE
Export To
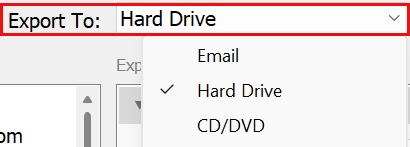
Choose where you want to export to.
As with all the other options, this will be saved in your preset, so you can create presets that export to different locations.
Export Location
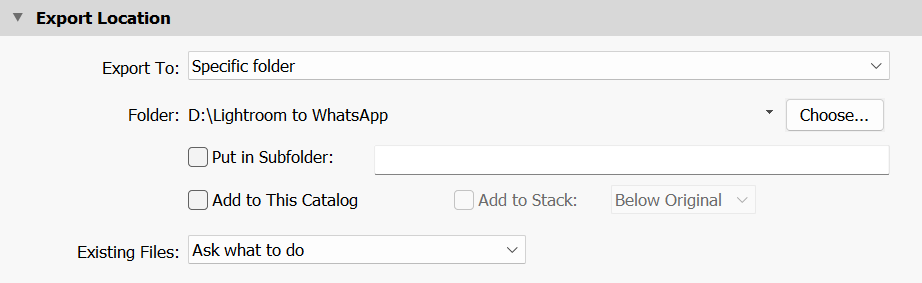 Export Location Options
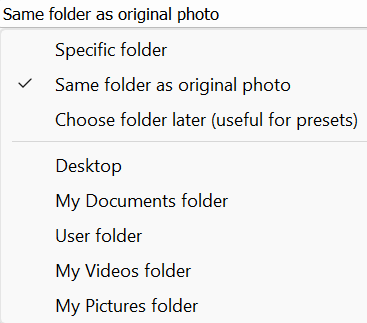 Export Folder Options
- Put in Subfolder saves the exported files inside a named subfolder within the chosen destination. Lightroom creates the subfolder automatically if it does not already exist, and all exported items are placed inside it.
- Add to This Catalog imports the exported file back into Lightroom as a new item. This always creates a duplicate of the image in the catalog, resulting in two separate entries for the same photo. It is generally used only in specialized workflows that need to manage exported versions independently from the originals. Most users don't use this.
- Add to Stack places the exported file in a stack with the original photo. Stacking is only available when exporting a single image, adding it back to the catalog and saving it into the same folder as the original. If any of these conditions are not met, the stacking options are disabled.
- Below Original determines the position of the exported file within the stack. When enabled, the exported version is placed underneath the original photo, keeping the original as the top item when the stack is collapsed.
- Existing Files controls how Lightroom handles exported files when a file with the same name already exists in the destination. Options include asking what to do, overwriting the existing file or skipping duplicates.
File Naming
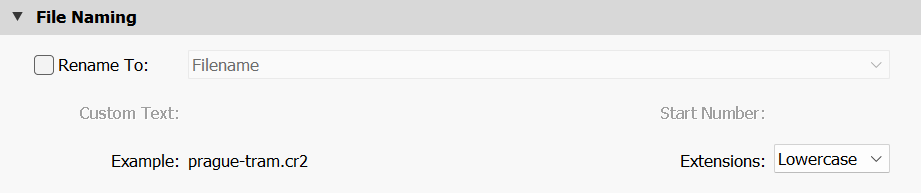 File Naming Options
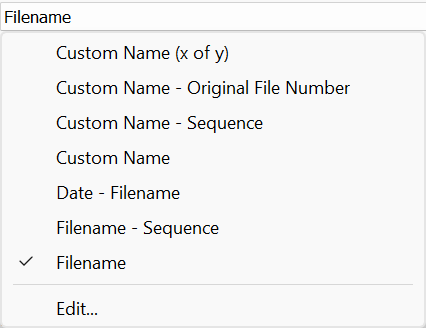 Filename Template
The File Naming section controls how Lightroom names exported files. Lightroom provides several preset templates, each combining elements such as custom text, original filenames, dates or sequence numbers. The selected template determines the structure of the exported filename, and Lightroom displays an example to show the final output format.
- Custom Name uses text entered by the user as the filename.
- Custom Name (x of y) adds a position indicator based on the number of exported files.
- Custom Name – Original File Number combines custom text with the original camera-assigned number.
- Custom Name – Sequence adds a numerical sequence that increments for each exported file.
- Filename exports the file using the original filename.
- Filename – Sequence keeps the original filename and adds a numerical sequence.
- Date – Filename places the capture date before the original filename using Lightroom’s date token format.
- Edit… opens the Filename Template Editor, where templates can be customized using tokens such as date, time, metadata fields, sequence numbers or custom text.
- Extension options allow the exported file’s extension to be written in uppercase or lowercase. This affects only the extension and does not change the file format.
Video
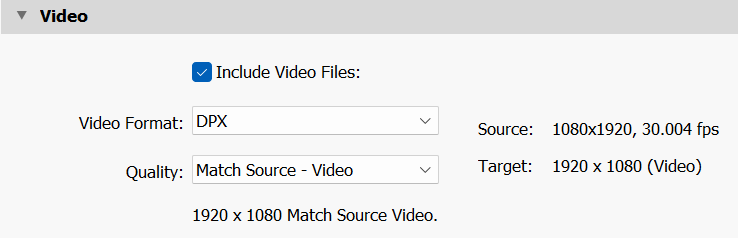 Video Export Panel
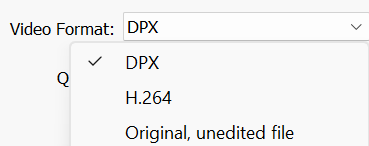 Video Format Options
The Video section appears when the export includes video files. It provides options for format and quality, allowing Lightroom to render video clips directly from the catalog. These settings apply only to video content and do not affect photo exports.
- Video Format determines the type of video file Lightroom exports. Options typically include H.264 and Original, depending on the source file and Lightroom’s supported formats.
- Quality controls the compression level applied to exported video. Higher quality reduces compression and preserves more detail, while lower quality produces smaller files with increased compression.
File Settings
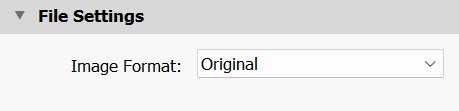 File Settings Panel
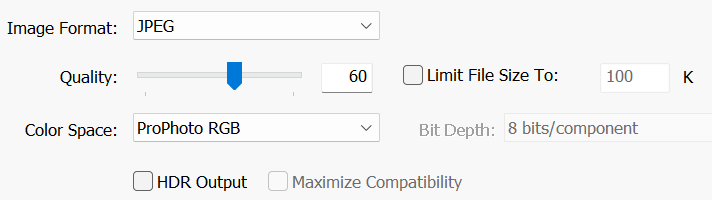 JPEG Quality Slider
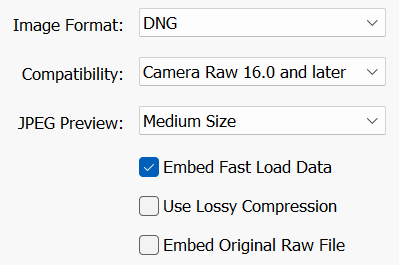 JPEG Quality Slider
The File Settings section controls the output format, quality and colour space. Available options depend on the selected format, such as JPEG, TIFF or PNG. Colour space choices include sRGB, Adobe RGB and ProPhoto RGB, allowing compatibility with different workflows and devices.
- Image Format determines the file type Lightroom will export, such as JPEG, TIFF, PNG or DNG.
- Format-Specific Options vary depending on the selected image format. Lightroom displays additional controls only for the chosen type, so options such as quality, compression, bit depth or compatibility settings appear or disappear based on the selected format.
- Quality controls the compression level for JPEG exports. Higher values reduce compression and preserve more detail, while lower values create smaller files with increased compression.
- Colour Space specifies the colour profile embedded in the exported file. Options typically include sRGB, Adobe RGB and ProPhoto RGB.
- Limit File Size To restricts the exported JPEG to a maximum file size in kilobytes. Lightroom adjusts compression automatically to meet the specified size. This option is only available for JPEG format.
- Compression applies to TIFF exports and offers choices such as ZIP or None. ZIP provides lossless compression to reduce file size, while None saves the file uncompressed.
- Bit Depth applies to TIFF and PNG formats and determines the colour precision of the exported file. Options include 8‑bit or 16‑bit per channel.
- DNG Compatibility appears when exporting as DNG and allows selection of the DNG version and compatibility level. Options include embedding the original raw file or enabling lossy compression.
- Embed Fast Load Data adds preview information to DNG exports to improve loading speed in Lightroom and other compatible applications.
- Use Lossy Compression creates a smaller DNG file using lossy compression. This reduces file size while retaining most of the original image information.
Content Credentials
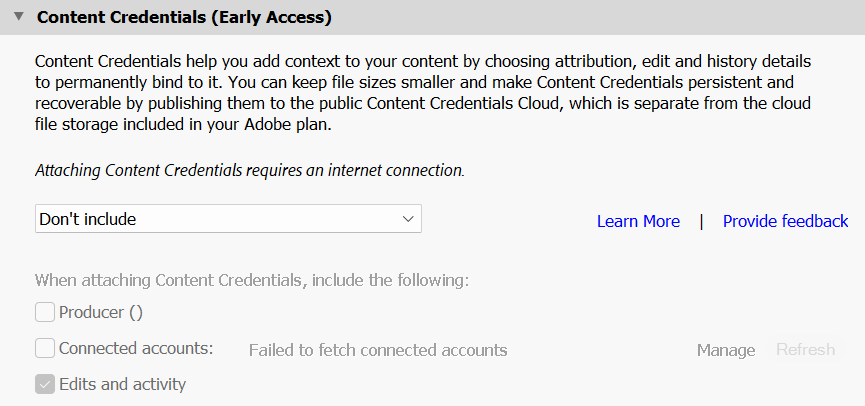 Content Credentials Setting
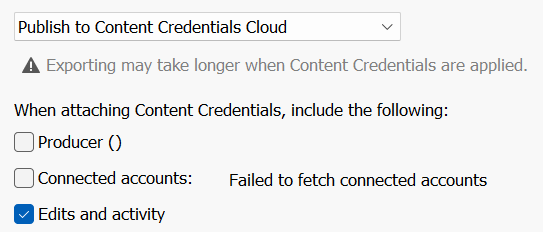 Content Credentials Setting
Content Credentials add optional provenance information to exported images, showing how they were created and edited. This data follows the C2PA standard and can include details such as the creator, editing tools and any AI involvement. Selecting “Don’t include” exports a standard image with no provenance data.
- Content Credentials attach optional provenance information to the exported image. This data follows the C2PA standard and can include details such as the creator, editing tools used and any AI involvement.
- Include embeds Content Credentials into the exported file. When enabled, Lightroom packages provenance information so it can be viewed by compatible applications and verification tools.
- Don’t Include exports a standard image without any provenance data. The exported file contains no embedded information about edits, tools or creation history.
- Account Linking allows Lightroom to associate the exported image with connected accounts such as Adobe or social media platforms. Linked accounts can be included in the provenance record when supported.
- Producer Information identifies the creator or organization responsible for the exported image. This information becomes part of the embedded provenance record.
- Edit History includes a record of the adjustments applied to the image. When enabled, Lightroom embeds a summary of the editing steps as part of the Content Credentials metadata.
- AI Usage indicates whether generative or AI‑based tools contributed to the creation or modification of the image. This information is included when relevant and supported by the C2PA standard.
- Internet Requirement is shown as a static note within the panel. Lightroom displays a message stating that attaching Content Credentials requires an Internet connection. This message remains visible even when signed in and connected, and does not indicate a problem with the feature.
Image Sizing
 Image Sizing Panel
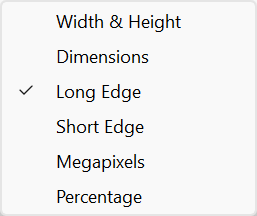 Resize Options
The Image Sizing section controls the pixel dimensions and resolution of the exported file. Lightroom can resize based on long edge, short edge, width, height or exact dimensions. Resolution is included for print workflows but does not affect pixel size.
- Resize To Fit enables Lightroom to scale the exported image to specific dimensions. Options include width, height, long edge, short edge or exact dimensions. Lightroom adjusts the image proportionally unless the “Don’t Enlarge” option prevents upscaling.
- Width & Height sets maximum values for both dimensions. Lightroom scales the image so neither the width nor height exceeds the specified values while maintaining aspect ratio.
- Dimensions specifies exact pixel limits for both width and height. Lightroom fits the image within these boundaries while preserving aspect ratio.
- Long Edge sets the maximum length of the longest side of the image. The shorter side is scaled automatically to maintain aspect ratio.
- Short Edge sets the maximum length of the shortest side of the image. The longer side adjusts automatically to preserve aspect ratio.
- Megapixels scales the image to a target megapixel count. Lightroom calculates the appropriate dimensions to match the specified value.
- Percentage resizes the image based on a percentage of the original dimensions. This option scales both width and height proportionally.
- Resolution sets the pixel density value written into the exported file’s metadata. Common values include 72 ppi or 300 ppi. Resolution does not change pixel dimensions unless combined with physical size constraints in certain applications.
- Don’t Enlarge prevents Lightroom from increasing the image size beyond its original pixel dimensions. When enabled, resizing options only reduce image size.
Output Sharpening
 Output Sharpening Panel
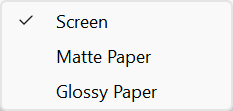 Sharpening Amount Options
Output Sharpening applies additional sharpening tailored to screen or print output. Lightroom offers different strengths and media types to compensate for how images are displayed or printed. This sharpening is applied after resizing.
- Sharpen For selects the intended output medium. Options include Screen, Matte Paper and Glossy Paper. Lightroom applies sharpening tailored to the characteristics of the chosen display or print surface.
- Screen applies sharpening optimized for digital viewing. This setting enhances edge clarity for monitors, mobile devices and other electronic displays.
- Matte Paper applies sharpening designed for matte printing surfaces. Matte paper absorbs more ink, so Lightroom compensates with stronger edge definition.
- Glossy Paper applies sharpening suited to glossy or semi‑gloss prints. Glossy surfaces retain more detail, so Lightroom applies a different sharpening profile to match the medium.
- Amount controls the intensity of the applied sharpening. Options include Low, Standard and High. The selected amount adjusts how strongly Lightroom enhances edges within the exported image.
Metadata
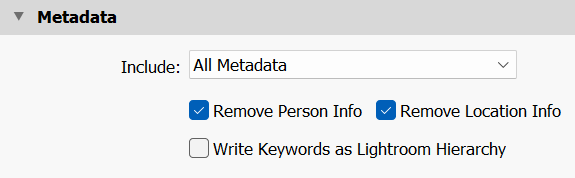 Metadata Panel
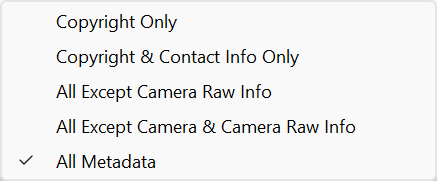 Metadata Options
The Metadata section determines which information is included in the exported file, such as copyright, camera data and editing history. Lightroom also provides options to remove sensitive details like location coordinates or person tags for privacy.
- Include determines which metadata fields Lightroom embeds in the exported file. Options include All Metadata, All Except Camera & Raw Info, Copyright Only or Copyright & Contact Info.
- All Metadata embeds the full set of metadata from the catalog, including EXIF, IPTC, copyright, contact information, keywords and editing history.
- All Except Camera & Raw Info removes technical capture data such as shutter speed, aperture, ISO, lens information and raw‑specific metadata while keeping descriptive and copyright fields.
- Copyright Only embeds only the copyright field from the metadata. All other descriptive, technical and contact information is excluded.
- Copyright & Contact Info embeds copyright details along with the creator’s contact information. All other metadata fields are excluded.
- Remove Person Info strips face‑recognition data from the exported file. This prevents identified person tags from being included in the metadata.
- Remove Location Info removes GPS coordinates from the exported file. This prevents the exported image from revealing the capture location.
- Write Keywords as Lightroom Hierarchy embeds keywords using Lightroom’s hierarchical structure. Parent keywords are included alongside child keywords when this option is enabled.
- Write Keywords as Flat List exports keywords without hierarchy. Only the individual keywords assigned to the image are included, without parent‑child relationships.
Watermarking
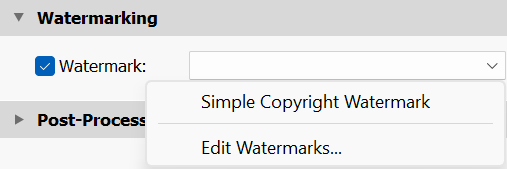 Watermarking Panel
The Watermarking section allows a text or graphic watermark to be applied to exported images. Lightroom uses watermark presets that define the style, opacity and placement. Watermarks are applied during export and do not affect the original file.
Edit Watermarks opens up the screen below, with many options. You can save watermarks as presets
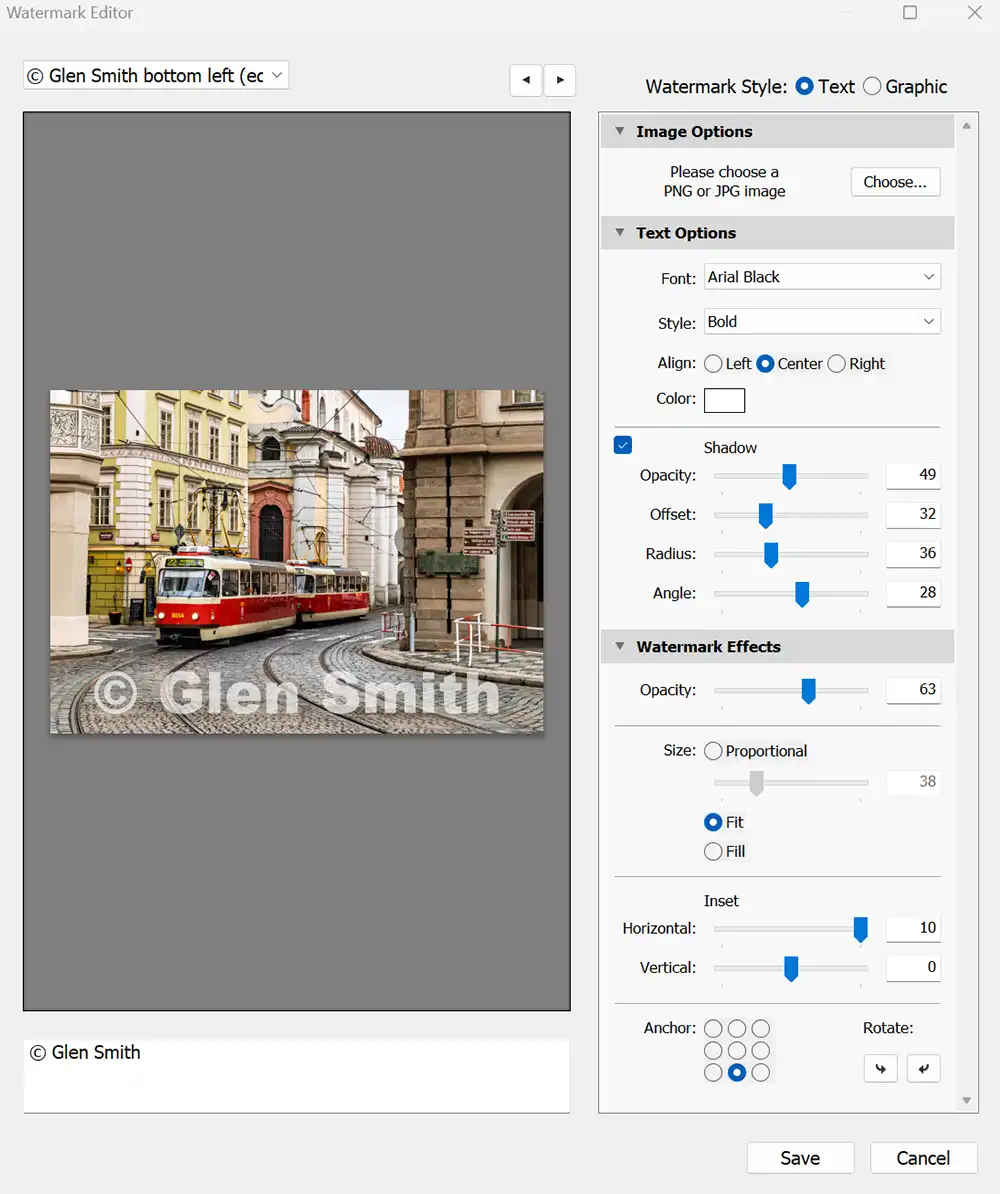 Watermarking Panel showing a Text watermark (large for clarity)
- Simple Copyright Watermark enables Lightroom to apply a graphic or text‑based watermark to the exported image. When enabled, Lightroom uses the selected preset from the watermark list.
- Watermark Presets displays all saved watermark configurations. Presets can include text, logos, opacity settings, positioning and styling options created in the Watermark Editor.
- Edit Watermarks… opens the Watermark Editor, where text formatting, font, size, shadow, opacity, anchor position and inset values can be customized Graphic watermarks can also be imported and positioned.
- Text Watermarks use user‑defined text with adjustable styling. Options include font selection, alignment, colour, opacity and placement relative to the image edges.
- Graphic Watermarks use an imported image file, typically PNG for transparency. Lightroom scales and positions the graphic according to the chosen preset settings.
- Placement determines where the watermark appears on the exported image. Options include corners, edges or center positions, with inset controls for fine adjustment.
- Opacity controls the transparency of the watermark. Higher opacity makes the watermark more visible, while lower opacity produces a subtle overlay.
- Size adjusts the scale of text or graphic watermarks. Lightroom applies the size relative to the exported image dimensions.
Post-Processing
 Post-Processing Panel
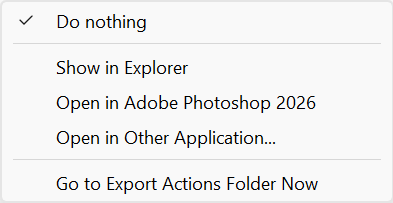 After Export Actions
The Post-Processing section controls what Lightroom does after exporting the files. Options include doing nothing, opening the exported image in another application or running external post-processing tools. These actions occur only after the export completes.
- After Export determines what Lightroom does once the export process is complete. Options include performing no additional action, opening the exported file in another application or running a custom command.
- Do Nothing completes the export without launching any external applications or performing further actions. Lightroom simply saves the exported files to the chosen location.
- Open in Finder / Explorer opens the destination folder containing the exported files. This allows quick access to the exported images without manually navigating to the folder.
- Open in Other Application launches a selected external program and opens the exported file within it. Lightroom displays a list of installed applications, and the chosen program is used for all exported files in that batch.
- Post‑Process Actions provides additional automation options through installed Lightroom plug‑ins. These actions can perform tasks such as running scripts, transferring files or applying external processing steps.
Set and Forget Settings
Some export settings in Lightroom only need to be configured once. After you set them the first time, they stay fixed for all future exports and do not need regular adjustment. These options are important for beginners to set correctly, but they are not part of the everyday export workflow. They simply sit in the background and ensure your exported images are consistent, correctly sharpened, and safe from unnecessary metadata exposure.
- Resolution set to 300 ppi and left unchanged for all exports.
- Output Sharpening set once to Standard for Screen or Standard for Print, depending on workflow.
- Metadata configured once to include copyright and remove sensitive information such as location or person keywords.
- Watermarking optional, created once and reused automatically for all relevant exports.
Summary
This reference guide explains every section of Lightroom’s Export window in clear, practical terms. Once you understand what each option does — and when you might need it — the Export panel becomes far easier to navigate, whether you’re exporting a single image or a full shoot.
If you prefer a simpler, beginner‑friendly workflow, the recommended settings tutorial provides safe defaults for everyday use. If you want to create fast, consistent presets, the presets tutorial shows you how to save your export choices for one‑click exporting.
Recommended Lightroom Export Settings for Beginners – a simple set of safe, reliable defaults for web, print, social media and email.
How to Create Lightroom Export Presets – a clear, step‑by‑step guide to building your own export presets for fast, consistent exporting.
