Page updated: 26 July 2026
Lightroom vs Photoshop: Editing File Size Compared
Why Lightroom and Photoshop Create Such Different File Sizes
Lightroom and Photoshop handle edits in completely different ways, and that difference shows in the file sizes they generate. Lightroom stores your adjustments as lightweight text instructions, while Photoshop saves pixel‑based changes inside the file itself. The result is a dramatic contrast: Lightroom barely adds anything to the original image file size, whereas Photoshop can multiply the file size many times over.
To illustrate this, I ran a real‑world test using three images, editing each in Lightroom and Photoshop to achieve similar results.
- A photo with a plain sky, but it still needed multiple AI masks and refinements to achieve a quality mask. This is the same image I used in my 3-part tutorial, refine-select-sky-mask-with-add-color-range.
- A photo without any masks. Just basic adjustments to exposure, highlights, shadows.
- A photo with a busy background where I have used masks to separate the subject, then duplicate and invert the mask to edit subject and background separately.
To make this comparison meaningful, I’ve used three different images: one with complex masking, one with only basic global adjustments, and one with heavy local edits including blur. Together, they show exactly how Lightroom and Photoshop scale as your edits become more advanced, and why the filesize gap between the two programs changes so much from one image to the next.
ON THIS PAGE
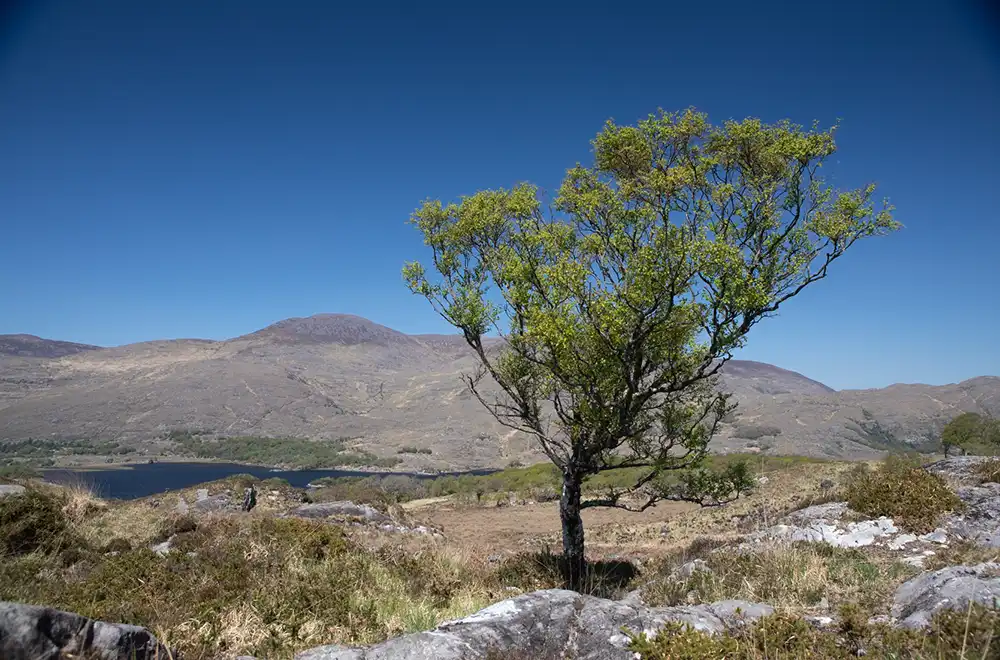 Photo 1. Sky Mask, Subtract with Color Range
  Photo 2. Simple adjustments to exposure, highlights, shadows. No masks.
  Photo 3. Multiple masks, complex background.
 Edited Sky behind complex objects
Selecting the sky accurately in all areas in this image to achieve a perfect mask, is more challenging than it first appears. Lightroom’s Select Sky does does well with clean horizons, but this image is full of tiny structural interruptions that break the sky into small areas. The large metal silos have thin metal struts and supports and the green structure has tiny railings, that cut into the sky. Lightroom often misses these small areas or softens the edges, leaving a faint halo around the structures.All of these small transitions between sky and subject require refining the mask manually. This is an example of the kind of image where Lightroom needs help to produce a clean, accurate sky mask.
With a bit of careful work, Lightroom can produce a sky mask that is extremely accurate. Lightroom has received a update in June 2026, including its Select Objects masking tool, which is a tool used in refining the Sky Mask in this image.
Photo 1. Sky Mask + Multiple Refinements
Photo 1. Original, unedited image 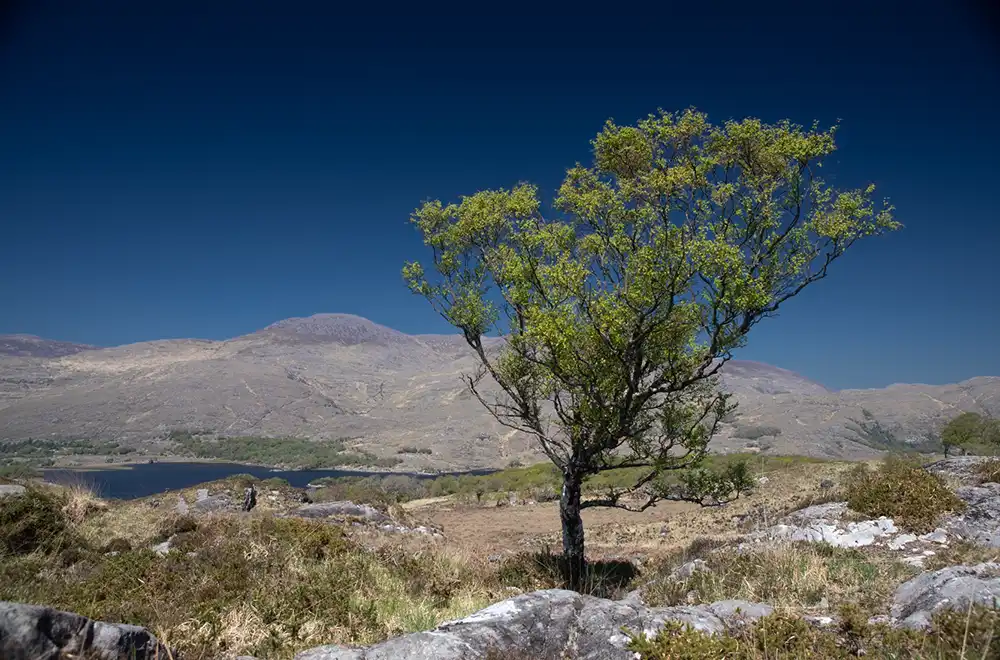 Photo 1. Edited image. Sky Mask, Subtract with Color Range
 This first image is the same one used in my three‑part Lightroom masking tutorial, refine-select-sky-mask-with-add-color-range. It's ideal for a real‑world comparison, because it includes a Select Sky mask, then several refinements to produce a good quality mask of the sky through the tree. In includes a Subtract using Select Objects refinement, and a duplicated inverted mask. This is typical masking for many photos, if you want a good quality mask.
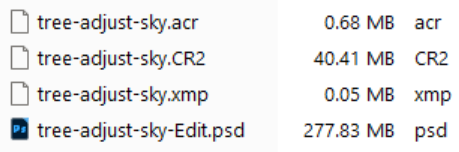 Photo 1. Screenshot from a file manager.
 Lightroom created two sidecar files: an .acr file (0.68MB) and an .xmp file (0.05MB). Combined, that’s just 0.73MKBB added to the original 40.41 MB RAW file — a total Lightroom footprint of 41.14 MB.
Photoshop, on the other hand, stores every adjustment as pixel‑based layer data. The PSD version of this same image is 277.84 MB — more than six times larger than the RAW file and over 230 MB larger than Lightroom’s entire edit.
| Photo 1 File | Size | Comparison |
|---|---|---|
| Original image (CR2 raw file) | 40.41 MB | |
| Lightroom sidecar files; .acr + .xmp | 0.73 MB (0.68 + 0.05) | Lightroom adds only 1.9% (less than one fiftieth) of the original file |
| Photoshop PSD | 277.84 MB | Photoshop adds 6.87 times the size of the original file - 380 times more than Lightroom |
Photo 2. No Masks
Photo 2. Original, unedited image  Photo 2. Edited image. Basic global adjustments only
 This second image — the tree on the rocks by the water — is a simple, low‑complexity edit. No masks were used at all. The adjustments were limited to basic global changes such as exposure, contrast, highlights, shadows, and colour balance. This makes it an ideal example for showing how Lightroom and Photoshop behave when the edit is minimal and contains no local adjustments or AI masking.
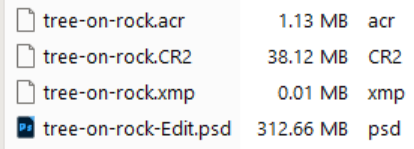 Photo 1. Screenshot from a file manager.
 This image uses only basic global adjustments, (no masks), so Lightroom adds almost no extra data. With no masks, no AI selections, and no local edits, the sidecar files remain extremely small. Lightroom simply records a handful of slider positions, so the total footprint barely increases beyond the original RAW file.
Photoshop, however, still creates a large PSD even for a simple edit. Even without layers or masks, Photoshop must store a full pixel‑based version of the image inside the PSD. This means the PSD is still many times larger than the RAW file, despite the minimal editing. This example clearly shows that Photoshop’s filesize overhead is not tied to editing complexity — it is inherent to how PSD files store pixel data.
| Photo 2 File | Size | Comparison |
|---|---|---|
| Original image (CR2 raw file) | 38.12 MB | |
| Lightroom sidecars; .acr + .xmp | 1.14 Mb (1.13 + 0.01) | Lightroom adds only 2.9% (less than one thirtieth) of the original file |
| Photoshop PSD | 312.66 Mb | Photoshop adds 8.2 times the size of the original file - 274 times more than Lightroom |
Photo 3. Complex Background, Multiple Masks
Photo 3. Original, unedited image  Photo 3. Edited image. Multiple local adjustments including selective brightening and background blur
 This third image is the most demanding of the set, combining multiple local adjustments to separate the subject from a complex, distracting background. The divers have been selectively brightened, while the buildings behind them have been darkened and softened with blur — exactly the kind of layered, targeted edits that push both Lightroom and Photoshop much harder. This makes it an ideal high‑complexity test case, showing how each program handles multiple masks, selective adjustments, and background manipulation, and how dramatically the resulting file sizes can diverge when the editing becomes more advanced.
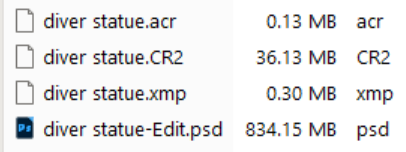 Photo 1. Screenshot from a file manager.
 Because this image uses several local adjustments — selective brightening, targeted darkening, and background blur — Lightroom generates noticeably larger sidecar files than in the previous examples. Each mask and local adjustment adds more text‑based instructions, so the total Lightroom footprint increases, though it still remains relatively small compared to Photoshop.
Photoshop, however, expands dramatically with this kind of edit. Every adjustment layer, mask, and blurred region must be stored as pixel data inside the PSD. This makes the PSD for Photo 3 the largest of the set, clearly showing how Photoshop’s filesize grows with edit complexity.
| Photo 3 File | Size | Comparison |
|---|---|---|
| Original image (CR2 raw file) | 36.13 MB | |
| Lightroom sidecars; .acr + .xmp | 0.43 MB (0.13 + 0.30) | Lightroom adds only 1.2% (less than one thirtieth) of the original file |
| Photoshop PSD | 834.16 MB | Photoshop adds 23 times the size of the original file - almost 2,000 times larger than Lightroom |
Conclusion
Across these three images — from simple global adjustments, to medium‑complexity masking, to heavy local edits — the pattern is clear. Lightroom keeps file sizes extremely small because all edits are stored as metadata. Even when multiple masks are used, Lightroom adds only a tiny amount of extra data to the original RAW file.
Photoshop behaves very differently. Every adjustment layer, mask, and pixel‑level change is stored directly inside the PSD. This is why the Photoshop versions of these images grow so quickly, especially with more complex edits. In the most demanding example, the PSD reached 834 MB — twenty‑three times larger than the original RAW file.
Lightroom also offers workflow advantages when you need multiple output versions. Export Presets make it fast and easy to create different sizes and formats from a single edited image. Photoshop can do the same, but it usually requires more steps, and beginners often find Actions difficult to set up.
Overall, this comparison shows a clear difference in how each application handles edits. Lightroom remains lightweight and efficient, even with several masks, while Photoshop’s pixel‑based workflow produces much larger files. Both programs have their strengths, but if you want to keep your storage footprint low while retaining full editing flexibility, Lightroom offers a far more space‑efficient workflow.