Blending Modes - Example Uses
Create an Artistic Sketch Effect with Divide Blending Mode
You can achieve a good color or black and white hand sketch effect with the Divide Blending Mode. This look can be achieved by blurring the image and changing the Blending Mode of the blur layer to Divide Blending Mode.
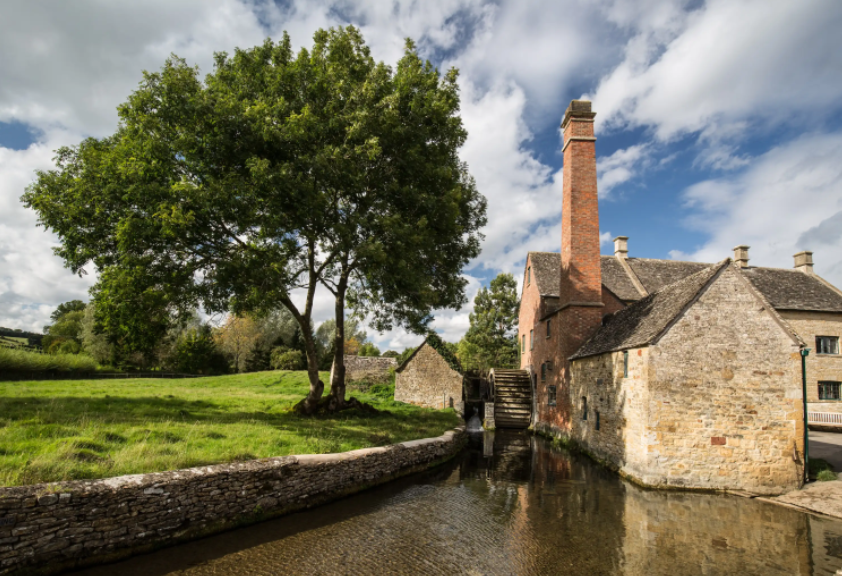
The original image
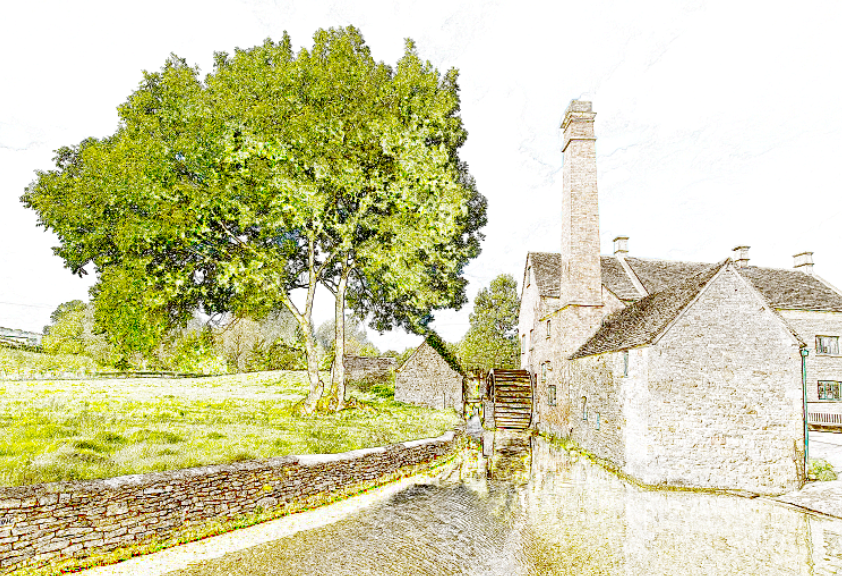
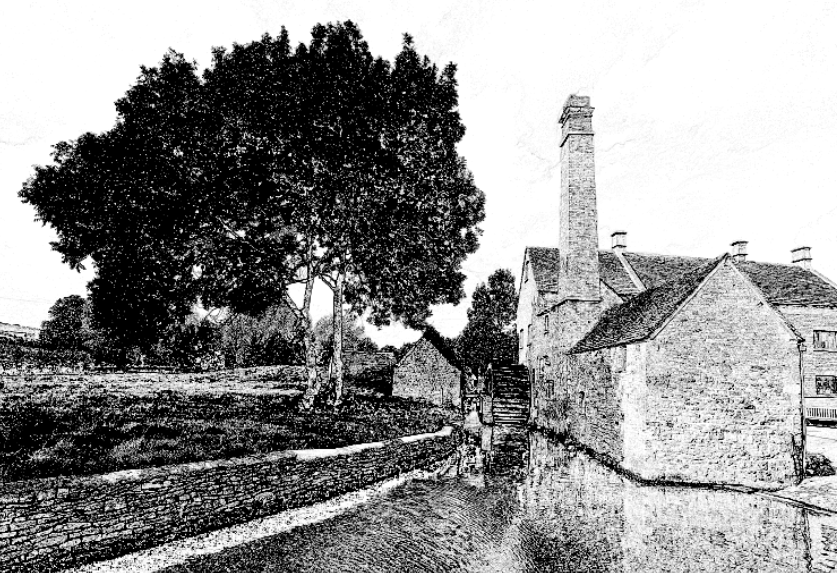
Using Gaussian Blur and the Divide Blend Mode, produces an effective hand sketch or painting look.
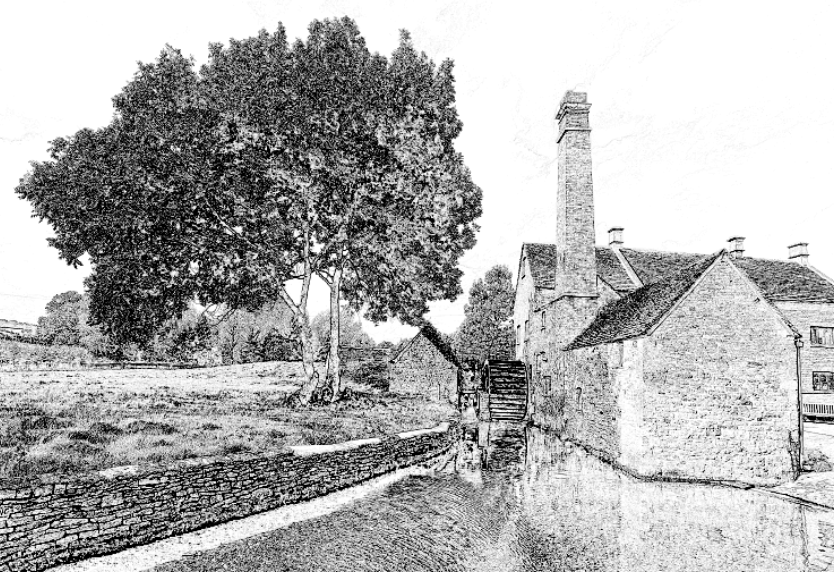
A black and white alternative, using a Black and White Adjustment Layer.
Step by Step Guide to Create a Sketch Effect with Divide Blend Mode
Step 1 - Convert to Smart Object
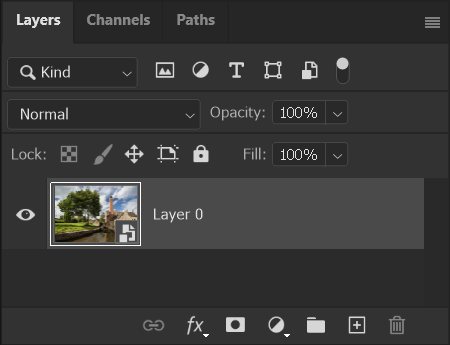
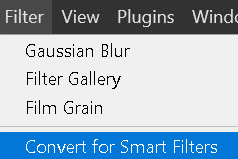
Right click on the layer and select Convert to Smart Object. Note that you can also select Convert for Smart Filters from the Filter menu.
The purpose of converting to a Smart Object / Smart Filter, is that you can then edit the filter later in the process to refine the effect. You can also apply the Blend Mode to the Smart Filter.
If you simply applied the filter to a regular layer, you cannot edit the filter settings and you would also need to firstly duplicate the layer, so that you can change the blend mode of the duplicated layer. Blend modes interact with a layer, so on its own, it wouldn't work.
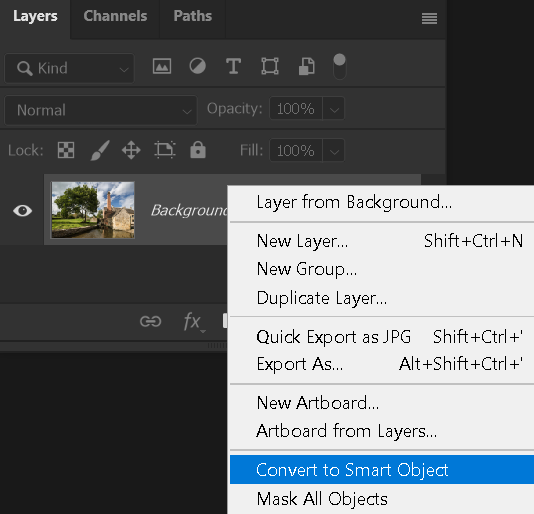
Right click and select Convert to Smart Object
Converted to Smart Object. Note the icon in the bottom right corner of the layer thumbnail.
Converted to Smart Filters is exactly the same as converting to a Smart Object and then applying a filter.
Step 2 - Apply Gaussian Blur
From the menu: Filter > Blur > Gaussian Blur and select a low amount. This can be changed later, when you can view the final effect, after changing the Blend Mode of the filter.

Select Gaussian Blur from the Filter menu
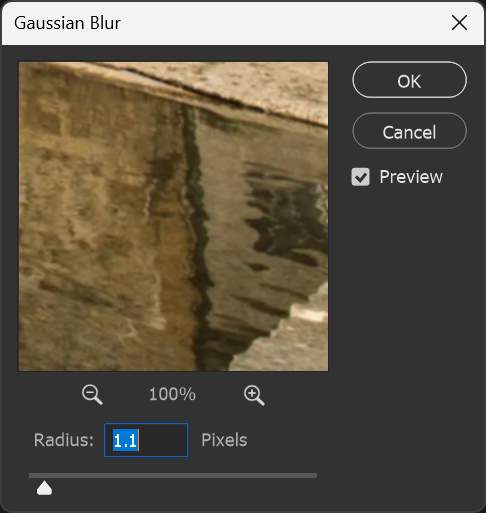
I've set a Radius of 1.1 px. This can be changed later, because it's a Smart Filter, i.e. a filter applied to a Smart Object.

You won't see much of a difference as the blur amount is low.
Step 3 - Change the Blend Mode of the Blur Filter
Double click the icon on the right of the Gaussian Blur layer (highlighted in red). This will open the panel to access the Blend Mode and Opacity of the Guassian Blur.
This is only available if you applied a Smart Filter, i.e. to a Smart Object.
Click in the Mode box and select the Divide mode (5th from bottom).
Click OK to close the panel.
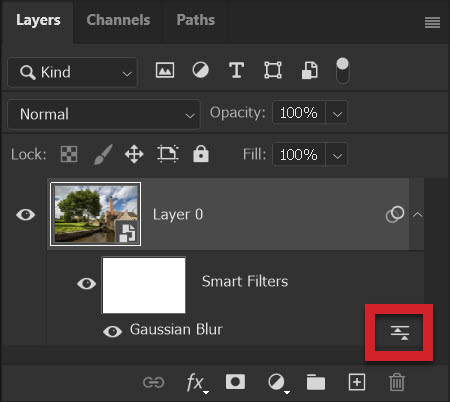
Double click the icon highlighted in red.
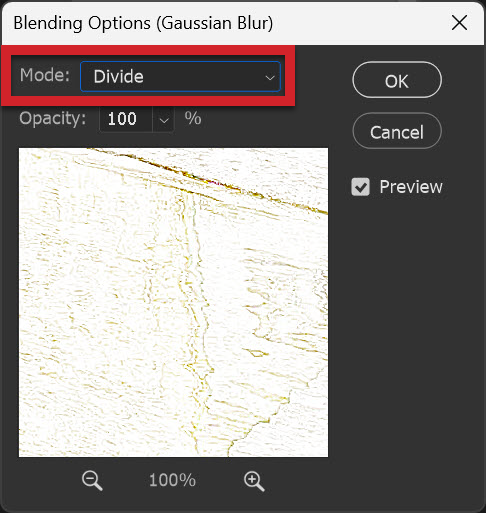
Select Divide Blend Mode in the Mode box.
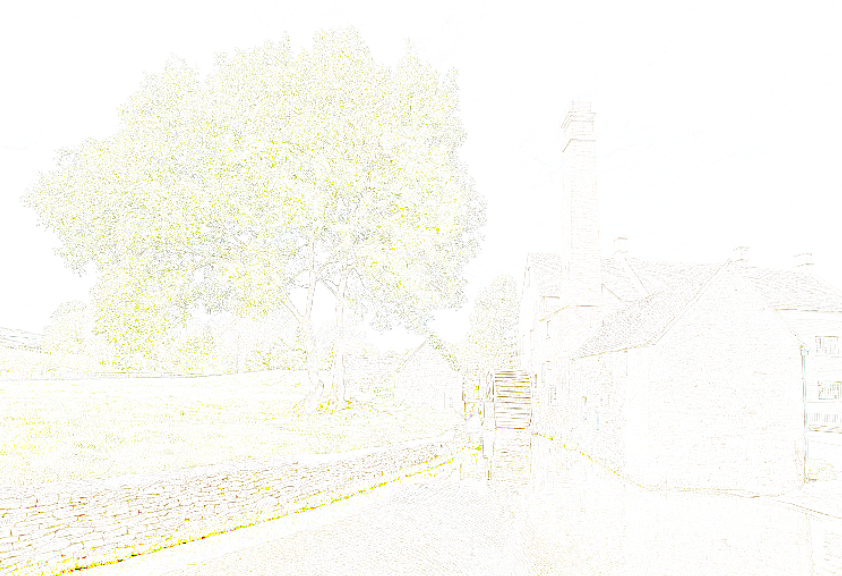
It doesn't look great yet.
Step 4 - Adjust Levels to Darken the Image
Click on the Adjustment Layer button (highlighted in red) and select Levels. Adjustment Layers are non-destructive, so this can be edited later, at any time.
Click and drag the Black slider (highlighted in green) to the right, to taste.
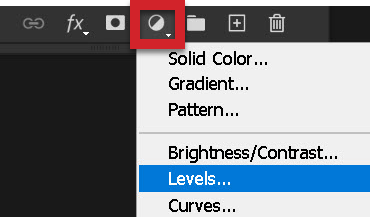
Add a Levels Adjustment Layer
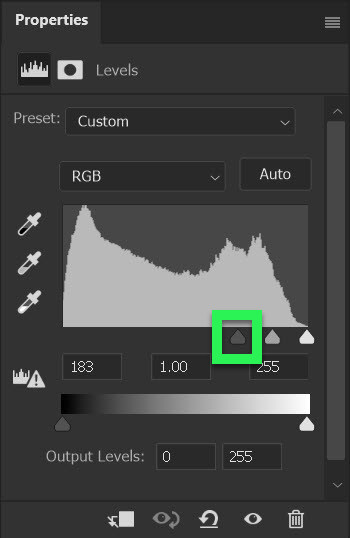
Drag the Black slider to the right to darken the image.
The image is now looking much better
Step 5 - Editing Each Element
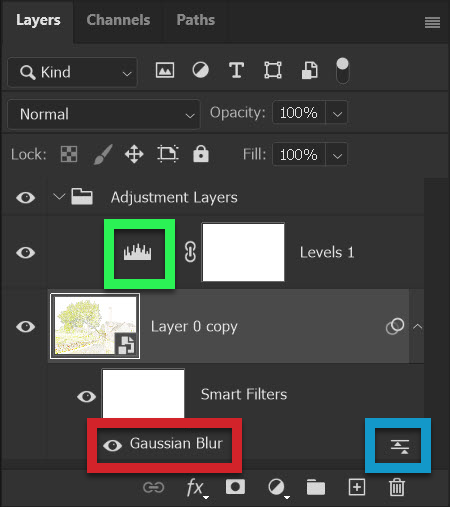
The Layers panel should look like this
To adjust Levels, double click the layer thumbnail (highlighted in green).
To adjust the Gaussian Blur filter, double click on Gaussian Blur (highlighted in red). You can also turn this filter on and off by clicking the visibility "eye" icon.
To change the Blend Mode or the Opacity of the Gaussian Blur filter, double click the icon to the right of Gaussian Blur (highlighted in blue).
Step 6 - Changing to Black and White
Click on the Adjustment Layer button (highlighted in red) and select Black & White.
In the Properties panel, you can fine tune how each color is represented in black and white. Experiment and watch your image for the effects.
Steps 7 and 8 show manually adjusted colors and steps 9 and 10 show examples using the presets.
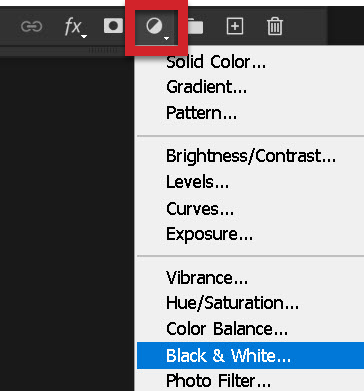
Add a Black & White Adjustment Layer
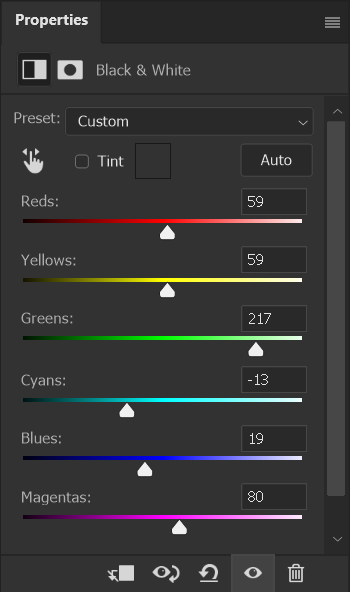
Adjusting color sliders will affect the shade of gray
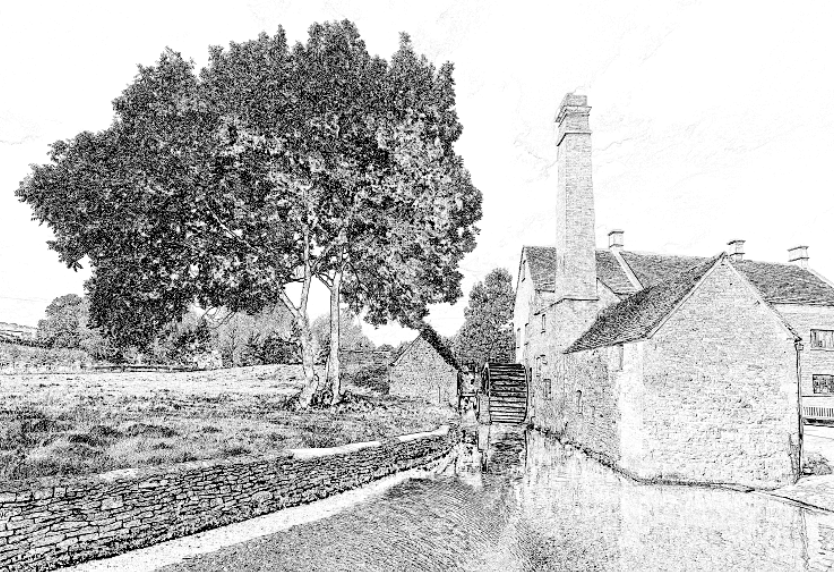
A black and white alternative
Step 7 - Editing Black and White Sliders for Darker Greens
Adjusting the color sliders in the Black and White Adjustment Layer can have a dramatic effect on an image. This is non-destructive, so feel free to experiment. You can change the settings at any time.
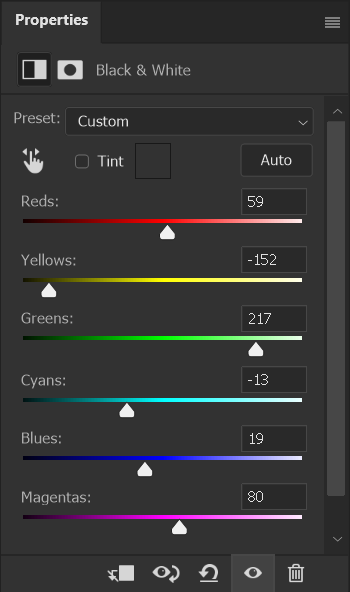
The Yellow slider has been moved to the left
Yellow tones are darkened, including the grass and leaves.
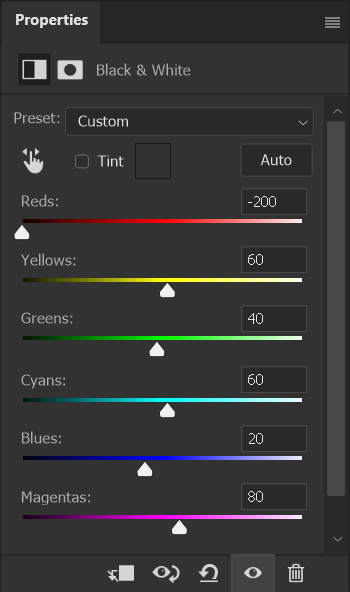
Step 8 - Editing Black and White Sliders for Darker Reds
The previous step darkened the greens. This time I've darkened the reds. The red slider has been moved to the left. The yellow slider is back where it was originally and the grass and leaves are a lot lighter again.
The Yellow slider has been moved to the left
Yellow tones are darkened, including the grass and leaves.
Step 9 - Editing Black and White Sliders using Presets
The previous steps looked at adjusting the sliders manually, but you can also choose from a number of presets. Each preset will adjust all the sliders for a different effect.
Click in the preset box (highlighted in red) for the dropdown list.

Choose from a range of presets

High Contrast Blue preset
Step 10 - Editing Black and White Sliders by Click and Drag in the image

The Yellow slider has been moved to the left
Click in different areas of the image, then drag the cursor left, or right, to adjust the slider of that color.
Click the icon highlighted in orange, then click and drag in your image.

The highlighted area shows where I clicked to begin

And this shows where I dragged the cursor to
Overlay or Soft Light with Brush tool – to lighten or darken
High Pass is best known for sharpening, but is also very effective at softening.
