Blending Modes - Example Uses
Hand Color a Black & White Photo with Blending Modes
Hand Color a Black & White Photo with Blending Modes
You can add color to black and white photo using various blend modes; overlay, soft light, hard light, color.
You can also control the overall effect by adjusting layer opacity and using Levels and/or Hue/Saturation Adjustment Layers, as I explain below.
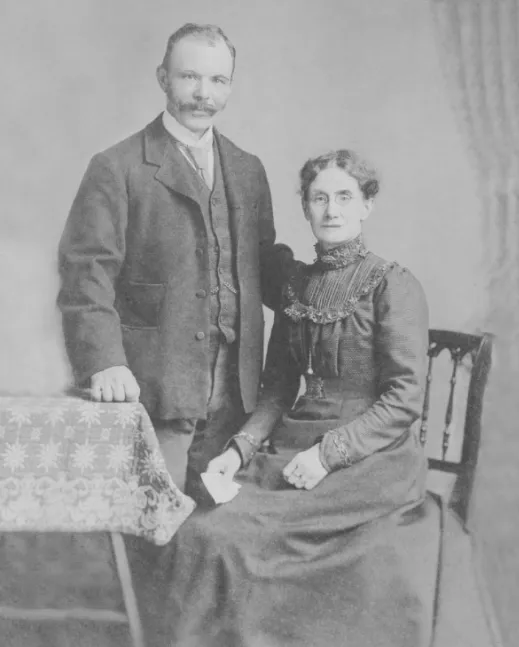
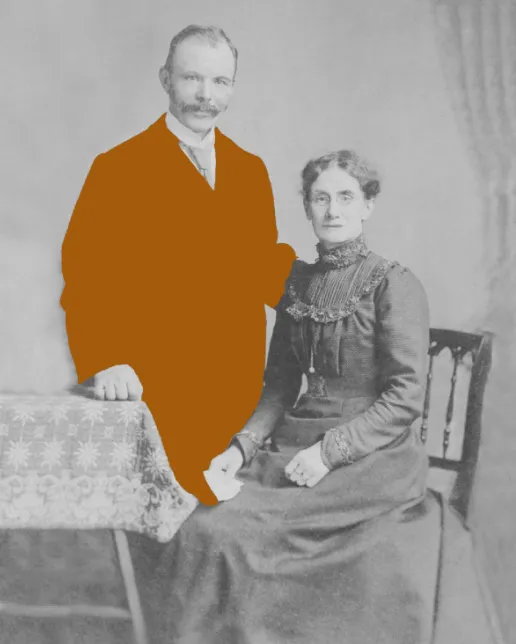
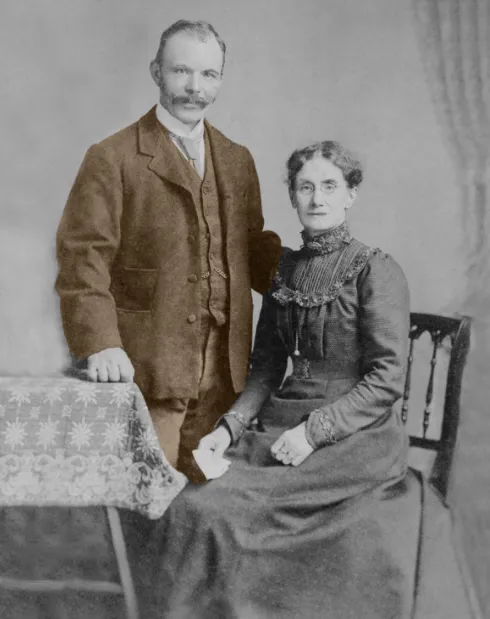
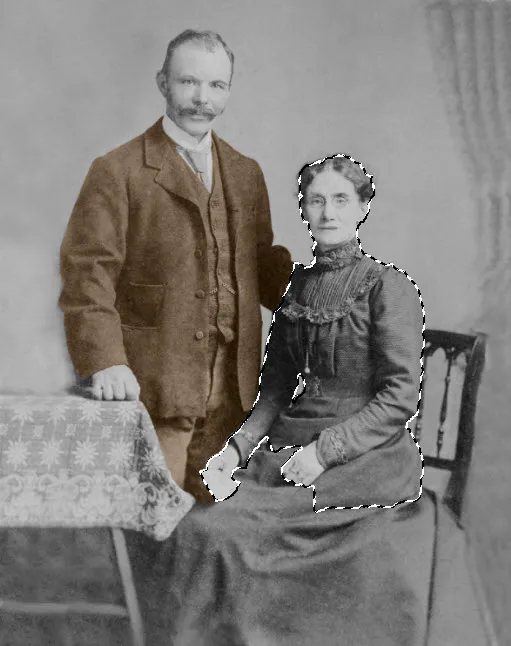
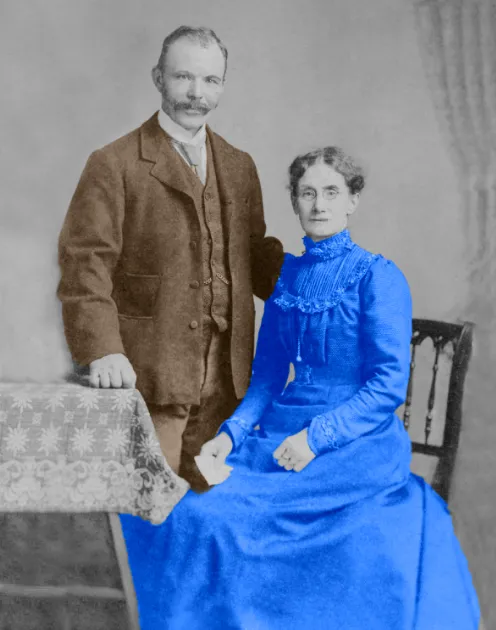
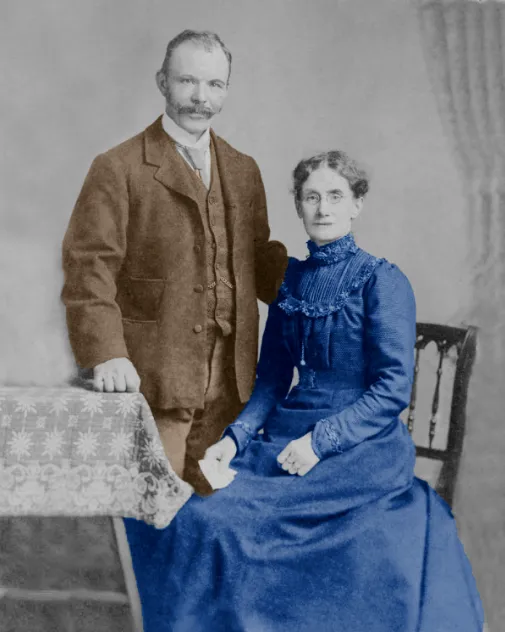
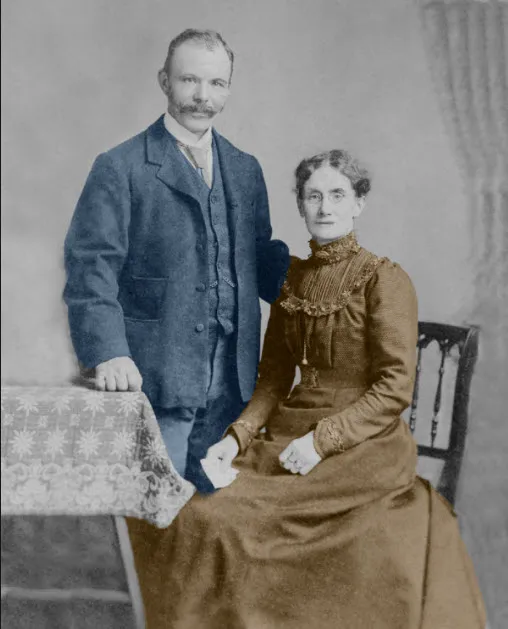
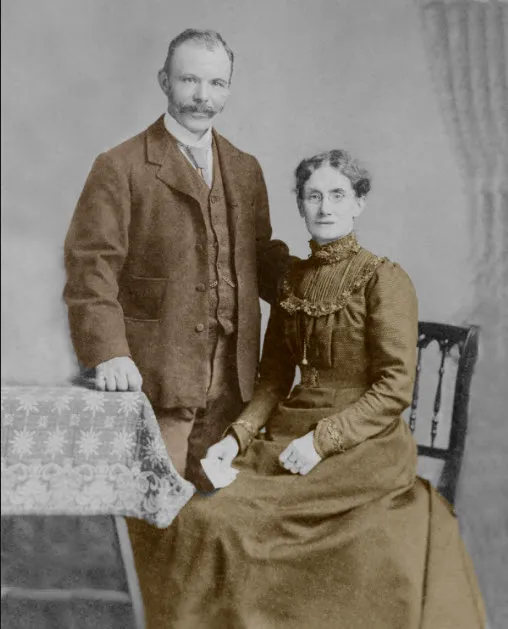
The original black and white image

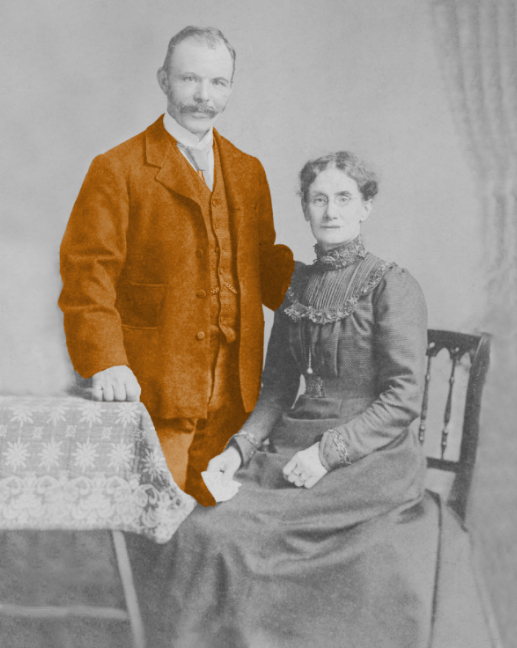
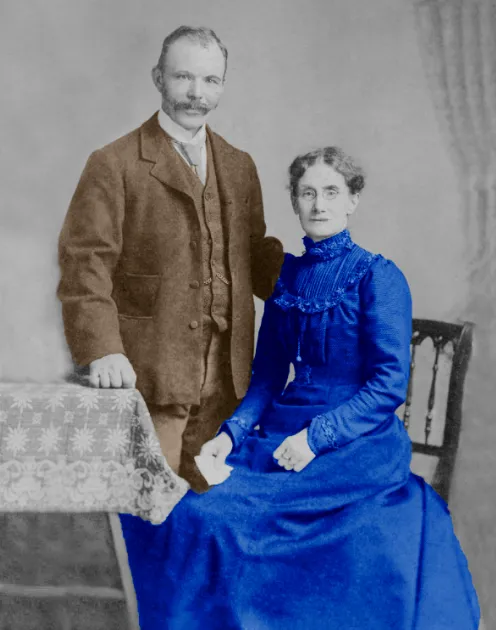
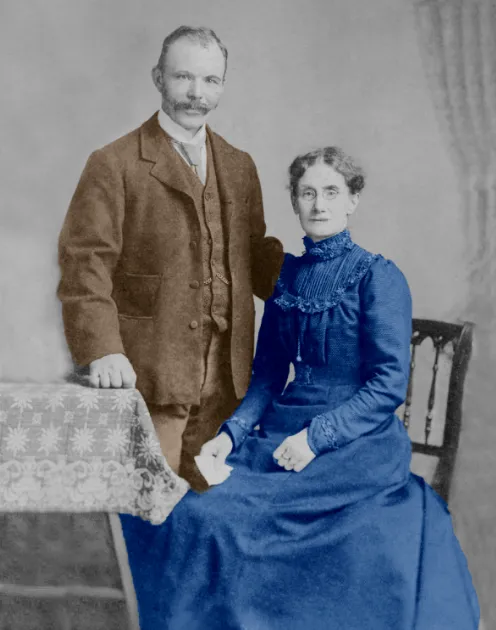
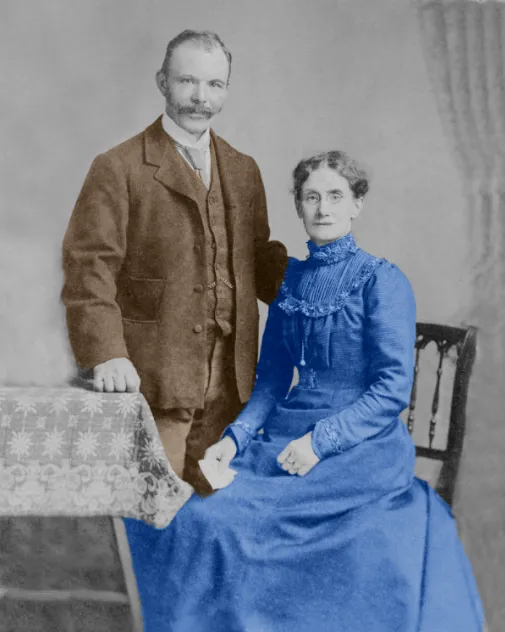
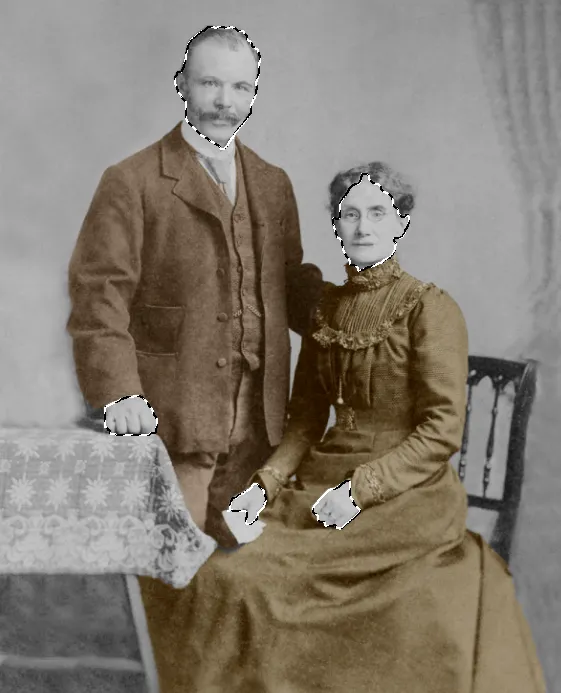
Image after applying color to the mans suit, the womans dress and hands and faces
Table of Contents
Hand Color a Black & White Photo with Blending Modes
Notes about this tutorial
Steps
-
Make a Selection
-
Refine Selection with Quick Selection tool"
-
Add New Layer for Suit Color
-
Fill Selection with Color
-
Select Suit Color
-
Add Color to New Layer
-
Change Suit Layer Blend Mode
-
Change Layer Opacity
-
Add a Levels Adjustment Layer
-
Object Select Tool for initial selection of dress
-
Refine Dress Selection with Quick Selection tool
-
Add New Layer for Dress Color
-
Fill Dress Selection with Color
-
Select Dress Color
-
Add Dress Color to New Layer
-
Change Dress Layer Blend Mode
-
Change Layer Opacity
-
Add a Hue/Saturation Adjustment Layer
-
Change Hue and Affect All Layers
-
Change Hue & Clip to Only Affect One Layer
-
Object Select tool won't select what you want
-
Select Faces and Hands with Quick Selection tool
-
Select All Faces and Hands
-
Finding a Realistic Skin Color
-
Adding Skin Color
-
Deselect
-
Change Blend Mode for Skin Color
Notes about this tutorial
This tutorial uses the Object Selection tool and the Quick Selection tool to make selections of various parts of the image, such as the man's clothes, the lady's clothes, their hands and faces.
In different images, the Object Selection tool will sometimes make a perfect selection. When it doesn't, you will need to manually refine the selection and the Quick Selection tool is often an excellent tool for this task. Before the Object Selection tool existed, this was my go-to selection tool.
When the Quick Selection tool is used correctly, it's great. But many users don't use it correctly, (as I've observed in classrooms). If you're not sure about using it to maximum effectiveness, please see the link below.
For more information on using these excellent selection tools, please see the following;
Object Selection Tool
Quick Selection Tool
Selection Tools Summary
An alternative to making selections, in this task, could be to paint with the Brush tool and Color Picker, onto a new layer, or layers. However, selections are quicker and more accurate.
I have also make a separate layer of each item to be colored, as this gives more control for individually adjusting each item. If you were painting with the Brush tool, you could put them all on the same layer, but this offers less flexibility.
Step 1 - Make a Selection
Make a selection of the area you want to color. The selection tool to try first is the Object Selection tool. Depending on your image and chosen subject, this usually produces the quickest selection, although the selection often isn't perfect, as in this image. In this case we will then need to refind the selection
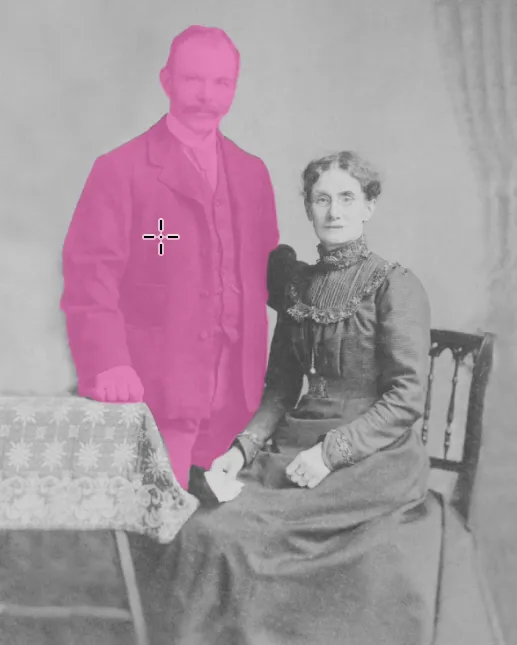
Automatic selecion with Object Selection tool
Selection includes unwanted areas, i.e. head, shirt, tie, hands
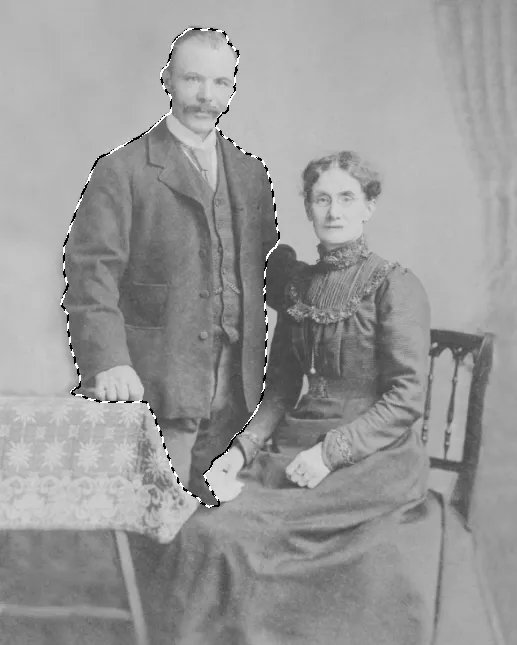
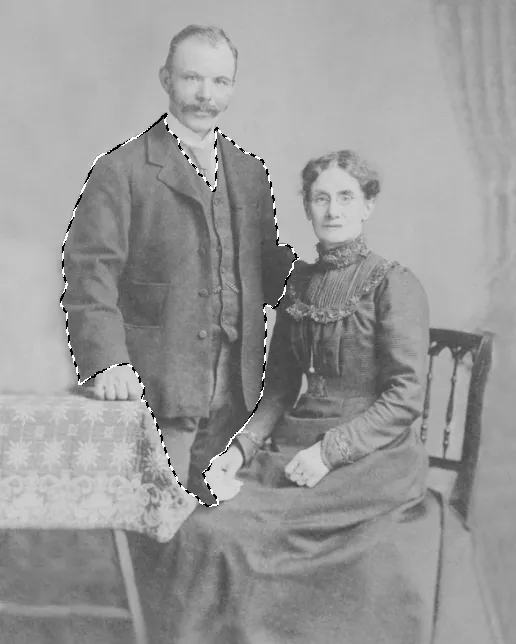
Step 2 - Refine Selection with Quick Selection tool
If the selection isn't exactly what you want you will need to refine it, as in this image. This will depend on your image and subject. A good tool to refine this selection is the Quick Selection tool.
Original image
Using the Quick Selection tool, subtract from the selection. You can select the subtract button on the options bar, but a better and quicker method is to use the keyboard shortcut of pressing and holding the Alt key. While the Alt key is pressed, the tool uses the Subtract option. When you want to add to selection, release the Alt key. This will soon become second nature if you persevere.
Important tips for good results.
- Use the Quick Selection tool at 100% hardness. You then know exactly where the edge of the tool is, so you don't select unwanted areas.
- Very important. Don't select unwanted areas. When adding to a selection, don't go over any areas you don't want to add to selection. When subtracting from a selection, don't go over any areas that you want to be part of the selection.
- When unwanted areas are selected, DO NOT UNDO. Instead, switch to Subtract mode and removed them from the selection. If you undo, you will have the same issue next time.
- Pay attention. If you accidentally select an area you shouldn't have (point 2), then Undo.
- The tool learns what you want and don't want - provided that you Add To and Subtract From the selection accurately. It's a superb selection tool when used accurately, but I've seen in the classroom, many beginners failing to avoid adding and subtracting what they shouldn't.
Step 3 - Add New Layer for Suit Color
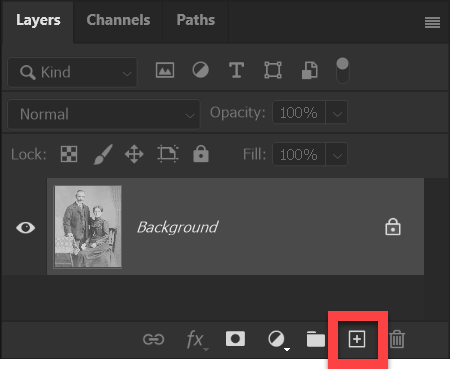
Add New Layer button
In the Layers panel, click on the Add New Layer button (highlighted in red) at the bottom of the panel. The selection will remain active while you do this.
Step 4 - Fill Selection with Color
Add New Layer button
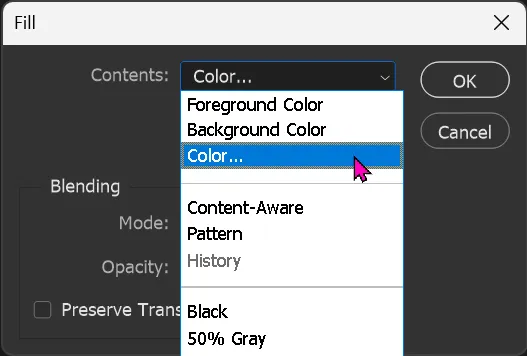
From the Edit menu select Edit > Fill.
In Contents, select Color...
Step 5 - Select Suit Color
Add New Layer button
From the Edit menu select Edit > Fill.
In Contents, select Color...
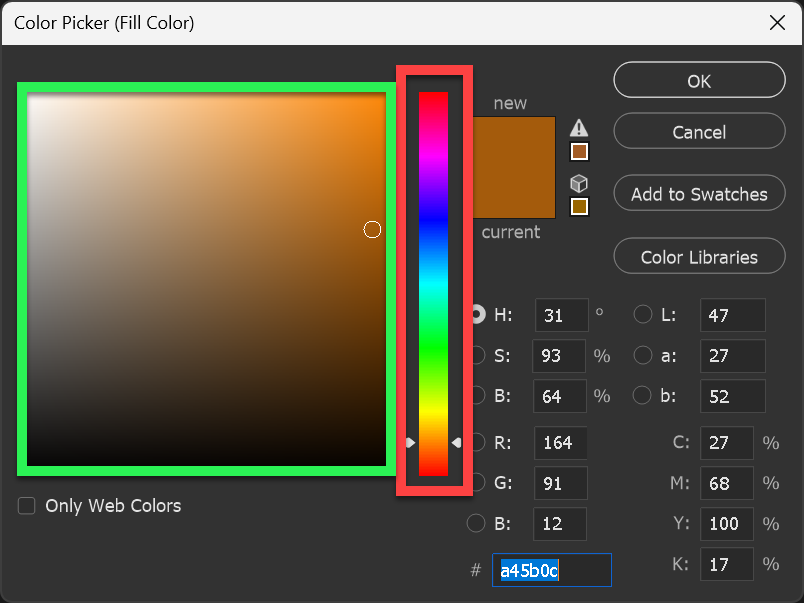
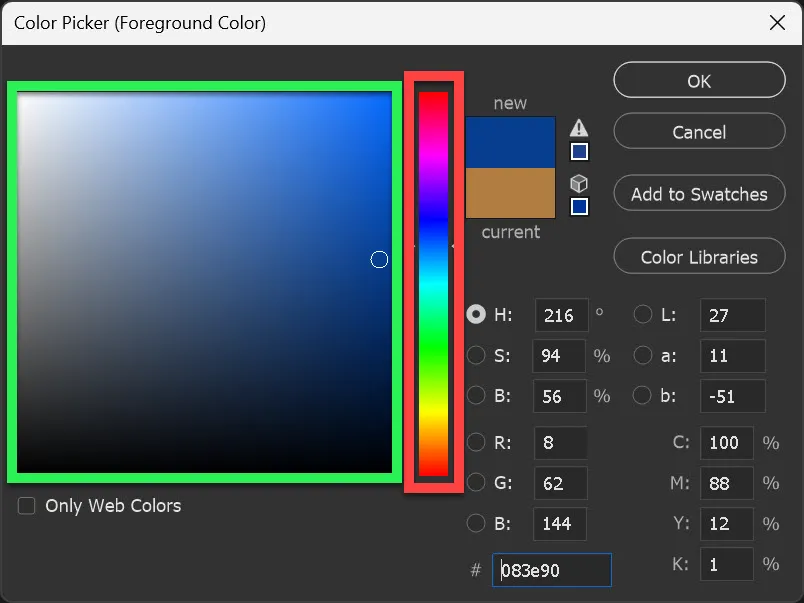
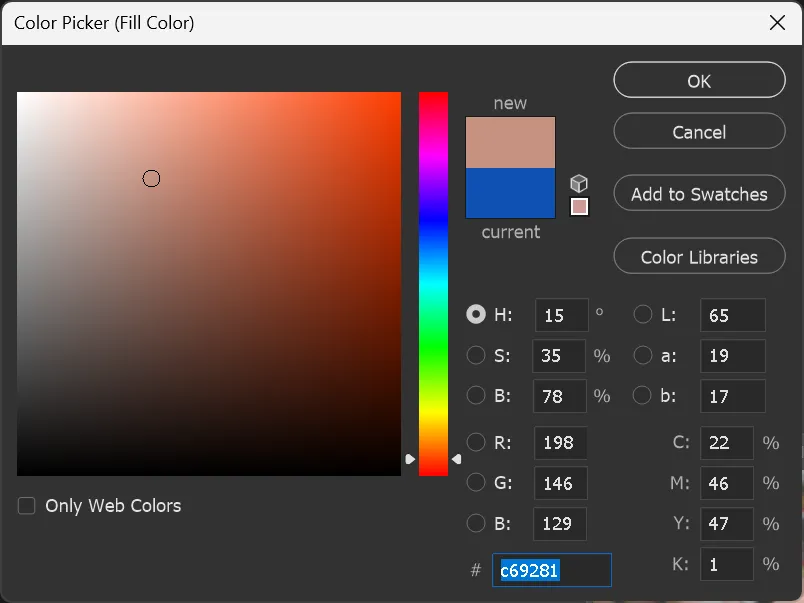
This opens the Color Picker panel.
Select a color in the Color Slider (highlighted red), the select a tone in the Picked Color area (highlighted green).
Click OK to close the Color Picker.
Step 6 - Add Color to New Layer
The selection is filled with color. This should be on the new layer. Deselect with the keyboard shortcut Ctrl+D, or from the menu; Select > Deselect, or click outside the image.
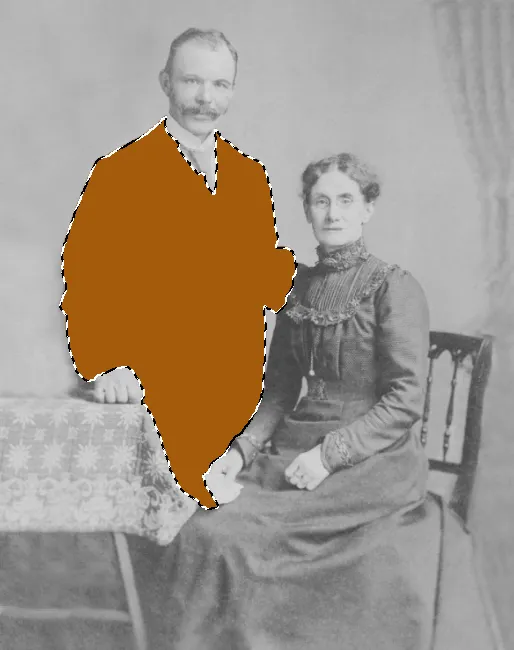
The selection is still active
Deselect (Ctrl+D)
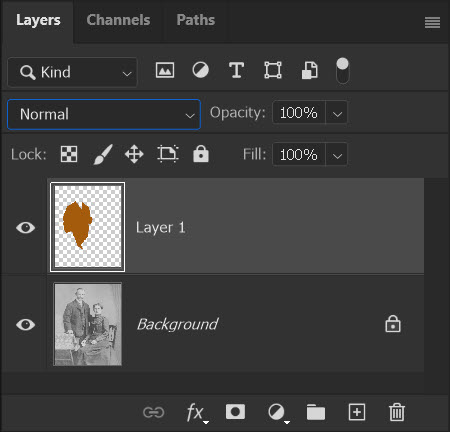
Your layers should look like this
Step 7 - Change Suit Layer Blend Mode
Change the Layer Blend Mode to either Overlay, Soft Light, or Color. You can also try Hard Light.
My immediate preference is for the Soft Light Blend Mode, as it produces a more natural looking color, but don't worry if you don't like the look initially, as you can change this using layer opacity, Levels Adjustment Layer and Hue/Saturation Adjustment Layer.
Overlay Blend Mode 100% Opacity

Soft Light Blend Mode 100% Opacity

Color Blend Mode 100% Opacity
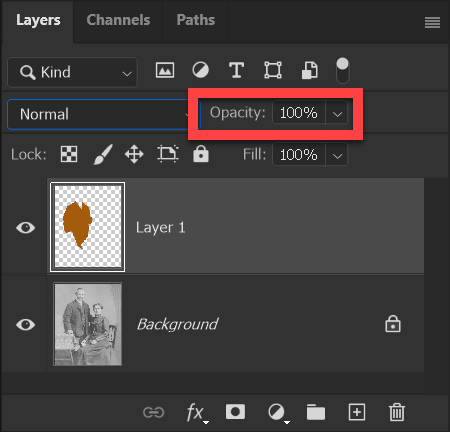
Step 8 - Change Layer Opacity
Changing layer opacity can make a big difference. I'm using Color Blend Mode as an example, as that was the most vivid. By reducing the layer opacity to 30%, it immediately looks a lot more realistic in this image. I have only changed layer opacity, nothing else.
A great keyboard shortcut to change layer opacity is to simply press a number key. Press 1 for 10%, press 2 for 20%, press 3 for 30%, and so on. This makes it very quick and easy to experiment and try how different opacities affect the look.
Overlay Blend Mode
100% layer opacity

30% layer opacity
Step 9 - Add a Levels Adjustment Layer
Changing Levels gives you another useful tool to control the overall look. This is often used along with reducing layer opacity, which I've reduced to 20%. A Levels Adjustment layer has been added, with only the black slider being moved. I have not moved the white slider, because I don't want to lose detail in the faces, which are already very light. In different images you may bea able to move thw white slider, but pay attention to the effect of the adjustments.
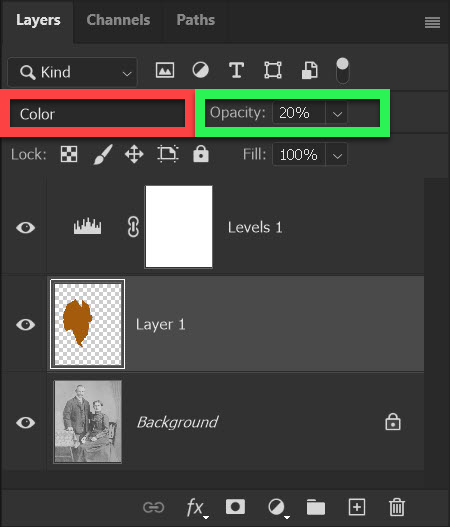
Color Blend Mode, 20% Layer Opacity
Realistic looking color
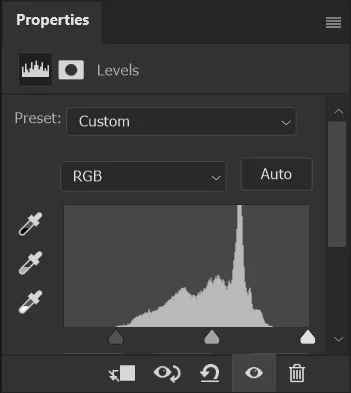
Only black slider was moved
Step 10 - Object Select Tool for initial selection of dress
Position the Object Selection tool over the dress. In this image it doesn't select all of it, so I'll accept what it does select. This automatic selection also includes the hands and head, which we don't want, so we will have to refine the selection, as we did with the man.
Object Selection Tool, automatic selection
Only top part of dress selected and hands and head
Step 11 - Refine the Dress Selection with Quick Selection tool
These are the same steps as in Step 2, but for your convenience, I have repeated them here.
For more information, see Quick Selection tool.
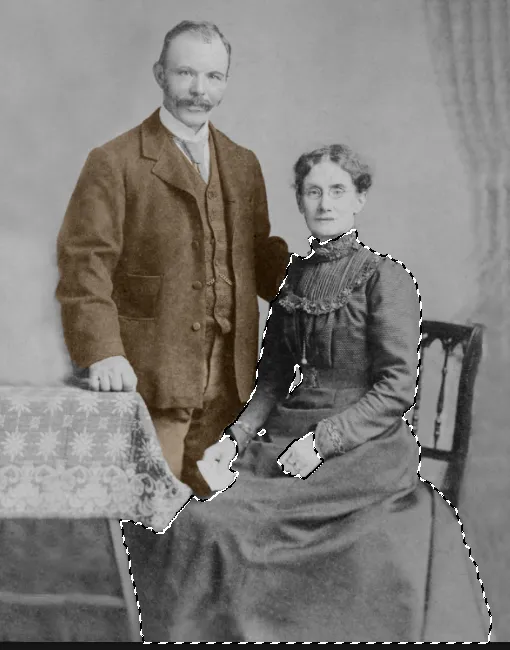
Refined selection, including all dress and no face or hands
Using the Quick Selection tool, subtract from the selection. You can select the subtract button on the options bar, but a better and quicker method is to use the keyboard shortcut of pressing and holding the Alt key. While the Alt key is pressed, the tool uses the Subtract option. When you want to add to selection, release the Alt key. This will soon become second nature if you persevere.
Important tips for good results.
- Use the Quick Selection tool at 100% hardness. You then know exactly where the edge of the tool is, so you don't select unwanted areas.
- Very important. Don't select unwanted areas. When adding to a selection, don't go over any areas you don't want to add to selection. When subtracting from a selection, don't go over any areas that you want to be part of the selection.
- When unwanted areas are selected, DO NOT UNDO. Instead, switch to Subtract mode and removed them from the selection. If you undo, you will have the same issue next time.
- Pay attention. If you accidentally select an area you shouldn't have (point 2), then Undo.
- The tool learns what you want and don't want - provided that you Add To and Subtract From the selection accurately. It's a superb selection tool when used accurately, but I've seen in the classroom, many beginners failing to avoid adding and subtracting what they shouldn't.
Step 12 - Add New Layer
This is the same as Step 3, but for your convenience, it's repeated here.
Add New Layer button
In the Layers panel, click on the Add New Layer button (highlighted in red) at the bottom of the panel. The selection will remain active while you do this.
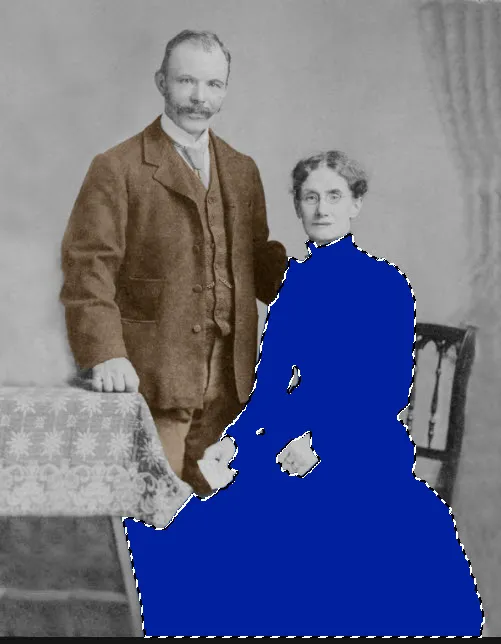
Step 13 - Fill Dress Selection with Color
This is the same as Step 4.
Add New Layer button
From the Edit menu select Edit > Fill.
In Contents, select Color...
Step 14 - Select a Dress Color
This is the same as Step 5.
Add New Layer button
From the Edit menu select Edit > Fill.
In Contents, select Color...
This opens the Color Picker panel.
Select a color in the Color Slider (highlighted red), the select a tone in the Picked Color area (highlighted green).
Click OK to close the Color Picker.
Step 15 - Add Dress Color to New Layer
This is the same as Step 6.
The selection is filled with color. This should be on the new layer. Deselect with the keyboard shortcut Ctrl+D, or from the menu; Select > Deselect, or click outside the image.
The selection is still active
Deselect (Ctrl+D)
Your layers should look like this
Step 16 - Change Dress Layer Blend Mode
This is the same as Step 7.
The selection is filled with color. This should be on the new layer. Deselect with the keyboard shortcut Ctrl+D, or from the menu; Select > Deselect, or click outside the image.
Overlay Blend Mode 100% Opacity
Soft Light Blend Mode 100% Opacity
Color Blend Mode 100% Opacity
Step 17 - Change Layer Opacity
Notice how Soft Light Blend Mode at 100% opacity is virtually identical to Overlay Blend Mode at 50% opacity.
Soft Light Blend Mode 100% Opacity
Overlay Blend Mode 50% Opacity
Color Blend Mode 50% Opacity
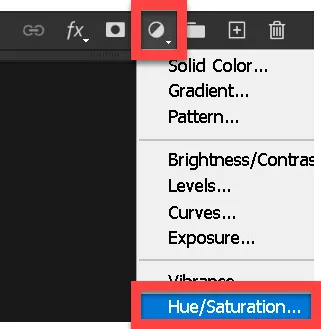
Step 18 - Add a Hue/Saturation Adjustment Layer
Add a Hue/Saturation Adjustment Layer (middle circular button at the bottom of the Layers panel).
When you add any new layer, it is always added immediately above the currently selected layer. Either select the required layer first, or reposition the Hue/Saturation layer by dragging up or down the layer stack in the Layers panel.
Soft Light Blend Mode 100% Opacity
Overlay Blend Mode 50% Opacity
Color Blend Mode 50% Opacity
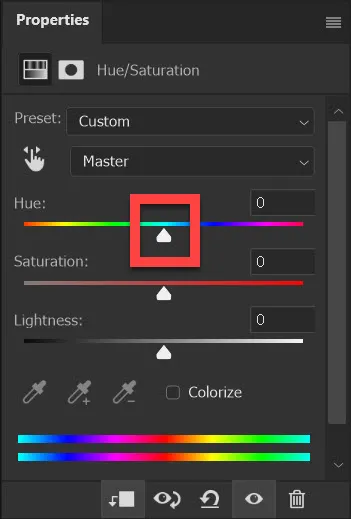
Step 19 - Change Hue and Affect All Layers
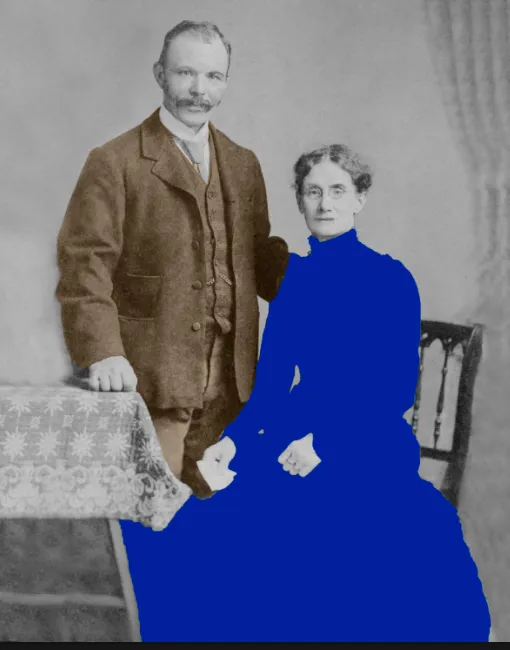
Drag the Hue slider to change the hue. In the previous step I dragged the Hue slider all the way to the right. The man's suit has changed to a blue color and the woman's dress has changed to a brown color.
The Hue slider is affecting all layers beneath it. This is the usual behaviour for all Adjustment Layers. See the next step to change this, so that the Hue adjustment only affects the layer immediately beneath it.
The Hue/Saturation layer is affecting all layers beneath it
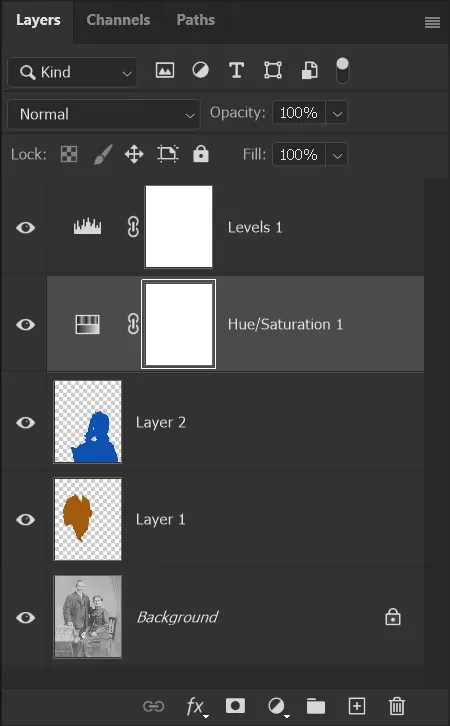
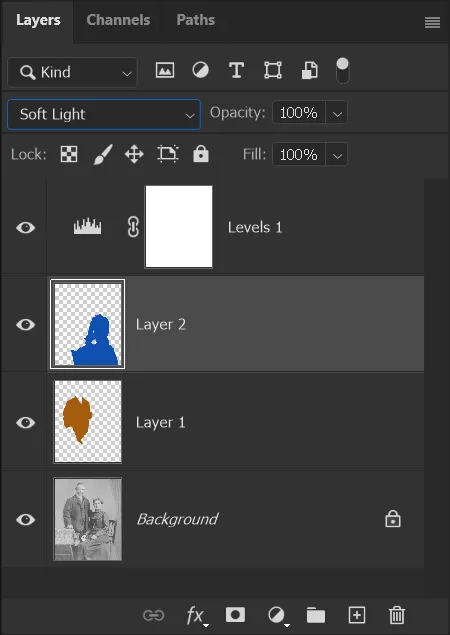
The Layers panel
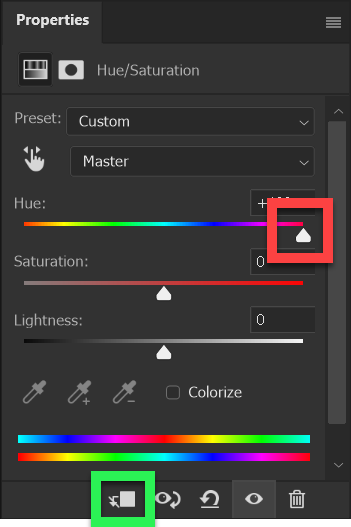
Step 20 - Change Hue & Clip to Only Affect One Layer
At the bottom of the Hue/Saturation layer, click on the button highlighted in green. This "clips" the layer, so it only affects the layer immediately beneath.
In the Layers panel, this symbol is visible on the layer (highlighted in pink).
Clipping a layer is a common technique when you only want a layer to affect the layer immediately beneath.
Hue/Saturation layer is clipped, so it only affects the layer immediately below it
The Clipping button is highlighted in green
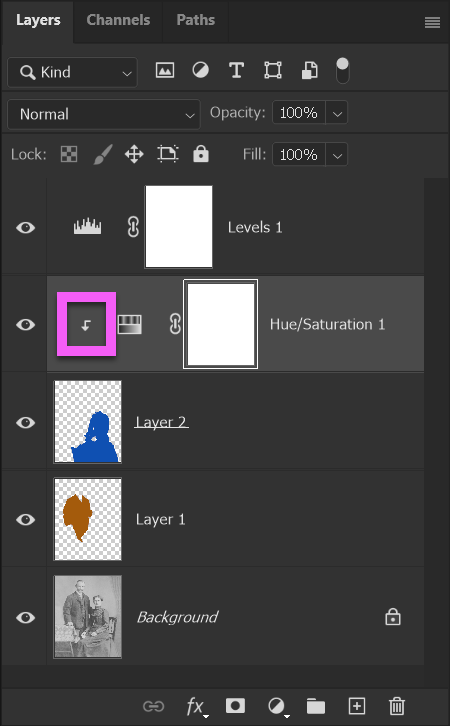
The Clipping icon in the Layers panel is highlighted in pink.
Step 21 - Object Select tool won't select what you want
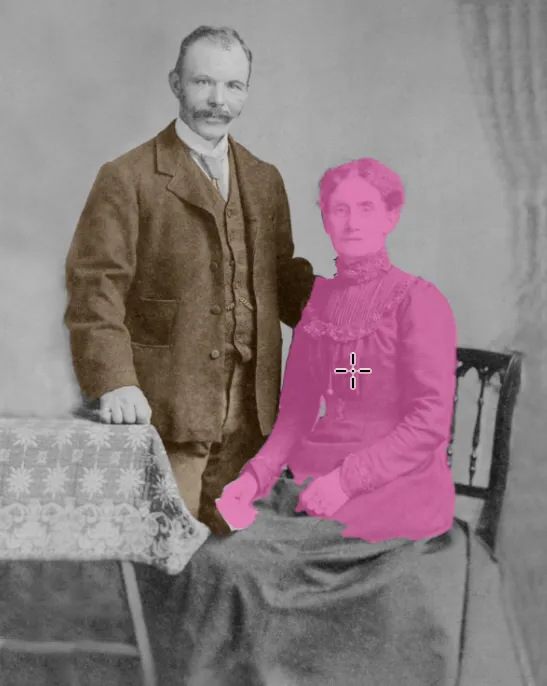
When making a selection, it's always worth trying first with the Object Select tool, as that is quick and easy. But sometimes it won't select what you want, as is the case here. The screenshots show the cursor (highlighted in green), showing that when I try to select the faces either of the man, or woman, the Object Select tool selects the whole person.
These selections will be better made with the Quick Selection tool, in the next steps.
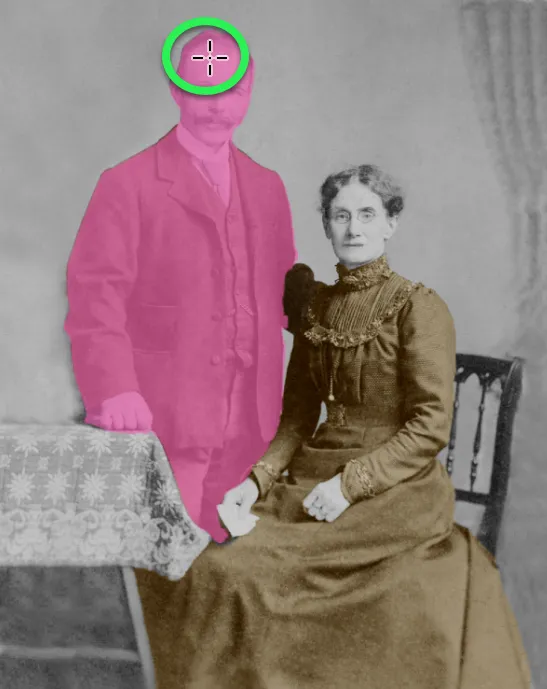
Object Select tool selects whole man, instead of face
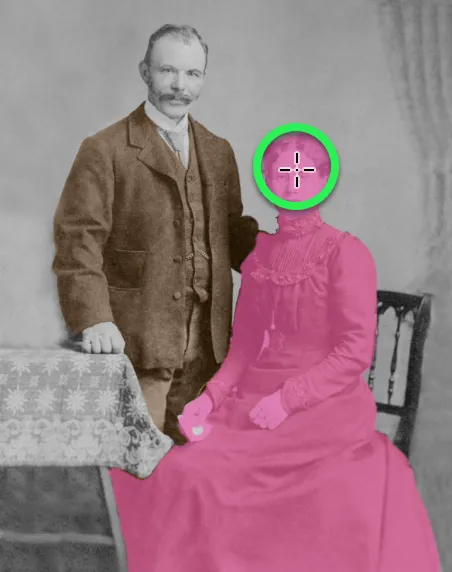
Object Select tool selects whole woman, instead of face
Step 22 - Select Faces and Hands with Quick Selection tool
As above, when selecting the man (step 2) and the woman (step 11), the Quick Selection tool is great for selecting (and deselecting) areas that are not automaticall selected accurately by the Object Select tool.
Select Add to Selection (2nd button on the options bar) and carefully brush over areas you want to select. Take great care not to let any part of the brush touch an area that you don't want.
When you Add to Selection you will see a small + (plus) symbol in the middle of the brush (highlighed in green).
When you Subtract From Selection you will see a small - (minus) symbol in the middle of the brush (highlighed in pink).
For more information on using the Quick Selection tool accurately, see Quick Selection tool.
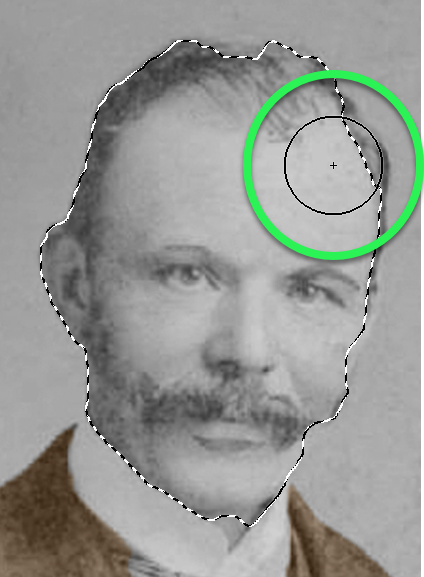
The + icon shows you are adding to selection
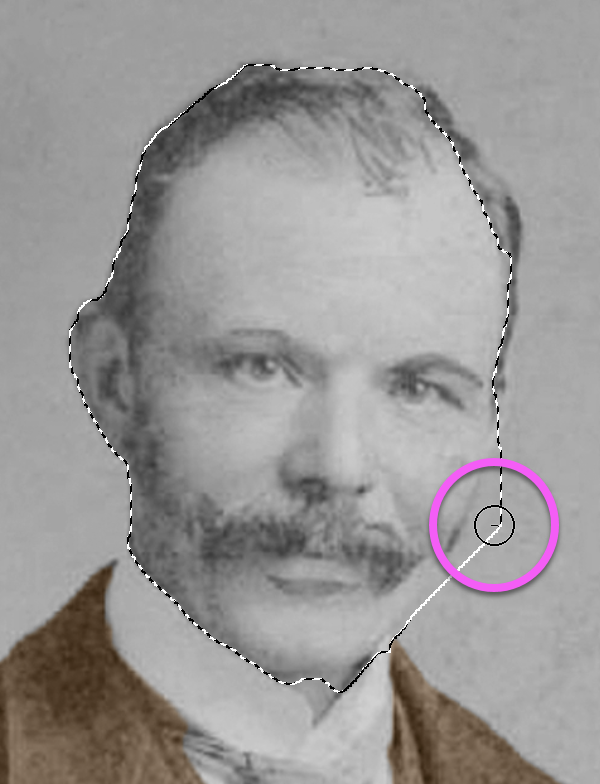
The - icon shows you are subtracting from the selection
Step 23 - Select All Faces and Hands
Carefully select both faces and all the hands.
The + icon shows you are adding to selection
Step 24 - Add New Empty Layer for Faces and Hands Color
Click on the New Layer button at the bottom of the Layers panel, to add a new, empty layer. The color for the faces and hands will be added to this layer.
The + icon shows you are adding to selection
Step 24 - Finding a Realistic Skin Color
When choosing a color for the suit or the dress, the exact color is not critical. However when adding color to skin, the color needs to be realistic and this is not easy to do just by clicking in the Color Picker.
Open an image containing people with skin tones you want to use.
Arrange the image windows so you can see both images simultaneously. In the Window menu select Window > Float in Window.
I have positioned the images close together for the purposes of the screenshot, but it doesn't matter where the other image is positioned.
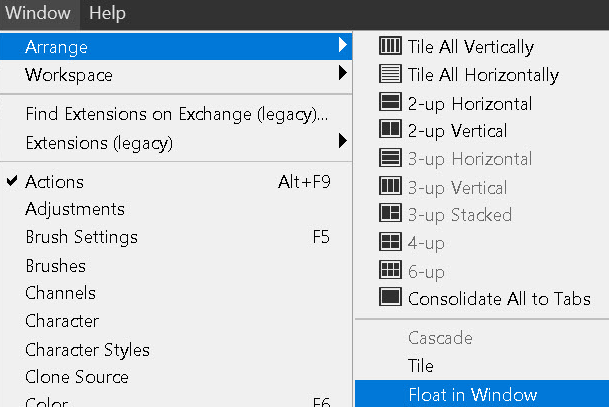
Float in Window puts the image into a separate window
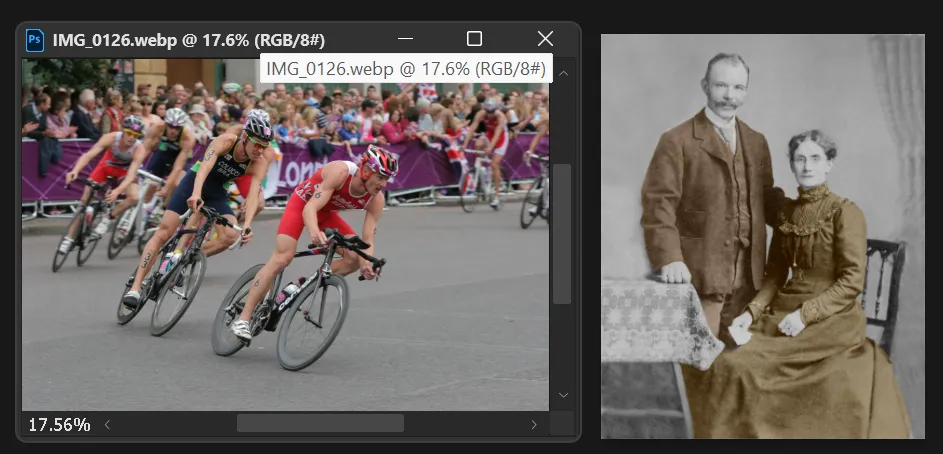
You can view both images simultaneously
Step 25 - Adding Skin Color
Select the image that you are adding color to.
From the Edit menu: Edit > Fill > Contents:Color.
This will open the Color Picker.
Move the cursor outside of the Color Picker and click on an area of skin. This color is selected within the Color PIcker. Click OK to close Color Picker.
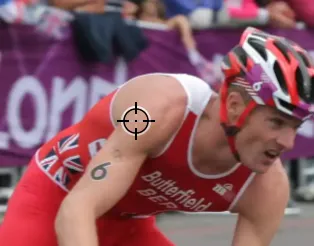
Select an area that is not too light or too dark
You can view both images simultaneously
Step 26 - Deselect
The selected areas are filled with the color.
Deselect by pressing Ctrl+D, or from the menu: Select > Deselect.

Selected areas are filled with color

After deselecting
Step 27 - Change Blend Mode for Skin Color
Soft Light Blend Mode
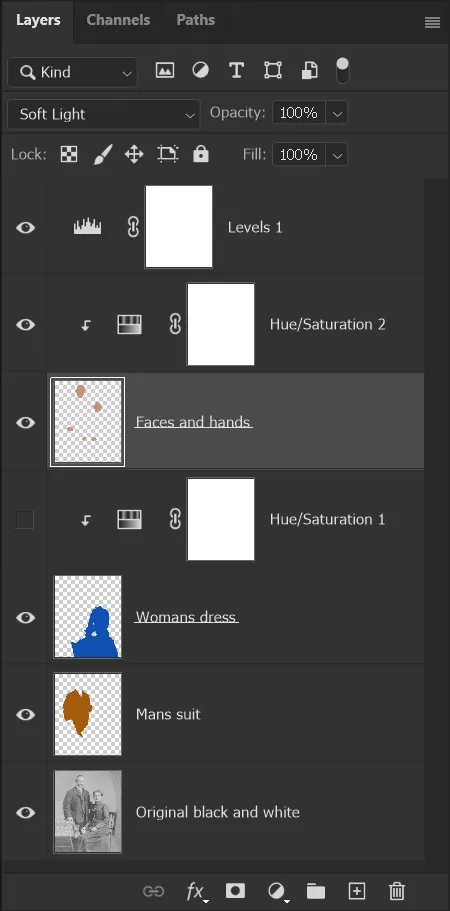
The Layers panel
