Classic Gradient Tool
The Gradient Tool is a very useful tool in Photoshop. It works completely differently to all the other tools and has several uses. You can use it to create patterns using colors, or create a smoothly graduated effect, for example to darken a sky. You can also create a smooth graduation from visible to transparent.
It's a big subject, as the guide below shows.

Classic Gradient Tool Options

Detailed descriptions of each tool option
Note that this older version, the Classic Gradient tool has options for Mode, Opacity, or Transparency. The newer Gradient tool does not have these. They are not needed, as they can all be adjusted on the Adjustment Layer.
Tool Presets

You can create and save a Tool Preset for any tool. This will remember settings that you choose. Presets for brushes are much more useful than for some tools. If you wish to use presets, you have the option of either creating a tool preset or a brush preset. Right click on the Tool Presets button to reset the tool to default settings.
Classic Gradient or Adjustment Layer Gradient

The Classic Gradient will apply a Gradient directly to a layer.
Gradient will apply a Gradient Adjustment Layer, with a Widget to edit the gradient.
Gradient Presets

There are many Gradient Presets you can use, in several colors.
Gradient Types

The following options create Gradient Types,. Each is affected by where you start and end. The small thumbnail buttons give a visual guide as to what they do.
Linear Gradient creates a gradient in a straight line.
Radial Gradient creates a gradient in a circular shape.
Angular Gradient creates a gradient in a counter clockwise direction from the starting point.
Reflected Gradient creates a mirrored linear gradient, both sides of the starting point.
Diamond Gradient creates a gradient in a diamond pattern.
Mode

In Classic Gradient mode there is a choice of 28 Blend Modes.
This option is not available in Gradient Mode, which creates a Gradient Adjustment Layer. You can change the blend mode of the Adjustment Layer, from a choice of 27 blend modes.
Opacity
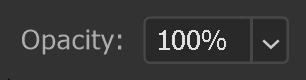
In Classic Gradient mode you can change the opacity of the gradient.
This option is not available in Gradient mode, which creates a Gradient Adjustment Layer, but you can adjust the opacity of the layer.
Reverse

This reverses the gradient and is available in both modes.
Dither

When creating a smooth gradient, sometimes there is a visual banding, especially with 8bit images, which ruins the look. Dither smooths out the banding.
Transparency

In Classic Gradient mode if you want transparency in your gradient, turn this on. If you don't tick the box, even if you select a gradient that includes transparency, it won't create a transparent gradient.
This isn't necessary in Gradient mode. If you select a gradient that includes transparency, you will see transparency.
Method

There are slight visual differences in each of the first 4 options. Try them each and see which you prefer. Perceptual and Linear are the newest, aiming to give more natural looking gradient, being closer to how the human eye sees them in the real world.
Stripes is designed for creating stripes, with multiple "stops" in the gradient.
Below are examples of each of the 5 Methods. Each example includes a Foreground to Background Gradient and a Foreground to Transparent Gradient, over a shorter distance.
Perceptual


Linear


Classic


Smooth


Stripes


How to use the Classic Gradient Tool
This guide will show you how to use the older Classic Gradient Tool, if you need to edit layer pixels directly (destructive editing).
I recommend using the newer Gradient Tool which edits non-destructively.
Step 1
Select the Gradient Tool from the toolbar. Like most tools, it shares the button with other tools and the one that is visible will be the last tool used.
Step 2
The two modes, Gradient and Classic Gradient, work in slightly different ways. Let's start with Classic Gradient (which was the only option prior to 2023, when Adobe improved the tool).
The main difference is that Classic Gradient applies a gradient directly to a layer or Layer Mask.
Step 3

Select the Gradient Type. The most commonly used type is the Linear Gradient (highlighted in red), which is what I will use here. It is selected by default, but if you have selected other gradients, the selected one will be the most recently used.
Step 4

Select the Gradient Presets from the Options Bar (red box).
Expand the Basics section (orange box), to show the 3 options.
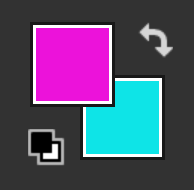
Foreground to Background (yellow box) This is shown here in the default Foreground and Background Colors, but you can change both to anything you like.
Foreground to Transparent (pink box) This creates a gradient that goes from the Foreground Color to transparent.
Black to White (green box) This creates a black to white gradient.
When a black and white gradient is used on a Layer Mask, the contents of the layer goes from hidden to visible. Layer Masks are black and white and shades of grey (black hides, white reveals).
Step 5
I have selected the first of the Basic Gradients, Foreground to Background Colors.
I have now changed each of the colors as shown. To change a color, click in either the Foreground, or Background Color and this will open the Color Picker. Then click to select a color.
For more information see Foreground and Background Color and Color Picker.
Step 6
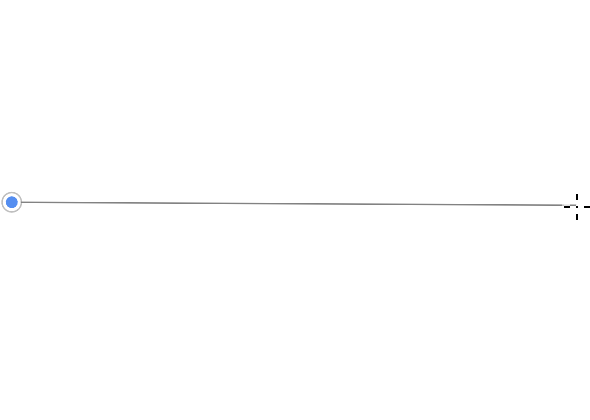
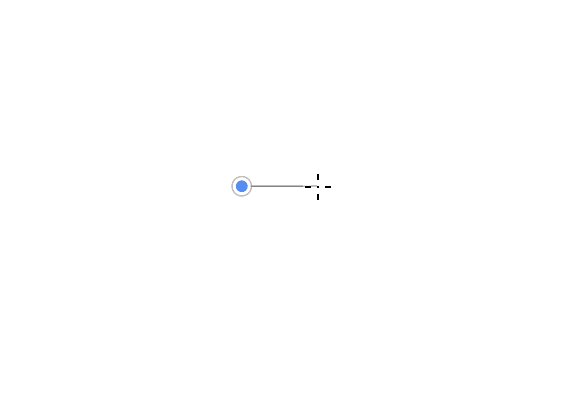
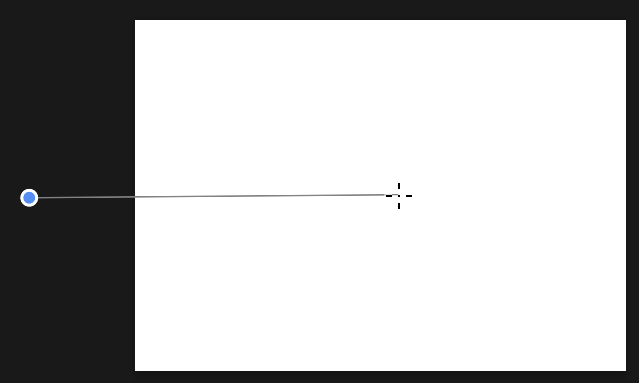
Click and drag. In the screenshot the start is indicated by the blue circle and the cursor shows where I have dragged to.
Note that I have started the Gradient close to the left of the image and dragged close to the right edge.
Tip. If you want to draw a perfectly horizontal or vertical line, press and hold the Shift key. If you move the mouse to change the angle enough, it will jump in 45 degree increments.
Step 7
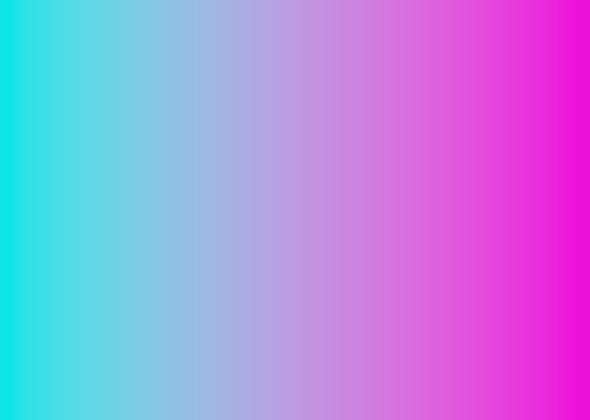
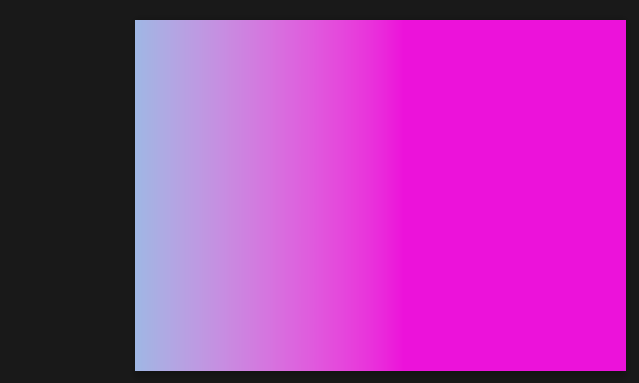
When I release the mouse button, this is the resulting Gradient. There is a smooth transition from the Foreground Color (at the start) and the Background Color (at the end).
Because my click and drag was (almost) between the edges of the image, the gradient transitions across the whole image.
Where you begin and end the click and drag will control the Gradient, as the next steps show.
Step 8
This time I have made a much shorter stroke.
Step 9

The shorter stroke results in a shorter transition between the Foreground and Background Colors.
To the left of the start point will be 100% the Foreground Color.
To the right of the end point will be 100% of the Background Color.
The length of stroke is the length of the transition between the colors.
Step 10

This time I have dragged from the left, upwards, at an angle.
Linear Gradients are created at 90 degrees to the angle of the line you drag.
Step 11

The Linear Gradient is created at 90 degrees to the direction I dragged. Also, because my click and drag was short, there is a short transition between the colors.
Step 12
You can begin and/or end a stoke outside of the canvas. The gradient starts at the point you initially click and it ends where you end the stroke.
Step 13
Here I have clicked outside the canvas, to the left and dragged to little over half way. We can't see much of the Foreground Colour because much of the gradient is outside the canvas.
From the end of the stroke, all the way to the edge of the canvas the Background Color is 100%. The gradient only happens between the points you click and drag.
Important notes about all steps (1-13) above.
All the above gradients were made with the Classic Gradient, which means they are applied directly to the layer. They are therefore destructive. You cannot choose to edit them, beyond undoing them, or creating another gradient to replace the existing.
This is a major difference to creating a gradient with the Gradient mode (as opposed to the Classic Gradient, which I have used in all the steps up to this point.
We will now look at using the Gradient mode, which works in the same way, but is non-destructive, so you can edit the gradient at any time.
Summary of the Gradient Tool
The Classic Gradient Tool is the older version of this tool. Unless you have a specific need to edit layer pixels directly, I recommend that you use the newer, better, more flexible Gradient Tool. This older version edits destructively, compared to the newer version, which edits non-destructively.
See Guide to the Gradient Tool here.
For more details see Destructive vs Non-Destructive Editing.
