Create a Radial Gradient with the Gradient Tool
There are two Gradient Tools; Gradient and Gradient Classic.
Gradient Classic is the old tool that existed prior to 2023 and you can see a guide to that tool here Gradient Classic.
This tutorial to create a Radial Gradient, uses the newer, better Gradient Tool. For a detailed tutorial and description of all its options, please see Gradient Tool.
The new Gradient tool works non-desturctively, whereas the old tool works destructively. For more details see Destructive vs Non-Destructive Editing.

Radial Gradient Tool Options
For a detailed description of each tool option, see Gradient Tool.
How to Create a Radial Gradient
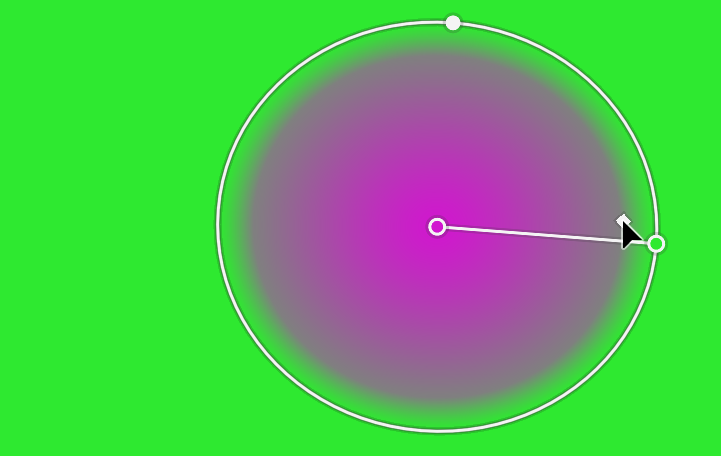
This guide is about creating a Radial Gradient with the newer Gradient Tool (not the older Classic Gradient).
Step 1

Select the Gradient Tool from the toolbar. Like most tools, it shares the button with other tools and the one that is visible will be the last tool used.
Step 2
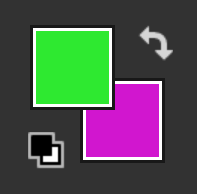
I have selected these Foreground (green) and Background (pink) Colors.
For more information, see Foreground and Background Color and Color Picker.Step 3
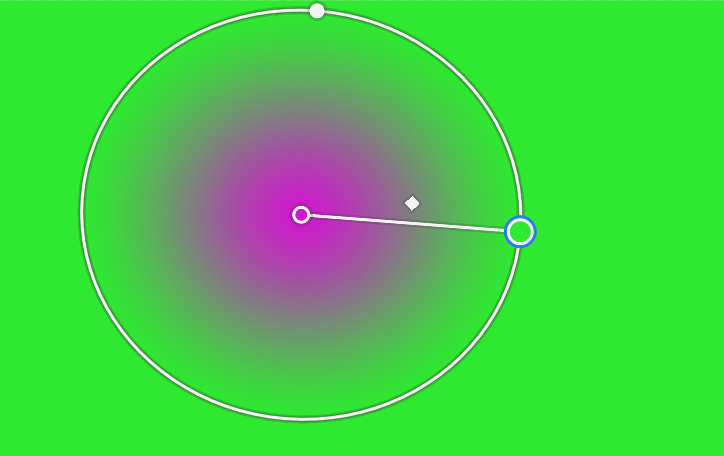
Click and drag to create a Gradient.
As soon as you click and then start to drag, you will see the Foreground Color applied to the whole layer and as you drag you will see the background color appear.
Step 4
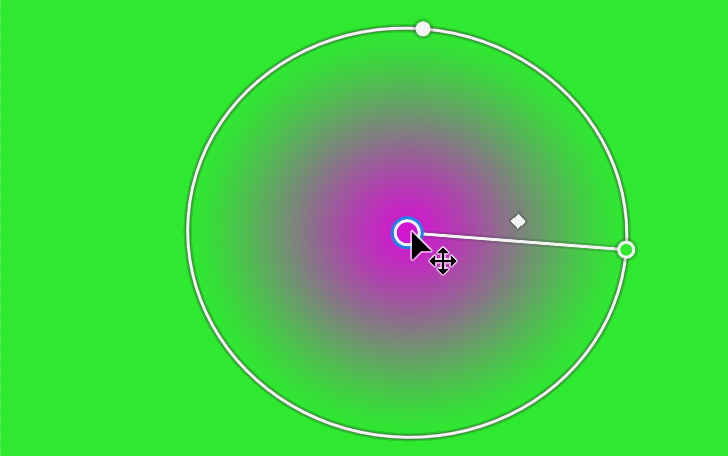
You can move the Gradient, by clicking and dragging the center point.
In this screenshot, I have moved the Gradient slightly to the right.
Step 5
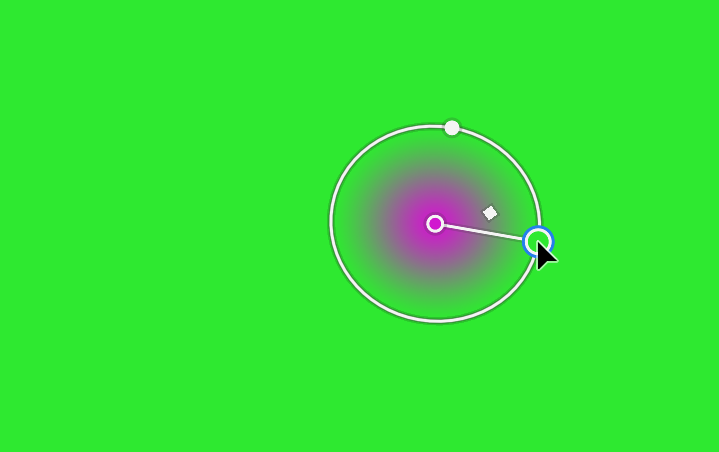
To resize the Gradient, click and drag the end point. In this screenshot, it is the green circle.
Step 6
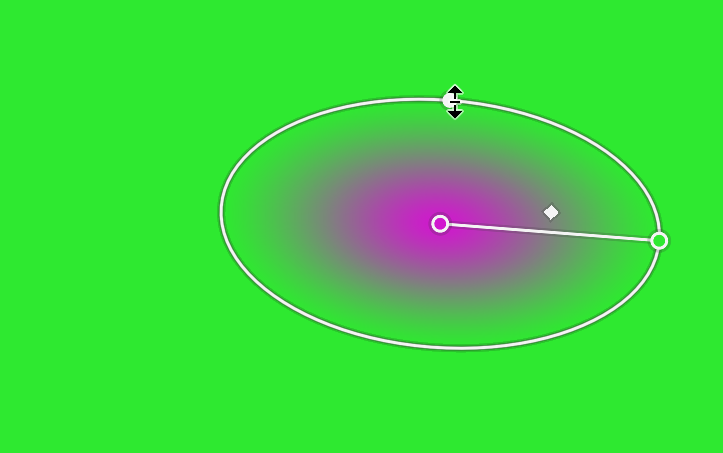
To change the shape of the Gradient, click and drag the circle at the top of the Gradient. Move the cursor over the circle and look for the two-way arrow before clicking and dragging.
Step 7

Click and drag the white diamond icon to change the degree of hardness (or softness) of the Gradient.
Step 8
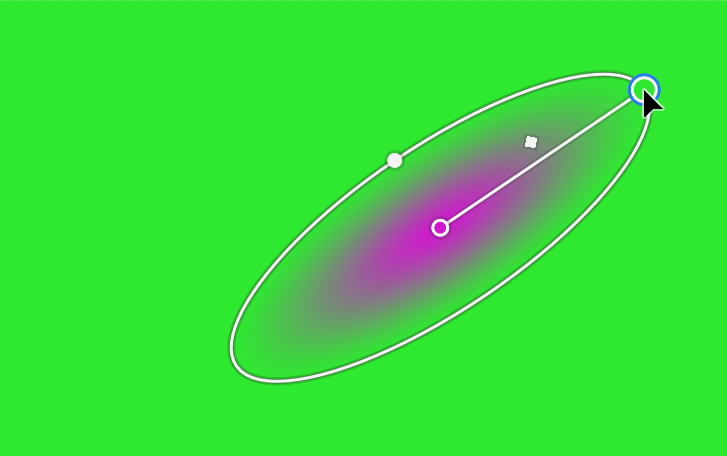
Click and drag the circle on the oval shape, to rotate the Gradient.
Step 9

Click to select Reverse, to reverse the colors.
Step 10
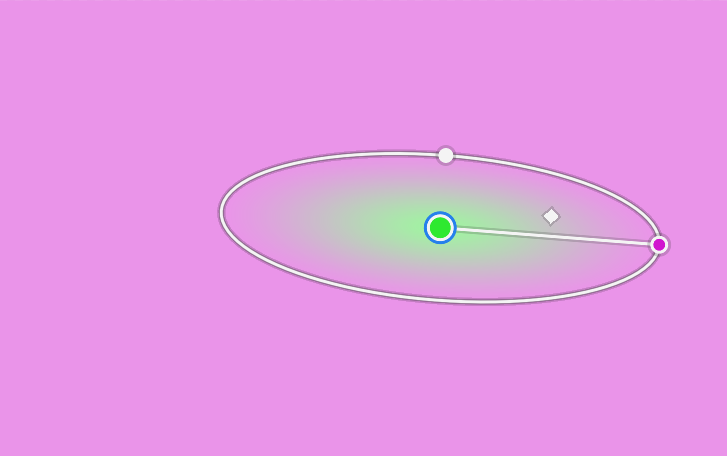
Because we have used the Gradient tool (not the Classic Gradient tool), an Adjustment Layer has been added in the Layers panel.
Adjust Layer Opacity to reduce the effect of the Gradient.
In this example, I have reduced Layer Opacity to 46%, as shown in the next step.
Step 11
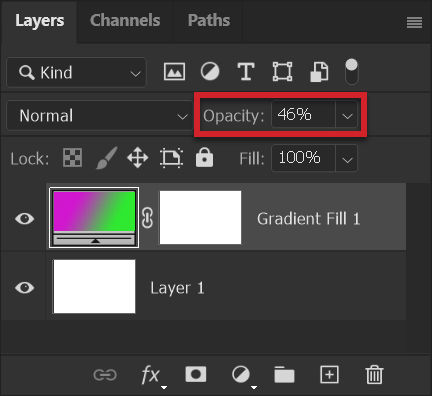
Here are the layers, showing the previous step, with Opacity reduced to 46%.
Step 12
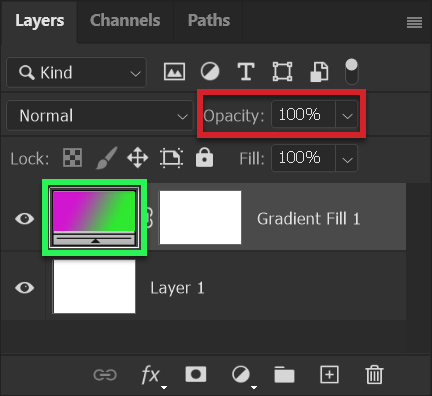
Opacity has been changed back to the default of 100% (highlighted in red).
Double click on the layer thumbnail (highlighted in green) to open the Properties panel for the Gradient Adjustment Layer.
Step 13
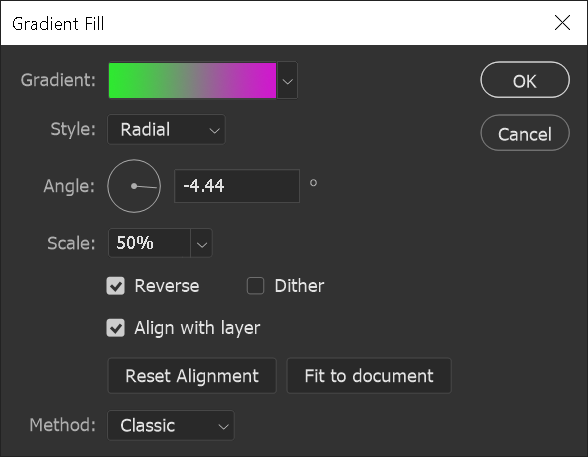
This is the Properties panel and from here you can adjust several options, which will be explained in the next steps;
Steps 14-15: Fit to Document
Steps 16-18: Layer Masks and Align with layer
Step 14

In this screenshot, the gradient is off center. If you wanted it centered within your image, click on Fit to Document and it will look like the next screenshot.
Step 15

This is the result of the previous step to Fit to Document.
Step 16
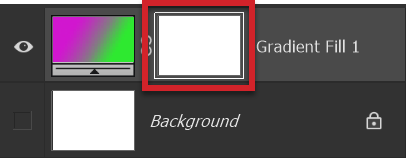
To apply a Gradient to a Layer Mask, first click on the Layer Mask. I have highlighted in red, but when the Layer mask is selected, it is highlighted in white, on the layer.
Then apply your gradient in the usual fashion. Here I have selected a Linear Gradient, Foreground to Transparent.
The Layer Mask shows the gradient being applied to the Gradient Adjustment Layer. On a Layer Mask, black is the equivalent to transparent and white is the equivalent to visible.
Step 17
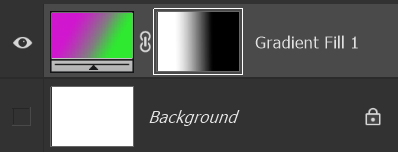
The Gradient has been applied to the Layer Mask. Layer Masks are black and white and shades of grey. Black hides and white reveals.
The following screenshot shows the result.
Step 18
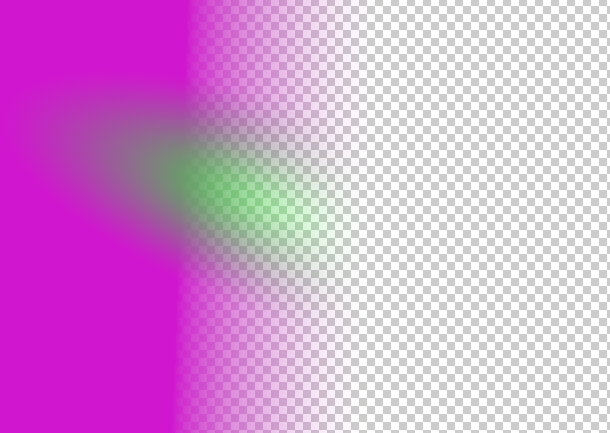
Here is the result of the previous step, where a Foreground to Transparent Gradient has been applied to a layer (in this case it's a Gradient Adjustment Layer, but it could be any layer).
This is with the Align to Layer Option unticked.
Step 19
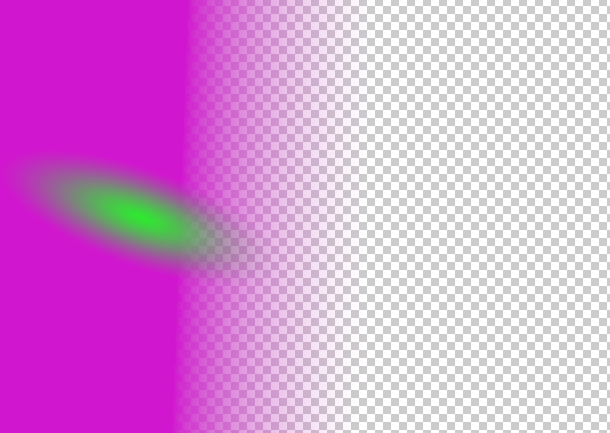
Here is the result of the step 16, where a Foreground to Transparent Gradient has been applied to a layer (in this case it's a Gradient Adjustment Layer, but it could be any layer).
This is with the Align to Layer Option selected.
Because of the Layer Mask, the visible part of the layer has been much reduced. When you select Align to Layer, it will automatically resize the layer to fit the visible part of the layer.
Summary of the Gradient Tool
There are two Gradient Tools; Gradient and Gradient Classic.
The Gradient Tool was improved in 2023 and now edits non-destructively, adding an Adjustment Layer to the image. This is a huge advantage over the old tool, Gradient Classic, which edits destructively.
Unless you have a specific need to edit layer pixels directly (destructive), I recommend you use the newer Gradient tool.
It's a big advantage, whenever you can, to edit non-destructively, because this gives you the flexibility to infinitely edit the Gradient in many ways.
For more details see Destructive vs Non-Destructive Editing.


